How To Repair Clear Coat On A Car

Вставка
- Опубліковано 25 жов 2018
- Hey guys! Here is a video of how to repair damaged clear coat on a car. Hope it helps!
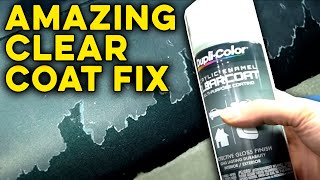
2k Clear Coat: amzn.to/2z5RuHj
Scotch-Brite Pad: amzn.to/2yzQAna
Micro Fiber Cloths: amzn.to/2CJr0yT
Respirator: amzn.to/2PkUc67
1500 Grit Sandpaper: amzn.to/2qdQXPJ
Masking Tape: amzn.to/2Q0rYdY
Sander: amzn.to/2z5UmUB
Check out my cover of All Girls Are The Same by Juice Wrld. Hope you like it! Let me know what you think please! www.youtube.com/watch?v=e1QYM...
SOCIAL MEDIA
facebook: / tobias. .
twitter/instagram: hi_im_tobias
snapchat: hiimtobias
bandcamp: tobiasholenstein.bandcamp.com
/ tobias-holenstein
Disclaimer: This video is for entertainment purposes only. Tobias Holenstein assumes no liability for property damage or injury incurred as a result of any of the information contained in this video. Use this information at your own risk. Tobias Holenstein recommends safe practices when working on vehicles and or with tools seen or implied in this video. Due to factors beyond the control of Tobias Holenstein, no information contained in this video shall create any expressed or implied warranty or guarantee of any particular result. Any injury, damage, or loss that may result from improper use of these tools, equipment, or from the information contained in this video is the sole responsibility of the user and not Tobias Holenstein.
Disclosure: Some of the links above are affiliate links, meaning, at no additional cost to you, I will earn a small commission if you click through and make a purchase. - Наука та технологія


Hey guys! Here is the follow up video to this video ua-cam.com/video/WS2Cv3JuvRA/v-deo.html
Tobias Holenstein lol. Are u blind man. That looks horrible. You needed to spray the car with the same colour then use the clear coat then wet sand then buff.
@@civichazz 😂😂
I like the way you did it, Bro.. I want to keep some of the oxidation look, but every shop wants me to do it the way this guy is trying to say you did it wrong. Like there is no other way to do it. I finally found a guy to do it at his home set up to do ii the way I want. I've noticed that some people have a problem thinking out of the box and only know how to do things the way they were taught and do not possess the ability to be openminded or understand that there can be the possibilities of other ways of doing things. Thank You very much for your video.
Definitely looks better than it did but a little more sanding would have made the whole job consistent. But I appreciate someone who takes the initiative to resolve a problem themselves. Nice job...
Thanks 🙏 yeah looking back on this video I think I should have used a slightly grittier sandpaper. It would have made getting the old clear coat off easier
@@TobiasHolenstein
I'm about to be doing a wet sanding, paint and clear coat job on my door that I need to touch up so your video gives me some step by step.
Tobias Holenstein did you ever buff out the hood?
I just ordered the buffer and a few other supplies, so I will be doing a video on me buffing the hood pretty soon :)
Should of add black spray paint before clear coat to clear up those dark areas
Exactly, but if he’s happy about the results, to each their own 🤷🏽♂️, however I’m with you on adding paint over dark spots that way it wouldn’t have showed up after he cleared it again
Best part of this video was showing me 2k clear in a rattle can with hardner. Thanks had no idea it was out there
He said it's his first time
One small tip, never use a rattle can on a warm or hot day. It's designed to dry fast, cooler weather slows that down. Gives you time to to get a good cover without getting dry streaks.
ERK!!! Arizona in the summer.....can't help that...gotta wait till it cools down first I guess!!!
Honestly whatever you do in life people are always going to judge. If it makes you happy that’s all that matters. Screw the haters... for you doing it alone by yourself I think it looks pretty good. Obviously it didn’t get done in a professional way but it came out good doing it by hand good job..
Thanks Selene, I appreciate your comment! I'm pretty happy with how it came out and it looked even better after I wet sanded and polished it :)
cutie
A Good heart like yours is what we real want..he does real good job
AMEN.... at least he shows he is not LAZY he try to do by himself not like other critics are LAZY people. thats the way how we learn... learn from your mistakes.... how about those those lazy people, how u guys learn?
True but thats why we should do things for ourselfs regardless what anyone thinks
It looks good enough to me. I'll watch the next video and see what you've learned 🙂
Very nice job on the video and editing. Straight to the point but very thorough. And no annoying sidebar BS that most people talk about 🤙🏼
Thanks a lot! I appreciate it 🙂
You will always find haters that are Jack of all trades but master of none. Look's good for a first timer you can only get better the more you do it. Keep it up. 🤙🤙🤙
Thank you 🙌
No shop, air compressor, da, two year college etc. Masterful job my friend. I hope mine comes out making me happy if I ever get around to doing it
Thanks Kenny! I appreciate it. Good luck with yours when you get around to it
It looks much better than before.I have the same problem with my truck the hood and the roof .Thanks for the video.God Bless U.
Thank you for watching Alfredo!
For your first attempt I think you did a good job. To see a young person get motivated to do a job like this and to research their project is great. The keyboard jockeys that have negatively criticized you probably still have their mothers wiping their ass. Corporate profits first=minimum clear coat application=pay a body shop to redo it or learn to do it yourself. Good job. Semper Fi USMC.
Thank you so much! I appreciate that!
Good job. Practice makes perfect
Thank you :)
Holy smokes. That was really really good. I was looking for a video on clear coat repair. Thanks for the video
When you do the roof,sand it all down with 400grit. Which you should of on the hood,that's why it has them dark spots,because you sanded it to fine. Then I would respray the color then clear it. You'll get a better finish without the dark patches.
Sleepe is right, sand it down and hit it with some color first, then clear it. I’d slow way down with your passes when you’re spraying the clear coat. Also get closer to the panel and I’d keep the overlaps tighter.
Val2016 yeah, it’s tough to get a slick finish with a spray can. I’ve seen some people on UA-cam pull it off though!
sleepe361 I'm going to do what u said. Thanks, it'll be my 1st time as well.
I have a red Chevy Malibu, how do you get a color match to spray it with?
Exactly. My previous reply was spot on with yours.👍🏻
Thanks for this video. The R&R guy is clearly expert and has all the tools and equipment. I've been contemplating doing this and what you ended up with is probably in line with the results I would get. I'm game - will get me by until I have saved up for a pro job.
No problem! Best of luck with your project! For what it was I think it turned out ok, for myself at least
thanks man... glad to see a beginner to do this... gave me more confidence
Awesome, best of luck with your project!
I’m just glad your still alive. That your lungs didn’t harden. Bad thought on that Corona mask. Should have got a good one for that hardener in clear. But you showed all of something we needed to see. Thanks for that!!
Well done, other than lack of respirator. I appreciate this because it's a real world process and result. I have undertaken similar recently with an older Infiniti and that's exactly what it looked like after clear coat. Granted, I did a more thorough job in sanding down beforehand, applying 2K primer and also metallic base coat.
There are other videos like Ratchets and Wrenches that offer a more professional looking version. They also know what camera angles to use and which ones to avoid. It fools the layman into believing that is what their homemade version will look like. Nope, yours will look like this.
I did the entire car. Obviously it is a learning process. Eventually I figured out how to apply dust coats with the metallic base coat. And to use a $5 handle attachment with the clear coat to allow more of a flowing motion for some nice wet coats. After a couple of weeks I wet sanded the clear coat with 1000 grit to remove orange peel, and then clear coated again. Then I waited some more before sanding with 2000 and then 3000 before polishing with advanced compound and polishing finish. Yeah, I got carried away but the compliments from family and friends are worth it.
Thank you! Also, thanks for sharing your experience. Like you said, it was a learning experience. I'll see how it comes out when I do the roof and I'll also get a proper respirator
@@TobiasHolenstein Along with respirator you should get an aerosol spray gun attachment. That tool makes it much easier to flow the clear coat. I got this one: www.amazon.com/Can-Gun1-2012-Premium-Aerosol-Spray/dp/B002EQEE82
I believe a Rust-Oleum version is cheaper than that at Walmart, etc.
Wasted Century Thank you for your tips. I’m going to try fix my car too.
I just remembered I have one of those, I don't know why I didn't think to use it lol
@@hhicks2979 You are welcome. I'm very glad I did it but I had to learn self forgiveness. Errors are inevitable. The hood was toughest. Spray cans work best when held in vertical position. Initially I got drips when held horizontally, like this video. That is especially true of base coat. Finally I read to warm the can for 15 minutes, placing in a plastic bag inside a coffee cup full of warm water. That all but eliminated drips. But don't do similar with clear coat. The warmth increases dripping. I learned that the hard way.
I used automotivetouchup.com for my base coat and supplies. I am not affiliated with them. Their products are very good and reasonably priced. But they sell lacquer primer instead of 2K. I had a bad result with bleeding through the lacquer. So I redid with 2K. World of difference.
This video helped me learn the dust coat technique. But it is only necessary with metallic base coat, like I have. He demonstrates how to flow the clear coat: ua-cam.com/video/nnILSQo_svI/v-deo.html
yeah that looks great- I have 2001 dk green honda that has that damage in spots all over - so its nice to see someone do this work who isn't a professional. For an average person that looks better than what it was :)
Very informative diy video. I’m going to tackle the clear coat on my hood now.
Cool. I'm going to try to do my 03 Hyundai Sante fe. Soon as I learn to take out the small dings in it. I did the old silver rims black/gold. Turned out NICE
Awesome! Good luck with your project! Sounds like you have some cool looking rims now 👍
for your first time and for the cost of your repair, I think it came out awesome. I also followed Rackets and Wrenches method and did the same as you:)
Thank you! That's awesome that you did this too!
If i was doing this job i would've repainted then cleared roof and the hood, 😉👍you did a good job prepping the car for primer,😉👍
Thanks man, when I finally get around to doing the roof, I will most likely paint it and everything
Thanks for the advice, 👍!!
I really found this video useful! Gonna paint my 4runner soon!
Bro good job much respect , u make me wanna try
Thanks so much Ivan. I wish you the best of luck with your project :)
Thank you Tobias, my 04 Sentra needs some love, it’s an old car but still running ok I don’t have the $$ dinero to pay for a pro, I’m going to give it a try, gracias for the video Tobias!!
Hi Manuel! Awesome man, let me know how yours turns out! I'm glad the video helped
I have an 05 with damage like this. How did it turn out Manuel?
Thanks broham, you just earned yourself a new subscriber, my main man!
Thank you for the sub dude!
@@TobiasHolenstein keep me posted, on more videos!
I definitely will!
Excellent work, very nicely done Aquamigo!
Thank you Aquamigo 🙌
Congrats man 👌🏻👌🏻👌🏻👏🏻👏🏻👏🏻... just subscribed! Tks for sharing. God Bless You!
Thank you so much!
I will do this, it looks real good. Thx
Thanks! Wishing you the best of luck with your project!
Just continue
I enjoy the video
We learn from each other
Agreed, and the comments help too. If you can afford to do it like the professionals.
Good effort Tobias! I'll follow you, thx. Luis.
Thanks Luis! I appreciate that :)
I'm currently at the same point you were at when you started making use of an random orbital sander. I actually started out using a sander but with a scuffing pad that sticks to the hook and loop surface of my sander. Probably would be fine for scuffing a faded and blotchy clear coat surface as prep for reclear coating but for what you had or I currently have. I slapped on an 400 grit Diablo disknet and quickly started making progress, probably too quickly. So now I'm headed off to grab a variety of higher grit discs.
Dude before you spray the rest of your car buy a respirator that 2k primer will do you in
Yeah I definitely will buy one for the next time I spray
Totally agree. What you used is trash for the clear you are using
This can contains Isocyanates and can kill you, It's a shame the good stuff is usually that way but you must use the respirator. It was documented a guy painting a wing on a plane dropped dead at the end of the day. They discovered he did it with no shirt and it absorbed through his glands in his arm pits. Isocyanates. This is serious stuff.
It's what you don't know is what will kill you. Be safe.
Get some paint coveralls and a proper respirator rated against isocyanates. Don't sacrifice your health to save a few bucks man.
@@robertjackson7590 😯😯😯 thanks for the information
Super helpful Tobias,
Thanks! I'm glad it helped!
I’ve tried this before and I don’t like the result of the clear coat from a can. I prefer clear coat from a spray gun. But sometime we got to do what we got to do to get the job done. Nice work. I was thinking about doing this or taking my carbon fiber hood to a professional auto paint shop do it.
Yeah I'm sure it would come out much nicer from a spray gun. If I had a nice expensive carbon fiber hood I would probably also take it to be professionally done
You gotta do the last pass a wet coat that’s thicker to prevent the orange peel look, and of course wet sanding
OMG I'm so sorry I did not watch the whole video for I commented and I see you're doing exactly what I said. I take back my comment earlier . You did a good job ✌️
Can I use sandpaper instead of the bright pad? If so what grit?
When applying Clear coat always change direction with each coat for instance if you go north south first coat, go east and west second coat also do the front and side edges first. Great job for a first time! I've been doing paint and body for 25 years
Hey, i want to know how many cans of clear coat did you use for hood and the roof?? And yes, your video is really helpful. Thank you
Hi Hiren, for the hood I used less than one can of clear coat. I haven't done the roof yet, but I'm pretty sure I can do it with one can also. I have an extra can on hand just in case I need it
@@TobiasHolenstein thank you for the reply
You're welcome!
Great video. Failed clear-coat is common where I live in the evil CA sun. People fight to park in the shade in parking lots in summer. It looks horrid on a dark car. My 1996 Plymouth minivan looks much worse than yours, esp. where I repainted accident damage and used cheap rattle-can clear-coat (not activated type) which later turned flaky white. I found the bulk of the failed clear-coat can be scaped off with a dull putty knife, before going to wet-sanding. I did that for several years to keep it looking presentable without even re-spraying.
I have less work on the top since the clear-coat is almost all gone there and even the base-coat some places to expose the primer. I think I'll paint the top w/ left-over white polyurethane "boat paint" (Interlux Brightside) which I used on my camping trailer. On a flat roof, it will look like the 2-tone of many Ford Flex. The hood and sides I might paint with single-stage car paint (modern looking grey-blue color) if enough left after painting another car.
I was gonna do this to my car until the guy at the auto paint store asked me if I've seen lip stick on a pig. I laughed so hard! 😂
He said it would be best if I repainted my whole car! I'm glad I took his advice! 👍🏾
Nice, glad to hear your car is looking good 👌
dude, that looks horrible
Amen brother!
Smitty4699 - why do you have to be such a dick!
Extremely HORRIBLE job.
smitty4699 there’s no need to knock someone that doesn’t know what their doing. How bout helping him instead of knocking him down. Not ok. Not cool.
The dude did his best..
I,m convinced, you'll do twice as good with a gun & compressor. I sold mine & really regret it.
I thought I was retired
With a gun and compressor do you still need to wet sand and polish? I'm not sure if I see myself doing a whole lot of painting in the future, so as of now I can't justify making the purchase for myself yet
Awesome job!
You should have followed the example set forth by ratchets and wrenches. By simply alternating the direction that you applied the spray on each coating, (1st coat front to back, 2nd coat side to side, etc) you most likely would have had a superior result.
Ratchets and Wrenches the best car channel
I love his channel
have a question. the spray is paint or just clear coat?
It's a great job done that I ll follow you.
Thank you!
You and the comments section answered a lot of my questions in my head about how my lexus will come out! Anyway good stuff man! Props on the effort
Thanks man! Glad it helped :)
A tip if you are trying to fix CC in a metallic finish, you must not sand the raw metallic finish as you are cutting the metal and other such metallic components in the paint. Metallic colour coat is never sanded once laid down as this damages it. This is why it looks patchy. If you can use a blunt scraper to lift of the crazed clear coat, mask the raw areas off allowing the mask to expose the edge of the remaining clear the clear coat several coats over the exposed metallic and clear coat exposed edge. Then take away the masking, carefully feather sand the over lap spray trying not to remove the protective clear coat you now have protecting the metallic paint. Once you have done your best feathering the clear overlap, sand the whole hood or roof and then clear coat the lot for your final finish. This technique will never produce perfect results but it does a good job at greatly improving the overall look. I have used this technique many times and as long as the base coat hasn’t been cut with sanding or polish or has faded badly then it’s a real winner as a diy CC repair.
Thank you for the tip! :)
I just did this. Used 800 grit sandpaper and I used about 4 cans of clear. After, I wet sanded w 2000 sandpaper, used compound and polish and looks so much better
Always wash with Dawn dish detergent. Great grease cutter and leaves no residue at all.
Rinse throughly.
Looking good for the first time
Thank you!
Gloss black for an even coat, and then maybe 3 coats of clear.
Ithink it looks good for first time ima try this with my car
Thanks! Best of luck with your car!
I worked in body shop as a cleaner, and everytime the car was painted it never looked good. Only after they buff it, it removes the imperfections and gives it glassy shine
Vahagn melikyan the painter must’ve sucked then. I mean, I paint daily in my shop, no booth, just an exhaust fan but my finishes come out like glass. Only flaws are some bits of dust but I always do a quick denib and polish before I send the cars down the road.
@@christrainor1129 What type of clear coat do you use; brand? I didn't think it was going to still look so textured after a clear. If one does have the same problem, can you just cut it with compound and gloss shine.
Autumn hi! So, I use Keystone’s private label clear coat. Right now I’m using their “multi panel” clear coat. I mainly do dealer work which doesn’t pay as good as insurance/collision type of work but it’s steady work and I enjoy it. If I was in the insurance/collision area, I’d probably use a better clear coat. However, for the price, the Keystone multi panel clear is pretty awesome. I use a Devilbiss Tekna Pro spray gun, 1.3 tip and set my regulator around 26 psi. I spray close to the panel (4 inches or so) and move pretty quick. 2 coats, 10 minutes or so between coats, comes out pretty great. I live in NY so I have to switch between activators. Winter - fast activator, spring/fall -medium, summer - slow. As for texture, I’m assuming you mean orange peel (looks smooth and glossy but has texture similar to the look of an oranges peel?) pretty much all cars come with some degree of orange peel. My paint jobs have orange peel too. Sometimes it can look bad though, uneven texture, clear went on too heavy in some areas. You have to be consistent with your speed, distance and overlaps to control this. You can reduce orange peel or eliminate it completely by wet sanding and buffing. Other texture could be if the clear didn’t go on wet enough and it looks dry, or if you’re using too fast of a clear coat and the overspray isn’t melting in nicely. Wet sanding and buffing will help that too. Anyway, if you have any other questions just let me know. ✌️
@@christrainor1129 Wow. That was pretty in depth, thanks. I'm thinking more along the lines of spray can clear, because I am not a professional painter. What is an activator, and how do seasons factor in, in choosing which to use?
Autumn oh! I don’t use spray cans, but from what I’ve seen, Spraymax is the way to go as far as spray can clears. Spraymax has a 2k clear in a can (2k meaning 2 part - clear/activator) Activator is what makes the clear coat cure and slow/medium/fast can slow down or speed up that curing process. You’ll want to choose a slow activator if it’s hot and a fast if it’s cold. Hope this helps.
That looks horrible but I like the positivism of this guy ☝️
Im in the same boat as you and giving it a go on my car. Ive watched a lot of videos on this as well lol. Maybe if you give it a good fine wet sand probably 2000 grits to smoothen everything out then buff it, use polish and wax itll probably get rid of those darker spots. Good effort on your first go mate!
Good luck with your car bro! I sanded and polished the hood in this video here ua-cam.com/video/WS2Cv3JuvRA/v-deo.html
It helped smoothen it out, but I think the dark spots are just going to stay because those are the parts where I completely removed the old clear coat
how many minutes did you wait inbetween coats?
Looks better than before. Keep learning keep perfecting sir.
Thank you!
That looks brutal. Whatever floats your boat..
Thank you for this! I was focused on the 1976 Celica. I'm, guessing '76, because that is when the "S" letters were issued on the California plates when the car was new. First time viewer to any of your vlogs!
Thanks for watching Carlos! The Celica is a '77 but you were very close! I'm planning on putting out content on my Celica in the very near future :)
@@TobiasHolenstein Well, it must be an earlier model '77. I'll look for that future Celica vlog.I really am into cars, as well.I would memorize the license plate numerals on several of the neighbors cars, and know the years of them. I like the Sepulveda Dam for your channel image art. I grew up in the San Fernando Valley. To build the San Diego Freeway, which first opened in 1963, half of our backyard was used for the southbound lanes, just north of Roscoe Blvd. I have a plat map from 1959 where it shows the future location of the freeway, and how much land was used from our house, and the neighbor's to build it. I thought that you might enjoy some little known Valley trivia, since you are a younger man than I am. Do you live in the valley yourself? I'll watch more of your vlogs. I wish you the best for this upcoming new year! You may ask me some questions re: valley history, if it is of interest to you. I probably know more than people would expect. Keep up the great work. I hope that I am an encouragement to you!
That's awesome Carlos! I love the Sepulveda dam, when I was a younger kid I was fascinated by it haha. Yeah I live in the valley and I grew up here. It's hard for me to imagine the valley pre-405 fwy since it's been around my whole life. I didn't even know they had to use peoples properties to build it. I will definitely keep you in mind if I have any questions about the valley. Thank you!
@@TobiasHolenstein Yeah, Sepulveda became North Hills in the mid 80's. We moved to Porter Ranch in 1965 when it was brand new, and they built the 118 Freeway two houses north of us, along Rinaldi St. That was the last section of the 118 freeway to open, in 1983.
Oh ok I see, I live not far from there. Just over in Granada
Can I use Dawn dishwashing soap?
Good job man👍 looks better.
Thanks Adam!
@@TobiasHolenstein
Yes sir, always try to better yourself...💪
Definitely!
OMG dood...THAT'S MY CAR!!!!!! 100% black Dodge Avenger with the crappy water-based Chrysler clear coat....same areas...I'm going to be doing the same thing. Thanks for the video!!!!
Best of luck with your car! After 4 years the one thing I would recommend is sanding a bit more than I did in this video. In the areas where I sanded away all the old clear coat, the new clear coat is still holding really well, but in the areas that where I didn't completely sand it away, it started peeling up again
Just watched another video on clear coat....he did the same thing except shot a light coat of rattle can paint on the hood before he did the clear coat....it turned out wonderful.
Yeah I'm going to give this another shot pretty soon with the roof with the paint and everything. My main regret of this attempt was that I didn't fully sand off some of the bad clear coat, which left those white areas
@@TobiasHolenstein This is a great video for covering bad clearcoat. ua-cam.com/video/Hj9VqSnT-bs/v-deo.html
You need more aggressive sand paper 1500 is for finishing. 🤙✌️
Girl..thats good job
What music track was that?
Good job on the vid showing results of doing this diy btw.
Def looks better.
Don’t think you could’ve gone all the way with removing the old clear coat without over scuffing paint, it’s a gamble and don’t think it would’ve made much of a difference
I'll see if I can find what song it was, I can't remember off the top of my head and thank you!
I respect the effort
Thank you
Looks good homie
Thanks man!
I was thinking about doing the clear over mine but after seeing this, i think a couple of base coats first before the clear would be highly warranted.
Yesterday prep it right and base coat . Beware the 2 k contains isocyanate and a n95 half mask wont stop you from breathing it that why at a body shop the painter has a full face remote air supplied mask paint suit nitrile gloves and a hood . Isocyanate will go into skin eyes through filters in masks . The isocyanate bio accumulates in you body for life it’s in construction glues paint hardener foam expanding insulation .I got poisoned doing a restoration on an old boat out side spraying expandable foam in to a deck for 5 min while wearing a carbon filtered dual 95 half mask. The manufacturer of the consumer grade expanded foam are sneaky in tiny letters contains MDI = methyl di isocyanate .
My '05 Altima is exactly like yours was. I tried Plasti-Dip. Not that great a result. I'll try your method next. I think you're supposed to polish after it's been drying for several days too. Gets rid of that orange peel finish. Great first try. I've saved thousands doing work on my car myself. Loved that you take pride in your work. Nevermind the haters. I loved the video. Peace bro✌️
Thanks a lot Andrew! I wish you the best with your car. A while later I ended up making another video of me wet sanding and polishing the clear coat. Here it is if you are interested :) ua-cam.com/video/WS2Cv3JuvRA/v-deo.html
Nice job 👌
Thank you 🙏
Once u buff it out it will be glossy like your looking for 👍 nice job
Thanks Tommy! I buffed it out and it looked a lot better :) ua-cam.com/video/WS2Cv3JuvRA/v-deo.html
We learn from what we do looks better your happy and I'm sure you know what too do next time that you didn't do
Thanks Fernie!
Did you wet sand it and buff it might look better
How many cans did you use for the hood I see how it looks like a lot more comes out than a regular can of paint
Hi Donald, for the hood I didn't even finish a whole can
Ok thank you great 😊
@@donaldbaker6961 Best of luck with your project!
Where did you get the 2 stage clear coat In a can
I ordered it from here amzn.to/2z5RuHj
Looks so good lol
Also hold can a little closer and move faster and lap the spray pattern a bit more to keep a wet edge.
Hi Glen, thanks for the tips, I'll keep them in mind for the future. My main regret is not fully sanding away all the white from the old damaged clear coat. Looking back I would have liked to take some more time with that
No matter hoe Well can you doit ,it's the the you explain .Nice job .
Thank you!
it looks better but not good. thanks for the great video though. Appreciate the experience
nice... makes most of diy'ers at least not be afraid to try it. i do agree more sanding and a base paint coat would really make it worth the effort. but thanks for the video. i am going to try it my self.
Thanks for the comment, wishing you the best with your project!
The most positive man on Earth.
Mr Jesus
Bless.
P.s these results would be catastrophical for negative me.
Super work
Thank you!
Tobias, it looks fine, Sure it could look perfect, but that's not what this was about, it was about you doing it, learning, and making it look a heck of a lot better than it did... Win Win for you in my Book!
Thank you so much!
You want to avoid touching the work surface and use a wax and grease remover and/or prep solvent just prior to spraying. Water alone will not effectively remove oils. Also check out Optimum CCR Clear Coat Restore.. simple prep, super easy wipe on application, self levels, and blends fairly well.👍👌✌
Thanks I'll check that out!
You need to be working on that beautiful celica!!
Thanks 🙏 I will be working on it soon! It has a leaky fuel line at the moment, but it runs and everything!
It's an awesome car man!! Please video it!! Rock on
Thank you! 🙏 I really hope to do a lot of work on that car in the near future! I have big plans!
Need base coat before the clear, also need proper respirator, especially with 2k, dust mask will NOT protect you?
Thanks for the info. What is the base coat of?
Tobias Holenstein try Rustolem 2x it works and is cheap
@@TobiasHolenstein base coat is the color of your car that goes on first than the clear coat. Most cars list that color # inside your front door.
Oh ok, thanks Stan!
Well at least you wasn’t trigger happy! Good learning experience no matter how turns out!
Great video, but I would want to remove all that bad clear coat first and respray the base coat then clear coat.
The whole point is to do a quick repair. Is sanding and laying down a base/clear the correct way. YES. It’s not a Ferrari it’s a old dodge. With your advice he should also rebuild the engine while he’s at it....🙄
really good ?1? what did you smoke hahahaha
Hi. Looks ok, doing this thing for first time. You need to sand it more, to get uniform texture, right after use tackle cloth, clear coat. If you noticed like orange peel texture, sand it with 1000 sand paper and compound, you will see better results.
I learnt a lot today. Nobody is perfect. Still very good job as a beginner.
Thanks! I'm glad the video helped
This dude says like so much. Literally said it eight times in one sentence
That celica though , need a video on that
I'm hoping to do some Celica content in the future. Sadly, I haven't really been able to put time into it recently. Last time I started it up, it started leaking fuel, so I gotta get that taken care of