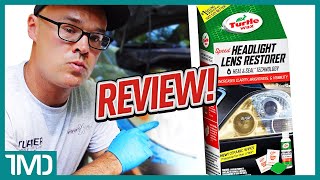
How to RESTORE your headlights for $10! Turtle Wax Headlight Restoration Kit is the BEST!

Вставка
- Опубліковано 8 чер 2020
- HOW TO restore your headlights back to new! Yellowing, hazy headlights can date any car, but with Turtle Wax Headlight Restoration Kit you can make your old headlights look BRAND NEW for $10! This kit is priced so cheap (we purchased this at AutoZone), it does the job more expensive kits couldn't do! No tools needed, can be fixed in 10 to 20 minutes permanently with these 4 easy steps! Let us know what you think?
Follow AT THE PUMP for all your automotive needs, HOW TO videos, and Automotive Podcasts for car enthusiasts by car enthusiasts.
Please Subscribe, like and follow us for more content @atthepump! - Авто та транспорт


Here is my experience of this product from the UK. I had my original faded headlamps sanded down by a mobile headlight restoration company 2 years ago. They were bad. I realised that the original coating would be lost. They guaranteed them for 1 year. Sure enough, after 1 year they started yellowing again. The car recently failed the MOT test as the headlamps were so bad. I bought this kit back in the summer, and planned to give it a try. Anyway, now in November with bad weather and a failed MOT, I was forced to give it a try. To my amazement, I used the cream only twice per headlight, with reasonable pressure and the headlights were back to like new. I was fully expecting to spend alot of time sanding. I could not apply the protective coating as it was forecast rain. I will do them again later and apply the protective coating. I really did not expect this result. I am very happy. I could see lots of yellow and black staining on the apllication cloth, so the cream was really taking off the contaminated layer on the lens.
Just think:
Before the advent of lens restoration kits, companies/dealerships were getting over on consumers concerning this!
It's the same concept (to me), seeing as how cable rates were ridiculously high and then comes streaming!
Good job, my guy!
It works! I purchased the 'Speed' version initially but then discovered the standard 'full' version so I got that too and used it since it was only a couple dollars more and had more stuff. I'm saving the other one for the future. At first it didn't seem to be doing much but after completing the steps it was a dramatic improvement. I took before/after photos and it's obvious. I didn't realize how clouded they were. Turtle Wax for the win.
Okay so I've just followed this as the (unused) kit my daughter gave me was missing the instructions.
I've got a 2005 ford Ka with just one light that needs cleaning.
Yes the light is better now yet really it takes 45 minutes on each light.
This has been a bank holiday weekend job when I've finally gotten the time to do it in.
Thanks for the excellent information! I thought I was going to have to buy new headlights! You’ve saved me a lot of time and money on my widows pension 😊
This absolutely worked for me on my 2010 Mazda CX-9!! There were orange and fogged up.. came out almost just like new!!
The kit is amazing i do it every year. Great video.
Awesome job man, pretty confident now doing this tomorrow after watching your video! Much appreciated! ✋😁
Thanks for the walk-through, got the same results. Great kit. Inexpensive + works as advertised = win.
Thanks for the video!
Thanks for taking the time. I wasn't sure which to buy and now I know!
Excellent presentation! You were thorough, clear and I could follow everything. I switched to your video from another one hosted by a guy who said that sandpaper was needed in order to do the job properly, and to use a drill and pad to apply the products. I'm glad I switched!
Great video thanks!
Thanks so much for the video had to watch it before I open my kit man I'm blown away I'm so impressed I can't stop looking at my head lamp it like new 😮
It does work well
I used 0000 steel wool, rubbing compound, polishing compound, then some 303 protectant. Mostly because it's stuff I already have around and works about as well as anything else. Thanks for sharing.
I like the music that comes on when he's scrubbing the headlight. 😃
Worked great. I still have more from both bottles, though.
I appreciate the video, does it have enough of the last 2 applications for both light's ?
The turtle wax kit is great value I got two cars done with one kit. One of the car's was quite bad so I sand it down to 2000 grit wet sand paper on its own first, then finished it with the turtle wax kit pads. For the other car I used only the kit's sanding pads. I think the kit's pads go higher than 2000 grit, maybe up to 4000 (which is how high you'd go if you just bought wet sanding paper and did it without a kit). I finished them both the kit's polishing compound and a small 3 inch pneumatic polisher. There's plenty of polishing compound. The wipes are the limiting factor and are just barely enough for two cars I'd you're careful. Both look great. I hope it lasts a long time, but I know it won't.
I use a blue kitchen scotch scratch (blue does not scratch plastic in the kitchen Ex. microwave controls, the green scratch does scratch/scars plastic) and Meguiars Restore & Polish which did an amazing job. I was still not satisfied, so used the blue scratch pad and wet baking soda - which took another layer of the oxidated yellow scum off. I did use Meguiars polish to try and protect it for 6 months. This only lasts 6 months, it must be restored biannually.
Nice video, but whats with the dim lights in the garage??
Nice job. Is there enough in the kit to do the second headlight? And, just so you know, it\s $20 in Canada. Still not bad. Thanks.
Switching up the direction of sanding with each pad is definitely the way to give the best results.
Circular hand sanding with a pad just doesn’t come close to what a drill can do.
Curious to know why you didn’t just pop the hood to be able to better sand the top of the lens. It would also eliminate the need to tape your hood.
The base coat wipe (and the sealant wipe) is not supposed to be unfolded.
How come other videos instruction said put the compount first and then do the sray and sand it afterwards? You sray and sand it and then use the compound. Is your technique the correct one?
I used this product following the instructions, the wet sanded headlights looked like new, however the lens protector\sealing wipes performance is really not as great as advertised. The headlights were back to discolored in about 6 months. Not as badly as they were before using the product, but definitely not as as advertised. More wipes should be included with the kit for touch up and maintenance applications.
just hit the headlight with spray wax once or twice a month after doing this to keep the UV protection renewed.
Can you use it on tail lights???
Oh... and in reality, I think that would be a great idea to have both headlights prepped before applying the protective coats since you have only one piece of each wipe tissue available in this kit .
Great tip!
You read my mind
The instructions do say to sand and polish both before applying the wipes. I managed to get two cars (for headlights) done using one kit. It was a stretch. The wipes are really only enough for two lights comfortably.
Hi !
I have this kit unused since 3 years, but is still ok.
I am curious how long lasts the protective coat applied in the last step.
Great job!
At least 3years...as long as its in the bottle🤭👍👍
one box for one headlight 😮😮
What front lip is that
My ocd had my eye twitching as I watched that dirty liquid dripping down all over the bumper as he went through the steps 😂
Haha... if I use this kit I'm going to paint tape dry cleaning clothes bag under headlight to protect bumper paint... yes, ocd but pretty much horse sense... 😏
In a cple other vids of this turtle wax kit being tested, the first step they said was applying the compound first, then the number sanding pad with the wet lube, then the number 2 sand pad, and so on, and the last step with the compound again. Any particular reason for skipping step one?
Wondering the same!
Great video. I'd like to know if there's enough supplies to do BOTH headlights and if so, are there 2 sets of the pads and wipes or just 1 set you have to re-use for the second headlight. Thanks.
I might be late but as advised in a previous video I watched, you should sand and complete sanding step on both head lights before moving to the coating and sealant steps as you will use them on both headlights not just one
@@Koltary Thank you for the reply. I totally agree you need to do BOTH headlights. That wasn't my question. My question was if the kit contained adequate supplies to do both and if it came with 2 pads & wipes or just 1 set that you use for both lights.
@@Wolfie1038 One set that you use for both It is suppose to have enough product to do both lenses
Yes, the kit does both lights. The instructions say to finish the prep on both before opening and applying the wipes. I actually got two cars done with one kit, but it's a stretch. The wipes are the limiting factor.
Instructions clearly state not to unfold those wipes.
It didn’t stop my yellow head light but it’s shiny and not foggy tho
Mine look great in the daytime. At night, micro scratches everywhere.
I used it on my Audi Q7 2009 and they look like new again. Don’t use the other brands as the mostly do the same job and cost much more.
great music video bruh! play some rap music next time. and thanks for keeping yourself in front of the camera through the whole video. that really helped
Does one kit do both headlight ?
From other videos learned the instructions say prep both headlights, then use base coat wipe on both headlights, do same with final coat wipe... 😀
I honestly think a normal cut and polish works better
Can you do both head lights with one box?
Yes, you can.
So maybe it's a condensation problem after years on the INSIDE. Think?
Open the hood next time
So one of those boxes is for one head light?
From other videos learned the instructions say prep both headlights, then use base coat wipe on both headlights, do same with final coat wipe... 😀
@@brucemattingly6476 did my lights awhile back I can see deer off the road and seen the first deer the night I cleaned them in my neighbors yard. This works well!
the kit is for only 1 headlight?
From other videos learned the instructions say prep both headlights, then use base coat wipe on both headlights, do same with final coat wipe... 😀
Great Video explaining the process...BUT...!!! i will say you were driving me crazy not wiping all the product running all over your front bumper!!..how could you not see it!!! DUDE..it was total tunnel vision on your part!!... but again good video.
he did wipe it
Haha... if I use this kit I'm going to paint tape dry cleaning clothes bag under headlight to protect bumper paint... yes, ocd but pretty much horse sense... 😏
Read the complete instructions first. The video fails to mention that the base coat should dry before applying the sealer. If you apply the sealer before the base coat dries you will get some streaking.
...but the background-music makes me dizzy and crazy. O.o
He's literally doing what the instructions say. Not sure why anyone would need a video for this...
From my understanding, you need one complete Turtle Wax kit per headlight meaning you need two kits to do both?
From other videos learned the instructions say prep both headlights, then use base coat wipe on both headlights, do same with final coat wipe... 😀
😘
I think you backwards
I don't see the purpose of taping around the light when you have run off onto the paint below.
The tape is to protect the paint from scratches by the sanding pads. Not from the sprays 👍🏻
Apply newspaper around the tape
Haha... if I use this kit I'm going to paint tape dry cleaning clothes bag under headlight to protect bumper paint... yes, ocd but pretty much horse sense... 😏
Wrong Wrong Wrong. Advice: before making a video, read the directions.
Why is it necessary to accompany what could have been a good video with such horrible music. Is this a youtube mandate??
Yea, UA-cam comes to your house with an AR-15 and force you to edit your video with shitty music if you happen to not include it.
I searched everywhere for that elbow grease, it's hard to find.