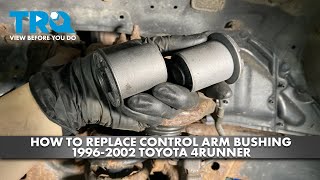
How to Replace Control Arm Bushings (EASY)

Вставка
- Опубліковано 12 жов 2014
- Control Arm Bushing Replacement. This video will show you how to easily replace Upper Control Arm bushings (press the old ones out and press the new ones in with common tools). This job is fast and easy and can be done with basic hand tools and a ball joint or bushing press which you can rent for free at your local parts store.
You can also use this method to replace bushings in your leaf springs and pretty much anything that has pressed in bushings!
Get inexpensive bushings here: www.amazon.com/s/?_encoding=UT...
Here is the press kit I was using (and I like a lot): www.amazon.com/gp/product/B002...
How to Press a Ball Joint: • How to Press a Ball Joint
How to Replace a Chevy Upper Control Arm: • How to Replace Control...
How to Replace a Ford Upper Control Arm: • How to Replace a Contr...
How to Replace a Lower Control Arm: • Replacing Lower Contro...
*If the video was helpful, remember to give it a "thumbs up" and consider subscribing. New videos every Thursday*
-Website: www.ChrisFixed.com
-Facebook: / chrisfix8
-Twitter: / chrisfixed
-Instagram: / chrisfixit
-Subscribe Here: ua-cam.com/users/subscription_c...
-UA-cam Channel: / chrisfix
Disclaimer:
Due to factors beyond the control of ChrisFix, I cannot guarantee against improper use or unauthorized modifications of this information. ChrisFix assumes no liability for property damage or injury incurred as a result of any of the information contained in this video. Use this information at your own risk. ChrisFix recommends safe practices when working on vehicles and or with tools seen or implied in this video. Due to factors beyond the control of ChrisFix, no information contained in this video shall create any expressed or implied warranty or guarantee of any particular result. Any injury, damage, or loss that may result from improper use of these tools, equipment, or from the information contained in this video is the sole responsibility of the user and not ChrisFix. - Авто та транспорт


9 years old video. Feels retro compared to the more recent ones. Thx for sticking with it all these years
Tip: If you throw the bushing, ball joint or bearing in a freezer, it slides in even easier due to temperature contraction.
Thanks for the tip!
Great tip! Even now with having owned a hydraulic press for several years now to this day I still freeze everything prior to marrying whatever it is even though I have the capability pressing the square peg into the round hole due to my press is really overkill for someone who likes to tinker on things and to build loud obnoxious things with the sole purpose to drive them like an idiot..
Pro tip you do that and you take a torch to the arm where it goes you should be able to tap it in with a hammer and right sized socket gota work quick or it will bind up part way
I do that to put a magnum.
I installed an upper main bearing on a 2 stroke outboard without a press by putting the crankshaft in the freezer and the bearing in the oven. Pretty cool although not sure it’s the best route for right tolerance cases like that lol. Seemed to work fine though.
Clear and complete explanation, one of the best videos on this topic on the internet.
It's a HUGE help to lubricate the threads on the screw. It's the friction of the threads that cause most of the resistance, not the metal on metal of the bushing. It also helps make your threads last longer from unnecessary wear.
is it better using grease or something more oily?
@@omartlili5849 Oil. Grease is great at providing some longevity to what you’re lubricating. So unless you remove bushings on a regular basis then using grease would be unnecessary when you can just use to oil.
@@omartlili5849 neversieze
@@omartlili5849 thats what she said PULSECHAIN $0.00014
I had to go to 4 different shops and spend thousands of dollars just to fail inspection and be told another 3k but i found all the bushings and itll cost 145 bucks, they said they cant replace bushings need the whole control arms and knuckles because thats what ford has written in their service manuals!! So looks like im doing it myself!!! Thanks chris! Once again saving the day!!
I’ve watched almost all of your videos, and honestly man I got respect for you. You never cut corners on explanations or safety . You do all your repairs with regular tools no matter the job and if it weren’t for you I probably would of gave up on a few things. Sometimes I wish I could just bring my dam car to you man you make it look so easy !
Chris Fix is a national treasure!
You're an excellent teacher and communicator. I'm always delighted when I see a video from you on some topic I search for, because I know you will address the important points, and will address any common difficulties. You've helped me save a lot of $$$ fixing things myself. Thank you!
I'm about to replace the bushings on my lower control arm. The arms are in great shape, but the bushings have visible splitting all around. I live in the desert, so metal doesn't rust much, but the climate and the intense UV light makes rubber break down fast. This is, as always, a very clear video! You've removed any fear I had of doing this myself.
I have been working on cars and trucks for longer than i want to remember, your video's are thorough enough for a novice to do the job right, very helpful and enjoyable to watch, thank you
I've been watching repair videos on many different topics and yours are - hands down - the best. You have a definite talent for this.
These videos are great. Never tried to do suspension/ steering components. Chris makes it easy so it is almost like I want to. The video focus on the item rather then the person doing the work is brilliant.
Chris, appreciate your videos - the BEST I've EVER seen. Crystal clear and to the point explanation leaving no room for error - very professional. Just can't locate a BJ/CTA Bushing tool kit as complete as the one you're using. All those extra pieces included in your kit has everything needed for any removal/installation. Keep up the good work!
+Steven Leong Thanks a lot! I link all the tools and products I use in each video in the description so it is easy for you to find!
Yes,excellent video and teaching skills.
Strait to the point and no fluffing about.
Best video I have ever seen to!🏅
Having watched several of your videos I'd just like to say they inspire confidence from being so well thought out and clearly presented. Great work!
You should try being a teacher!
This is an excellent video. Your explanation is complete and your choice of words is spot on. Moreover, you go above and beyond to explain AND show with your camera exactly what is going on. Very few people take the time to put together such an excellent explanation, thank you.
Very informative
This is the best diy auto repair channel on youtube. It's allowed me to do my own work and save tons of money, and learn this stuff on the fly. I could not afford to have a car if you did not have this channel up. I really appreciate the work that you are doing!
complete and concise with enough explanation for first time users. Great video with excellent camera work.
As a newbie to pretty much all car mechanics, your videos have been really helpful and clear. I'd love a really quick explanation on what the parts do or how the function in the vehicle itself. Thanks so much
Austin Carter No problem Austin! I try to make all of my videos simple and easy to follow!
I've watched a bunch of how-to videos and I like your explanations and visuals the best.
I want to say thanks for the "how to" videos,I've seen several and take pride in the fact I did it and didn't pay anyone for labor. I'm retired and disabled,so your videos do make a difference! Next task is that pesky shift lever indicator. Happy Trails!
Your videos are an excellent resource for me for my 1973 Challenger restoration project. Very thorough and informative. I appreciate your help!
Awesome! I’m glad the videos are helpful!
Man, that was excellent! IMO your videos are by far the best of all auto DIY series. Keep em coming!
Great job Chris, you have the gift of explaining things real well and in a language that anyone can understand. What I really love about your videos is that you sound confident, you're precise in your language and none of those "umm" in your narratives. Keep up the good work man.
alia176 I agree with you. Chris you do have a natural ability to communicate what you're doing in straightforward language. As a female, I so often feel taken advantage of with car repairs. The suspension arms on my nissan bluebird have been done on separate occasions (different auto repairers) & I'm sure I was ripped off with the first job. If I had viewed your video back then I would have felt far more confident to discuss and query the work that was done. Thanks for sharing your knowledge and expertise (all the way to NZ!).
alia176 truuuuu
You are an Amazing Teacher ! Thank you for being so detailed in your videos.
"This would be a really good time to have a workbench. I'm gonna use the floor." haha classic.
"Don't try this at home!"
I really don't get why millennials don't understand the difference between a floor and the ground.
Gitter done.
That was a legit shade tree mechanic move....we all do it😂
This is an amazing video. I love the way that you explain everything in full detail. You go the extra step to explain even the most simple things. Great video, keep up to amazing work. You sound like a prime time host.
Thanks!
Man!... you're the king of all mechanics!! I love to watch all your videos and at the end in every visual is the same good satisfaction that I can do it too!
Thanks to you Chris!
I'm so glad you can rent the kit because on Amazon there like 350$! And the mechanic was charging 300$ for new bushings and and new tie rods to be replaced! Glad I found this guy!!!
You make some REALLY GREAT videos! Very professional, straightforward, and right to the point with excellent descriptions and explanations without any extraneous jibber-jabber. Great job , THANKS 👍🏽!
Once again you're helping save me a bunch of money and add another notch on my diy wall of fame. You're an excellent teacher,thank you! Overhaulin' a '78 El Camino project and some here n there work on my '81 Camaro!
+Mr. Dreadz awesome! I'm glad the videos are helpful!
Nice looking Tool! I used a vice on my '65 Mustang upper and lower control arms. this was back in '83 my hat off to the engineer who thought of this tool. Love your videos.
Best auto mechanic channel you can imagine. Chris, thank you, thank you very much.
good job I have learned a lot from your videos thank you so much you really have the gift of explaining think keep doing a good job amigo
I bought some used upper arms for my truck that provided additional suspension travel. Like you suggested I pressed the old bushings, painted the arms the same shade as the original manufacturer, then pressed in my brand new polyurethane bushings. It was easy and very rewarding
😊😊😊😊😊
Excellent video. You added a lot of extra detail which makes it easy to follow and clears up any misunderstanding.
I'm just commenting to say, I've watched a load of your videos now, and your channel is by far, the best I've subscribed to. Thanks for teaching me a little something, and for all the effort.
It's so refreshing seeing a DIY channel actually recommending proper grinder safety :P
***** Thanks! I try to recommend proper safety techniques whenever possible.
“Easy” is debatable.. I feel good after doing my own fluid changes and replacing a new battery.. haha thanks for the video, this video was done so well it made me tackle this myself and probably saved some good coin!!
You are such a good instructor and your videos are so thorough and just plain fantastic
your videos are so informative you not only show everything in perfect view but you explain everything. thank you so much for all your videos...
You really produce great video's Chris. Reminds me of Ed China in the old days. I really like how you explain what you're going to be doing and why....before you do it. I appreciate all the effort you put in to your work, it is much appreciated.
Getting ready to change ball joints on 98 Chevy truck, your video was very informative on how to use press good detail Thank you!
+Tyler Fleming glad the videos are helpful
Dude +ChrisFix Your explanations are really clear and helpful, and you get right to the point. Never found mechanics this straightforward. Thanks!
Nice job. Excellent videos, very clear and up close. Excellent explanations. I am too old to do this myself but sure do like to watch a master.
Nice Job Chris. I've watched a few of your videos and I like the way you explain things and have your videos organized with tools and yo0ru tid bit advice like rent the tools from your local auto parts store etc. Only suggestion I have is to list all the tools in the SHOW MORE box. Best Wishes n Blessings Keith
+Keith Noneya Thanks man! I link the tools I use in the description
This is genius! I used this same setup (balljoint press and various impact sockets) to replace the bushings in my rear upper control arms. Would’ve cost over $300 to replace them! Regular bushing press wouldn’t have worked, because bolts were solidly seized (welded) to the inside bushing sleeves - so couldn’t pass anything through the old bushings.
It took two afternoons and ten Sawzall blades to cut the old bolts loose and free the control arms from my car, btw.
Chris, you make very good how to videos. Thanks for everything you do and keep 'em coming!
Very talented. Everything is logical and methodical.
clear and easy to understand, keep it up
you're a Godsend, thanks man
I love your videos. They are very easy to follow. And you explain things in intricate details.
As a single mother trying to figure out how to afford to fix my car, this is so helpful! I've been trying to find a video I can understand so I can fix my car and get my sons and I back on the road sooner rather than later. Thank you so much.
Where you stay at Gurrrl? I got's you!... that's easy money!....
Always a great job Chris.Thanks
Great video and instructions, very impressive and very helpful indeed.
Thanks! Glad the video was helpful!
amazing... literally needed to do this today... this video just made my life a lot easier... thanks!
This guy is the father that we all wish to have in our childhood. U the best Chris
Not only pro mechanic, but also pro UA-cam video editor which is VERY important. Nothing worse than a video being 3X or 4X as long as it needs to be because of lazy video posters. Thanks, Chris
Thanks! I spend 120hrs on each video to make it as concise as possible!
Well, while I always like to be positive on those kinds of videos, since the person is trying to help and often does have good information to share. But you are right, the diff is pro-level versus not. And this was a perfect video in the sense of great information delivered as concisely as possible, without being hurried or incomplete.
"pushing the bushing." my new favourite phrase :D
Great job Chris on this video! Very well done, easy to understand! Thank You!
Has not change much this type of work since nineteen fifty seven - or since Dean Moriarty - but always a pleasure to see such an update up to date.
Your videos explain everything so well and so easy to understand, no one does it better than you. Thank you for sharing.
Thank you so much, just don't stop doing this videos
Atallah abdulaziz Thanks man! I wont! New videos every Thursday and a bonus video every Monday!
I'd position a wrench or some other solid object inside the bushing mount so it does not flex in and crack the welds. I also would use an impact gun and do a lot of penetrating oil first. thanks for the video I'm doing this job this weekend.
My ball joint press specifically states not to use an impact tool on it. I never do.
Thx to chrisfix today I replaced the bushings on the front control arm of my dad's fiesta although I'm 15 did all the work myself and the best part is the bushing was bad and the mechanics had ripped my dad 2 times saying the sway bar bushings are bad so everything to lower the subframe and make extra money...but this time I changed it and now the car is good
BEST VIDEOS!!! Really like how you will get into the gritty detail, but you do it so efficiently. Skills man!
+Mister Klein thanks man!
For everybody doing this, you need to have a spacer for removing the bushings on lower control arms (on older vehicles) and for most modern control arms. The easiest (and cheapest) way is to take exhaust pipe and cut it wide enough to fit in between the metal, but it must be cut in half (making two c shapes) in order to fit around the bushing to keep from bending the metal. Hope this helps somebody before it’s too late.
cutting exhaust pipe. thats a good idea, will remember this one
Now I have to replace my exhaust pipe. Should have thought this through a bit more...
Necroing this comment but you can literally see the welds break when he pushes it out
Although this video is helpful, it is very important to not miss this step. Good job brother.
For stuff rusted like this, its best to hit it with the penetrating spray, everywhere, starting 24 hours in advance, and several times. Also, once force is applied to the press, rather than applying more and more pressure with a longer breaker bar, you can hit it with a hammer, while its under load, to break the hold. The impact of the hammer strikes will loosen the hold from years of press-fit and corrosion and soon it'll pop right out without having to put extreme force on it. You can always crank up the force if it's still stuck and hit it some more.
excellent video, great camera work, focus and explanations you make it look so easy i feel motivated to do it now
love your audio, I'm hearing impaired and can hear you very clearly. Thanks for the quality of your audio (and the video)👍✌
ziinnnnggg!! right off.....good vid bro👍
+Daniel Samaseia haha, thanks!
Hit it with a couple uggaa duggaas haha
It's stamped metal,you need to use a spacer between the two layers of the control arm otherwise you deform it or crack it,like here 5:20
+michaelovitch Thanks for the tip!
How do you know if the bushings are bad to begin with? Also have you ever seen or is it possible for the control arm bolts with Alignment keys to wear on one side of the bolt? In-other-words the shaft of the ( bolt ) that goes into the bushing spacer becomes oval from the bushing spacer constantly rubbing on it? I've seen that done to a bolt before on Dual axle utility trailers where the axles two leaf springs meet in the middle at the pivot mount. The weight of the trailer pushing down on the leaf springs/bushing spacers putting pressure/load on the leaf spring bushing bolt
I Know You're Right But in order to know if it’s bad most of the time you will here it. Normally when at a very slow speed or from start to stopping while turning. Just listen for a creaking sound it’s hard to miss. Mine is bad right now and it drives me nuts listening to it.
michaelovitch june vippink. Floyd. Og. Div. Rock,. Pop
Pink. Floyd. Og. Div. Pop. Rock.
This was awesome to watch. I’m not a mechanic, and I hv no tools. I just wanted to learn about bushings so I don’t get ripped off. Great video. Thank you!
Very detailed and that's what I need cause I don't know shit bout cars until I started watching your videos. Cheers from the Kingdom of Tonga.
Also, place your new bushings in the freezer until you install them... it'll shrink them just a little bit and make life easier :)
Pro Tip: Take your control arms with the worn out bushings and place them in a fire pit with cardboard. Set the cardboard on fire until the old rubber bushings catch fire. They will start burning and literally pop out all by themselves. Allow the control arms to cool off naturally by themselves before touching them. You will usually have to remove the round metal casings but they will come out very easily. The old paint and grease will also burn off, making the control arms very easy to wire brush to bare metal.
A true pro tip
Awesome tip but any pro tips on getting them back in (without) a press? Would a c clamp work
Wouldn’t this anneal the steel control arms. Is this steel air hardening, I’m sure it’s got to be some sort of hardened , high strength steel.
@@evanmorris1178 control arms from the 60s 70s and 80s are just regular old stamped steel. The only control arms that I know are different are from the C4 Corvette in 1984, which switched to forged aluminum.
Thanks! Good to know.
Thanks for the info & help.
While borrowing the press kit they mentioned putting the new bushings in freezer until your ready. Seemed like it worked good.
Just lost the lower ball joint on the 97' XR-7, and while I'm in the park, suspect that the bushing are gone as well. Great walkthrough in the replacement. Appreciate the help.
Ball joint press is the trick for the circular control arm bushings!!
Also a good idea to put a support piece between the sides of the control arm so it is not crushed or distorted by the press.
+john smith Absolutely! You almost always have to wedge something into the channel of the A arm to support and keep from crushing and deforming the A arm ends.
+john smith Yeah, typically a short socket will fit in there and keep the ears from touching.
+Tim Heagarty where were you guys 2 years ago when I had to do this? I sure could have used that knowledge back then. LOL That thought never crossed my mind! I ended up returning the bushing and buying new control arms because I stretched out the openings for the bushings getting the old ones out.
remove lower control arm sedona
Honestly....this is one task that is worth having a shop do. I've done many A arms, and it's just too often a real nightmare doing these bushings.
Chris I gotta give it to you your great at tutorials ! everything you say makes total sense and your explanations are so detailed well done my friend you've helped me ALOT! PROPS!
+xBlazT77x Thanks a lot!
This helped me. I didn't realize you could flip things over and still press out the bushing. Appreciate this video.
Of course, my favorite GT7 song.
Me too XD
I need that camera you use lol
I wondered how good those presses were. Thanks for the vid!
Great video. Good quality and clear instructions. Very helpful!
I feel like I'm watching a baby version of the ChrisFix I know now.
BIZZZZZZZING!!!
Great tutorial, gifted instructor. 1st time watching your video, subscribed!
great camera work, I wont be doing this job( I lack a lot of tools) but thanks to you now I know what parts I have to buy.
everytime i hear the fact that you guys can rent tools free from your auto parts store makes me want to migrate
AngeV2 Haha, it is a nice perk!
Where are you at that you cant?
Who doesn’t do that?
You have to leave the cost of the tool as a deposit which they return to you once you bring the tool back. It's free but not really.
In Arizona , the cost of the tool is charged on your debit card & id is held until tool returned . So you pretty much buy it . Then return it lol
Did you damage the control arm at the 5:22 mark? It seemed to look like it pinched a little bit..? But overall very informative and great camera angled vids!
+Rob ST he should have put a nut in between the arm to prevent it
He definetly did.
yes the controlarm is cracked at 2 spots and should have been re-welded.
Yes a spacer should be inserted to keep it all in jig before compression.
Once again a jewel of a video. Great job and thank you very much.
Great video. Excellent job of explaining all the steps
***** Because I didnt want to use that penetrating fluid while working on my plastic tailgate cover. Might eat right though it! I really need a workbench badly!
You should make a video to build one :-)
***** I wish I had the room. My garage is tight. I was considering it though.
I think you can for one in there. Hell, make one that folds up like one of those wall needs. Lol that would be cool as shit! !!!
***** That would be really cool. I will have to start thinking about it!
I saw a couple online....think I might have to make one myself. They look rather simple and space saving!!!
5:15 zing right off 😂😂
Yeeeee Haw
Chris, outstanding job. Clear, careful and well-explained. Only question: how do you get the control arms out to be able to work on the bushings?
I love this channel .. Keep up the Awesome Work . I have 06 charger and need to replace pretty much everything.. uggh .. but your videos Definitely Help ... And you explaining as you go .. On Point!!!!
Nice tutorial, but shouldn't you really use a metal collar to fit between the "ears" of the control arm to ensure that the metal does not get crushed inwards while you're pressing? Control arms are often made of surprisingly thin pressed metal.
dunebasher1971 Thanks man. I am unsure what you mean... They way I did it in this video is exactly how you are supposed to do it. You use a cup to press on the outside of the control arm ear and an attachment to press on only the bushing. Your control arm is designed to have bushings pressed in and out this way and will not bend. If I can bend a control arm with hand tools, it is a bad control arm and you need a new one anyhow. I hope that answers your question.
ChrisFix Quite a few manufacturer's OEM control arms are thin enough to risk crushing them - solid-axle Jeep/Dodge ones for example. That's why the factory special tool for replacing the bushings comes with a metal collar to fit in between the ears to ensure they don't crush when the pressure is applied. Look up Miller tool 7932 for an example, the U-shaped piece is the collar.
At 5:22 in your video, you can see one of the ears of the control arm bending inwards. The risk is that it doesn't spring back when the bushing pops free. When you're comparing the control arms at 7:20, you can see that the ears of the arm you've just pressed the bushings out of are noticeably deformed compared to the other arm.
If it works for you, great, but it's worth knowing that there's a risk of deforming the ears so much that the new bushing will never seat properly. It wouldn't surprise me if the factory procedure for replacing those bushings specifies a special tool that includes a collar to sit between the ears to prevent them bending.
dunebasher1971 Oh, I understand now. In this case, the bushing was bending the ear a little. In this case, it is a good control arm but as you said, some control arms are weak and it could damage the actual control arm. You could put a piece of metal or wood in between the two ears to prevent them from bending (like the collar you are talking about). Thanks for pointing that out man!
@@dunebasher1971 At that point it also looks like a weld broke- I would consider that a safety risk and throw the items away.
@@codyapplegarth That poor wishbone got wrecked by doing the job improperly. It is definitely a failure waiting to happen. There was some proper crack initiation going on in at least two places. It will fail no problem. This video gets things about halfway right, but the things it gets wrong are cringe-inducing.
Am I the only one on this whole thread that noticed that when he pressed it out he broke the weld on the control arm lmao.
Nope i saw that too 😅, and i saw your comment right before i was going to write my own, BTW do you also hear how depressing @chrisfix sounds on these old videos?
You've saved my ass on an engineering assignment i have because across the entire web, i couldn't find anything that would tell me what the bushings were made other than just 'rubber'. thanks for the help m8
thanks mate this is another great video easy to understand and your saving me heaps of money by doing it myself keep up the good work subscribed to your channel thanks again Reever Dee from australia