Been transitioning from SketchUp to blender (not leaving SketchUp behind, but expanding my capacity) lately and your channel has been amazing. Keep up the consistent solid cotent!
Love it! I wish more people would get past the "leaving software behind" and expand there capacity - that's what I'm trying to do as well - glad I've been able to help! :)
I used to follow all your sketchup tutorials back when I was a student in 2018! After switching to blender I've been bouncing around different channels for years and finally found yours again!
This was exactly the tool I needed. When sculpting using highres modifier and not using the change base mesh option. This really helps shaping the low poly to the new sculpted shape.
Your the man :) didnt have to replay once lol. Clear explanations clearly spoken. So many tutorials on youtube miss stuff out or are given in accents I strain to understand or both! Shouldve subscribed ages ago as I've learnt loads off you already.
Hi. Forgive me if I say anything terribly ignorant here, I've only been learning Blender for a couple months. I have a hair mesh that was created using a different (and now unavailable) head mesh/model from the one I am now trying to fit the hair to. Unfortunately the proportions are not the same. The original head mesh was shallower in the space behind the ears and had more of a brow in front of the ears. This means that when I try to fit the hair onto the head, either it fits in back but extends beyond where the hairline should be in front, or vice versa. Thus far, the only way I've found to be able to fine-tune the fit is to have the hair mesh clip into the head mesh, and then manually try to move the parts that are clipping outward so that they rest on the surface rather than clipping. In edit mode, I may do this edge-by-edge (or face, or vertex), and by trying to rotate and nudge strand elements ever-so-slightly without exposing the scalp. In sculpt mode, I may try to use the Draw or Clay Strips or Grab tools. Either way, I end up with a hair that fits, but it's really messy (like, looking at it in Object Mode or Sculpt Mode, the elements of the hair mesh may be "lumpy" in places because I couldn't exactly move things so that the vertices didn't get deformed in places. Thankfully, since it's hair, a lot of that fudging isn't ever really seen, but there are always hairstyles that are the exception and will somehow reveal places where the hair mesh gaps away from the scalp, or is deformed, or whatever. I keep thinking that surely there is a more reliable, accurate, less time consuming way, but I haven't found it. I've been trying to figure out how to make this work using either the shrinkwrap modifier or Conform Object addon, but in both cases, attempting to implement it results in the hair mesh getting completely deformed. For instance, using the shrinkwrap modifier, it tends to "flatten" all the stand elements to be completely flush with the surface of the scalp, rather than keeping them layered as they should be. Using Conform Object...honestly I don't even know what it's attempting to do, but the grid ends up far FAR above the scalp, and the hair is deformed and stretched between the grid and the scalp. And any attempt to move the hair or re-proportion it creates a scary mutant mesh that isn't even recognizable as the hair mesh it started out as. I've found lots of tutorials on how to draw hair, and to model hair using the particle system, but those aren't relevant to what I'm attempting to accomplish here, and your tutorials about Conform Object and Shrinkwrap are about the closest I've found. Do you have any advice on how to accomplish this?
How do you then save or "lock" the mesh in place? I am shrinkwrapping to close holes in a really bad photogrammetry surface model and I just want the shrink-wrapped mesh not the messy surface underneath. Is it possible?
I think you select the modifier (in the panel list), then there is an icon bar > click down arrow > select Apply. But I am unsure how to merge meshes permanently and they both keep their materials? (Meaning connect all surface verts, where the 2 meshes meet. But delete any verts of Mesh2, that go inside Mesh1 - since we dont need the extra verts of Mesh2.) Can someone answer. (I tried Control J or whatever. But that doesnt "vacuum form" the surface verts, to make a solid around the Mesh1 shape - and erase unneeded verts of Mesh2.)
Hi Justin, your videos are great! One question, I am trying to rotate my object in many ways for animation and camera angle but the shrinkwrapped borders and designs are not rotating with the object. They disappear if moved or rotated slightly... (Also, shrinkwrapped materials have degraded colors). How can I move them altogether?
I'm having an issue with the applying a logo to a ball and then rotating the ball. I got the shrinkwrap on correctly but when I rotate the ball that it is on, it doesn't rotate with it. It's kinda spinning on its own. Have you seen this before or know how to fix it? I'm new to blender
My problem lies with baking the decals, I want to bake a decal i shrinkwrapped onto a garment that is a separate object, I can't figure out how to bake the shrink wrap so that the image is exactly where it is meant to be in my other uv map (of the garment or whatever object it is on), i tried moving the uv myself but theres no way i can properly see if it is in the right place to fit the fabric wrinkles and folds properly, i want it to be in the right place. I tried my texture from one uv to another method but because it is a separate object only the uvs of that object (the plan) appear in the node. I'd love to know how to bake all the decals we place on our object so they fit with that objects uv map and baked diffuse texture
+1 decals. I could have used this vid last year. I made a decal the hard way by manually curving a flat plane, then moving verts to match another Mesh's surface. But it was annoying because I had to keep adjusting the curve radius of the plane, to better match the surface.
Hey dude excellent tutorial, at the beginning I was skeptical at your way of showing tutorials because the way you talk, but I was wrong🤪 This tutorial explain what I want to know, excellent timing.
Lolz. I watched his vids since last year, and agreed back then that the intro was weird - I was in a rush and wanted info fast without intros. But now I remember him, his voice, and the dog. Google recommends his vids when I search for Blender issues. So I think his personality method works - I click him/his thumbnail as a seal of approval.
Bro your videos have been SO helpful. I would LOVE a vid demonstration of wrapping geometry around objects. I've been modeling a starship for months and getting the windows booleans aligned to the surface (even with snapping) is a tedious nightmare. I've tried geometry nodes, instancing, and just manual placement one at a time. It's a nightmare.
Love the vids! Just curious...can you use texture painting to project/stencil an image/texture using this method with the modifier? I know, sounds counterintuitive but what if you can't have the model manipulated or change it's UV mapping? One thing I don't like about texture painting is that it projects the texture directly onto a surface, which is fine for a flat-ish surfaces BUT curvy surfaces, like the top of some aircraft, creates some distortion. Basically, I'm trying to project a decal over the top of an F16 for a livery mod in MS Flight Sim 2020. For the most part, the overlay appears good enough when using texture painting but in some really steep curvy areas (near the cockpit) and viewing the area from the side, it's really stretched and distorted. Would love to be able to texture paint over the shape of the object (like a shrink wrap "brush" stencil) vs just a flat stamp. :)
So how would I take my shrink wrap can combine it with an object to make it one object. I select my shrink wrap and my object and press control J, but then my shrink wrap gets messed up. How do I combine my shrink wrap and object into one object?
I believe you need to APPLY modifiers first, to make them final (no longer editable). [Select the modifier (in the right panel list), then there is an icon bar > click down arrow > select Apply.] Notice how he says it's "live." In Blender, this means that modifiers are not actually applied to the FINAL mesh, but merely showing a preview like a filter in Photoshop - that you can still toggle on/off, to adjust. Thus the APPLY makes effect permanent, which seems to be needed to do other operations.
Is it possible to add vertices to a image you add as a a plane? Im trying to wrap a bottle with a image I added as a plane but the image has no vertices
Im new here and I love your videos, they're easy to follow and understand Blender. Hope someday you make a video about how to make cloth with collision on other objects like curtains. Thank you!
So far the best results are using the 'Project' wrap method. However, no matter how clean the low poly mesh, there are still nasty spikes and oddly placed holes created by the shrinkwrap mod. Some sort of bug? It makes no difference what I do to tweak the model or the settings of the shrink wrap. The best I can do is 'Nearest Surface point' keep subD modifier at 1 and turn OFF "Use Limit Surface" Man...SO close to being perfect w the Project, really a shame.


Hi everyone! Let me know if you have any questions in the comments below! :)
This is just Euler transformations, basically.
Hey, i cannot get a surface to Subdivide into a grid like that, i just get a hexagon
Been transitioning from SketchUp to blender (not leaving SketchUp behind, but expanding my capacity) lately and your channel has been amazing. Keep up the consistent solid cotent!
Love it! I wish more people would get past the "leaving software behind" and expand there capacity - that's what I'm trying to do as well - glad I've been able to help! :)
I used to follow all your sketchup tutorials back when I was a student in 2018! After switching to blender I've been bouncing around different channels for years and finally found yours again!
This tutorial made so much sense.
Thank you for not trying to sell anything or waste time.
This was exactly the tool I needed.
When sculpting using highres modifier and not using the change base mesh option.
This really helps shaping the low poly to the new sculpted shape.
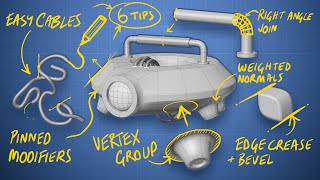
at 07:01 the solution could be Vertex Group. Assigning & Removing the vertexes on which you want the projection.
Love your energy mister! And thanks for the tutorials!
Your the man :) didnt have to replay once lol. Clear explanations clearly spoken. So many tutorials on youtube miss stuff out or are given in accents I strain to understand or both! Shouldve subscribed ages ago as I've learnt loads off you already.
Thank you, man, for this tutorial on shrinkwrap. Now I know what to do with it.
Really like the way you explain things. It now looks simple!
Awesome... Great timing, as I needed this today, lol. Miraculous.
Perfect!
It's amazing the time I can save with this modifier now that I know something about it, thanks!
Project was really valuable. Thanks,
What all can this be used for?
Great explanation of the shrinkwrap modifier! You are very helpful in understanding what can be achieved in Blender!
Glad it was helpful!
HA Dood the way you start your videos is epic thanks for all the tutorials!
Thank you. I'm just about to start modeling face masks, and seeing this saved me hours.
Awesome! :)
fantastic thanks love your clarity
excellent as all of your teaching videos! thank you very much
a real guru
Thanks, that's actually a really nice modifier to model clothes when the pc can not handle cloth simulation.
Great tour. Thx!
Hi. Forgive me if I say anything terribly ignorant here, I've only been learning Blender for a couple months.
I have a hair mesh that was created using a different (and now unavailable) head mesh/model from the one I am now trying to fit the hair to. Unfortunately the proportions are not the same. The original head mesh was shallower in the space behind the ears and had more of a brow in front of the ears. This means that when I try to fit the hair onto the head, either it fits in back but extends beyond where the hairline should be in front, or vice versa.
Thus far, the only way I've found to be able to fine-tune the fit is to have the hair mesh clip into the head mesh, and then manually try to move the parts that are clipping outward so that they rest on the surface rather than clipping.
In edit mode, I may do this edge-by-edge (or face, or vertex), and by trying to rotate and nudge strand elements ever-so-slightly without exposing the scalp. In sculpt mode, I may try to use the Draw or Clay Strips or Grab tools. Either way, I end up with a hair that fits, but it's really messy (like, looking at it in Object Mode or Sculpt Mode, the elements of the hair mesh may be "lumpy" in places because I couldn't exactly move things so that the vertices didn't get deformed in places.
Thankfully, since it's hair, a lot of that fudging isn't ever really seen, but there are always hairstyles that are the exception and will somehow reveal places where the hair mesh gaps away from the scalp, or is deformed, or whatever.
I keep thinking that surely there is a more reliable, accurate, less time consuming way, but I haven't found it.
I've been trying to figure out how to make this work using either the shrinkwrap modifier or Conform Object addon, but in both cases, attempting to implement it results in the hair mesh getting completely deformed. For instance, using the shrinkwrap modifier, it tends to "flatten" all the stand elements to be completely flush with the surface of the scalp, rather than keeping them layered as they should be. Using Conform Object...honestly I don't even know what it's attempting to do, but the grid ends up far FAR above the scalp, and the hair is deformed and stretched between the grid and the scalp. And any attempt to move the hair or re-proportion it creates a scary mutant mesh that isn't even recognizable as the hair mesh it started out as.
I've found lots of tutorials on how to draw hair, and to model hair using the particle system, but those aren't relevant to what I'm attempting to accomplish here, and your tutorials about Conform Object and Shrinkwrap are about the closest I've found. Do you have any advice on how to accomplish this?
Wow great tutorial. I learned a lot from this. Thank you.
Excellent tutorials! Thanks for all your help!
How do you then save or "lock" the mesh in place? I am shrinkwrapping to close holes in a really bad photogrammetry surface model and I just want the shrink-wrapped mesh not the messy surface underneath. Is it possible?
I think you select the modifier (in the panel list), then there is an icon bar > click down arrow > select Apply.
But I am unsure how to merge meshes permanently and they both keep their materials? (Meaning connect all surface verts, where the 2 meshes meet. But delete any verts of Mesh2, that go inside Mesh1 - since we dont need the extra verts of Mesh2.)
Can someone answer. (I tried Control J or whatever. But that doesnt "vacuum form" the surface verts, to make a solid around the Mesh1 shape - and erase unneeded verts of Mesh2.)
Saved me!!! Thank u hero❤
I have a font which is bigger in width than my cylinder jar. If is shrinkwrap, the edges stay in original position. how do i rectify this. pls help
Hi Justin, your videos are great! One question, I am trying to rotate my object in many ways for animation and camera angle but the shrinkwrapped borders and designs are not rotating with the object. They disappear if moved or rotated slightly... (Also, shrinkwrapped materials have degraded colors). How can I move them altogether?
I'm having an issue with the applying a logo to a ball and then rotating the ball. I got the shrinkwrap on correctly but when I rotate the ball that it is on, it doesn't rotate with it. It's kinda spinning on its own. Have you seen this before or know how to fix it? I'm new to blender
Man, u r the best! Thank you
Thanks for watching!
Best modifier for making Cheeseburgers!
I mean...you're not wrong ;p
@@TheCGEssentials Next up : how to make subway sandwiches with shrinkwrap modifier (100% works)
… or iced doughnuts!
My problem lies with baking the decals, I want to bake a decal i shrinkwrapped onto a garment that is a separate object, I can't figure out how to bake the shrink wrap so that the image is exactly where it is meant to be in my other uv map (of the garment or whatever object it is on), i tried moving the uv myself but theres no way i can properly see if it is in the right place to fit the fabric wrinkles and folds properly, i want it to be in the right place. I tried my texture from one uv to another method but because it is a separate object only the uvs of that object (the plan) appear in the node. I'd love to know how to bake all the decals we place on our object so they fit with that objects uv map and baked diffuse texture
Hey great tutorial!
Did you say decals? Does this enable us to do our own DIY decalling? That would be cool...
+1 decals. I could have used this vid last year. I made a decal the hard way by manually curving a flat plane, then moving verts to match another Mesh's surface. But it was annoying because I had to keep adjusting the curve radius of the plane, to better match the surface.
ty
a great help! ty!
Hey dude excellent tutorial, at the beginning I was skeptical at your way of showing tutorials because the way you talk, but I was wrong🤪 This tutorial explain what I want to know, excellent timing.
The into is a bit nuts lol but once you pass it its all professional, 5 star tutoring.
Lolz. I watched his vids since last year, and agreed back then that the intro was weird - I was in a rush and wanted info fast without intros. But now I remember him, his voice, and the dog. Google recommends his vids when I search for Blender issues. So I think his personality method works - I click him/his thumbnail as a seal of approval.
Definitely going to use this to make some custom GMD models. Yakuza modding, here I come!
Bro your videos have been SO helpful. I would LOVE a vid demonstration of wrapping geometry around objects. I've been modeling a starship for months and getting the windows booleans aligned to the surface (even with snapping) is a tedious nightmare. I've tried geometry nodes, instancing, and just manual placement one at a time. It's a nightmare.
Love the vids! Just curious...can you use texture painting to project/stencil an image/texture using this method with the modifier? I know, sounds counterintuitive but what if you can't have the model manipulated or change it's UV mapping? One thing I don't like about texture painting is that it projects the texture directly onto a surface, which is fine for a flat-ish surfaces BUT curvy surfaces, like the top of some aircraft, creates some distortion. Basically, I'm trying to project a decal over the top of an F16 for a livery mod in MS Flight Sim 2020. For the most part, the overlay appears good enough when using texture painting but in some really steep curvy areas (near the cockpit) and viewing the area from the side, it's really stretched and distorted. Would love to be able to texture paint over the shape of the object (like a shrink wrap "brush" stencil) vs just a flat stamp. :)
does this work on a moving object?
Great video! Thanks!
So how would I take my shrink wrap can combine it with an object to make it one object. I select my shrink wrap and my object and press control J, but then my shrink wrap gets messed up. How do I combine my shrink wrap and object into one object?
I believe you need to APPLY modifiers first, to make them final (no longer editable). [Select the modifier (in the right panel list), then there is an icon bar > click down arrow > select Apply.]
Notice how he says it's "live." In Blender, this means that modifiers are not actually applied to the FINAL mesh, but merely showing a preview like a filter in Photoshop - that you can still toggle on/off, to adjust.
Thus the APPLY makes effect permanent, which seems to be needed to do other operations.
@@kenalpha3 Alr thanks
Thankyou
how would i scale my shrinkwrap mesh so it covers an object?
this modifier good for hard surface modeling
Thanks a lot
what if you sphere is shade smooth?
Is it possible to add vertices to a image you add as a a plane? Im trying to wrap a bottle with a image I added as a plane but the image has no vertices
why don't you UV-unwrap the bottle first then apply the image as a texture on the bottle
Im new here and I love your videos, they're easy to follow and understand Blender. Hope someday you make a video about how to make cloth with collision on other objects like curtains. Thank you!
You rock!
Hello! Thank you very much, more useful explanation. Greetings!
Hello! Thank you very much, an explanation more useful. Greetings!
useful tutorial
damn thats trippy
The inside one may be good for some decent cartoons hair.
mark zuckerberg started making blender tutorials damn
So far the best results are using the 'Project' wrap method. However, no matter how clean the low poly mesh, there are still nasty spikes and oddly placed holes created by the shrinkwrap mod. Some sort of bug? It makes no difference what I do to tweak the model or the settings of the shrink wrap. The best I can do is 'Nearest Surface point' keep subD modifier at 1 and turn OFF "Use Limit Surface" Man...SO close to being perfect w the Project, really a shame.
shouting spikes and holes to begin a sentence requires context outside of here
@@rafone3026 Edited to be less dramatic. This was done a year ago, I wonder if the shrinkwrap has improved?
👌👌👌
HHhhhhhhhhhWhats up guys
°o °
Deja de aprovecharte de la imagen de ese pobre animal para obtener views... y no le estoy hablando al perro!!!