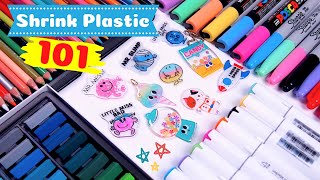
UPDATE: instead of fixative, you can also use krylon clear coat or rust oleum triple thick spray to seal the shrink plastic. If you are using other brands, always test on a piece before applying to your project. ALSO, yes you can cut shrink plastic with a Cricut or a Silhouette!!! I answered this question in the description box but some people don’t bother looking there so I hope people will read a pinned comment 🙏
Hi Amy! So I have noticed that each time I’ve used krylon crystal clear and krylon fixative on my shrink plastic it seems to not seal properly after I apply the final seal. I use mod podge dimensional could it possibly be the ink I use to print? Or am I not adding enough sealer to hold ink together? Also any tips on not getting any dust particles on images while it’s drying? Thanks!
@alba requena , what do you mean by not sealing properly? it’s not drying? Or is it tacky or not glossy? I need more info to help you. To avoid dust particles settling onto the final coat of any sealer, it’s best to cover the pieces while they’re drying.
@@AmyMade once I add the fixative i let it dry out I add the mod podge dimensional over it but notice the day after the color ran a bit not sure if I didn’t coat it enough times before adding the dimensional ? I usually just add 2 coatings
Girl, there is something about the way you explain things...you answer all the questions I have in my head when you explain something. Great job. You're a succinct and thorough teacher.
Honestly, I'm struggling with my shrink plastic pins today, nothing is working, and your video gave me courage to not give up today and inspired me, so here a tip, not a lot, but just because i'm very grateful for that useful video. tysm
thank you so much! i never thought it was possible to make keychains like these on their own but after hearing about shrink plastic i came across your video and fell in love with this idea. i'd love to give this ago and add it to my list of products!
Thank you so much for the incredible advice!!! I’ve been wanting to make my own pins recently and it’s been very difficult to find a good video like this for a digital artist like me🙏🙏🙏
Thank you SO much for this tutorial! This is the first year I'm making Christmas gifts for my friends and family and it's very last minute!! 😅 Your videos are so clear and concise, I cannot thank you enough!
Thank you so much for being so detailed and generous with your information! Those are very cute pins! I may have to buy one for myself! Many blessings to you and yours!
OMG! Bless you! I have been buying these images from a supplier not it’s costing me a fortune and not always images I would like. Thank you so much! Just what I needed ☺️
Glad to see this video of the opacity, saturation and contrast before making mine because I've had this on the brain for awhile. Although, I'm surprised there aren't a lot of people on here screaming, "You can cut this out with a Cricut or Brother Scan N Cut!" LOL! And you can also arrange them in Cricut Design Space as well but the opacity and such is a great idea to do in Canva or other program first. Love your videos! :D
I saw some comments regrading Cricut but I think a lot of people watching this videos aren't digital cutter owners. When I made this video, I wasn't either. But now I have one, I've been playing around with it!
So cute! I've been trying to make monarch butterfly do dads & they kept coming out so dark & ugly. I gave up! Will try again using your advice. Shrinky dinks are fun & have so much potential.I think you've figured out the secrets! Thanks!
I followed this and a few other videos of yours and just did a practice run and it turned out so cute!!! Making my bf one soon for his bday and I know he’ll love it. I sent my sister this video so if you see this comment, good luck it was super easy🥳
This is so helpful! Thank you so much! Do you take any steps to prevent yellowing in the two types of resin you use? What's your experience with yellowing with the pins you've made?
Thank you! I try to use resin with uv stabilizing additives. The ones I made for this video have not yellowed so far. But I know they will over time.(as all epoxy resins do)
I have some made 4-5 yrs ago that have not yellowed. I sealed all of them with krylon clear coat, let that dry. Then did a layer of Modge Podge Dimensional Magic. They’re still crystal clear
@@amynickerson4258did you make it the same way she did? Also, what’s the full product name? I really want to start but it’s difficult for me to own uv resin and such.
@@amynickerson4258did you use that as an alternative to resin? as a top coat? or did you still add the resin after and it hasn’t yellowed? thanks in advance 💕
Thank you so much for this! I tried using this same shrink film for making pins a while back and had so many issues because of the lack of instructions.
Graciassss, explicás muy biennn intentó hacer un regalo con este papel. Seguí tus pasos y todo biennnn, me encanta tus dibujos y tus manualidades son muy lindosss. ♥️♥️♥️
Thank you very much. All this information is very useful.. I subscribed immediately after watching this video and it is the first video I watched from this channel.
Great video!! So many helpful tips!! I am off to buy some printable shrink plastic now lol love the clip at the end with your little one and Meeko! Too cute! ❤️🥰
Ohhhh so this is how you made them hehe. Love these!! So cute!! I just recently became a cat mama so my love for cat things has increased by tenfold 😍😍😍😍
Wow... So creative... I remembered my days of watching the disney show "ART ATTACK"..i was crazy about that.. But couldn't find any sort of use or help in reality...
Okay after watching this, and already feeling overwhelmed with new craft skills I've learned; I've decided I'm just going to order some instead. Who's selling these cute little charms?
I bought the shrink plastic, now I'm worried my printer will jam. I was trying to print on cricut sticker paper and it jammed. Your videos give me s many ideas. So well done.
thank you so much for these tutorials, I just got some of that shrink plastic and an inkjet printer to start making charms! i cant wait to try and make some charms soon definitely subscribed
Beautiful! Thanks for the detailed video ❤. Quick question, I have a canon that uses pigment ink, do I still need to apply a sealing coat? Or can I directly apply the resin?
Hi. Love this idea and would like to try. Can I use Cricut to cut instead of scissors? Also I have a Canon printer. I saw you did too. Are all Canons ok to use?
I don’t have a cricut but there are plenty of tutorials on UA-cam on how to cut shrink plastic with a cricut. I believe it has to be with a Maker or any cutter that has a high cut pressure. Any inkjet printer will work with this plastic.
Thank you so much for this. They turned out great! My first try with shrink art was not too bad. But all my pieces had a paper like backing that started peeling off after it cooled. Nothing I've read or Google says anything about this. Can someone tell me what that is? Thanks so much.
Thank you for your video i start to draw on procreat so i like to make them as pins i did but i had problem with printing …. Can you tell me please what is your printer or can you suggest for me what printer should i use?! Injekt printer or laser printer?! Thank you 💙
Hello Ma'am..can I print in any kind of plastic shrink sheets with injection printer as long as they have a rough side which can be printed?..like one side is a little blur
Heyy, Omg I love the pins💜💜😍 they're so cute. You're so creative. May I know what tool you were using to pop those bubbles? I use torch to pop them but I'm looking for a safer alternative.
hi amy 😊 im a big fan and watched so many videos of your channel ! would like to ask , if i used colour pencil for my shrink paper , what is the best way to seal it ? 🤗 thanks
Hello. Did you watch my Shrink plastic for beginners video? I do talk about different sealer options. Make sure to always test a piece out first before applying to all of your pieces
I did what you said to do with the resin !nd there is no air pockets when I cure it! But while it is curing I see a lot of error pockets rise, do you know what causes this!? 😭
Thank you so much for this awesome video. I made some shrinky dink charms for my daughters crocs. Question is there anything I can use to give the charms a shine or three dimensional look? Thanks again
I've made cute stud earrings, but I'm wondering what I can do to seal around the edges rather than just the front and back to keep them waterproof. Any suggestions? I wore a pair and showered forgetting them and it wasn't good.
Thanks so much for your helpful videos. There's just one thing I wanted to ask: So, if I'm using Shrink Film from the printer, it will be enough rough for the UV resin to directly stick on the surface, right? And mod podge would smudge it? And if I'm using regular Shrink Paper and painted it with markers, THEN I'm using mod podge first and after this the resin, right?
@AmyMade After I take the shrunken items out of the oven do I need to immediately apply some kind of sealer? If so, what sealer should I use? I need something easy that I can apply and it will air dry. I would like it to look glossy, or shiny / smooth? Do I need to use more than one product?
Thanks for these videos! I’ve done shrink keychains in the past, & thinking about revisiting but this time with printables. A few questions: Do you know if it’s possible to print on both sides & then shrink? I read in comments that rear tray is fine but what about a front tray printer? For a cricut explore air, what settings would you recommend/you used? These are quite pricey so if they won’t work with me, I don’t want to waste the time & money to get them 😅 Thanks again!
Hello, is there any ink printer recommendation for this type of paper? I tried with Epson L4160 eco tank, and it's not accepting the paper, just slide it to the exit. Y also tried with a normal paper attached in the back, but no luck. Thanks for your suggestions!!
Your works shrunk so well. Mine would shrink but it leans to the left a lot. Unlike bumps and curling, when my projects end up leaning it's over and I can't fix them so I'm left with a permanently leaning picture. I'm still trying to figure out what's causing it


UPDATE: instead of fixative, you can also use krylon clear coat or rust oleum triple thick spray to seal the shrink plastic. If you are using other brands, always test on a piece before applying to your project. ALSO, yes you can cut shrink plastic with a Cricut or a Silhouette!!! I answered this question in the description box but some people don’t bother looking there so I hope people will read a pinned comment 🙏
I’m still confused on the sealer 😔 not sure what I’m supposed to use or not use. Can you help me out?
Hi Amy! So I have noticed that each time I’ve used krylon crystal clear and krylon fixative on my shrink plastic it seems to not seal properly after I apply the final seal. I use mod podge dimensional could it possibly be the ink I use to print? Or am I not adding enough sealer to hold ink together? Also any tips on not getting any dust particles on images while it’s drying? Thanks!
@alba requena , what do you mean by not sealing properly? it’s not drying? Or is it tacky or not glossy? I need more info to help you. To avoid dust particles settling onto the final coat of any sealer, it’s best to cover the pieces while they’re drying.
@@AmyMade once I add the fixative i let it dry out I add the mod podge dimensional over it but notice the day after the color ran a bit not sure if I didn’t coat it enough times before adding the dimensional ? I usually just add 2 coatings
Maybe try 3 coats? I’ve had great success with just resin or rustoleum triple thick (oil based)
Girl, there is something about the way you explain things...you answer all the questions I have in my head when you explain something. Great job. You're a succinct and thorough teacher.
Honestly, I'm struggling with my shrink plastic pins today, nothing is working, and your video gave me courage to not give up today and inspired me, so here a tip, not a lot, but just because i'm very grateful for that useful video. tysm
Oh my gosh, your lil baby is so sweet and the kitty meow was perfect!
☺️thank you!
I freaking love Canva it's a life saver for so many things. The resumes are 10/10
That was adorable at the end. I'll have to give printable ones a try again.
Very informative and no waffling, just clear a easy to understand and follow instructions. Thank you.
thank you so much! i never thought it was possible to make keychains like these on their own but after hearing about shrink plastic i came across your video and fell in love with this idea. i'd love to give this ago and add it to my list of products!
Thank you so much for the incredible advice!!! I’ve been wanting to make my own pins recently and it’s been very difficult to find a good video like this for a digital artist like me🙏🙏🙏
Thank you SO much for this tutorial! This is the first year I'm making Christmas gifts for my friends and family and it's very last minute!! 😅 Your videos are so clear and concise, I cannot thank you enough!
This is the best video on shrink wrap so far
Bummer Canva is no longer free but I think the detail in this video will help alot. Thank you for making using Shrinky dinks full proof.
Thank you so much for being so detailed and generous with your information! Those are very cute pins! I may have to buy one for myself! Many blessings to you and yours!
I just got this shrink wrap paper yesterday, I'm very excited to work with it. I'm glad I found your channel!!
Thanks so much for sharing all the details. You are saving me from more painful learning curve! One of the best how to vids I have seen. 👍💕
OMG! Bless you! I have been buying these images from a supplier not it’s costing me a fortune and not always images I would like. Thank you so much! Just what I needed ☺️
Thanks for this video. I love the idea of sealing the back with resin after putting on the pin back.
Glad to see this video of the opacity, saturation and contrast before making mine because I've had this on the brain for awhile. Although, I'm surprised there aren't a lot of people on here screaming, "You can cut this out with a Cricut or Brother Scan N Cut!" LOL! And you can also arrange them in Cricut Design Space as well but the opacity and such is a great idea to do in Canva or other program first. Love your videos! :D
I saw some comments regrading Cricut but I think a lot of people watching this videos aren't digital cutter owners. When I made this video, I wasn't either. But now I have one, I've been playing around with it!
So cute! I've been trying to make monarch butterfly do dads & they kept coming out so dark & ugly. I gave up! Will try again using your advice. Shrinky dinks are fun & have so much potential.I think you've figured out the secrets! Thanks!
I followed this and a few other videos of yours and just did a practice run and it turned out so cute!!! Making my bf one soon for his bday and I know he’ll love it. I sent my sister this video so if you see this comment, good luck it was super easy🥳
Thank you! I’m glad my video helped!
Well, thanks to you, I bought some of this shrink plastic. I'm excited to try this now! Excellent tutorial, by the way.
They look great! And such a cute design!
By far the best , most informative video I have watched. Thank you! ☺️
This is so helpful! Thank you so much!
Do you take any steps to prevent yellowing in the two types of resin you use? What's your experience with yellowing with the pins you've made?
Thank you! I try to use resin with uv stabilizing additives. The ones I made for this video have not yellowed so far. But I know they will over time.(as all epoxy resins do)
I have some made 4-5 yrs ago that have not yellowed. I sealed all of them with krylon clear coat, let that dry. Then did a layer of Modge Podge Dimensional Magic. They’re still crystal clear
@@amynickerson4258did you make it the same way she did? Also, what’s the full product name? I really want to start but it’s difficult for me to own uv resin and such.
@@amynickerson4258did you use that as an alternative to resin? as a top coat?
or did you still add the resin after and it hasn’t yellowed?
thanks in advance 💕
Thank you so much for this! I tried using this same shrink film for making pins a while back and had so many issues because of the lack of instructions.
Graciassss, explicás muy biennn intentó hacer un regalo con este papel. Seguí tus pasos y todo biennnn, me encanta tus dibujos y tus manualidades son muy lindosss. ♥️♥️♥️
Thank you very much. All this information is very useful.. I subscribed immediately after watching this video and it is the first video I watched from this channel.
What a total labor of love. 🤍
Can’t wait to receive the goodies I ordered ☺️ love your creations
This has been a HUGE help! Thank you! And i love listening to your sweet voice ^^, and ur kitty so adorable ^^
These are so cute!!! Thank you for always making quality art content ✨✨✨
omg tysm you saved my life. I've been asted soo many trying to figure out why it wouldn't print right
These are so cute!!! I'm getting ready to make some for a convention, I'm so excited! Thanks for the tips.
Great video!! So many helpful tips!! I am off to buy some printable shrink plastic now lol love the clip at the end with your little one and Meeko! Too cute! ❤️🥰
thank you so much!
Ohhhh so this is how you made them hehe. Love these!! So cute!! I just recently became a cat mama so my love for cat things has increased by tenfold 😍😍😍😍
Awww! New cat mama! Show me your kitty!
The bonus clip was really funny😂
Wow... So creative... I remembered my days of watching the disney show "ART ATTACK"..i was crazy about that.. But couldn't find any sort of use or help in reality...
Awww super cute kitty. Great video, they turned out so perfect. Animated Amy is so cute! ♡
This is neat! And I love your cat omgoodness 🥺
Okay after watching this, and already feeling overwhelmed with new craft skills I've learned; I've decided I'm just going to order some instead. Who's selling these cute little charms?
I really want to try this.
thank you Any been wanting to learn how to also add multiple same images in on sheet, and for all the tips.
Love these, so cute! Love how you have Gato con leche
I liked it so very much.
Informative and helpful. I also like the packaging.Thanks for the bonus video 👍🏻😄
I bought the shrink plastic, now I'm worried my printer will jam. I was trying to print on cricut sticker paper and it jammed. Your videos give me s many ideas. So well done.
Wow these are gorgeous! You make it look so easy!
Thank you for this video!! Perfect instructions! And love your sweet kitty! ❤️
thank you so much for these tutorials, I just got some of that shrink plastic and an inkjet printer to start making charms! i cant wait to try and make some charms soon definitely subscribed
Thank you for sharing information. And your pins are very well done and cute. ❤
Thank you so much for the video I wanted to make large amount of keychains and had no idea we can print on the sheet too😭❤️
Thank you so much. Exactly what I’ve been looking for
This is how i exactly do my shrink plastic pins and earrings :)
This video was so helpful! Definitely trying out some of the tips in this video. Hopefully my charms turn out better than they did the first time!
Thanks so much for such an informative video! Is it possible to print double sided on the Shrinky Dink paper to make a double sided charm?
Thank you and yes. The brand I used is printable on both sides.
These are so cute and thank you for the awesome tips. Love your kitty.
ordered mine today, made my day! 🙂
Thanks,really informative and covered such a lot of helpful tips and tricks xx
Beautiful! Thanks for the detailed video ❤. Quick question, I have a canon that uses pigment ink, do I still need to apply a sealing coat? Or can I directly apply the resin?
Again 100% helpful and informative thank you soo much!!!
Now I want to try this so bad! Also, the ending was sooo cute
Gato con Leche, lo mejor
Hi, thank you for this great video. Is that a heat gun you are using to pop the bubbles? Which one do you recommend?
Hi. Love this idea and would like to try. Can I use Cricut to cut instead of scissors? Also I have a Canon printer. I saw you did too. Are all Canons ok to use?
I don’t have a cricut but there are plenty of tutorials on UA-cam on how to cut shrink plastic with a cricut. I believe it has to be with a Maker or any cutter that has a high cut pressure. Any inkjet printer will work with this plastic.
Thank you so much for this. They turned out great! My first try with shrink art was not too bad. But all my pieces had a paper like backing that started peeling off after it cooled. Nothing I've read or Google says anything about this. Can someone tell me what that is? Thanks so much.
Wow your voice is so sweet and ashetic 😍❤️✨
Hi, love your tutorial. My pins turned out great! What kind of glue did you use to glue the pin backs on?
I think I used crazy glue for these
Beautiful work!
Lovely tutorial. Thanks for sharing 👍🏽
This is amazing can't wait to try
Thank you for your video i start to draw on procreat so i like to make them as pins i did but i had problem with printing …. Can you tell me please what is your printer or can you suggest for me what printer should i use?! Injekt printer or laser printer?! Thank you 💙
Beautiful pins
Can we paint the back side and the sides with black acrylic colour??😊
Hello Ma'am..can I print in any kind of plastic shrink sheets with injection printer as long as they have a rough side which can be printed?..like one side is a little blur
Heyy, Omg I love the pins💜💜😍 they're so cute. You're so creative.
May I know what tool you were using to pop those bubbles? I use torch to pop them but I'm looking for a safer alternative.
Thank you! I used a torch as well!
How long do you have to put it under the uv lamp for?
Great video, thank you for sharing your knowledge! Much appreciated!
I've seen earrings made with shrink plastic but the images are on both sides. How is that done?
You would just invert the image you made on canva, flip the shrink plastic over, and print.
hi amy 😊 im a big fan and watched so many videos of your channel ! would like to ask , if i used colour pencil for my shrink paper , what is the best way to seal it ? 🤗 thanks
Hello. Did you watch my Shrink plastic for beginners video? I do talk about different sealer options. Make sure to always test a piece out first before applying to all of your pieces
I did what you said to do with the resin !nd there is no air pockets when I cure it! But while it is curing I see a lot of error pockets rise, do you know what causes this!? 😭
I hope you have some cricut tutorials! I feel like it should be easier for me to use. 🙄🤐😂
I do! For example “the Disney cast member badges”
So helpful!! I will have to try thank you!!!!
Thank you!I love how detailed this video is! Can I use UV resin for each resin step or do I have to use the various resins you used?
Thank you! can use uv resin
Ok great! Thank you again!
for shrinking the paper/plastic, is it possible to use hairdryer instead of an oven or heatgun?
No, a hairdryer will not get hot enough, and hot air will result in inconsistent heat spread.
Great 👍🏻 video I will try my shrink dinks again ❤️
Excelente!! De maravilla. Me ha servido muchísimo!!! Gracias!!! Aclaraste las dudas que tenía!! 🤗
I love your video it has really helped me. Question: Why didn't you add the pins to the back the first time you added the resin?
because the glue will securely hold onto the resin better than the paint
Thank you so much for this awesome video. I made some shrinky dink charms for my daughters crocs. Question is there anything I can use to give the charms a shine or three dimensional look? Thanks again
Yes! It’s in this video!
Your cat is really cute😻
Thank you so much for this video. You are amazing for sharing your talent with others. New subscriber!
Thank you and welcome!
Hello! I know it's been a long time since this video. I want to use this in girls hair bows. Should it also be sealed even if it is for bows?
I've made cute stud earrings, but I'm wondering what I can do to seal around the edges rather than just the front and back to keep them waterproof. Any suggestions? I wore a pair and showered forgetting them and it wasn't good.
Thanks so much for your helpful videos.
There's just one thing I wanted to ask: So, if I'm using Shrink Film from the printer, it will be enough rough for the UV resin to directly stick on the surface, right? And mod podge would smudge it?
And if I'm using regular Shrink Paper and painted it with markers, THEN I'm using mod podge first and after this the resin, right?
@AmyMade After I take the shrunken items out of the oven do I need to immediately apply some kind of sealer? If so, what sealer should I use? I need something easy that I can apply and it will air dry. I would like it to look glossy, or shiny / smooth? Do I need to use more than one product?
Several coats of spray sealer. But you need to make sure the sealer is compatible with the inkjet ink and won’t cause any bleeding.
@@AmyMade How do I know if the product is compatible? I saw your recommended the krylon spray should I use that?
@@AmyMade Also, how does the two part resin work?
Thanks for these videos! I’ve done shrink keychains in the past, & thinking about revisiting but this time with printables.
A few questions:
Do you know if it’s possible to print on both sides & then shrink?
I read in comments that rear tray is fine but what about a front tray printer?
For a cricut explore air, what settings would you recommend/you used?
These are quite pricey so if they won’t work with me, I don’t want to waste the time & money to get them 😅 Thanks again!
Great video, can’t wait to try. Thank you 😊
Do u make the little boxes to package them in also???? I love the simplicity of it the packaging so cute!
Thank you! The boxes are bought
Hello, is there any ink printer recommendation for this type of paper? I tried with Epson L4160 eco tank, and it's not accepting the paper, just slide it to the exit. Y also tried with a normal paper attached in the back, but no luck. Thanks for your suggestions!!
I would suggest printers with rear paper feed slot
Your works shrunk so well. Mine would shrink but it leans to the left a lot. Unlike bumps and curling, when my projects end up leaning it's over and I can't fix them so I'm left with a permanently leaning picture. I'm still trying to figure out what's causing it
You make the best videos. TFS! 💜
Thank you!
Do you use a different oven than the one you use to cook with?
I personally do. But you can also use an embossing heat gun