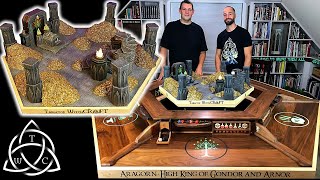
Craft a Brazier for Tabletop Gaming

Вставка
- Опубліковано 30 вер 2024
- Transform my Dwarven Pillars into these awesome braziers for tabletop gaming. First watch my Dwarven Pillar video to learn how to make these modular braziers. You can get multiple builds out of one craft in seconds. Powered by a flashlight these will light up your gaming table and your players faces!
Patreon:
www.patreon.co...
DOWNLOAD THE PLANS at Itch.io (PayPal Accepted): tabletopwitchc...
Subscribe for more crafting UA-cam tutorials: / @tabletopwitchcraft
AMAZON LINKS TO STUFF I USED IN THIS VIDEO:
“As an Amazon Associate I earn from qualifying purchases.”
Mini Flashlights: amzn.to/30nNBeq
Orange Lens: amzn.to/32sdOLF
Dwarf Mini in Thumbnail: amzn.to/2OBxhkI
Proxxon Hot Wire Cutter: amzn.to/2N72UCs
Hot Knife Foam Cutter: amzn.to/2QZk6el
Large Magnets: amzn.to/3f2BsCL
Accelerator to Cure Super Glue: amzn.to/31xIiJE
OLFA Ratchet-Lock Heavy-Duty Utility Knife: amzn.to/2scRVjM
OLFA Ultra-Sharp Blades: amzn.to/2sSvz7D
X-ACTO Knife: amzn.to/2R0AnzD
X-ACTO Blades: amzn.to/2N7vR0X
Fiskars Cutting Mat 24"x36": amzn.to/303arYa
Dahle Cutting Mat 24 x 36": amzn.to/39TafiS
Glue Gun: amzn.to/2FyhSgD
Gorilla .27" Glue Sticks: amzn.to/2s7nzis
Aleene's Tacky Glue: amzn.to/2t1lyVy
Mod Podge: amzn.to/2woIFuI
UV Resin: amzn.to/2BBiFyZ
UV Flashlight: amzn.to/39z8h7F
Clear Beads: amzn.to/3jJVsvR
Clay Sculpting Tool: amzn.to/37NNniQ
Vallejo Dust and Dirt Pigments: amzn.to/2UgMn33
Vallejo 16 Color Paint Set: amzn.to/2vcjRVS
Miniature Brushes: amzn.to/2N7GlgP
Fluffy White Dry Brush :) : amzn.to/2MAdeT2
8" x 12" Framing Square: amzn.to/2TS3Zlv
Latex Gloves: amzn.to/3f2Yxnm
Nitrile Gloves: amzn.to/3hcwTGA
Krylon Matte Finish to Seal The Craft: amzn.to/2TcYoq3
#TabletopWitchcraft #Braziers #DwarvenSeries


Watch the complete series that leads to the EPIC Finale of the Dwarven Burial Chamber and a Visit with Paladin Woodworking to check out his awesome Dwarven themed gaming table. That video can be found here: ua-cam.com/video/moxn_PK3RXQ/v-deo.html
Just an idea, but if you put a light filter under the Flame anyway, which would somewhat hinder the use of any other colour of flame, you could also just use coloured glue.
Yellow, Orange, Red, there are hotglue sticks in these colours. If you feel adventurous, you could even try to add red and orange glue to the yellow via the usual way, blending it in with the tip of the gluegun.
Or you could use a colourless "filter" for the cone under the flame, and put a coloured filter on the lens of the flashlight. That way, you could, at least in theory, change the colour of the flames to all kinds you like.
Like, you are in a dwarven tomb, that has burning braziers? Just put the orange filter in.
But lets say, you enter the secret temple of the cult of the green flame. Just change the filter to a green one, etc.
I almost spilled my water out because I misread the thumbnail as "D&D Brazzers"
I had to look that up, wish I didn’t on my work phone haha.
Awesome work. Hope there's going to be some futuristic/cyberpunk builds
I'll tackle some of these for sure. Thanks.
you always have briliant idea, i love this fire, thanks for sharing buddy, i always respect to your idea, love it
Thank you! Cheers!
wonderful job. Congratulations and thank you very much
Thank you :)
*no views club*
You made it :)
@@TabletopWitchCRAFT I really, really dig the attention to detail on the coals. Another great one, my friend!
Thank you... it was fun using that resin and I was pleased with the final result.
That is not a hexa gone it is a hexa improved/multi use. Can't wait for the collage and final video. Keep up the amazing work. You can perform the perfect crime,no finger prints.lmao
Kenneth Young Nice play in words there Kenneth. I’m excited to release the video!!
This channel is so amazing, I'm totally psyched when I see these pop up
Thank you Tyler... every Friday at noon EST!
One day I'll get up enough nerve to try one of your builds and but the plan. Gotta decide which one also. Even your "Simple" builds make one think twice and I've been crafting for 30 yrs. Hehehe Your projects are awesome.
But the plan = Buy the plan
David you got it! Start with the Tavern, the plans are free :) Just take your time, rushing a project to get to what you want the end result to be is what will mess you up. Take your time and have fun!
@@TabletopWitchCRAFT Thank you very much. I'm going to give it a try.
I finally bought a Proxxon cutter. Found one barely used on ebay for a good deal. Should have been here Monday, but the damn post office misdirected it and it's still not here yet. They must have thought it was a box of mail-in ballots.
Nice technique on the fire. Pretty sure those flames could even fool Beavis.
lol. Thanks. I'm sure you have a list of projects once you get your hands on the Proxxon!
I don't understand why you have only 21K subscribers so far. When it comes to gaming terrain you do just better than what I see on other channels. Perhaps it has to do with selling the templates that scares people away: (If I need to buy those then I won't bother), where you can still make the builds without the templates if you want too. It just takes a bit more work measuring everything and making your own decisions. The techniques shown here and the precision are what it is about though and I love those. Super nice again!
Thanks again Kylara! Yeah, the plans really are just a bonus if people would like to buy them, not totally necessary. Keep in mind my channel is only 10 months old! I hope to grow this channel big time. I appreciate the kind comments, watching my videos, and your support!
Soooo cool.. Do you ever use a 3d printer?
Thanks! No I don't use one at the moment. Maybe some day I'll pick one up. From time to time I might use some bits and pieces from old sets I have laying around for embellishments but other than that, it's all straight up crafted by hand.
you always have briliant idea, i love this fire, thanks for sharing buddy, i always respect to your idea, love it
Thanks so much.... :)
Excellent ! Have a video on the stairs from the final part?
Thank you. Yes you can see how I made them in this video. ua-cam.com/video/meIX-ow3xQs/v-deo.html
Great as always
Thanks Christopher.
Another great vid, look forward to seeing your collaboration with Scott at Paladin loved the Wyrmwood video of his table
Seeing that table in person was unreal. Thanks :)
is this project the Calm before the Storm so to speak?
It is... it is..
You can also buy black pebble rock in the craft section at Dollar Tree to use as your coal. That way you dont have to paint other stones unless you cant find black pebble stones that are used for floral decorations.
Sure can, great tip... thanks!
@@TabletopWitchCRAFT You can also find other color of pebbles and sand. I found some red sand to use for hot coals, black pebbles for my black coals, brown sand for dirt and white sand for snow and blue sand for some blue rocks in water all at my Dollar Tree
Very good job with this flam
Patrick Massé Thanks Patrick, it took some experimenting until I had something I liked.
Well this is boring, there’s only 2 comments for me to read! Great video tho!
haha, swing back later :) Thanks seymour butz!
Ah yes, a few more comments to scroll through now! Hope you got a chuckle from the name 😜
seymour butz of course. Classic.
Ooohhh, you said "Brazier"! Yeah, yeah. I have the sense of humor of a 14 year old boy. Love the glue gun tip tricks.(say that 5x fast). They came out fanfrickentastic, Mr. Modularity. Thanks as always. Keep 'em coming !!!
It's the key to staying young haha.... glad you liked it... more on the way! 🤘
@@TabletopWitchCRAFT I can see Mr. Modularity coming on a T-shirt when you get the merch happening!
Mykl Carlton hmmm 🤔.
My favorite part is when you added the black pigment! Like button Hammered! Looking forward to your next build.
Right on. The black pigment was the finishing touch for sure!
2:30 it's called a chamfer just letting you know
Thats wild. I love this
Thank you, this was a fun series to work on!
Omg they are so good. Can I please get the name of the foam you use because you make your stuff look so cool
Thanks, I use Owens Corning XPS.
If you live in the United States you can get that foam at Home Depot in the Building Materials and Lumber Department just ask for the Insulation Aisle.
It's not a "stencil", it's a template. You're welcome
Good stuff.Those flames look amazing!
Thank you Perry.
I was wondering what the size of those magnets are?
I think I may have messed up by getting magnets that were too small. Making holes that small and accurately on the project I was doing ( my windmill is all wood too, it's all finished by the way.) was a nightmare in the end I gave up.
Which was a pity because I got all the first floor internals all done but no one will see them now ( of course I could just make an open replica of that internal no walls would make it easier to play!? hmmm?)
However I am very happy with the end result.
My favourite bit was hacking the hell out of the sails to make them all ragged and creepy.
My Sculpted Barn Owl looks brilliant now its painted, I added some sculpted flour bags and I bought some of those steampunk cogs for jewellery and stacked them outside next to the steps covered them in verdigris because they are brass and on the opposite side of the steps I place two Sculpted pumpkins.
I built the hillside base separately because that made the windmill easier to work on but all the time I was looking at the size of the Windmill and the size of the base and thinking "Er that's not going to fit!" but come the moment it fit perfectly with a bit of working room . I'm really pleased with the outcome.
Sounds like a great build. I'd love to see it. The magnets are 6mm x 3mm in size that I used in this video. You can find the exact ones in the description of the video that will take you right to Amazon and the item. Your sculpted pieces sound like an awesome addition, those are the types of things I love to add to my builds. Don't give up on a technique that fails you at first. Keep at it, that way you keep as many doors open for yourself while crafting!
Excellent 👍👍👍
Thank you Mat !
Amazing!!!!
Thank you :)
Not really interested in the full build but how to do the flame/coals etc was boom for me. Totally going to make a bunch. I assume you used diode with the button batteries?
Yeah, take what you find useful for sure. No they are flashlights.
Absolutely brilliant! Would love to see you and Jeremy over at BMC do a collaboration on a project.
Thank you Mike.
Cool ^_^
Thanks. :)
Awesome and very useful build! Great transformation of the already made Dwarven pilllars. I’m working on a 28mm gate house at the moment and am sure I can convert it to something else with a bit of thinking, althoigh it’s not made with any foam (XP’s and eps are quite tricky to get in small amounts and quite pricey here in NZ), so I used card and balsa wood!! Will ost a pic on the FB page! Really can’t wait to see the final epic reveal you keep teasing us with!!
Excellent Andy, I can't wait to check it out.. all wood, very cool! One week and counting for the finale :) !!
Tabletop WitchCRAFT just posted a WIP pick of the gate house......will post something when it’s finished 😉 Thank you for the inspiration to get crafting!
Andy Gorman Where is it posted, I want to check it out!
Tabletop WitchCRAFT on the Facebook page.....I hope!
More awesome content man :)
This table is gonna look sweet.
Thank you, one week to go!!
Hey man, greetings from the UK. Have just started the hobby and love watching your crafting vids and skills. I notice you like to weight your pieces with washers. I tried drawing around the washer scoring then digging the little bits of foam, but I got pretty impatient with that. I've got a hack that speeds the process up and as I learned to use washers from you I thought maybe I could share my idea with you and anyone that it may help.
So I had a wooden broom handle which was slightly smaller diameter compared to washer diameter. I simply cut about a 400mm length of the handle, screwed 2 washers to the end. With a flame torch I heat the screwed washers then gently push the washer handle into the foam to create a melted, perfect size recess ready for you to glue a washer or washers into.
Best done outside as melting that area of foam kicks up quite a bit of fumes.
Hey Kieran, thanks for the tip. That's a cool idea for sure. Sounds like it works really slick too. Thanks for sharing.
@@TabletopWitchCRAFT works at treat. Keep up the great work, you have a really good presenting style also. You will do great with your channel without a doubt. I'll be sure to head to patreon once my paycheck comes to at least give a little support.
Kieran Davies Thank you Kieran, I appreciate that, and thanks for the feedback :)