Y'all just buy the tools or rent them from auto part store save yourself the extra work. Great video thank you guys very much for what you do you make it possible for those who never done these things before.
Putting most of this method to an 07 focus. Was hit in the wheel pretty hard bend the control arm and tierod so wrenching and prybar was the strategy. Car on blocks as the wheels broke no lift for my project. 1 day in actually 3hrs. Have a spinning outter tierod bolt. A missing jam nut its spot welded sheesh. Back 21 or 13/16 top nut is rounded and rusted so someone attempted to repair and failed. Used a 12 point socket and jammed it on an angle and it held long enough to break it loose. Had to use needlenose to hold to finish removing that bolt/nut. The front 18/15mm was fine wrenching after penetrating fluid. Ball joint is beat up not much to pry on even if I had a pickle fork. No T50 to hold bolt still got it out and used punch to finish getting it out. Sway bar link busted top nut was easy. Bottom is low and behold spot wel no nut who was this person who owned. So need to cut it out wrenching isnt gunna work here. If i fail im gun a forgo the link on this side or have to replace the sway bar as it welded to the bottom link. Today skipped tomorrow will use jack to hold outter tierod end in knuckle and remove nut. Replace inner and outter tierod. Hopefully remove ball join and replace control arm. And possibly remove lower link.
Nice video. Thanks. I noticed you replaced the control arm and end links. Most Focus owners will find that while you're in there for the inner tie rod end you should go ahead and do the whole control arm, end links, and a brake job too. Go ahead and do it all and only get dirty and cuss all in one day :) Also at this point in it's life, it probably needs both motor mounts and the transmission mount. All 3 are fairly easy to do. You will have lots of vibration and engine noise when they are bad.
Thanks for posting. Well explained and demonstrated; sadly for me this is waaaaaaaay out of my skill set. Looks like one of the local garages is going to be getting my money...
I rented the "special" tool from Auto Zone when I replaced a tie rod on a 2009 Ford Focus but I wasn't able to loosen it even with the tool. I think it was worn and kept slipping off, so I welded the ball of the joint to the fitting. I was changing the outer end also, so I welded it to the rod also. Then it was easy peasy to unscrew it by using the box end of a large wrench through the outer end. It was easy to unscrew it from there with all the leverage I needed. I apologize if I wasn't clear but I hope you got the idea. Welding the inner joint together and unscrewing it from the outer end is the trick. Just be careful and protect the rack and other parts with some type of fire retardant cloth and keep a fire extinguisher handy.
I love your videos and you guys and gals speak very well. I will say that you should try to torque the inner tie rod to the proper specs. I’m sure u did put it on tight enough.
Nice vid brother! just a couple of points ,only becuz Ive done the inner tierod repairs myself multiple times and noticed a few things absent in ur vid.. please take this in the spirit its meant, no offense here... I notice you used the vise grips directly on the rack and its a cringe moment... now i get that the very end of the rack may not touch the seals so it likely doesnt matter but still...U can use an adjustable wrench with smooth flats and fit it to the end of rack where the teeth begin and hold it that way... I noticed no mention of thread lock but it Should be used on the focus since there is no locking ring nor pins... torque is critical here as well in tightening it down, 60 ftlbs i believe which could have been done with a crow foot adapter on an extension with ur torque wrench...lastly, i see the tierod is geased on the inside ball, but no mention of that fact or what grease to use... some joints such as moog inners, come with Nothing at all, no threadlock, no lock washers or pins and no grease!... so installers even run them dry, ungreased..i sure wouldnt.. anyway my 2 cents, the vid was great for do it urselfers who Dont have all the fancy tools but need to get it done....I'd say though, if u have an autozone or oreillys near by, rent the inner tierod tool thats a long cylinder that slides over the old tierod and then break it loose with a breaker bar.. beats pulling the control arms.. in this case though, i understand why u pulled the arms becuz that damn rod had no flats on it.
Very good video. Here's a tip if you don't want to remove the lower control arm. Throw some weld on the joint so it doesn't spin freely. Then loosen with a pipe wrench.
Its not necessary to remove the control arm. With the right size pipe wrench or some large channel locks there is enough room to get them loose. Once you get the factory thread locker to break loose you can finsh turning them off by hand.
It could be the sway bar link if you change the inner and or outer tie rod check the link with the load off the suspension. If it is wobbling around I would replace it.
great video. whats up with that guys exhaust? his resonator pipe after flex is upside down...hangers bent and a random clamp hanging down hahaha......i thought my subframe was rusty...woooweeeeee
I have a 2005 ford focus and when I'm driving itll randomly pull to the left and I have to straighten out the car so I'm pretty scared of taking it to highway. What do you think could be my problem? It happens when I'm accelerating and the it'll jerk to the left.
Guess i never imagined that the jolt of breaking the inner tie rod free/loose & then again when tightening the new inner tie rod, I Never imagined that it would or could cause damage but, He is cutting indents into the rack end by clamping on vice grips. I have changed my inner & outter tie rods many times & just ordered a lower control arm w/balljoint, sway bar link, inner & outter tie rod kit because i think the control arm bushings are going bad? Then another allignment! However, I always use a inner tie rod tool (the cheap $5.00 C-clamp stylewhich resembles a exhaust clamp) i am ordering a 12 peice inner tie rod tool today!
Does anyone know if it is absolutely necessary to hold the shaft on the steering rack with a locking vice grip like he did? or can we just use the inner tie rod tools to take it off? other videos i see, i do not see them doing that.
+Jesus Garcia Thanks for watching! You can use an inner tie rod tool to remove it as well. We just used the tools we had at our disposal in this instance!
Anyone know what this special tool is called that is for taking the tie rod out if it doesn't have grooves. Would of been super helpful if they would of mentioned the name in the video
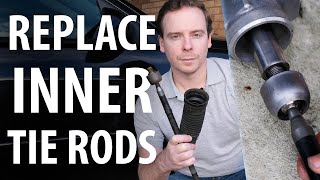
It is called a inner tie rod removal tool it looks like an exhaust clamp but with groves to lock around the inner tie rod head. And it has a slot for a 3/8 inch extension or rachet to snap into.
It is but compared to newer vehicles, this is actually not that bad. It's also great for me because I need to replace the control arm and tie rods. Two birds in one stone haha
+Jettawi We currently do not have an auto repair video that covers this particular repair. We will keep this request in mind in the event that we need to make this repair in the future. 1aauto.com
In my renault megane I the same situation, I however prefer to buy the special tool for a few dollar rather than put up with all this hassle especially that I don't have a ramp or lift.
I have dislodged several of my caps with just a lug wrench. The caps are aluminum with adhesive gluing it to the steel nuts. The adhesive breaks down eventually. Just replace the original nuts with solid ones.
I have a 2006 Ford Focus it doesn't look like quite like this one. The manufacturing date is 09/05 do you have a video for that one? The driver's side inner tie rod snapped. Thanks!
+billybrantd It may be a different procedure on your application. We currently do not have an auto repair video for this particular year, make and model. Thank you for asking. 1aauto.com
Frick all this, just clean the joint of the inner tie rod out, and then weld it to together, then take two nuts, put them onto the tie rod and spin the tie rod off.


√ *Watch the Video*
√ *Buy The Part at 1A Auto* 1aau.to/m/Visit-1AAuto
√ *Do it Yourself*
√ *Save Money*
Everything in this video took me 3 days but it's getting my Focus back on the road. This and your valve cover gasket video have helped so much!
Y'all just buy the tools or rent them from auto part store save yourself the extra work. Great video thank you guys very much for what you do you make it possible for those who never done these things before.
+Daniel Sokol It is called a tie rod puller.
One of the best instructional videos I have seen Well done.
1A auto make the best vids 🇱🇷
And just like THAT,it ended up with a new lower control arm by the end of the video !!! 😂
Putting most of this method to an 07 focus. Was hit in the wheel pretty hard bend the control arm and tierod so wrenching and prybar was the strategy. Car on blocks as the wheels broke no lift for my project. 1 day in actually 3hrs. Have a spinning outter tierod bolt. A missing jam nut its spot welded sheesh. Back 21 or 13/16 top nut is rounded and rusted so someone attempted to repair and failed. Used a 12 point socket and jammed it on an angle and it held long enough to break it loose. Had to use needlenose to hold to finish removing that bolt/nut. The front 18/15mm was fine wrenching after penetrating fluid. Ball joint is beat up not much to pry on even if I had a pickle fork. No T50 to hold bolt still got it out and used punch to finish getting it out. Sway bar link busted top nut was easy. Bottom is low and behold spot wel no nut who was this person who owned. So need to cut it out wrenching isnt gunna work here. If i fail im gun a forgo the link on this side or have to replace the sway bar as it welded to the bottom link. Today skipped tomorrow will use jack to hold outter tierod end in knuckle and remove nut. Replace inner and outter tierod. Hopefully remove ball join and replace control arm. And possibly remove lower link.
Thank you. Watching your video helped me do this job, very much needed, in my vehicle today.
+Mr. Gigi Thanks for checking us out! 1aau.to/m/Shop-1AAuto-c
great camera shots and detailed instructions.
Nice video. Thanks. I noticed you replaced the control arm and end links. Most Focus owners will find that while you're in there for the inner tie rod end you should go ahead and do the whole control arm, end links, and a brake job too. Go ahead and do it all and only get dirty and cuss all in one day :) Also at this point in it's life, it probably needs both motor mounts and the transmission mount. All 3 are fairly easy to do. You will have lots of vibration and engine noise when they are bad.
Thanks for checking us out and for the feedback! Shop here for high quality auto parts: 1aau.to/m/Shop-1AAuto-c +Toxic Coolaid
Thanks for posting. Well explained and demonstrated; sadly for me this is waaaaaaaay out of my skill set. Looks like one of the local garages is going to be getting my money...
nonsense. i was useless a few months ago and now I'm out in my shed messing with cars nearly every day.
cooking scrambled eggs (properly) is harder.
Has anyone noticed that they changed the lower control arm at 16:50
Yes, magically a new control arm appeared!.....but what the hell this is a tie rod video.
James Earl Cash of course!
Those bushings were toast!
Yes I was just going to comment on that
Yes noted that too and the outer tie rod also.
I rented the "special" tool from Auto Zone when I replaced a tie rod on a 2009 Ford Focus but I wasn't able to loosen it even with the tool. I think it was worn and kept slipping off, so I welded the ball of the joint to the fitting. I was changing the outer end also, so I welded it to the rod also. Then it was easy peasy to unscrew it by using the box end of a large wrench through the outer end. It was easy to unscrew it from there with all the leverage I needed. I apologize if I wasn't clear but I hope you got the idea. Welding the inner joint together and unscrewing it from the outer end is the trick. Just be careful and protect the rack and other parts with some type of fire retardant cloth and keep a fire extinguisher handy.
Great 👍
They really designed some cars in such a way to discourage the people from working on them, instead they want you to take it to a dealership
Just what I need. Exactly. You guys are cool at 1A Auto. Thanks!
+Én egymagam Thanks for the feedback!
Great explanation.You are so calm-a natural tutor.
Just watched and ordered inner tie rods , and front wheel bearings for 2009 Ford Fusion.👍🏼
+J - Who? Thank you for your order! We'd love to hear about your experience. Here's a link to leave us a review on Google: goo.gl/i5JFNY
I love your videos and you guys and gals speak very well. I will say that you should try to torque the inner tie rod to the proper specs. I’m sure u did put it on tight enough.
+Dhi 2667 Thanks for checking us out! 1aau.to/m/Shop-1AAuto-c
Good video it showed all the detail.
These videos are the best. Thank you very much.
Great video. I appreciate your attention to all of the tips👍
Question, what is the missing tool you didn’t have to remove the inner tie rod explain
Nice vid brother! just a couple of points ,only becuz Ive done the inner tierod repairs myself multiple times and noticed a few things absent in ur vid.. please take this in the spirit its meant, no offense here... I notice you used the vise grips directly on the rack and its a cringe moment... now i get that the very end of the rack may not touch the seals so it likely doesnt matter but still...U can use an adjustable wrench with smooth flats and fit it to the end of rack where the teeth begin and hold it that way... I noticed no mention of thread lock but it Should be used on the focus since there is no locking ring nor pins... torque is critical here as well in tightening it down, 60 ftlbs i believe which could have been done with a crow foot adapter on an extension with ur torque wrench...lastly, i see the tierod is geased on the inside ball, but no mention of that fact or what grease to use... some joints such as moog inners, come with Nothing at all, no threadlock, no lock washers or pins and no grease!... so installers even run them dry, ungreased..i sure wouldnt.. anyway my 2 cents, the vid was great for do it urselfers who Dont have all the fancy tools but need to get it done....I'd say though, if u have an autozone or oreillys near by, rent the inner tierod tool thats a long cylinder that slides over the old tierod and then break it loose with a breaker bar.. beats pulling the control arms.. in this case though, i understand why u pulled the arms becuz that damn rod had no flats on it.
Before putting the boot back on, do you need to grease the new inner tie rod first?
Wow . i don't know any mechanic that deos this job with just hand tools . Impact wrench is the way and speed is the game.
+Steamy1225 We like to show the repair with normal tools that a regular customer would have on hand. Thanks for watching.
How do you get the inner tire rod off of the passenger side? There doesn’t seem to be as much clearance as there is on the driver side
Awesome video
Haha, so glad I was replacing all my front suspension parts and didn’t install my new control arm before doing this since autozone is closed right now
Thanks for checking us out! +Nikita Boikov
How do i noticed if the inner tie rod needs to be replacement?
Very good video. Here's a tip if you don't want to remove the lower control arm. Throw some weld on the joint so it doesn't spin freely. Then loosen with a pipe wrench.
Thank you for the comments and for watching! +Rob Marques
Good tip rob. Thanks
Its not necessary to remove the control arm. With the right size pipe wrench or some large channel locks there is enough room to get them loose. Once you get the factory thread locker to break loose you can finsh turning them off by hand.
fantastic mate keep it up
Will the inner tie rods being bad cause my car to make a loud clanking noise while going down the road?
Possibly, but more likely the ball joint.
It could be the sway bar link if you change the inner and or outer tie rod check the link with the load off the suspension. If it is wobbling around I would replace it.
Does a 2007 require the same steps? Nothing different?
great video. whats up with that guys exhaust? his resonator pipe after flex is upside down...hangers bent and a random clamp hanging down hahaha......i thought my subframe was rusty...woooweeeeee
+john foster Thanks for checking us out. Shop for high quality auto parts on 1AAuto.com:
1aau.to/m/Shop-1AAuto-c
I have a 2005 ford focus and when I'm driving itll randomly pull to the left and I have to straighten out the car so I'm pretty scared of taking it to highway. What do you think could be my problem? It happens when I'm accelerating and the it'll jerk to the left.
Steering rack or bad tires
Guess i never imagined that the jolt of breaking the inner tie rod free/loose & then again when tightening the new inner tie rod, I Never imagined that it would or could cause damage but, He is cutting indents into the rack end by clamping on vice grips. I have changed my inner & outter tie rods many times & just ordered a lower control arm w/balljoint, sway bar link, inner & outter tie rod kit because i think the control arm bushings are going bad? Then another allignment! However, I always use a inner tie rod tool (the cheap $5.00 C-clamp stylewhich resembles a exhaust clamp) i am ordering a 12 peice inner tie rod tool today!
I tried this and mine wont come loose even with pb blaster and a monkey wrench, what should i do?
i would have cursed a dozens times doing this job they must have edited it lol!
Very well done video, really good info, thx
+Andrew Wilson Thanks for checking us out. 1aauto.com
Does anyone know if it is absolutely necessary to hold the shaft on the steering rack with a locking vice grip like he did? or can we just use the inner tie rod tools to take it off? other videos i see, i do not see them doing that.
+Jesus Garcia Thanks for watching! You can use an inner tie rod tool to remove it as well. We just used the tools we had at our disposal in this instance!
1A Auto Parts bought one and it worked perfect :). Done!
+Jesus Garcia Thanks for checking us out! 1aau.to/m/Shop-1AAuto-c
+Jesus Garcia Thanks for checking us out! 1aau.to/m/Shop-1AAuto-c
Title - "No special tools needed"
Video - 7:28
Nice trick on the inner tie rod however it is not a simple thing to do 2 take the whole lower control arm off it is not easy to do
Ford f -150 pick up truck 2000 front end rod left and right
Is there any danger of damaging the rack when taking off an inner tie rod?
That is why he held the rack with vise grips to prevent damage.
Anyone know what this special tool is called that is for taking the tie rod out if it doesn't have grooves. Would of been super helpful if they would of mentioned the name in the video
+Chloe Mills It should be called a tie rod separator.
It is called a inner tie rod removal tool it looks like an exhaust clamp but with groves to lock around the inner tie rod head. And it has a slot for a 3/8 inch extension or rachet to snap into.
@@pizzamonster975 Thanks , I knew there must be such a tool.
That’s too much work for an inner tie rod 😆
It is but compared to newer vehicles, this is actually not that bad. It's also great for me because I need to replace the control arm and tie rods. Two birds in one stone haha
Help me pls how do remove a 2000 Lincoln Town Car Side courtesy light cover
+Jettawi We currently do not have an auto repair video that covers this particular repair. We will keep this request in mind in the event that we need to make this repair in the future. 1aauto.com
POV now you know how to replace your joint control arm
No special tools needed but the $3,000 Lift
lol
Where is nut lock. i dont see. its so dangerus
In my renault megane I the same situation, I however prefer to buy the special tool for a few dollar rather than put up with all this hassle especially that I don't have a ramp or lift.
The caps are missing because people use air guns ,or impact wrenches on them ! 😉
agree , makes me mad. I have to point that out to mechanics if I am doing it it is hand tools only.
I have dislodged several of my caps with just a lug wrench. The caps are aluminum with adhesive gluing it to the steel nuts. The adhesive breaks down eventually. Just replace the original nuts with solid ones.
Hmm, no thread-lock used...interesting. Mine comes with it in the box...
No tools needed except an Auto Shop car Jack Lifter😂
do you sell any of your tools at 1a auto.com?
+DanPepFPV You can find our selection of tools here: www.1aauto.com/tools-equipment/c/393
Is the 2008 ford focus the same? If not, can you direct me to another video?
nope very different
I have a 2006 Ford Focus it doesn't look like quite like this one. The manufacturing date is 09/05 do you have a video for that one? The driver's side inner tie rod snapped. Thanks!
+billybrantd It may be a different procedure on your application. We currently do not have an auto repair video for this particular year, make and model. Thank you for asking. 1aauto.com
You never jack a engine up as you rip the engine mounts this puts the vehicle in a dangerous condition
It's kind of how or is how
I wouldn't hit the top of the bolt like that with a hammer. You can ruin the thread.
Usually you replace the tie rod end with the inner so it doesn't matter
Nice work but the removal tool would have cut the time and cost way way down.
No special tool needed???. You used a lot of special tools.
👍👍👍👍👍❤️❤️❤️❤️❤️
Frick all this, just clean the joint of the inner tie rod out, and then weld it to together, then take two nuts, put them onto the tie rod and spin the tie rod off.
😑😑
Can y’all stop advertising everything y’all do 😂 every 5 minutes “you can get this torque wrench at 1aauto.com” ok bruh 😂
LOL! It’s free advertising. Don’t hate the playa! Lolo!