How to 🎨 STEAL Color Grading - Photoshop Tips & Tricks!

Вставка
- Опубліковано 6 лип 2024
- Learn how to effortlessly copy and apply color grading from one photo to another in Photoshop (tutorial). Achieve consistent and appealing color tones in your images with this tutorial. Let's get started!
Select two photos with a similar theme for the best results. If your photo is an outdoor portrait, choose a reference photo that matches the theme.
00:39 Optional Step: To balance highlights and shadows, duplicate the background layer by pressing Ctrl/CMD+J. Change the blending mode to "Multiply" and add a layer mask. Go to "Image," select "Apply Image," and keep the default settings. This step is optional but can contribute to a more balanced look.
01:32 Create a stamp visible copy by pressing Ctrl+Shift+Alt+E. Select the new layer, go to "Filter," choose "Neural Filters," and scroll down to "Color Transfer." Enable this feature.
01:58 In the Color Transfer settings, select "Custom" and click the folder icon. Choose the photo from which you want to copy colors and click "Use This Image."
02:28 Fine-tune the colors by changing the color space option from LAB mode to RGB. Adjust the sliders below to modify brightness, saturation, and hue. Set the output as a smart filter and click "OK."
03:32 Place the reference image alongside the edited photo. Double-click on the smart filter to reopen the color transfer settings and make any necessary adjustments.
04:05 Click "OK" to apply the changes. Congratulations! You've successfully copied the color grading and applied it to your image. Repeat this technique with similar-themed images for the best results.
04:16 Effortlessly enhance your photos with this simple process of copying color grading.
We hope you find this trick helpful. Subscribe to our channel for more Photoshop tutorials. Thank you for watching! Remember to like, share, and leave your comments. See you in the next video. Happy editing!
►SUBSCRIBE: goo.gl/d31fld
►Download Free: photoshopdesire.com
Follow US - LET'S BE FRIENDS!
------------------------------------------
►Official Website: www.photoshopdesire.com
►FACEBOOK : / photoshopdesire
►GOOGLE+ : plus.google.com/+photoshopdes...
►Twitter : / psdesire
►Instagram: / photoshopdesire
#photoshopai #neuralfilters #colorgrading
color grading in photoshop,
photoshop color grading,
lightroom color grading,
copy color grading,
how to use the color grading tool in lightroom,
easy color grading photoshop,
color grade in photoshop,
photoshop cinematic color grading,
how to color grade in photoshop,
how to color grade photos in photoshop,
how to color grade in lightroom,
color grading tutorial. - Навчання та стиль


Definitely made this look simple. I’m going to have to use this method
Great tutorial! I’ll be using this for sure!
u open a new world to me thanku so much
Thanks for sharing your knowledge.
This tip is really perfect brother thank you for your sharing❤
Thanks a lot! Great quick tips even the first part about higlights balance is very useful for me!
Glad it was helpful!
I learn so much new things from you.. Luv from india
brilliant tutorial
Thank you!
Thanks a lot!!!
New to your channel loving this video
I didn't find this tutorial helpful... I found it AWESOME!!! You're amazing dude... thanks for sharing your knowledge and experience so selflessly!
it was great .you are so creative thank you
Thank you! 😊
I love your tutorial. Thanks a lot!!!
Please subscribe for more tips and tricks
Thank you for the reminder. I did it.
@@psdesireYT
Hi beautiful tutorial, can this be saved as a lut or preset?
Great job 🙂 I used to use another method to do the same but this method is really faster and simplier. Thanks a lot for this sharing!
How else would you do this?
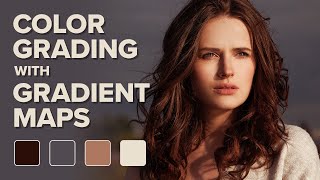
@@Life_Scope First of all, I extract from the picture of reference the 3 colors corresponding to highlights, midtones and shadows. Then I introduce the brightness value of each of these 3 colors into a gradient map
@@damienu.2668 thank you bro
THANK YOUUUUUUUUUUUU!!!!
Awesome!🎉
Thanks! 😄
Great lessons 👏🏼👏🏼
(If what I’ve seen happen recently is correct, within a few weeks we might see other photoshop channels copy this lesson and share it also with their followers)
Don't you know that this technique already shared more than 3 years ago?
veryy helpfulll lesson sir thankuuu after long time i found real meaning video and just subscribed you keep sharing more info with us
Hi, can you share the photo sample here? :) I just wannt to try this technique thank you
A great technique. Very lucidly explained!
Many thanks!
That's awesome, but how can you turn that into a preset?
Subscribed! How can I download this preset?
Hola puedes compartir la imagen por favor? Gracias.
😍😍
For some reason I don’t have the color space option I’m Neural
Wow
How can i turn that into a preaet. please reply!
good
Dont active color space why ?
My colour space not showing
CMD+SHIFT+OPT+E HOW IS key sr
How do I get the neural filter cus is not in my system
update photoshop!
Sir ye photoshop ke kon se version me milega hamare isme show nahi hora he
If you are using an older version of Photoshop, your software may not have the neural filters feature. This feature is only available in the latest versions of Photoshop.
Hi prefect
Which photoshop use sir this tutorial
the most recent version
I CANT FIND COLOR OPTION AFTER I SELECT THE PHOTO THAT I WANT TO COPY THE COLOR
I FOLLOW ALL STEPS
ALSO MY ADOBE PHOTOSHOP IS LATEST
preset
Gone those days where we have to set each color in gradient maps and fine tume it
I am still using that method that so satisfied 😌
@@rupesh_06 yes same pinch