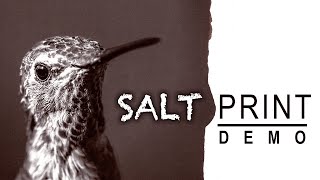
How to Make your Own Cyanotype Prints

Вставка
- Опубліковано 30 бер 2020
- 🔴 Here is a simple tutorial about Cyanotype printing.
Cyanotype is a photographic printing process that produces a cyan-blue print. Engineers used the process well into the 20th century as a simple and low-cost process to produce copies of drawings, referred to as blueprints. The process uses two chemicals: ferric ammonium citrate and potassium ferricyanide.
Ma Chaine en Français / My french Channel : @mathieustern-fr
Cyanotype kit for printing your own photos : amzn.to/3c5We2n
Cyanotype Set, Cyanotype Pre-treated Fabric, Cyanotype bulk chemicals: www.dickblick.com/products/ja...
SolarFast Dyes, SolarFast Wash, SolarFast Kit, SolarFast Film: www.dickblick.com/products/ja...
Instagram / mathieustern
⇩↓⇩↓⇩↓⇩↓⇩↓⇩↓⇩↓⇩↓⇩↓⇩↓⇩↓⇩↓⇩↓⇩↓
🔴 To make my VIDEOS I use…
This camera - amzn.to/3Arn96d
This Lens - amzn.to/3AnMJJf
This Lens - amzn.to/3L03P4Y
This Lens - amzn.to/3V0G0yi
This Lens - amzn.to/3AqwScM
This Lens - amzn.to/3N7SP80
This Lens - amzn.to/3N8tDys
This Lens - amzn.to/3mZ2rr7
This camera mic - amzn.to/3LmRxF6
This voice over mic - amzn.to/3AnJTnx
This tripod - amzn.to/41zIrKT
This Lens Blower - amzn.to/3Apmlia
This 256GO SD card - amzn.to/2Ddb8Ve
This LUT pack for color grading - tinyurl.com/yag5lu96
► M U S I C ♫
Here are the best options for great music for monetizing your videos:
🎹 I use Musicbed for the cinematic electronic music in my videos. Sign up for a free account to listen for yourself:
fm.pxf.io/c/3558945/1347628/1...
Use my coupon code MATHIEU23 at checkout to get your first month free when you purchase an annual subscription.
🎸 Epidemic Sound is perfect for classical epic cinematic soundtracks
share.epidemicsound.com/rFnt2
More vintage Gear I Use :
MY VINTAGE LENS ADAPTERS SELECTION
🔴 M42 ADAPTERS
- Canon: amzn.to/3A01npe
- Sony: amzn.to/3GwHLeO
- Panasonic: amzn.to/3qqzOBY
- FUJI FX: amzn.to/3rb6D5e
🔴 FD ADAPTERS
- Canon: amzn.to/3FosWcF
- Sony: amzn.to/3qraOuB
- Panasonic: amzn.to/3zZPjny
- FUJI FX: amzn.to/3zXJgzX
🔴 MD ADAPTERS
- Canon: amzn.to/3qrdNTP
- Sony: amzn.to/3fpPS0M
- FUJI FX : amzn.to/3fo4eyM
🔴 M MOUNT ADAPTERS
- Canon: amzn.to/3zYvXPJ
- Sony: amzn.to/3A1vWea
- FUJI FX: amzn.to/3qrkyFd
🔴 Lens cleaning tools :
Lens Wrench : amzn.to/2ROBKE8
Microfiber Cleaning Cloths, 6 PACK : amzn.to/2CrgCtA
Lens pen : amzn.to/2Ddxt4I
Gloves : amzn.to/2FCFUsc
Lens Sucker: amzn.to/3tvPQwq
Filter Wrench : amzn.to/3zZJff9
SOCIAL
📱 Please join me on Instagram: / mathieustern
►T W I T TE R: / mathieustern
If you want to support the channel consider purchasing my color-grading LUT packs, or becoming a Patreon / Channel member!
/ mathieustern
www.mathieustern.com/luts
How to Make Cyanotype Prints of your Own Photos Epidemic sound : share.epidemicsound.com/rFnt2 - Наука та технологія


Thanks for all your kind messages during my week with Covid-19 , i am now feeling way better, and strong enough to finish this video and make new ones !
take care and stay home to fight this virus !
I'm glad you are feeling better! :)
Nice having you back
Youpiii
So pleased to hear you are well
Glad to hear that. Good to see you back.
You should use 2 droppers or clean it really well between products A and B or you will contaminate each product and reduce their shelf life !
Taking note
Can you explain this better, I don’t understand. Clean what really well?
The dropper at the very beginning when he mixes the chemicals.
looks like you got a taste of analog photography when we met :) I would love to see you shooting 4x5 and doing prints of it - for a starter medium format would also be great. Love the second portrait a lot!!!
Great job Mathieu, doing cyanotypes is not hard but perfecting them is difficult. I did a tutorial on my channel a few months ago how to create cyanotypes in medium format cameras, you may be surprised at the results.
This is so awesome. Making cyanotype prints can be a pain at first while you're getting your groove and start getting the results you want. Specially when you get that one photo that you just nailed it when printing it in cyanotype is very rewarding.
I'm glad you are feeling better!
I am glad you are feeling better! Thanks for another informative and fun video.
Glad to see you are feeling better. Thanks for sharing.
Great video! I’m so glad to see you looking so much better!
Good to see you're feeling better!
Glad you recovered! I've been thinking about trying this, and your instructions were very clear and helpful! Great video - thanks! 👏🏼
So glad you are getting well. Thank you
Felt great to see you back😍
My God, how beautiful!
This series turned out so good. Found your stuff through Reddit, honored to subscribe to your UA-cam. Amazing content my friend. Glad I diacovered your work.
Thank you so much for this video! Will try it, definitely!
Hey Matthieu great video! I bought this kit some time ago and thought I would finally try it out today. I was going to do some photogram style sun prints but after seeing your beautiful work I’m going to make some negatives and use those. Very inspiring, thanks!
Hope you enjoy it!
I hope you are doing better! I love your work. I knew you would power right through it. Keep it up!
Merveilleux, comme de la magie ! And great great great to see you on the mend! Good health to you and yours.
Welcome back! Great video.
I love the way the image appears
Mathieu thanks for your knowledge sharing. You're very generous!
J’avais l’intention de me lancer dans le cyanotype pendant le confinement et voilà que je reçois la notification de cette vidéo, ça tombe à pic !👌 Merci beaucoup !
Beautiful video I love this process!
Very cool! Definitely something I want to try!
Brilliant work! Thanks!
Thank you for such a brilliant share of your knowledge and skills. 🙏
Literally, the coolest thing ever! 😍
Lovely stuff - I need to try this! Hope you are recovering well.
I knew it! Strong as horse! Your art and love made you strong! So happy to get this good news, buddy! It's funny, because I was thinking about you and your wife last night at dinner.
You crushed it! Totally awesome! This is a great way to start a day. Good news and a coffee, the perfect breakfast. 😉
this is so sick! THANK YOU SO MUCH!
Great video! Informative. Nicely composed. No extra jibberish! Thank you!
Glad you liked it!
Awesome! Have to try it
Now i have to buy all, to do this! Awesome :D
You got a subscriber for life this channel is incredible 😊❤
Welcome aboard!
Amazing!! Thanks for share!
Thank you! This explain exactly how I can turn my art into Cyanotype prints!
It looks like the photo (picture) had to be converted back to film positive/negative. This is the part I am confused about. For Art I would asume you will have to take a picture of the art say 8.5" x 11" then print the film negative which is actually used to make the blue print. How would you do or convert a digital camera output into a film negative.
Glad you are way better 👍
This is amazing!!😍
This is satisfying
amazing video, thanks!
Awsome, thanks for sharing !
Magical !
Thanks for this video!!!
Love this ❤
Do you have to fix the image like you do with photopaper or is the end result light-safe? Thank you for making this video! this is so cool.
Lovely!
thanks Sina
Great stuff !!!
Glad you enjoyed it
Great video.
thank you so much, that's great !
You're welcome!
How do you prevent streaks when coating? I'm using a foam brush, but it's so streaky! Thank you for the wonderful videos!
hey really helpful tutorial! I had one question. Im having problem finding a place to print the negatives. Can i do this in conventional printer with standard ink or i need something more specialized? Thank you in advance
I'll be trying out Mike Ware's "new cyanotype" formula soon. It's stated advantages are shorter exposure times, deeper blues which don't was off, and a long shelf life. One drawback: you need to create the formula yourself using a mortar and pestle as well as using a thermometer. One huge advantage: the finished formula is one bottle - no more 1:1 measuring is required. 😀
I want to buy this formula but i dont find a website that sells it... where did you find yours ?
@@MathieuStern The website Photographers Formulary carries it. The webpage allows you to read and download the mixing instructions. Mike Ware's website www.mikeware.co.uk has enough reading material to keep you busy through a dozen pandemics. Ware is British; the cyanotype process is an English invention. So, they're the perfect people to update it! 😀
Mathieu , I have tried to use a transparent negative print for my cyanotype and bought almost identical Iv lamp to yours (20 watt ) and built a light box out of cardboard- at distance of 10 inch .
Iv tried different exposures timings (18min to 40min ) it won’t print right ... It feels as though perhaps my negative isn’t contrasted enough (?) . It’s very very faint . No details visible
Could you tell me how long you expose your print for ? What lamp you use - is it watercolor paper you print on ? Do you adjust the negative print ?
Any advise would be appreciated
Thank you! I'll advice this video to some other art-affine friends
Looking at the close-up at 4:58, is the texture there a result of the watercolour paper, the way the solution has been applied or a combination of the two? Are other papers viable beside watercolour paper?
you are the best !!!
Hello Mathieu, j’espère que tu vas mieux. Je me disais que ce serrait une bonne suite pour ta vidéo que de montrer comment changer la couleur de ces cyanotype. Le UA-camur Nilered avait montré deux options mais je suis sûr qu’il y en a d’autres que tu peux utiliser et qui pourrait donner un bon résultat. En tout cas super vidéo et hâte de voir les prochaines !
Hope you are recovering well Matthieu!
Great video! Thank you! What is the lamp model/technical info? Is it 365nm ?
This is great, what paper did you use and what did you use to print the negative on?
What UV light are you using? Is the wavelength and wattage a factor?
I finally got around to attempting to copy an old glass negative using your method and supplies. I did it for 7 minutes and had a great image until I washed it. The entire image was lost. I'll try a much more gentle rinse tomorrow and maybe a longer exposure. I used watercolor acid free paper.
Hello Dale, it's normal, glass plates are thicker than transparent paper, 7 minutes is too short for glass plates.
do one test at 15 min and one test at 25min i think it will give you a good result
@@MathieuStern I tried 27 minutes and got a strong border around the negative but still no image. I'm using the same light you used in this video and acid free watercolor paper. This is a very dark and early glass negative of a 4th of July parade. I'll try a transfer image next to reassure myself lol. Thanks for taking the time to read your comments.
@@MathieuStern I finally got a pretty decent image at 90 minutes. Next I'll try 3 hours. This is a really dark glass negative but the picture produced is quite stunning. This is a great process indeed.
@@dalehammond1704 uv light doesn't go through glass well. Plastic acrylic will maybe work better/faster.
Did 3 hours work for you?@@dalehammond1704
Love the video ! Don't suppose anyone knows where I could get a stand like that for my uv light! Can't find anything similar online?
Fantastic video tutorial!! Congrats!! 🎈 🎉 it’s possible apply some chemical product for to have another color or black and gray tones ? (Not blue) thank you so much and best regards!!
I'm glad you're on the mend. The hydrogen peroxide at the end really seem to make a difference. Do you think time would have got the same result? I'm really surprised at the resolution. I have a kit I really need to get it out.
time will make the same result as Peroxide but you will have to wait 24h or more to see the final color
Wow! I want to try. I have a laser printer but on Amazon I found transparent film for it, can the result change? In your comment I read that without Peroxide it takes 24 hours, how long with? Is it better to use 100% cotton as watercolor paper? How many watts is the lamp? Thanks!
would you need a photo printer to print those negatives or would a regular printer be fine? if not where else would you get negatives?
Great work !!!!how many watts for the uvlight???keep going!!!
@mathieu stern ... where did you get the UV light? You don’t have a link in your gear for it.
Did you found a answer by chance ?? :) thanks
Dang I just asked the same question...you didn't by any chance find an answer?
great video! what is the clear liquid used for the final developing process?
Water
Hey, this was a great tutorial. I love that you show us all the ingredients (including commercial labels so we just go order what we need). I'm hoping to do this with our kids this summer. Quick question: I assume the water bath stops the process ... but how long with these prints last before they become "washed out" by age and light exposure? Is there any way to permanently fix them? (As with conventional photos? Yeah, I know conventional photos don't last forever, but ... I'm pretty sure this cyanotype process is much less permanent, no?)
a good exposed cyanotype ( dark blue) will last years if it is not exposed to direct sunlight 24/24
Hi ! What is this UV spotlight you're using ? Do you have a model recommendation ?
Hello Mathieu i have a question about the impresion of the negatives!
I have a doubt in which format you export the photos to have the white part as transparent for the printer, PNG? Do you have to clean the white part in photoshop?
Have a nice day!
I don't think you have to clear the white since the negatives are printed on transparent sheet
Thank you for your very informative video Mathieu. Also glad to hear that you have beaten Covid! I'm about to buy the UV light. Do you suggest 10w, 20w, 30w, or higher?
30 W should be enough :)
thanks a lot for the nice message !
Hi Mathieu, amazing, I am so excited about this technique. Thank you! I am curious about the red one. How does works? Just painted by red after process or?
I added some red pigments after the process
what are your settings for printing this on a regular inkjet printer?
Can you tell us where to buy the UV lamp you are using in the video??? I've been looking for one for a while and I can't find any that really works... And also it's very difficult to find a tan lamp nowadays...
Great video - Can i do this with the strips of negatives that came with my old 35mm photos? I know they'd be really small but would it work?
of course it will work
Now do this with the same solutions in CMYK layers.
hey mathieu great video, any chance you could give us alittle info on the exposure unit your using here?
ITs a cheap Amazon Party LED UV light lamp, i think it was $30
loveeeee
Hope you are feeling better now hun x
Yes I feel better and I hope I am not going to get covid again ... I hope you are safe too
Hi, I'm not so interested in the cyanotype printing as much as I'm in you transparency printed negatives, since I want to print some of my digital pictures on paper using my enlarger. Did you get good detail making the negatives on transparency film? I have to ask because in the video it only shows it so far. Thanks in advance.
Hello, i dont have a glass frame to hold down my print, could i just use masking tape instead?
is it possible for the print to come out different colours? I would love a yellow finish
Would a standard home printer be okay to use on the clear sheets?
is the UV lamp the typical Black light or is is UVc or UV b?
Where did you buy the UV lamp???😍
I've only made prints from traditional negatives, really interested in using digital. Which printer did you use?
You can use either laser or inkjet, just buy the correct transparency paper for your printer.
is the water in room temp or does it require specific temp (cold or hot) ty :)
This video is awesome. Can you do a video on how to make red, similar to the one you have in the preview?
I just added some red pigment on the finished cyanotype when it was still wet and i got this result :)
@@MathieuStern how would you add the pigment? Through paint/solution or something else?
Hello ! Can you tell us how you add the pigment please ? In the water directly or after washing your cyanotype ? ( possible to add pigment directly on the cyanotype when It’s wet ? ) thanks and “merci” for the videos ! :)
Where did you find your vintage printing frame?
How do your images turn out so crisp? Could it be the paper I’m using? Mine look fuzzy and almost painted-like.
I hope you see this soon --- Great video. I was wondering, did you actually drop the hydrogen peroxide onto the rinsed print without it being in a water bath? I was looking real hard and did not see the image underwater. Super curious and thank you!
I poured it directly on the wet paper, it worked instantly
Hey I'm just wondering what type of light you are using. I want to try this but I'm having a hard time with the lighting. From what I've read blacklights don't work but it looks like you're using one with good results. Any tips would be really helpful! Thanks!
You can find 30W UV Led light lamps on amazon, it will work great, they cost around 30$
@@MathieuStern Oh awesome...is it a black light?
Hi Mathieu, can you give me an advice which printer is the best for printing on transparency paper? Thank you. Marcel
Any Inkjet printer will work, even the cheapest ones
Hi! nice work, could you tell me what lamp you used in this video? Thanks
Its a 30W Led UV lamp from amazon
@@MathieuStern I will try my first cyanotypes, Thanks!
what kind uv light are you using in this video?
Hi, I was experimenting with different papers for cyanotype and brushed the solution on my hobonichi bound journal that is now drying, without realizing that I could not submerge it in water to wash. Any advice? Is it save to just leave it in the journal dry? Thanks.
You can rince just one page under running water