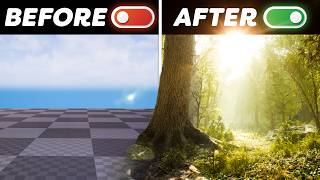
Using Physics to Improve your Shots in Unreal Engine 5

Вставка
- Опубліковано 12 тра 2024
- Learn how to use the FREE Physical Layout Plugin in Unreal Engine 5 in order to get realistic results for creating rubble, organic rock formations, pebbles, trash, whatever you like, in just a few clicks.
Get EasyMapper HERE: www.unrealengine.com/marketpl...
EasyMapper TUTORIAL: • Introducing EasyMapper...
Purchase EasyFog for Unreal Engine 5: www.unrealengine.com/marketpl...
Physical Layout Tool: www.unrealengine.com/marketpl...
Lighting Tutorial For Beginners: • Lighting in Unreal Eng...
Color Grading in Davinci Resolve: • Unreal to Davinci Reso...
Join my Patreon to get free content and video credits!
/ williamfaucher
---------------
Timestamps:
00:00 - Intro
00:22 - Plugin Download and Setup
00:44 - EasyMapper Sale
01:27 - Setting Up Collision Meshes
03:19 - Using the Physical Layout Tool
07:39 - Known bugs, and quality of life tips
08:47 - Improving Collision Meshes
--------Cameras and Gear Used To Film This Video ------
DISCLAIMER: This video/description contains affiliate links, which means that if you click on one of the product links, I’ll receive a small commission. As an Amazon Associate, I earn from qualifying purchases. This helps support the channel and allows us to continue to make videos like this.
Thank you for the support!
My Streaming / Recording Setup (How this Video was Recorded)
Nikon Z6II : geni.us/OPxBG
Nikon 28-75mm f/2.8 : geni.us/d47dj
RØDE NTG-3B Shotgun Microphone: geni.us/JKnnPpS
Aputure MC Pocket LED: geni.us/uVZNl
Godox LEDP 260c LED Panel: geni.us/OgidwX
Godox Parabolic Softbox : geni.us/oHZ2b9
Godox SL-60W Studio Light: geni.us/68wx


Thank you William, and yes I am the developer of this tool!
Your work is incredible. How long have you been using unreal for?
@@evanlouanthony as a hobby, well, quite some time, but in real production since 4.2 if I remember correctly!
thank you for this tool!!
Hahaha, was going to message you on our work Teams about this. Happy to see your tool get recognized!
What an amazing tool you've made!!!
This guy and his channel is pure gold!!! Please, release a full course in UE!
Feels like every feature I dream about eventually becomes a reality in Unreal Engine. I love this incredible tool. Thanks for sharing, William.
It's killing it for cinematic. If you're planning to use theses tools without re editing them for games, then you'll be really disappointed..
Oh yeah? Then drop a video explaining why and with definitive proof why this method cant be used in game development or its just a false inaccurate opinion attempting to dis knowledge and let someone's expectations down.
@@JunkztrGaming
Well akadz isn't wrong, but not entirely right either. Game development is a complex topic especially when it comes to optimization and performance.
Unreal Engine is heavily single threaded, which they are trying to address in the coming updates.
A few things to consider when optimizing games, is entity / actor count, size of the triangles (which is ingeniously solved with nanite), and overdraw just to name a few.
It just depends on the type of game that you're making.
Why it's bad to use such techniques for an open world, especially if you use it absolutely everywhere for everything, causing a large spike in the amount of entities / actors. Of course, excluding any smart hardware instancing optimizations in the background, it can work if you set it up correctly.
Level based games wise, it's definitely more viable to a certain extent. Since the number of entities / actors will cause higher CPU load, since all of them need to be loaded / sorted.
What akadz meant by reediting, is probably taking the results from the physics placed asset and combining them as 1 large mesh instead of leaving them as many smaller entities/actors, which will still give you the same visuals, but also converting a potential 100+ entities / actors to 1.
Either way, combining the meshes will be more performant than leaving it as separate entities / instances. William also mentions merging the mesh. Anyway better performance in games is a always good thing to have (:
@@JunkztrGaming I don't need to make a 20 minutes long video to explain why physics is fucked on Unreal Engine lmao. I just told someone who talked about "Dream Feature" to not be disappointed in some case since it's laggy asf. For exemple creating a system in my situation to simply play a cue when an object is hitting the ground is absolutely garbage even with the best collision box possible. Because yeah, unreal is fantastic because of everything it have built-in, the problem is that since it's a MASSIVE software, there is nothing perfect and yes, you need to recreate system that are working better in your cases in games.
@@JunkztrGaming Just like Lumen & Nanite, features are insane, good luck with the game stability & optimisation. Lumen will divide by half your FPS in certain condition and overall it'll make you lose 20% in average of true perf. I'm not talking about the weird lightning glitches it create. You just need to use Unreal at least for 1 project to understand where unreal is good and where it's not. Which mean that it's not simply, click & dragging. That was my point. That's the reason why i said, for cinematic Unreal is killing it, but you need to recreate systems & re-code stuff when it's games.
Every minute spent watching your tutorials is priceless. Please keep them coming!
The content is good, but I love this clip for the production quality. Lighting, audio, background, composition, everything is first class. A pleasure to watch.
Got it, Avoid selection mode until baked. Complex collision to simple. Excellent.
You are truly a MASTER, not just because your talent and knowledge, but the charisma... Idk, you are special. Thanks William.
Bought easymapper without discount and that was already a steal! Going to add this one to my toolbox. Thanks for the great tutorials!
Thanks again William, you are an absolute legend! A stable factor in my previs work!
It's absolutely amazing! Watching the video for the first time has piqued my curiosity about these tools. I find myself waking up in the middle of the night just to give a try. Thank you for sharing. 🔥
And once again, an excellent tutorial by William! Thank you so much, it is really helpful.
Super cool. Very concise explanation, as usual. Thanks William!
Cool intro to the tool, and a great straightforward primer on setting up collisions too!
you look younger in every new video. really
Hahah thank you! Better mental health, and a haircut does wonders!
Because he is a free soul
Oh fuck, he really does
That's the power of unreal engine 👀🕺
Something like, every time he restarts the Unreal Engine for the plugin, he also restarts the living 😍
Super helpful! I've been looking for a tool like that for a while. You've provided some very handy and clear explanations!
Dude, I subscribed within the first minute of watching this video. I can tell you're going to help me A LOT on my long adventure in Unreal. Thank you, you have got me excited!!
Nice, i've added this immediately to my workflow and in my templates! Thanks for the great video, as always ;)
Absolute legend for this . UE UA-cam needs more people this helpful
Great job once again. This is so helpful for not only cinematics, but game making too!
Thank you! Hope it helps!
This looks like the perfect tool for creating cascading rocks from a cliffside, or maybe making a cool eruption. Added to my wishlist, thank you for the video.
such a time saver, incredible. Thanks William!!
Another video gem. In good time. Thank you very much for all the knowledge you share and for inspiring us to be better artists every day.
THANK YOU !!!as always simple and on the point best tutorials I ever used!
its really useful discovering new tools like this one. thank you.
I was just about to start using this tool for my project. This is super helpful, thanks! ✌
Simple yet very effective. I really liked it. Thank you👍
Wow, thank you so much for the tutorial! Very helpful, keep up the good work!
oh man, the stuff I'm learning by William is pure gold. Thank you so much :)
Great tutorial William!
Thanks!
Thank you for another great tutorial. Your tutorials have helped shaped my career thank you so much.
I would've NEVER found this tool if it werent for YOU. THANK YOU!
Wow this exactly what I needed for my current environment piece! I have fire pits and I made a few variations of coal in zbrush and baked to low res. I was gunna place them by hand in the fire pits but this is gunna save so much time! 😁 thanks!
Thank you for always making Unreal more welcoming
Thank you!
Great this plugin thanks William for tutorial and the easy mapper is really fantastic tool ❤❤
Thank you!
Thank you William. This is gold!
I have been using the Physical Layout Tool for months now for my survival game project, Dismal Survival: A Father's Journey. Even though it can be buggy at times, I must agree that this tool is a massive time saver. I'm glad I settled on the exact same preferred settings months ago! I am considering creating some tutorial videos myself in the near future. I really enjoy watching your videos. Thanks for sharing your knowledge.
Does it crash when you press select all actors? Do you have a workaround?
Always The best informations comes from our good and dear senpai, William, Thank you so much !
Thankyou so much for making this tutorial. you doing very well
Amazing video William. Thanks for sharing.
you are great man, your tutorials are amazing.Thanks a lot 😍
Really cool feature! I just test it out, thanks for sharing man!
William you legend this is the video I didn't know I needed but love
my workflow already includes recovering and repairing my projects every 3-7 days due to engine crashes or buggy plugins so honestly you had me at free
Absolutely incredible Faucher
Ooooh! Definitely going to check this out for my next project!
Incredible tool. Thank you for this. You are awesome!
Amazing! Thank you a keep up the good work with the videos, we all learn a lot with them 👌
This is so cool! Thanks for showing this to us! Very useful.
This is so useful, even for me doing ArchViz. Thank you, William
William and plugin Creator thank you gyus!
Oh yeah one of my favorite tools in my arsenal. William not sure if you knew. But once you setup all your meshes you want to paint with the plugin gives you an option to save a preset. So when you come back to the plugin, you just load the preset and it will load up all your meshes again. Also you can set the weight of each mesh. Let's say you don't want to see that red rock too often you can lower the weight so it won't spawn as often when you paint with gravity. really awesome.
that's cool!! very inspiring! thanks so much ❤
Don’t know from where you get this ideas, but THANK YOU 🙏 ❤🎉
Thank you for sharing nolleg. Great job bro your are my inspiration to learn unreal engine love you bro ❤❤❤
You sir are great and always enjoy the new content you make.
This looks really interesting. A real time saver
What a great tool. thanks for letting us to know.
This is amazing, thank you!
Really useful to know, thanks William!
So helpful!!! Thanks William 🎉😊
Fantastic tutorial! Thanks!
you always giving the best tips!!!
I really wanna see one video yours about unreal engine compositing for chroma. You are the best
Thanks @william , VEry helpful
You are a Legend sir, Thank you for all the work u do teaching us
Thanks as always for your fantastic video !
Have you planned to do a video about RVT textures ? Especially blending meshes/terrain ? It would be a fantastic addition.
Thanks in advance !
Thank you!
I haven’t really planned to make a video about RVT because there are already PLENTY of videos on that topic, and it is extremely long and tedious to talk about, it’s a fantastic feature, but I find it extremely dull to talk about
Damn, this is pretty cool! Thank you William!
thank you for the amazing tut
Awesome tut! They only thing I would add for the complex collision mesh from Zbrush part is maybe, as an additional step, do a decimated version and export that geo as the custom high res collision. Save ya a few million polys. Even a quick remesh/dynamesh version might work. (I haven't tried this so I'm just spitballing)
You rock with every new tutorial !! No pun intended :)
Thanks!
Brother you are a gem, you really should create a course with UE5 basics for beginners
Dude you're a life saver, thank you! Also wondering if I bring that rock mesh into blender and cut down the geometry using decimate or something, would that make the collision less heavy? I feel like I could likely cut the geometry at least in half. Assuming it would work.
Picking up easy mapper now, you're the man William!
Thanks for you sharing!
Awesome! Please dont stop making content
Great tutorial !!!
amazing job really your videos are awesome
I hardly see anyone talks about these tips tricks. You're best. I am want to Soo you explain about clothing, dress, collisions at different situations for example in shockwave, collision with metal, water etc. please make a video on it if you're available. Also Include about simulations related to non cloth yet dress eg: chainmail, hanging grenades/guns etc. Love your content
Really useful tutorial. Thank you !
Q: Can you please tell me where can I find similar HDRI like the one you used? with background buildings.
This is amazing.
Great tips, thank you! I assume this plugin will work with nanite meshes as well?
What a wonderful tool! Thanks for recommending 😍😍I would have needed to run the sim and export mesh from blender if it doesn't exist.
I made some gold ingots for it to spew 🤣and then revel in my wealthiness. Gold, gold and MORE GOLD at each wave of the mouse. Heaven!
For large static open meshes with Nanite support enabled in Unreal Engine 5 (shader model 6 is enabled), the "Use Complex Collision As Simple" option may not always provide the most accurate collision representation, especially for intricate or complex geometry. In such cases, it's often beneficial to customize the collision mesh further to ensure accurate collision detection in your game or simulation.
When you enable the "Customize Collision" option and adjust the settings in the Convex Decomposition settings dialog, you have more control over the creation of collision hulls for your mesh. This allows you to fine-tune the collision representation based on your specific needs, potentially improving accuracy and performance.
At 9:59: To use the high-resolution mesh as the collision mesh for a large Static Open Mesh with the 'Enable Nanite Support' option set to True, in Collision Complexity, after selecting 'Use Complex Collision As Simple,' do you recommend enabling the 'Customize Collision' option (then applying it in Convex Decomposition - with Hull Count = 4, Max Hull Verts = 16, Hull Precision = 100000), or do you suggest leaving the 'Customize Collision' option set to False? I've found that with a large Static Open Mesh and the 'Enable Nanite Support' option set to True, the 'Use Complex Collision As Simple' method isn't accurate enough.
Enabling the "Customize Collision" option allows you to manually adjust the collision settings, such as the number of hulls, maximum vertices per hull, and hull precision. By customizing the collision, you can create a more accurate representation of your mesh's geometry for collision detection. So my question is: Which collision settings do you recommend with the "Customize Collision" for a collision mesh better than the "Use Complex Collision As Simple" method that maintains the best balance between accuracy and performance? I think a video tutorial from you covering the different types of collisions would be super welcome! Thank you for reading. I await your response eagerly.
Been using this plugin for a year now and it's incredible, I hope It gets updated to be more polished. it doesn't seem like much has been changed, I just want those bugs squashed.
I just made the same tool months ago lol. With undo, gravity , baking to ISM , moving and cleaning already spawned assets and others, it also clean the assets with bad collision that fall in strange places, it’s very simple. If I guys need a tutorial just hit me up!
Thanks William 👏
thank you for the tutorial! how would create a video from this? i mean, how would you record the simulation while the rocks are falling down?
the legend strikes again
Amazing Tool.
you are the man!
It's nice to see custom colliders as easy as drag and drop into a slot. I am still using the UCX pipeline D:
What's that please? Looking for a crash-proof method to animate like an hourglass type visual.
@@jawbone1218 UCX is the prefix needed for handmade colliders in your DCC of choice, and made child objects of the LOD0 visual mesh. The UE static mesh pipeline documentation details it.
Amazing video. Please how can we animate the spawn or scatter in a sequencer?
I'm in particular, looking to simulate an hourglass type of animation.
Thanks.
You can't really, you'll need to simulate the assets themselves with something like the take recorder.
always wondered why this plugin is so underdeveloped. its so useful potentially
Fantastic!
Excellent ❤❤❤
Hi William! Thank you very much for this great video, so well explained. We have some questions that we would like you to explain.
1. To create a cinematics that includes, for example, the detachment of some rocks, how would you proceed?
2.- in game mode, what would be the blueprints to use necessary for the event (of the rocks falling) to start at a certain moment? Thank you very much
1. This isn't the tool I would use for that. You're going to want to look into Chaos physics.
2. As for the blueprints, you'll need to make your own custom blueprints to trigger events like this
Epic!
Nice tutorial bro.
Always learning something new which makes work easier and better.
But can you please tell how the scene at 1:16 is made with thayt street and building behind it.
As wanted to know how can I make such scene on quite low specs pc.
Hi! Thanks! It's made using the City Demo provided by epic. Not sure it's designed for low spec pc's though
Thanks!
awesome!
WONDERFUL