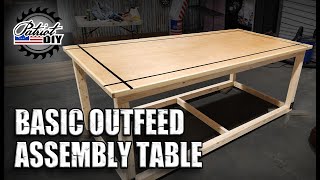
Workbench Upgrades / Getting the Most Out of My Outfeed/Assembly Table

Вставка
- Опубліковано 26 сер 2022
- Today I'm making some much needed upgrades to my outfeed/assembly table. Like some dog holes, a sliding deadman, some leveling feet and wheels.
Get the build plans HERE: inspirewoodcraft.com/product/...
TOOLS USED IN THIS VIDEO:
Dovetail Clamps - lddy.no/1cmad
Router Bit for Dovetail Clamps - lddy.no/1cmae
Bessey Ratcheting Table Clamp - amzn.to/3Kn6XqO
Bessey 6" Table Clamp - amzn.to/3POhk8d
Bessey 12" Table Clamp - amzn.to/3e0fVhE
3/4" Bench Dogs - amzn.to/3Auw2v9
Router Template Bearings - amzn.to/3cnY2ZD
Whiteside 1/4" Compression Bit - amzn.to/3e3au1r
Dewalt Cordless Router - amzn.to/3wBfv7D
Dewalt Plunge Base - amzn.to/3cnEVia
Cabinet Hardware Jig - amzn.to/3dXyzqb
Looking for DISCOUNTED HIGH-QUALITY PEC COMBINATION SQUARES, DOUBLE SIDED TAPE and overall great savings ALL THE TIME? Shop where I shop! lddy.no/go67
YOU CAN SAVE 10% ON STARBOND CA GLUES AND ACCELERATOR!
Use the code “INSPIRE10” at checkout! www.starbond.com
SAVE 10% ON OLIGHT FLASHLIGHTS, TACTICAL LIGHTS AND HEADLAMPS!
Use the code "INSPIRE10" at checkout! www.olightstore.com/?streamer...
BANGGOOD WOODWORKING TOOLS: www.banggood.com/marketing-Wo...
MY HAND TOOLS, POWER TOOLS, CAMERA GEAR AND MORE:
www.amazon.com/shop/inspirewo...
VISIT THE INSPIRE WOODCRAFT SHOP: inspirewoodcraft.com/product-...
Adjustable Box Joint Jig Plan: inspirewoodcraft.com/product/...
Multipurpose Shooting Board Plan: inspirewoodcraft.com/product/...
All Purpose Tapering Jig Plan: inspirewoodcraft.com/product/...
EMAIL: inspirewoodcraft@gmail.com
WEBSITE: www.inspirewoodcraft.com
PATREON: / inspirewoodcraft
INSTAGRAM: / inspirewoodcraft
If you appreciate this content and would like to help give back FREE OF CHARGE, simply give this video a “thumbs up”, leave a positive comment, subscribe to Inspire Woodcraft’s UA-cam channel and SHARE THIS VIDEO with someone who you think would enjoy it. Some of the links that we’ve provided above are affiliate links. That means that when you make purchases through those links, we earn a small commission of the sale at no additional cost to you. While we do use affiliate links where we can, we only endorse products or services that we believe in. That commission is a big part of our income, which also goes back into making more videos, so by using the links you help support what we do and for that we are very grateful. - Навчання та стиль


This is a pretty solid little workbench. While once you figure out how it comes together, it is physically Easy to assemble ua-cam.com/users/postUgkxyFZUPFEey-PuqsPMxqaykBhgA1LWxFHh by yourself. But the diagrams explaining the steps are really pretty bad. I could not get the handle pins in all the way despite multiple attempts, so I just used a screw I had on hand for the 2nd handle. I could not get the first pin in further or pull it back out. You are supposed to hammer it in, but I had no leverage and the handle is plastic and I did not want to risk breaking it. I will get a lot of use out of the bench because of the convenient size and height. It does fold up nicely for storage. They even explain how to fold it so you don't get pinched...that is important!
A possible improvement on your miter gauge relief slots in the outfeed table. They will quickly fill with sawdust. Why not drill a hole at the end of the relief slot down through the table to act as a "sawdust waste basket", so that when you push the miter gauge through the relief slot it will bulldoze the sawdust in front of it until the sawdust falls through the hole.
Will Boudreau That's a great idea. If it starts to become a problem, I will do that. Thanks!
A thousand times YES! “Everything should be on wheels!” Finally, it’s been said by a pro, not just me. Thank you for that confirmation!
(Locking variety for sure)
I uses to teach a class at work, and someone (a lady) scolded me for saying "Guys". It was a tough habit to break, but she was right. Lots of female woodworkers out there. Your videos are very good and will hopefully continue. Something for you to consider. THANKS.
Excellent points all.👍👍 Thank you for sharing. Have a great day and stay safe.🙂🙂
Another great video, Jodee. Thanks for the tips, the t-tracks in the legs are a "why didn't I think of that" moment!
Those Rockler flip casters are great for my main workbench because it has a decent overhang, but like your outfeed, mine does not have a large overhang and they get in the way (trip hazard) when flipped up. Look at the extra brackets they sell that allow you to slip the casters on and off when they are not needed. Another advantage is they allow you to use one set of casters between any number of benches. Just get extra sets of the brackets.
The dog holes are nice, but I went with MicroJig MatchFit groves in my 3/4" plywood top... routing a bunch of dados spaced every 6" in both directions. T-tracks without the need to mount all those aluminum t-tracks ($). ;) The entire top is simply screwed down to a rigid base and can be removed/replaced when the plywood becomes damaged (just need to re-route the MatchFit dados).
@csimet I like the idea of one set of wheels. So far I kick the leveling feet more than anything. Haha. I debated going either MatchFit or t-track, but I opted for dog holes for two reasons: the dogs themselves, and holes won't catch anything coming off the saw or fill full of debris. I am kind of digging the MatchFit clamps though. They seem a little pricey, but I think the cost is seriously offset by not having to buy track.
Love the MatchFit clamps! And the dovetail slots don’t leak sawdust as the dog holes do.
Norm Abrams had the best diy for bench casters. There must be a video somewhere. He made an L the width of the inside of the legs. Mount casters to the short side and hinges to the long side then mount the hinges to the inside bottom of the legs where the wheels will have enough clearance. Then inside the legs you have blocks at each leg that hang from hinges and a rope attaches to the bottom of each of those boards, when they're down they lock the L down and engage the wheels to the ground. There are 2 of these setups, one at each end of the table, the center of the rope hanging on a hook on each end near the tabletop for easy access. You pull the rope those boards lift and the legs drop to the floor. You lift the table and the wheels drop and lock in place. Very simple and bulletproof design, and the entire mechanism sits inside the bottom of the table frame.
Plane Stop - I insert my ratchet clamp from below through a dog hole and it works well as a low profile plane stop.
Really like improvements, especially the dead man helper. If you redo, here’s a thought-rebuild to original size, remove bottom slide put deadman in top groove and put bottom in place with deadman on groove and screw it down.
Try a bench holdfast in stead of coming up from the bottom. The top thickness may be an issue but you can always throw down another plywood and re route your dog holes using the existing top as a template.
As always ,great video on a great idea, I'm 70 and in poor health, but watching these videos is a great source of enjoyment for me so thanks so much for your brilliant work, from Garry in the UK
nice changes to an outfeed table. takes away some justification for a fancy workbench.
the easy solution to the deadman issue is to cut it just a little loose then cut a width of the bottom track put the deadman in then replace the cut bottom track. Love the slot in the leg.
That was great how you fixed the dead man with the wedge. Everyone makes mistakes...legends find ways out of them.
Pretty cool and versatile. It is like the Swiss Army Knife of shop furniture! I don't often use my sliding deadman, but when you need it, you have it. The added fact that it looks killer is a bonus.
Great ideas and additions!! Really like this table. Well done!!
You have a perfectly named channel. I believe you are inspired, you certainly inspire me, and I am sure you inspire others as well. The “fix” for the sliding dead man alone was worth watching this video. I have a completely mobile workshop. I share my shop with my cars and have been trying to figure out what to do about a bench. Currently an old table top on saw horses. This has given me several ideas how to achieve my goal of something solid/heavy yet not awkwardly in the way.
Great video and narrative! I really like the improvements, very clever all the way around! Thank you for posting
Such a creative and talented mind. Thanks for the inspiration and great instruction!
Well done. Knowing what you need and executing without overthinking it. That, is inspired woodcraft.
Love it - great combo table!
Nice additions to the bench Jody 👍
I like the sliding deadman concept as a basis for using holdfasts. I'll need to modify it into thicker material and to withstand the backforce when tapping down the holdfast, but the versatility of having it slide is terrific.
Thanks for sharing that!
Love the quick tip videos, love the longer form as well. Your videos have been good for a long time, but this one was superb. The long continuous shots of discussion and useful demonstration look natural but no doubt take hard work to master. Thanks for what you're doing.
This was very useful to see your innovations. Its nice that your table top is nicely set up for clamping, gluing, assembly etc. Great video and well done.
Great video. It did not run too long.
Nice job on the table. Looks like it went from useful to super useful.
Thanks for another thoughtful and useful video.
A great table you made it so much better and pleasing to know I am not the only one who gets to the end of a project and thinks I should have done this or that. I enjoy your presentation of the subject
I have been looking for some ideas for my workbench and the time of this video was perfect. Nice job. Thank you.
All of those improvements/upgrades are very intelligent. I will be making an outfeed/assembly table soon and will definitely incorporate some of these! !! !!!
Great upgrades to the bench. I think my favorite part are the grooves in the legs for the clamps. All of the upgrades definitely make the bench more versatile. Well done!
Nice application of antique technology. You should be proud of yourself.
You are the most innovative woodworking UA-camr I’ve seen. I always get great information and ideas from your videos. Thanks, and enjoy that new table!
Brilliant work, dude! Really well done! 😃
Stay safe there with your family! 🖖😊
Never actually seen a plunge base for a laminate trimmer. I figured they existed. That's all cool ideas man well done. Your shop is very clean. I appreciate you. Thank you for sharing your skills knowledge and experience
Just wanted to drop you a note and tell you how much I enjoy your show. You are one of my favorites to go to. You explain things in a very simple manner. Your manner in explaining "how to" is so enjoyable.
Looks like a nice setup. I like the Multi functionality.
Awesome video I really liked your clamping mechanism very imaginative and I will be doing your deadman thanks for the step by step on it I was confused before this and mistakes happen
Perfect video for me. This is similar to my upcoming shop project.
Thank you very much for very interesting ideas and presentation. You really helped me a lot. Great and regards Leone
You have some very clever ideas built into this table. Thanks for posting! I'm always looking for ideas. The problem, however, is that I will never be able to implement all the cool ideas I've seen unless I build 6 workbenches! Thanks for what you do!
Nice upgrades. Definate worth in all of them. Concerning your sliding deadman, I had the same issue getting my sliding board into place over the bottom rail. My solution was to leave the bottom rail free and hold it into the groove at the bottom of the sliding board, then slide it into the upper groove and into position. That allowed me to screw it down afterwards with the sliding board on track.
@j_b_93 I might scab a new piece on to the back side where I nibbled too much away, and then do this exact thing. Thanks!
Those are very cool table mods!!!!! I would probably have two sliding deadmen after seeing the utility.
Thanks! I had decided to build a very simple outfeed table attached to the saw, but you just convinced me of the utility of a table on wheels. That also will let me make a smaller table. I hadn’t considered being able to rotate it 90 degrees before.
For my track saw/cutting station you confirmed my plan to route t-slots in the outside legs. Instead of the floating deadman, I think I’m just going to add a middle “leg” with holes in it.
amazing idea! great video! thank you!
I've gotta say you're very well spoken at explaining what you're doing. Another great video. I like how you make simple but useful projects that don't seem too overwhelming for a new woodworker to take on and still looks great.
That’s beautiful! It all works so well and you appear so at ease using it. Well done you have created for you!! Your prospects should see this and they will understand that you do actually make bespoke in its truest form!
How! How have you kept the bottom shelf free of stuff???
You wax your screws but don’t appear to wax your tracks?
That dead dog thing is terrific! Never be told otherwise I even want the clamp insert thing!!
Bob
England
Great video and info 👊🏼
Really enjoyed this video. I will be revisiting this when i build mine.
Even with the longer format you still filled it with good quality content. ( i hate b roll)
To make your deadman work as originally planned make another one. Wax hell out of both ends and the track, remove the bottom track then insert the top in its groove and hold the bottom track in the deadman slot and slide them both into place on the bottom and screw the track down.
Jodee, for future reference, you can grind or file off the nib on the bessey ratcheting clamps that keeps the clamping head from coming off and just use the bessey clamping head on the microjig dovetail bar; no need to rout a different or modded slot.
@inspirewoodcraft That’s it…I’m building one of these. You’re videos have come along very well. Keep up the good work and May you prosper. I appreciate your creative mind since mine in not so much that way. For years you came across as a woodworker on a budget (as most of us are) and now you have invested heavily into festool. Once you have used the domino, router and dust extractor for a while it would be nice to get your comments on them as well as how much better they do the job if that is the case.
Really interested in more details on routing the groove that works for the two types of clamps. Which t-slot bit? What was the depth? This is a great complication of upgrades to a outfeed bench. Thanks!
@Stephen Zello So I just went out and tried to get some measurements. The bit that I used is 5/8" in diameter and the cutters are 3/16" tall. It looks like the depth was about 5/32" from the face of the material to the start of the cut, if that makes sense. Hopefully that gives you a starting point. I just ran test cuts until I got it right. My thought was to get the t-slot bit just high enough to let the clamp slide in but not take too much from the dovetailed walls. Of course the wood fibers will compress over time too so it will probably loosen up as time goes on.
thanjs for the tips, man!
thanks for sharing! do you have any plans of doing an updated shop tour? would love to see more of your new set up.
Very nicely done! I’d probably put a clamp, open side up, in the holes of the deadman slider rather than just a dog. Else, “Mr. Murphy” would make sure it somehow slipped off the dog face and dinged an edge or corner of the stock.
Make the bottom higher on the deadman bottom slide and it you won't even need the wedge
I also have the flip casters on a couple of my work/assembly tables, and ran into the same problem that csimet ran into (no pun intended). I agree with csimet as far as the slide mounts. From where you put your casters, I believe your going to have the same problem. The last thing you need is to trip over something while having a live power tool in your hand. A cheap and safe upgrade.
@Bruce Gibson I kicked them a few times while putting everything together. If it becomes a problem, I'm definitely going that route.
Nice additions! I really love your deadman idea of the locking taper/slope part, pretty clever idea from a "oopsie!" moment.
I feel like you could make a really quick and easy fix for it that could improve your life, in my opinion.
I would flip the deadman so that the slope is inside of your workbench (hidden from the outside).
Then, I would double up the size of the "locking" slope (and possibly shorten it).
Then, I would add a small wooden block that is fixed to the side of the deadman, going inwards, with a vertical slot that is close to the second thickness you glued/screwed of the "locking" slope.
Then, you push the 2 together and you drill and tap a hole in the "locking" slope.
Then, you put a screw with a wooden star head (or whatever design you like) with 2 nuts (one on each side of the block to lock it in place, so that only the tapered part moves).
Voila! Now, you can move it pretty easily with your feet and whatnot, while holding the workpiece in one hand, resting on the deadman, and locking the deadman in place with your other hand for "proper" spacing!
It’s Hasan, loving all your latest videos
Thanks Brother! 💪
A good solution for your bench clamping and clamping square to the dog holes is to use mft table clamps - most mfts don't line up exact to your material without the use of mft quick clamps because you can extend them to hold materials against the bench dogs.. Great channel keep it coming
For your deadman, you could remove the bottom track, put the deadman on in then install the bottom track. That way the shoulder could be tighter at the top. Hopefully that makes sense. I need to add one of those to my outfeed table.
I really like your videos and watch them over and over because you are teaching me so much. TY. Can I ask what kind of wood you used the frame looks to me like white oak instead of plywood. I am getting your plans to make one. Thanks keep them coming. Also love your tool reviews. I did buy a Harvey 1.75 putting it together now. Thanks
If you ever want to do another top, you are welcome to borrow my UJK Parf Guide. It's one of those things that is just so cool, capable and precise, that you grin as you are using it. Just replace the drilling bit when you finish... I'm a sharp snob. You should have my email and numbers from donations a couple years ago.
@Clinton Lemon III That would be amazing and thank you!
Hey Jody your Workbench ist great! I also like your idea with that sliding board at the side, but I would say, you need a longer sliding lip that doesn't fall off the track, when you slide the board. The easiest way would be to mill about 7 cm down to half the board thickness in the upper area of your gliding board and glue a new board there, which then gives the full thickness of your gliding board again. In this way, a new sliding lip can be quickly produced that is longer and your Board doesn't doesn't fall off anymore.
However, I am afraid that your milled T-slots will wear out with prolonged use and in the positions where you often clamp material. You may then need to use aluminum T-slots.
I would consider a dust drawer a few inches below your desktop. The dirt gradually falls through the desktop holes and whatever is underneath will covered with dust. A light dirt drawer is really useful then.
Greetings from g'd old Germany 😄
Me from the future: "Thank you, my workshop just got better and more efficient and productive!"
Thanks for sharing your clever table enhancements in this video. Do you intend to utilize the space below your work surface for material, jig, or tool storage? I would be tempted to add another shelf about 7-9 inches below your top surface and then add bins or drawers below. On all my mobile tool stands I bolt a 1 x2" plywood bar between each pair of mobility pedals so that one foot press by me locks or frees each pair of wheels.
Great video impressive. What size t slat you use and how high you cut the slot? I have the same clamps too. Thanks for all your knowledge too.
Smart!
very cool! wondering would it be pretty easy to add cabinets in the space below?
Great stuff. If you had it to do over, would you consider a row of dog holes vertically in the legs, instead of the dovetail/ T slot? Just wondering if the 3/4 material of those legs will remain strong enough for the grooves.
Love the sliding dead man, as well.
For the DYI "MFT" there is the UJK Parf Guide System, I got mine from TSO product. , that will bring the precision of alining the holes and squareness too. Not cheap, but a worth while investment, and cheaper than the MFT. have a look.
When it comes to installing your sliding Deadman I would suggest installing the vertical Deadman at the same time you install your rail sitting the bottom rail Into the Groove you have cutout then sliding both bits of material into the location that will allow you to get it in place without cutting down the vertical Deadman and I would suggest having to vertical Deadman boards
Some great ideas there! 👍 What did you do for the rest of the morning? 🤣
I really like the design and the improvements you made! Question - why did you decide to go with dog holes instead of using the dovetail grooves and system to go with the dovetail clamps you have? I'm in need of an outfeed/assembly table and am trying to decide which way I want to go - dog holes or dovetail grooves/clamps. Thanks!
Also, how do you use your fence when the table is flush up against the saw table?
Do you find the table to be heavy enough so that when you plane a board it doesn’t push (scoot) the table forward? I have the sawstop flip up outfeed support, but I’m liking the versatility of this table. I am about to finish an assembly table but didn’t want a bunch of dog holes in the top and I’m not keen on t-track. This could give fit my work bench needs. Thanks!
Great upgrades. Are you going to have updated plans available?
@Rta373 I don't think so, just because the upgrades are something that folks can do themselves based on what makes more sense to them.
Just wondering on a thin table like this wouldn't t track with clamping jigs have been an easier solution
@Andrew Beimmer I opted for dog holes because there are a lot more options on what you can do, as far as stops and hold-downs and the like. I can also reach almost every square inch of the bench with dog holes. T-track is somewhat limited by what you can do because you’re stuck, quite literally, in a track. And not all t-track matches every accessory, which is something I’ve come across before.
Could you go into detail how the compression bit was helping you in your task? I'm new to routers...
@VD A compression bit is a bit that starts out as a spiral upcut bit, and then quickly changes to a spiral downcut. Upcut pulls fibers/chips towards the router motor, downcut pushes fibers/chips away. I wanted both the top face and the bottom face of the plywood to be a clean cut, and the compression bit will achieve that by pulling the fibers on the underside up towards the router, and the fibers on the top side away from the router, giving a clean cut on both faces. One could argue that since I put a chamfer on both faces, it doesn't really matter if I used that type of bit or not, because the chamfer bit will clean up any rough edges, but I was winging it on this project and didn't want to take any chances. I'll try to make a quick video on this because it's kind of hard to explain in writing.
How he not know they make white and red led for pencils for darker wood🤔
Great idea for a work/assemble table. I wish I saw this before I made one for myself. Question: did you move your shop?
@Rich H I did! About three months ago.
The people's putfeed table. Not too crazy and fancy and not to basic that it won't provide a short term life in the shop.
Why 3/4" dog holes instead of 20mm? Even here in the US, I find there's more available for 20mm. The only company that doesn't seem to get on board with 20mm is Rockler; their bench cookie accessories would be nice in 20mm. Rockler, grrr!
Do you have a link for the cabinet handle jig you use?
@Kyle McKelvey Sorry. I forgot that one. amzn.to/3dXyzqb
@@InspireWoodcraft thanks! I probably could've found it on a previous video of yours or a quick Google search. I've been meaning to get one of these for a project
Why did you decide to not make the table the same width as your table saw?
@Nathan Bilbao Because the other end of my table saw is a router table, and it would have made it way too crowded.
@@InspireWoodcraft Got it. I've got the exact same table saw and I've been going back and forth between Michael Alm's table saw extension or an outfeed table. Both yours and his cut short of the router table, and probably take into consideration the overhead dust collection arm.
Huh. I like that deadman's hand (is that what you called it?) And when did all the Festools/systainers show up? Congrats on the upgrades. And did you move your workshop? Crap, did I miss a bunch of videos even though I"m subscribed w/ bell on? I'll go double check. Finally, @11:56 I don't understand why you'd need to put a car into your workshop?!? 🤣 (Loved how you solved cutting off to much of the slider-thingy)
@Hansang Bae I did move shops! We moved about three months ago (hence the time off from videos for a few months). New shop is a little bigger. As for Festool: dust collection is high on the list now since I have the space, and it's hard to beat Festool when it comes to small tool dust collection, so I drank the green Kool-Aid. Buy once, cry once, I suppose. So far, so good.
@@InspireWoodcraft Good for you! I'm sure the Festool tools will serve you well!
I have a question. How much electricity does your shop burn in a month?
@Alexandru Gajin Interesting question. I'm not sure yet. We've only been here about five months or so and I don't really have a way to measure it out. I know it has to be a little bit more than the last shop because I have the dust collection and mini split now.
@@InspireWoodcraft Well, there are two accurate ways i suppose. One is to calculate every single device and tool and charger, etc. By how much they consume and how much you use them wich is..
And the other way is to instal an electricity meter. Since electricity will become more and more expencive in the future, i was curious. You know if you take jobs and projects you may wanna include in price the cost of that too.
Here in europe, the electricity is ridiculous... If you excceds 250 kw, the price per kw they charge you up to 5-6 times more per kw.
So having a meter and seeing how much you consumed for a project is also a good way to calculate the price of the project. Because you know, electricity is not free.
Please never put a plane down on it's blade. Great job & Video
@Pierre Combrink Always an ongoing debate amongst woodworkers. Haha
First. Yahoo