William, you are a gem of a human being. I began my photogrammetry journey with you after years of failure. My scans are now GORGEOUS after watching your videos and following your advice. Thank you so much for the time you put into these. If you ever wonder if they make a difference, let me assure you: they do. Thank you a million times.
RealityCapture has a very good ability to auto detect "irrelevant" parts of scans on rotated objects and remove them when using a bright uniform background. I use a Foldio3 light box with a turntable for my small object scans and I can just do a full rotatiom of pictures, flip the object over, and repeat several times if needed and when RealityCapture builds my object it just ignores the bright white background/turntable automatically and gives me a perfect scan without any manual work needed or any multi-scans or object masks or multiple mesh building.
Yeah this works great when you have a controlled environment for it! And if I had taken a better dataset of images, even outdoors, it would have aligned perfectly on the first try! I still wanted to show people how to manually connect the two because sometimes, you need to. :)
we going have just tired to model manually !! It is unimaginable how much this thing is *_full of help_* and saves a lot of *_Valuable_* time .. Just Awesome ..
Great tutorial as always! I know first hand how frustrating getting the alignment to work with control points can be. It's been hit and miss on my end. As you brought up in your video, just really try and take as many pictures as you can. When I saw the 258 pictures for the stump, I said, "yeah, that's about right".
Nice to see more traditional photogrammetry videos coming back up, great stuff as always William! I'm not familiar using RC as much as Metashape/photoscan, but there may be some image culling features to help cull overshoot or lowimage quality estimation issues that can also stagger scan results ( or cause misalinments) looking at the control point segment, there is an accuracy reading going on. Your 0.1-0.2px is accuracy to the matching control points so it may also be available at earlier photostages too, might be worth investigating. Keep it up! Nice to see you on patreon too. well deserved.
A useful tutorial, especially as it includes a lot of small important details from the photography process or using the software. And of course, presented in a clear and concise way. Thank you!
Another solid video friend! I'll be getting final models up soon as I finish marketing planning. Then I'm building a database of 10k models per year and building experiences using these assets.
So this might be a bit dumb and I've only tested it in Metashape but i've had an easier time getting both halves to align automatically by just turning images of the bottom half upside down in lightroom. Otherwise reconstruction assumes both parts have the same side facing up. Thanks for the masking tip BTW, I keep forgetting that feature can be useful for alignment.
You could add easy to remove geometry to the model which makes it asymmetrical, hence give the software only one way to align it. Like putting needles to the sides of the log with shapes as their heads. The needles would be so small and hard to capture the they might even not show up in the scan at all. (I did some photogrammetry as well as used artec scanners..)
You're not wrong! But that really isn't always possible depending on what you have available, and the object you're trying to scan. This method makes it accessible to anyone.
Awesome video, as always! Thank you, Sir. Do you have any tips for scanning soft objects? I'm working on a project right now where I'm going to need to scan a fight belt. I haven't gotten to see it in person, so I'm not sure exactly how "floppy" it is. I was thinking about trying to suspend it with string and tape.
I wonder if you can just rotate all the bottom images 180 in Lightroom and load both to and bottom image groups into RealityCapture as one set? I would think it could find the alignment points for all images at once that way. Or would the flipped background make it not work at all?
Question: If you have a model with no obvious control points, should I add some to the model when I take the pictures? Like a small piece of tape or dry erase marks?
Thank you very much for all your advice, I am looking for the best technical solution for large buildings in photogrammetry, perhaps drone with 8 K camera ?
You've probably mentioned this along the way, but I'm curious about using a 35mm (slightly wide) focal length for capture as opposed to something like 50mm (assuming a full-frame sensor). Also, with the 35mm FL, you have a better native depth of field. But what aperture do you find works the best at that focal length? For smaller objects, do you feel the 35mm FL is the way to go for that too? Sry for all the questions!
I'm shooting with a 35mm in this video. The aperture depends on your subject, use whatever gets the most of your subject in focus, I avoid going past f12 though, because then you introduce diffraction which deteriorates your image as a whole. I was shooting at F10 for this object. Again, there's no magical settings that work for everything, you need to figure out for yourself what works best for a given object!
Is it possible to do this with sunglasses, using a black turntable and beige background? Or will I need some of that spray foam that evaporates, and re create the textures later? Not sure how to deal with the glass elements 😅
I had a thought while watching this video, do you think it’d be at all possible to just flip the bottom half of the images in lightroom before exporting and doing them all as one reality capture? Only problem I can think of would be the lighting
Hi William, I can't figure out why I don't get the "Export Depth Maps & Masks" dialog box when trying to export Masks from Reality Capture. When I click the Depths & Masks button, I get the first dialog box asking me where to save the files, however, that's it; there is no second dialog box asking me to adjust my settings before the actual export. Any help you can give me would be greatly appreciated. Thanks, Mathew.
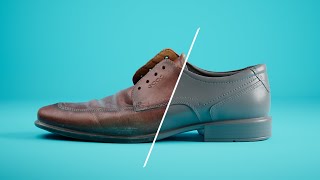
Awesome video William!! as always. Just one quick question - would this work for asymmetrical objects like a shoe (one that doesn't deforms) or let's say a collectible figure? Or it has to be practically symmetrical? Thanks!
I have a question. The polarizer is already composed of two polarizers. Rotating and crossing can effectively remove the highlights. Why do you need to control the direction of the light source?
It can remove the highlights from *polarized* light, but not from unpolarized light. That is why we polarize the light with the filter on the light itself.
hello my drone camera only has 12 megapixel , if i want to have greater result for 3d models do i need more megapixels ? i see a camera with 48 megapixels only for 100 dollar ? willi it be better with this camera you think ? please help me
This is sooooo helpful!! I know this is a long shot, but any tips for how to apply this to a full sized car? The only thing I can think of is a 2 post car lift, but I have no idea how I could shoot the areas that would be covered by the supports under the car. Thanks for a great video!
Hey guys, I'm trying to work on recreating a whole room...it's quite a small room in fact but would I essentially be able to use this process to recreate a whole room in 3D and then export it into Unity to make it into an assetbundle? Thanks
One time at the project with 1000+ photos with litlle overlapp and without ability to take new pictures I had 163 control point! It took several days. And I think pretty importnt to describe about the control point weight parameter. To access them you should to select one of control point and in 1Ds window set target Weight. If the control point stay at the hight contrast party and you much shure about correct placement you can set 100 instead of 10 weight by default. It have strong effect when the picture contains shiny or reflection surfaces. In this cases the Reality Capture can't correct calculate camera positions, so you can help them with you hight weight control points.
I was following along here and ran into trouble generating the depth and masks. It would fail that step in about 3 seconds. I even ran it over from the start a few times and it still failed. What solved that issue was generating a normal mesh. The preview mode wasn't playing well with generating masks.
Hi, I'm having a problem with the alignment of my photos on Reality Capture. I have two different orientations which causes double alignment in the same model. Can you please help me. I can send you a screenshot of my object if you want. Thank you for your help.
Hi, I am in the process of learning Reality Capture. I was having a similar problem about a week ago. I was using (2) 36" softboxes from opposite sides to light my statue, (subject). When I brought the pictures into Reality Capture the model was facing in (2) opposite directions, and no amount of control points was going to fix that. My only successful scan so far was outside in the shade. I believe that the first one failed because there were 2 light sources, and that confused the software. I believe that the one outside in the shade worked because there were only one light source. Next, I am going to try one softbox inside with a 4x4 bounce opposite it. I am hoping this one works. Best Regards, Mathew.
Merge component only seems to duplicate the component I`m currently vieuwing, do i need to select 2 at the same time somewhere or will the scan simply not work ? Does it
Hey William, I just want to thankyou for all the content you provide for the community! Another great video.:D They are awesome and your manner and personality make it easy to take in. One thing I really like is that you are coming from a vfx viewpoint. So helpful. One thing that I am having trouble understanding, and hoping you might know is to do with HDRIs. Can we not light a scene with a single HDRI and get proper(strong/sharp) shadows like in offline renderers? It seems like it is only possible in conjunction with a dir light. Also second question if you read this: Do you know if there will be a solution coming for capturing/exporting a shadow pass from movie queue? I have read some of your comments in other videos, highlighting how getting them from composure is clunky. I personally tried it for a upcoming project and definitely agree with you on that!. I super excited to see where UE5 is going and so desperately want to do some traditional set extension type stuff, but these HDRI and shadow limitations are holding us back. Thanks again anyway. Look forward to all your vids. Sorry I am off topic for my comment.
Great tutorial, thank you! I didn't know you could do masking like that. Seems very useful. One could also use a featureless base and backround wich would be faster, but perhaps the results would not be as good?
It would reduce your effort quite a lot if you simply added a few sharp cube shapes to your shots. Depending on scale you might use Legos, Rubik's Cube, Post-it pad, etc. Legos in particular are nice since you can make them the size you need, they are cheep so you can easily have many of them strewn about, and you can get fancy with the colors to help you keep track of orientation when zoomed in for control point placement.
Well, yes and no. You'd need to have those tracking markers on the object you're scanning itself, because we mask out whatever isn't the object. If said trackers are on the object, then it means you need to do some cleanup in post, which kind of defeats the purpose of "reducing the effort". If your dataset is shot correctly, then you don't need control points at all, as both sides should align on the first go. Don't get me wrong, tracking markers are great, but not always applicable depending on what you're scanning.
This is awesome . I would love to see a video on reality capture using huge dense point clouds way over the 40 million limit captured with a laser scanner. My scan is 713 million so simplifying it down that much makes it look so bad. I am struggling so bad right now haha.
You just want to use clipping box, to visualize how it looks on smaller segments. The 40M limit I think is due to VRAM limitations. It gets heavy real fast.
@@WilliamFaucher If I set a clipping box via a reconstruction region *which I already did to see the quality* would it only export the area that is selected in the clipping box? My concern is my Scan is of a large store with aisles and I'm not sure how I would set control points to realign something like this. Im also worried that maybe the person *freelance contractor * who did this scan should have taken photos to maybe project onto the lidar scan data rather than solely relying on the lidar scan photo detail. My end goal is to bring this scan of this store into Unreal Engine to use on a virtual production shoot haha.
@@tomrey5 The clipping box doesn't affect the output, it's purely for viewing purposes, to be able to show the actual 3d model across a smaller area. Do you actually need control points though? Did the entire scan align?
@@WilliamFaucher ahh ok that’s good to know . I have been wondering about that for like a day now. The scan is aligned . In my head I originally thought i would have to export each small clipping box area as a separate component and realign it. I guess I could just try to export it based on that information. I am just wondering how the LSPs or basically the laser jpegs would export as UDIMS into unreal. I guess I will give it a go and try to find out haha.
Pixel matching across sets of images isn't too difficult. Why can't the software use the control point as a hint, then procure its own best match, for us to accept?
You... can. But you have to be sure the person doesn't move. At all. Even moving 1mm can throw off the alignment and the results will be a bit messy. You'll get the rough shape of the face for sure, but it will need a lot of cleanup in Zbrush.


William, you are a gem of a human being. I began my photogrammetry journey with you after years of failure. My scans are now GORGEOUS after watching your videos and following your advice. Thank you so much for the time you put into these. If you ever wonder if they make a difference, let me assure you: they do. Thank you a million times.
same here
You just saved me from 3 days manual work I would normally do in Zbrush . Fantastic vid and VERY well explained. Many thanks , bud!
Many other tutorials over same arguments but William has lot of empathy for us. We can feel it. Thanks William. Number one.
RealityCapture has a very good ability to auto detect "irrelevant" parts of scans on rotated objects and remove them when using a bright uniform background. I use a Foldio3 light box with a turntable for my small object scans and I can just do a full rotatiom of pictures, flip the object over, and repeat several times if needed and when RealityCapture builds my object it just ignores the bright white background/turntable automatically and gives me a perfect scan without any manual work needed or any multi-scans or object masks or multiple mesh building.
Yeah this works great when you have a controlled environment for it! And if I had taken a better dataset of images, even outdoors, it would have aligned perfectly on the first try! I still wanted to show people how to manually connect the two because sometimes, you need to. :)
Brilliant, thank you. So good to have a complex function broken down and explained graphically.
we going have just tired to model manually !!
It is unimaginable how much this thing is *_full of help_* and saves a lot of *_Valuable_* time ..
Just Awesome ..
'one dark frame in-between' great tip
Great tutorial as always! I know first hand how frustrating getting the alignment to work with control points can be. It's been hit and miss on my end. As you brought up in your video, just really try and take as many pictures as you can. When I saw the 258 pictures for the stump, I said, "yeah, that's about right".
295 images is actually on the low end of what I'd normally shoot for something like this! The more, the better the scan!
@@WilliamFaucher Good to know, sounds like I need to pump my numbers up a bit :)
I always go 350+
I always like the vid before watching Will is just amazing. Thank you
Thanks so much!
Nice to see more traditional photogrammetry videos coming back up, great stuff as always William!
I'm not familiar using RC as much as Metashape/photoscan, but there may be some image culling features to help cull overshoot or lowimage quality estimation issues that can also stagger scan results ( or cause misalinments)
looking at the control point segment, there is an accuracy reading going on.
Your 0.1-0.2px is accuracy to the matching control points so it may also be available at earlier photostages too, might be worth investigating.
Keep it up!
Nice to see you on patreon too. well deserved.
Thank you so much for these tips, I've been thinking for a while to scan my first object and will surely use your advice!
A useful tutorial, especially as it includes a lot of small important details from the photography process or using the software. And of course, presented in a clear and concise way. Thank you!
You have an amazing gift as an educator
Another solid video friend! I'll be getting final models up soon as I finish marketing planning. Then I'm building a database of 10k models per year and building experiences using these assets.
Fantastic video, especially on resolving in-depth issues you can run into, using photogrammetry software.
Thank you!
TNX a lot for a very comprehensive tutorial. You have already answered many of my questions.
It was very interesting. thanks for the content William.
again a fantastic video William, thanks very much, cheers mate
Thank you!
Great video!
Quick question : Why not avoid risk and go with f/16 or f/22 to take rid of blur images?
Because when you go that crazy, you introduce diffraction, and end up making the entire image less sharp.
Wow! Another perfect tutorial. Thank you William.
Great tutorial! Always clear and concise.
great tutorial also your voice and background gave me cozy vibe thank you
Big thanks William, love the quality content.
Thank you!
nice, i'm using this technique on another photogrammetry software but thank to you, i'm now able to use this in rc
Yet again another comprehensive explanation! Kudos to you for your vids. And I look forward to more as always.
So this might be a bit dumb and I've only tested it in Metashape but i've had an easier time getting both halves to align automatically by just turning images of the bottom half upside down in lightroom. Otherwise reconstruction assumes both parts have the same side facing up. Thanks for the masking tip BTW, I keep forgetting that feature can be useful for alignment.
It's been very informative. You are a good teacher. Reality Capture is very useful. Thanks so much for your hard work.
You could add easy to remove geometry to the model which makes it asymmetrical, hence give the software only one way to align it. Like putting needles to the sides of the log with shapes as their heads. The needles would be so small and hard to capture the they might even not show up in the scan at all. (I did some photogrammetry as well as used artec scanners..)
You're not wrong! But that really isn't always possible depending on what you have available, and the object you're trying to scan. This method makes it accessible to anyone.
Thank You, really helped me with scanning quite soft, fabric suitcase.
Awesome video, as always! Thank you, Sir.
Do you have any tips for scanning soft objects? I'm working on a project right now where I'm going to need to scan a fight belt. I haven't gotten to see it in person, so I'm not sure exactly how "floppy" it is. I was thinking about trying to suspend it with string and tape.
Thank you for your aM amazing detailed explanation , just wondering do you use central Auto focus in your shooting at f10 for faster scanning?
Fantastic tutorial I would pay money for.
Very clear very detailed tutorial. Thank you
THANK YOU SO MUCH! I'm new to photogrammetry and your video is so useful!
I wonder if you can just rotate all the bottom images 180 in Lightroom and load both to and bottom image groups into RealityCapture as one set? I would think it could find the alignment points for all images at once that way. Or would the flipped background make it not work at all?
Excellent video as always. Top notch content and quality.
Thanks so much!
William, you cheeky fella!
This is amazing!
Thank you!
Awesome tutorial! I love the scan of the Nikon D800 you had in the intro, did you have to do anything special to get that scan?
Fantastic tutorial - keep them coming!
Thank you!
Thank you man its really helpful 💖 a life saver
Glad it could help! Thanks for writing!
Question: If you have a model with no obvious control points, should I add some to the model when I take the pictures? Like a small piece of tape or dry erase marks?
Yeah that can be helpful!
Need this instrument sooo much. Thank you ☺️
Thank you very much for all your advice, I am looking for the best technical solution for large buildings in photogrammetry, perhaps drone with 8 K camera ?
If I want to use reality capture to scan the indoor space, how can I shoot to keep more foundation and have a complete space layout?
You've probably mentioned this along the way, but I'm curious about using a 35mm (slightly wide) focal length for capture as opposed to something like 50mm (assuming a full-frame sensor). Also, with the 35mm FL, you have a better native depth of field. But what aperture do you find works the best at that focal length? For smaller objects, do you feel the 35mm FL is the way to go for that too? Sry for all the questions!
I'm shooting with a 35mm in this video. The aperture depends on your subject, use whatever gets the most of your subject in focus, I avoid going past f12 though, because then you introduce diffraction which deteriorates your image as a whole. I was shooting at F10 for this object. Again, there's no magical settings that work for everything, you need to figure out for yourself what works best for a given object!
OMG! Thank you this helped big time!
Is it possible to do this with sunglasses, using a black turntable and beige background? Or will I need some of that spray foam that evaporates, and re create the textures later? Not sure how to deal with the glass elements 😅
If you're scanning glass elements, you'll need scanning spray. And a black background is best!
This is a great tutorial! However, what I need to know is how can I scan the bottom surface of a stockpile without moving the stockpile???
Always amazing tutorial.
Cool tips. Thanks William
Thanks!
I had a thought while watching this video, do you think it’d be at all possible to just flip the bottom half of the images in lightroom before exporting and doing them all as one reality capture? Only problem I can think of would be the lighting
Flip the bottom half? As in rotate them? No, that would not work.
Awesome tutorial as always. Thank you!
I'd love to see a 3DFlow Zephyr video.
Hi William,
I can't figure out why I don't get the "Export Depth Maps & Masks" dialog box when trying to export Masks from Reality Capture. When I click the Depths & Masks button, I get the first dialog box asking me where to save the files, however, that's it; there is no second dialog box asking me to adjust my settings before the actual export.
Any help you can give me would be greatly appreciated.
Thanks, Mathew.
Thank you for this excellent tutorial!
Awesome video William!! as always. Just one quick question - would this work for asymmetrical objects like a shoe (one that doesn't deforms) or let's say a collectible figure? Or it has to be practically symmetrical? Thanks!
doesn’t have to be symmetrical at all, it’s just happenstance that the log is symmetrical. symmetry has nothing to do with this approach :)
@@WilliamFaucher awesome thanks! :) I appreciate how fast you're answering !!
I have a question. The polarizer is already composed of two polarizers. Rotating and crossing can effectively remove the highlights. Why do you need to control the direction of the light source?
It can remove the highlights from *polarized* light, but not from unpolarized light. That is why we polarize the light with the filter on the light itself.
Great video! Are you going to check out the reality capture phone app when it comes out public??
You can 100% expect a video on this ;)
Can I have my camera fixed in one place but using something like a lazy suzan to rotate the model?
hello my drone camera only has 12 megapixel , if i want to have greater result for 3d models do i need more megapixels ? i see a camera with 48 megapixels only for 100 dollar ? willi it be better with this camera you think ? please help me
This is sooooo helpful!! I know this is a long shot, but any tips for how to apply this to a full sized car? The only thing I can think of is a 2 post car lift, but I have no idea how I could shoot the areas that would be covered by the supports under the car. Thanks for a great video!
You could do it, but you'd need to make sure the car doesnt have any reflective surfaces while scanning, as that won't work with photogrammetry.
@@jennalee1 lmaoooo :'D
Awesome very needed missing information
Thank you!
If i want to scan a soft object by reality capture , how can i make that ?
какой из игровых движков именно в таком качестве может потянуть такую модель?
Hey guys, I'm trying to work on recreating a whole room...it's quite a small room in fact but would I essentially be able to use this process to recreate a whole room in 3D and then export it into Unity to make it into an assetbundle? Thanks
Thanks for the content, awesome as always!
How do you know if your missing a certain area or need more data for area's
Whenever I press CRTL A it only selects the photos from one component. How do I truly select them all?
Hi William Faucher how r u I want to ask you a question can you tel me how i can show animated plant of path tracer rendering in unreal engine 5
Free licence in late april! 😍
I'm not too familar with light room, how did you get that "Camera Flat" profile?
It depends on your camera, not all cameras have that profile. You can use the adobe neutral profile :)
Subscribed to patreon.
what if whe take pictures more closers to object will it look better
It's possible to do it with a turntable? If I don't turn around it's ok or the background can cause problemes?
Should be totally possible yes, as long as you have a nice black background to block out any incoming light :)
One time at the project with 1000+ photos with litlle overlapp and without ability to take new pictures I had 163 control point! It took several days.
And I think pretty importnt to describe about the control point weight parameter. To access them you should to select one of control point and in 1Ds window set target Weight. If the control point stay at the hight contrast party and you much shure about correct placement you can set 100 instead of 10 weight by default. It have strong effect when the picture contains shiny or reflection surfaces. In this cases the Reality Capture can't correct calculate camera positions, so you can help them with you hight weight control points.
Wow! I think your case here is a bit more specific an issue, than the topic of this video is hahah
The Mac version of 3D Scanner App is free, and does the masking automatically.
Depending on the bottom I'll just project from perspective using an image that's been textured into various layers.
I was following along here and ran into trouble generating the depth and masks. It would fail that step in about 3 seconds. I even ran it over from the start a few times and it still failed. What solved that issue was generating a normal mesh. The preview mode wasn't playing well with generating masks.
That's pretty weird, never experienced that before.
Hi, I'm having a problem with the alignment of my photos on Reality Capture. I have two different orientations which causes double alignment in the same model. Can you please help me. I can send you a screenshot of my object if you want. Thank you for your help.
Hi,
I am in the process of learning Reality Capture. I was having a similar problem about a week ago. I was using (2) 36" softboxes from opposite sides to light my statue, (subject). When I brought the pictures into Reality Capture the model was facing in (2) opposite directions, and no amount of control points was going to fix that.
My only successful scan so far was outside in the shade. I believe that the first one failed because there were 2 light sources, and that confused the software. I believe that the one outside in the shade worked because there were only one light source.
Next, I am going to try one softbox inside with a 4x4 bounce opposite it. I am hoping this one works.
Best Regards, Mathew.
Merge component only seems to duplicate the component I`m currently vieuwing, do i need to select 2 at the same time somewhere or will the scan simply not work ?
Does it
Then you need more control points :)
I added some more and it didn't work,
If I just realigned them again, I got the result I wanted, though.
THX for the quick reply :D
Hey William, I just want to thankyou for all the content you provide for the community!
Another great video.:D
They are awesome and your manner and personality make it easy to take in.
One thing I really like is that you are coming from a vfx viewpoint. So helpful.
One thing that I am having trouble understanding, and hoping you might know is to do with HDRIs.
Can we not light a scene with a single HDRI and get proper(strong/sharp) shadows like in offline renderers? It seems like it is only possible in conjunction with a dir light.
Also second question if you read this: Do you know if there will be a solution coming for capturing/exporting a shadow pass from movie queue? I have read some of your comments in other videos, highlighting how getting them from composure is clunky. I personally tried it for a upcoming project and definitely agree with you on that!.
I super excited to see where UE5 is going and so desperately want to do some traditional set extension type stuff, but these HDRI and shadow limitations are holding us back.
Thanks again anyway. Look forward to all your vids. Sorry I am off topic for my comment.
Thank you!!
Great tutorial, thank you! I didn't know you could do masking like that. Seems very useful. One could also use a featureless base and backround wich would be faster, but perhaps the results would not be as good?
can you do a video on using april tags
Thank you 🙏 🙏
how can i give camera movement inside the realitycapture and export it as a mp4 ? please advice me is anyone have a video to learn about it
Thanks!
The Kodak 35mm film camera any good for this?
it COULD possibly work but you'd need a LOT of rolls of film for this. Then digitize/scan the negatives, which is a lot of extra steps.
@@WilliamFaucher Someone may try that with a new algorithm.
wow gj with this video and thanks
It would reduce your effort quite a lot if you simply added a few sharp cube shapes to your shots. Depending on scale you might use Legos, Rubik's Cube, Post-it pad, etc. Legos in particular are nice since you can make them the size you need, they are cheep so you can easily have many of them strewn about, and you can get fancy with the colors to help you keep track of orientation when zoomed in for control point placement.
Well, yes and no. You'd need to have those tracking markers on the object you're scanning itself, because we mask out whatever isn't the object. If said trackers are on the object, then it means you need to do some cleanup in post, which kind of defeats the purpose of "reducing the effort".
If your dataset is shot correctly, then you don't need control points at all, as both sides should align on the first go. Don't get me wrong, tracking markers are great, but not always applicable depending on what you're scanning.
This is how you get fairy circles in your backyard
Cool video, Hahahahaha RIP Grass !
Thanks man!
You're awesome!
Thank you!
Can you take a look for local exposure in ue5?
What about it?
@@WilliamFaucher its like balancing over saturated exposure in level, similar to HDR in camera
thanks!!
This is awesome . I would love to see a video on reality capture using huge dense point clouds way over the 40 million limit captured with a laser scanner. My scan is 713 million so simplifying it down that much makes it look so bad. I am struggling so bad right now haha.
You just want to use clipping box, to visualize how it looks on smaller segments. The 40M limit I think is due to VRAM limitations. It gets heavy real fast.
@@WilliamFaucher If I set a clipping box via a reconstruction region *which I already did to see the quality* would it only export the area that is selected in the clipping box? My concern is my Scan is of a large store with aisles and I'm not sure how I would set control points to realign something like this.
Im also worried that maybe the person *freelance contractor * who did this scan should have taken photos to maybe project onto the lidar scan data rather than solely relying on the lidar scan photo detail.
My end goal is to bring this scan of this store into Unreal Engine to use on a virtual production shoot haha.
@@tomrey5 The clipping box doesn't affect the output, it's purely for viewing purposes, to be able to show the actual 3d model across a smaller area.
Do you actually need control points though? Did the entire scan align?
@@WilliamFaucher ahh ok that’s good to know . I have been wondering about that for like a day now. The scan is aligned .
In my head I originally thought i would have to export each small clipping box area as a separate component and realign it.
I guess I could just try to export it based on that information. I am just wondering how the LSPs or basically the laser jpegs would export as UDIMS into unreal.
I guess I will give it a go and try to find out haha.
Those are dip bars. Do you also do calisthenics?
I really don't, they're not mine hahah
Pixel matching across sets of images isn't too difficult. Why can't the software use the control point as a hint, then procure its own best match, for us to accept?
That's... exactly what it's doing? You place a control point, and the images align for you to confirm.
Can I do this to scan a human face?
You... can. But you have to be sure the person doesn't move. At all. Even moving 1mm can throw off the alignment and the results will be a bit messy. You'll get the rough shape of the face for sure, but it will need a lot of cleanup in Zbrush.
@@WilliamFaucher excellent, this is just what I need to get someone on a metahuman
Just shoot raw otherwise that will dont work well xD THX for this tutorial!
It can definitely work without raw, but raw will be better.