*Important:* Ortur have now release the Aufero 1 and Aufero 2. Check them out (affiliate links): Aufero 1: s.zbanx.com/r/UIJHKEwKsb7p Aufero 2: s.zbanx.com/r/QDfwpnpONkFW
Can the Ortur laser products also de actual engraving into the cobber clad, and create the PCB in that way, so etching are not necessary? If yes, what power laser from Ortur, can do this as minimum?
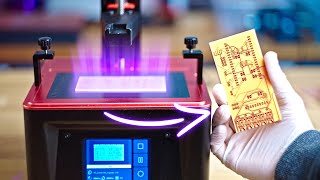
Would have been nice if you focused the camera in the final fabricated pcb. The camera was so zoomed out that we can hardly see the condition of the traces. Other than that, nice tutorial.
Nope! Some fiber lasers can manage, but the results are not very good. Remember, if there is enough energy to cut copper a bit of the fiberglass will also burn away.
@@DIYTECHBROS Yey thanks a lot! That's what I needed. I'm going to use a CNC mill with an engraver. to mechanically remove the excess copper. It wouldn't look as pretty but for prototyping could be somewhat faster.
You shouldn't remove the paint with acetone but put the PCD back under the laser using a system to maintain it precisely at the same place and use the laser to remove the paint from the pads, not from the rest of the PCB.
Yes, the plan was actually to include that in the video, BUT, after a few test we found a few issues. The biggest one is if you are not able to clean it good enough the soldering becomes a headache!
I've enter to this video, thinking that it would be about that. Without needing to use chemical liquids. Just a laser, from zero to end (obviously without UV mask)
May sound stupid as a question, but there is no way that laser will actually etch the copper itself instead pass thru the mask etching and the chemical etching bath? just asking
@@DIYTECHBROS I've been trying just that over the last couple of days and yes, it works fine using a 450nm "Blue" laser. I run at about 10% laser power and 1000m/min and it very nicely darkens the photoresist in one pass. However.. simply exposing the outline results in 'tracks' that are far too thin to survive the developing process and will fall off the copper if they don't get dissolved away. So its necessary to expose the tracks and pads as a laser raster, which works, but its a slow process to do - the accuracy of these diode laser mechanics isn't reliably up to any sort of speed making exposing even a small PCB hours long. (these are 0.2mm lasers beam width) Quite frankly, its just not worth all the messing about. Get a laser printer and a modified laminator and use toner transfer.
What software packages do you use? I have a Enjoywood A10 laser engraver. I have only found that lasergrbl and lightburn can work with this laser engraver, and I found I need to generate a png file with the pcb layout. For that I use kicad to generate an svg file which I then convert to png with Inkscape. However, running into a problem, that the resolution is too low. Fine traces and pads are jagged and not useful. So I can’t get the pcb detailed enough for smd components.
Use flatcam to create your Gerber and burn as gcode no SVG or other rubbish tool as inkscape....you are a PCB designer not tee-shirt publisher😊😊.export your gcode processed as grbl laser ,burn varnish with also grbl laser....works fine but as my case and reason to post here my disappointment about the process,the laser ends after 4 PCBs.....
Hello, thank you very much for the video! I have another question for you: is there a way to apply UV solder mask on the pcb and use the laser to remove it from the pads?
you should try using photoresist film rather than paint spray, the laser diode has a 445nm wavelength which is just in range to expose the photoresist. People uses black paint because they have a red laser diode, the black paint absorbs the heat from red laser.
Using photoresist need more time in laser, because have to pass above larger areas. Using paint spray, you have to pass laser only thin area around the tracks, this is faster. And cheaper too.
@@WilkerAzevedo True black paint is good but the details are not great, professional PCB fab houses uses film or liquid based UV photoresists. Also photoresists does not need more time, you need to properly apply it to the board and use much less optical output power, requires only 30-60mW optical power in the UV range. There is a youtuber who did a video about CNC UV laser PCB photoresists, his channel name is "Marco Reps", check it out, he made two videos about it.
@@WilkerAzevedo Photoresits are dirt cheap. You buy them in a roll in quantity and it's super cheap. Your state of the art iPhones and Macbooks PCBs are all made using photoresit, matter of fact all of your electronics are made professionally using photoresits. Professionals uses photoresit because it produces much higher quality and finer details of the PCB layout. Black paint spray is not great for precision PCB designs. There is also a special photoresit paint which is in liquid form, this is also used in high precision PCB designs. The key objective is using smaller wavelength of light such as around 300-400 nanometers (Near ultraviolet) to produce higher quality sensitize PCBs, red lasers are around 670 nm, it will never produce higher quality PCB designs compared to photoresit method for ultra precision work. Such as making a PCB which have a FPGA chip containing hundreds to thousands of ball grid array (BGA).
@@alwayscensored6871 Nice, let me know how it worked out for you. The lower the wavelength, the better it is for the photoresit to sensitize, around 300nm is ideal, however these lasers are super expensive. The common 420nm lasers are easy to get and cheap. You only need to drive they at super low power, like 30-60 milliwatt. When you are drilling holes into the PCB, make sure you wear a mask, almost all common PCBs are made from fiber glass, this can cause permanent damage to your lungs if you breath the dusts from the PCBs, therefore put a cover or simply do not breath the dusts produced from the PCB while drilling. Make a youtube video if you can.
@@DIYTECHBROS Thanks for the response but I was wandering, if you port an image from Kicad or some other PCB software. You wind up burning the tracks. IE you wind up etching away the tracks and not around the tracks. I'd love to know your process for how you do this. Maybe an idea for another video?
That's actually very easy in LightBurn! Export the image of the PCB and import it into LightBurn. Have LightBurn trace the image. That creates lines around the tracks. And, if needed there is a function to offset the lines outwards. Thanks for the video idea :-)
If you have to etch the PCB anyway, what's the advantage of using a laser to burn paint? Why not just print the board layout on thermal transfer paper with a laser printer?
That’s a very good question! I’m not going to say that a laser is soooo much better, but in terms of accuracy and reliability a laser will give you perfect results every time. No lines will be broken transfer, no weal lines etc. In terms of equipment, one requires a laser printer while the other a laser engraver… BUT, we actually usually use a CNC to mill our PCBs 🤠
@@DIYTECHBROS, I recently bought a mini 3018 CNC kit I am going to use to mill simple circuits (filter, amplifier, mixer, impedance matching network, attenuator, etc) for an RF class I'm teaching. Your videos have been very helpful.
Simplified answer, no. A soldering iron does 3 things at once, heats up the pad, the leg of a device and the solder. It does this by being in contact with and transferring heat to all 3 at the same time. Complicated answer, yes, it can be done. But with a simple setup and a diode laser it will be more a hobby project than and actual "soldering station".
Never thought about it, that way. Are you thinking SMD components? The only difficult part of SMD's would be the packages that have no legs, I guess there could be enough heat transfer from the copper to the pad and solder paste. You might have issues with larger though-hole components, but I'm only guessing, This is an interesting idea, if I invest in a laser cutter for this operation, maybe it could do some smd soldering for me
@@DIYTECHBROS I guess a solder paste applied to the pads could be heated with a laser, which will seat the smd component? I guess one will have to try, but first, what laser printer?
Well, the simplified answer was no, but the more accurate answer is that you can even do welding with lasers… so you can make it happen. But most current diode lasers have 5-40 watt with a focus spot of 0.1 x 0.1 mm - so thinking a CO2 laser will be better suited.
huh. when I tried this there was a residue that was left behind that protected the copper from my etching solution....! I didn't try washing it, thats a good idea. Though my tests It was hard to get fine details; I didn't account for any laser kerf though.
@@angst_ , maybe. I tried synthetic enamel and water-based paint and got the better results with the synthetic enamel, but there was still that residue which prevented the eching solution from etching the copper.
Hello and thank you for that instructive video. I have a laser Ortur 1 (5500 mW) but I have a great problem to arrive at a file that can be used with LaserGRBL. I use Kicad 6.0 to make my circuit board. I also have Flatcam and LaserGRBL. Could you please detail me the way to transform a Kicad file to a file that can be used with LaserGRBL ? Thank you very much H. Phil
Very nice and interesting! I have a few questions: 1) What kind of paint do you paint the PCB? 2) What type of liquid (inside the container) do you use to completely remove the ink from the PCB? (Sorry, English is not my native language) Thank you


*Important:* Ortur have now release the Aufero 1 and Aufero 2. Check them out (affiliate links):
Aufero 1: s.zbanx.com/r/UIJHKEwKsb7p
Aufero 2: s.zbanx.com/r/QDfwpnpONkFW
Compliments!
but could you show what software you used and how you came to plot?
Why not burn the copper off?? Why etch?
He said the laser will not burn metal off.
Have you tried this laser with a negative UV photoresist. Was thinking low power like 1% just to expose.
Which Etchant did you use please?
Can I use 5.5 watt laser to make PCB?
Yes :-)
Isn't it possible to just laser-away the not needed parts of the copper coated plate and done? Why the etching process?
sir which type of paint you use for pcb purpose
Can the Ortur laser products also de actual engraving into the cobber clad, and create the PCB in that way, so etching are not necessary?
If yes, what power laser from Ortur, can do this as minimum?
What software are you using to produce the files which drive the laser? Thanks
Would have been nice if you focused the camera in the final fabricated pcb. The camera was so zoomed out that we can hardly see the condition of the traces. Other than that, nice tutorial.
Thanks! I’ll keep that in mind :-)
You have a nice zoom at 1:58 , results seems clean enough. I think I will go for this solution for my PCBs, cleanest and easiest one :)
How much minimum wattage required to make a pcb successfully? Is CV-01 Creality cut this type? It used 1.6W laser.
Is it not possible to cut copper layer of pcb without paint on it?
Nope! Some fiber lasers can manage, but the results are not very good. Remember, if there is enough energy to cut copper a bit of the fiberglass will also burn away.
Very interesting video. However I'm more interested in how did you produce the g-code for laser cutter?
Lightburn, engrave from image or trace image :-)
@@DIYTECHBROS Yey thanks a lot! That's what I needed. I'm going to use a CNC mill with an engraver. to mechanically remove the excess copper. It wouldn't look as pretty but for prototyping could be somewhat faster.
What power laser do you think you could get away with as minimum? Would 1 or 2 watts be able to burn away the paint like this?
I do it with 0.7w monomode laser
You shouldn't remove the paint with acetone but put the PCD back under the laser using a system to maintain it precisely at the same place and use the laser to remove the paint from the pads, not from the rest of the PCB.
Yes, the plan was actually to include that in the video, BUT, after a few test we found a few issues. The biggest one is if you are not able to clean it good enough the soldering becomes a headache!
What about 500mw laser module please
Would be nice if it could cut the copper layer on the pcb
I've enter to this video, thinking that it would be about that. Without needing to use chemical liquids. Just a laser, from zero to end (obviously without UV mask)
May sound stupid as a question, but there is no way that laser will actually etch the copper itself instead pass thru the mask etching and the chemical etching bath? just asking
Not at these power levels, it's not cost effective, as you will also destroy the PCB. See other comments.
A shame you didn't give a few more details to replicate this. I tried this once and it was complete fail. Maybe I was just using the wrong paint.
what about using the laser on UV-sensitive photoresist plates? dont works?
maybe, never tried? :-)
@@DIYTECHBROS I've been trying just that over the last couple of days and yes, it works fine using a 450nm "Blue" laser. I run at about 10% laser power and 1000m/min and it very nicely darkens the photoresist in one pass.
However.. simply exposing the outline results in 'tracks' that are far too thin to survive the developing process and will fall off the copper if they don't get dissolved away.
So its necessary to expose the tracks and pads as a laser raster, which works, but its a slow process to do - the accuracy of these diode laser mechanics isn't reliably up to any sort of speed making exposing even a small PCB hours long. (these are 0.2mm lasers beam width)
Quite frankly, its just not worth all the messing about. Get a laser printer and a modified laminator and use toner transfer.
Yes, its will work...
What is the laser beam width at the PCB surface? How is beam reflection damage to the laser, from the exposed copper surface avoided.
What software packages do you use? I have a Enjoywood A10 laser engraver. I have only found that lasergrbl and lightburn can work with this laser engraver, and I found I need to generate a png file with the pcb layout. For that I use kicad to generate an svg file which I then convert to png with Inkscape. However, running into a problem, that the resolution is too low. Fine traces and pads are jagged and not useful. So I can’t get the pcb detailed enough for smd components.
Try to use the Trace Image feature in Lightburn :-)
Use flatcam to create your Gerber and burn as gcode no SVG or other rubbish tool as inkscape....you are a PCB designer not tee-shirt publisher😊😊.export your gcode processed as grbl laser ,burn varnish with also grbl laser....works fine but as my case and reason to post here my disappointment about the process,the laser ends after 4 PCBs.....
Hello, thank you very much for the video!
I have another question for you: is there a way to apply UV solder mask on the pcb and use the laser to remove it from the pads?
Yes, just create a rig so you can precisely place the PCB in place again. Then you spray paint it again and burn the pain off the pads :-)
@@DIYTECHBROS Thank you very much for the hint. But, what about a follow-up video? I didn't find any similar on the web. Best regards
you should try using photoresist film rather than paint spray, the laser diode has a 445nm wavelength which is just in range to expose the photoresist. People uses black paint because they have a red laser diode, the black paint absorbs the heat from red laser.
Using photoresist need more time in laser, because have to pass above larger areas. Using paint spray, you have to pass laser only thin area around the tracks, this is faster. And cheaper too.
@@WilkerAzevedo True black paint is good but the details are not great, professional PCB fab houses uses film or liquid based UV photoresists. Also photoresists does not need more time, you need to properly apply it to the board and use much less optical output power, requires only 30-60mW optical power in the UV range.
There is a youtuber who did a video about CNC UV laser PCB photoresists, his channel name is "Marco Reps", check it out, he made two videos about it.
@@ShopperPlug Thanks, got a 2.5W with my 3018.
@@WilkerAzevedo Photoresits are dirt cheap. You buy them in a roll in quantity and it's super cheap. Your state of the art iPhones and Macbooks PCBs are all made using photoresit, matter of fact all of your electronics are made professionally using photoresits. Professionals uses photoresit because it produces much higher quality and finer details of the PCB layout. Black paint spray is not great for precision PCB designs. There is also a special photoresit paint which is in liquid form, this is also used in high precision PCB designs. The key objective is using smaller wavelength of light such as around 300-400 nanometers (Near ultraviolet) to produce higher quality sensitize PCBs, red lasers are around 670 nm, it will never produce higher quality PCB designs compared to photoresit method for ultra precision work. Such as making a PCB which have a FPGA chip containing hundreds to thousands of ball grid array (BGA).
@@alwayscensored6871 Nice, let me know how it worked out for you. The lower the wavelength, the better it is for the photoresit to sensitize, around 300nm is ideal, however these lasers are super expensive. The common 420nm lasers are easy to get and cheap. You only need to drive they at super low power, like 30-60 milliwatt. When you are drilling holes into the PCB, make sure you wear a mask, almost all common PCBs are made from fiber glass, this can cause permanent damage to your lungs if you breath the dusts from the PCBs, therefore put a cover or simply do not breath the dusts produced from the PCB while drilling. Make a youtube video if you can.
Which type of Laser it is ????
Thanks for the video. could you tell me what software you are using?
Sure! Laser GRBL is included in the download package from Ortur. But I like to use LightBurn as you can do designs and adjust almost any objects.
@@DIYTECHBROS Thanks for the response but I was wandering, if you port an image from Kicad or some other PCB software. You wind up burning the tracks. IE you wind up etching away the tracks and not around the tracks. I'd love to know your process for how you do this. Maybe an idea for another video?
That's actually very easy in LightBurn!
Export the image of the PCB and import it into LightBurn. Have LightBurn trace the image. That creates lines around the tracks. And, if needed there is a function to offset the lines outwards.
Thanks for the video idea :-)
@@DIYTECHBROS Thanks for that I'll check it out
I wonder if you could just coat the PCB board with solder mask and burn that off, etch and then apply a second coat.
If you have to etch the PCB anyway, what's the advantage of using a laser to burn paint? Why not just print the board layout on thermal transfer paper with a laser printer?
That’s a very good question!
I’m not going to say that a laser is soooo much better, but in terms of accuracy and reliability a laser will give you perfect results every time. No lines will be broken transfer, no weal lines etc.
In terms of equipment, one requires a laser printer while the other a laser engraver…
BUT, we actually usually use a CNC to mill our PCBs 🤠
@@DIYTECHBROS,
I recently bought a mini 3018 CNC kit I am going to use to mill simple circuits (filter, amplifier, mixer, impedance matching network, attenuator, etc) for an RF class I'm teaching. Your videos have been very helpful.
hi..this is great,but what is the file format to do this ? can i export png from easyeda ?
Export the PCB from easyEDA to DXF format. Lightburn will open it.
Seems quicker than what i could normally do with PCB toner transfer
Can you also solder the PCB with the laser?
Simplified answer, no. A soldering iron does 3 things at once, heats up the pad, the leg of a device and the solder. It does this by being in contact with and transferring heat to all 3 at the same time.
Complicated answer, yes, it can be done. But with a simple setup and a diode laser it will be more a hobby project than and actual "soldering station".
@@DIYTECHBROS interesting
Never thought about it, that way. Are you thinking SMD components? The only difficult part of SMD's would be the packages that have no legs, I guess there could be enough heat transfer from the copper to the pad and solder paste. You might have issues with larger though-hole components, but I'm only guessing, This is an interesting idea, if I invest in a laser cutter for this operation, maybe it could do some smd soldering for me
@@DIYTECHBROS I guess a solder paste applied to the pads could be heated with a laser, which will seat the smd component? I guess one will have to try, but first, what laser printer?
Well, the simplified answer was no, but the more accurate answer is that you can even do welding with lasers… so you can make it happen. But most current diode lasers have 5-40 watt with a focus spot of 0.1 x 0.1 mm - so thinking a CO2 laser will be better suited.
Hello and thank you for the video. If you can do a special episode on pcb in detail, thank you
Cool and inspiring, thanks :)
Can that laser cut copper ?
Yes thank you, why not just cut the copper?
I really wanted to know to decide whether to buy the machine or not
@@Gadget_Plus To cut copper using laser requires high power. This way is cheaper.
huh. when I tried this there was a residue that was left behind that protected the copper from my etching solution....! I didn't try washing it, thats a good idea. Though my tests It was hard to get fine details; I didn't account for any laser kerf though.
I have similar problems. Did you find a solution?
@@mod100 unfortunately no. I stopped playing with it. Maybe scuffing it gently with scotch-brite after? or a different brand/type of paint?
@@angst_ , maybe. I tried synthetic enamel and water-based paint and got the better results with the synthetic enamel, but there was still that residue which prevented the eching solution from etching the copper.
Hello and thank you for that instructive video.
I have a laser Ortur 1 (5500 mW) but I have a great problem to arrive at a file that can be used with LaserGRBL.
I use Kicad 6.0 to make my circuit board.
I also have Flatcam and LaserGRBL.
Could you please detail me the way to transform a Kicad file to a file that can be used with LaserGRBL ?
Thank you very much
H. Phil
Hi. Did you have any success doing this with FlatCAM? I'm trying to use pcb2gcode.
Nice 😀
Thanks 😋
hey!, I have a question for you, do you recommend some special brand tint in special to paint the copper?
No, just pick a dark colour without any metallics or UV filter. Go for the cheapest one you can find 😄
So good!
Very nice and interesting! I have a few questions:
1) What kind of paint do you paint the PCB?
2) What type of liquid (inside the container) do you use to completely remove the ink from the PCB? (Sorry, English is not my native language) Thank you
2. paint can be removed by acetone or paint thinner., 1.iam guessing acylic paint. etchant is probably ferrous chloride
@@Vegetakhan Thanks
you can use hydrogen peroxide with Hcl liquid . The ratio of mixing 1 ( h.p.) to 4 (Hcl) . Alternate method , use only ferric chloride .
Thanks
Have you tried burning kapton tape ?
Using a laser etcher might be a better way of creating a board.
Much money in a expansive laser. No way!
i would let the paint on it and just laser again the pads..
Hello, how do you ensure that the paint does not flow back into the PCB paths? It happens to me and then I can't erode paths. Thank you for answer.
You let the paint dry before you use the laser
That is not a 50 watt laser! Diode based lasers are available up to 15 watts max.
The only way to get more power, Is with a C02 tube.
I just use hot iron and a laser printer. costs $1 and takes 5 minutes. Thanks for doing all the hard work though.
Can you explain what u mean? Sounds interesting
@@martinshkreli9681 he uses the toner transfer method. I do it using a laminator.
It’s a bit hit and miss though isn’t it? Would you tell me where you bought your laser printer for $1, I would like to try this.
show!!!
Narration is a bit difficult to follow. Maybe use another mic, or speak a bit farther from it???
Hadir menyimak
His speaking tires me.
Me 2 🤠
@@DIYTECHBROS sorry to hear that buddy 😔
😁
Want to support us? Buy us a coffee ☕️
buymeacoffee.com/DIYTechBros