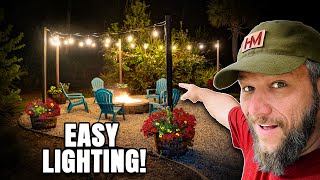
DIY How to hang patio string lights

Вставка
- Опубліковано 24 лип 2024
- How to hang string lights in your backyard or patio is easy. This demonstration shows how to hang Edison bulb string lights within a covered patio. I purchased the lights from Home Depot. I also have string like poles from Backyard Therapy that work great below:
Check out my how to hang string lights with poles!! -HERE- • DIY How to hang patio ...
Buy now string light poles: amzn.to/3FiVGXC
Amazon store with all the tools you need: amzn.to/3TZrQOY
Buy 48ft string lights: amzn.to/3nKMbuo
...and how to install the poles here: • DIY How to hang patio ...
Subscribe for future project and review videos: ua-cam.com/users/HomesbyCB?su...
Check out our social media accounts:
- Facebook: / homesbycandb
- Instagram: @coltoncrumpdiy
Tools Used in this video:
AMAZON AFFILIATE LINKS:
Buy 48ft string lights: amzn.to/3nKMbuo
Makita Drill: amzn.to/2Wb37Kf
Ryobi Drill Bit Set (not the exact set but close and this is a better deal): amzn.to/3aS7hLa
Werner Multi-position Ladder: amzn.to/2QcA0CD or a better alternative amzn.to/38Lmmg1
Stanley Leverlock measuring tape: amzn.to/33eFulA (this is a new model link)
Screw Hooks: amzn.to/3cXxd9Z
Disclaimer
This video was made to demonstrate how I/Colton/we/Homes by C & B/Colton Crump DIY personally completed this type of project. I/Colton/we/Homes by C & B/Colton Crump DIY assumes no liability for property damage or injury incurred as a result of any of the information contained in this video. I/Colton/we/Homes by C & B/Colton Crump DIY recommend safe practices when working with/on any structure or object, seen or implied within this video. Information contained in this video does not create and hold any warranty or guarantee for any reason.This video was made for demonstration purposes and provides my/our own opinion on how to complete a project. I/we/Homes by C & B/Colton Crump DIY will not be held liable for any damage, injury, accident, or mishap that may happen to you when attempting the same or similar steps outlined. Any injury, damage, or loss that may result from use or improper use of these tools, equipment, or from the information contained in this video is the sole responsibility of the user and not Homes by C & B, Colton Crump, Bailey Crump, or Colton Crump DIY. - Навчання та стиль


Thank you for not making this an unnecessary 15 min video. Clear, consider and to the point. 🙏🏻
K M thanks for watching and commenting!! What you just said is the whole reason I started UA-cam videos. I hated the long non edited videos. The first videos uploaded in the first 2 years are a bit rough but feel like people enjoy the newer ones and this format. Thanks again!
Thissssss 👏👏👏👏👏👏
Thank you for watching and commenting!
You answered all my questions in your video! Thx so much Colton!
Thanks for watching Andrew and happy to help! Let me know how it goes for you!! :)
Extra thumbs up for making a simple how to video that’s straight to the point
Thank you!! Appreciate the commenting and watching! Straight to the point is the whole purpose of why I started my UA-cam channel
👍👍👍💝🙏
😩And I foolishly thought I was gonna “just hang the lights”....there’s so much involved in the process. LOL I’m glad I checked UA-cam. This video was very helpful. Thank you! 💝🙏
Well I hope you were able to get it done or feel more confident in getting it done! Best of luck and thanks for watching and commenting! :)
Thank you! All the information needed in a short and sweet video! Perfect!
Thanks Sharon! I'm glad you enjoyed it! Keep an eye out for future videos and check out my other videos if you haven't already. I'd appreciate any shares with friends or family you may know that this info could benefit also. Thanks again!
hi
Hi
This is exactly my situation and I had no idea where to start! I have a covered porch too and the zigzag shape is a great idea. Also, the walls are stucco and they are hard to drill but I will use a drill bit for cement I think it is called... I am planning to use the Christmas indoor outdoor extensions lights before i invest in the larger lights and see how it goes. My main issue now is getting my son to come over and do this for me :D Maybe I'll cook him some chicken fricassee!
Masonry bit
Thank you!!! Straight to the point 🤝
Thanks for watching Sean!!
Love the editing of this video! So clever and entertaining!
Thank you! Go check out the other videos I have posted if you haven't already and subscribe!
Thanks I have an awning too so great ideas.
Thank you! Thanks for watching and commenting :)
Perfect video! I've been trying to figure out how to hang my lights in a covered areas on stucco - this is exactly the information I needed!!! Thanks!
Awesome! I'm so glad! Ashelynnt thanks for watching and let me know how your project goes :) best of luck!!
@@ColtonCrumpDIY I finished my lights just yesterday and they turned out great!! Thank you!
Woo hoo! Im so glad!
Loved it, keep them coming!
Thank you!!
This was extremely helpful !!! Also you have a radio voice ! Good job 👍
Thanks for watching and commenting! Maybe I'll try my skills at radio when I retire. Or maybe.... a podcast?
@@ColtonCrumpDIY Bible you definitely should 💯 you have the talent and voice !
Thank you for simple instructions!
Thanks for watching! Check out my other videos if you haven't already!
Thanks for the tips
For sure! Thanks for watching and commenting!
Colton, you have the best how to video for installing string lights! Are you happy with Hampton Bay? Are the lights a cool white or more yellowish. I don’t like lights that have a cold ambiance. Thank you for your advice!
Thank you!!! I appreciate you watching and commenting! So these Hampton bay Edison bulbs are more of a soft yellow. It really creates a cozy environment. Id buy them again for sure.
Colton Crump I really appreciate your comment on Hampton Bay Edison bulbs. I’ll be going to Home Depot soon to purchase. Thanks much!!😊
You the real MVP!
Thanks Andrew for watching and commenting!
That was sooo helpful!!
Thank you! Glad it helped! Thanks for watching
Hi, thanks for this great tutorial! What size of the question mark hook do you recommend? Is it enough for 1/2 or should I go to 5/8 or bigger? Thanks!
So a 1/2 in should be fine. You just need to make sure that the threads are drilled deep enough into the house to hold. String lights aren't that heavy. There are those hooks that the threads are only like..1/2 inch long, id say get some that the threads are at least 1 1/4 to 1 3/4 inches long.
@@ColtonCrumpDIY this is noted. thanks so much!
Thanks for this helpful video… I’m curious. Did you place a hook above your light fixture and then you next point was between the end and pillar? Where is your first point and where did your last point end up which is toward your neighbors?
So I just found the center of the wall and identified the places I want to connect, then did the same on the opposite wall but shifted it down so it made a zigzag
Hey, was the one 48' string enough for your space? I'm looking to do the same type of design, and our outdoor spaces look to be similarly sized (roughly 10'x18-20'?). Thanks!
Hey Benjamin. Surprisingly it was enough. I don't have the exact measurements of my back patio on hand but that sounds about the same. And it was nearly perfect. Any excess I had I made sure to swoop a little more to eat up any excess cord. You could even measure from what 1 point to another (on the ground) and see if the pattern you would want works out.
@@ColtonCrumpDIY awesome, thanks for the follow-up!
Did you use an extension chord to attach the lights to the power source? If so, what kind of extension chord?
Hey Carina! So I actually didn't use an extension cord. I measured out the amount of cable I had from the part that plugs into the wall to the first bulb, and considered that height when installing. If you do need an extension cord, I'd highly recommend an outdoor extension cord. They are usually insulated better and have weatherproofing. You can get one at your local hardware store, home depot, or Lowe's
What size drill bit and hooks did you use? I have 1-1/4 inch hooks but no idea how small the drill bit should be?
So I have the hooks in the description and those are 1/4 in thread. I believe I used a 1/8 in bit to start the hole so you still have enough of the threads to dig into the wall you're screwing in to. Hope that helps!
Great video. Did the hooks stay attached to the stucco wall? We have similar stucco wall. Nothing steems to stay on.
Great question! The hooks did stay and they are still pretty secure. So a couple things with stucco. You have your stucco outer layer that is like a fake stone concrete spray stuff. This will crumble as you drill and cut holes in it. Under that you will usually have a backer board, metal mesh made out of aluminum, moisture barriers, then wood. If you get a bit that is smaller your threads of the screw, use that to drill, drill into the wood then use your screw to really dig into the hole, that screw won't go anywhere. If your screw is still loose, I'd maybe recommend a screw anchor made for stucco or similar material.
@@ColtonCrumpDIY Great suggestion. Thank you. Fingers crossed!
Let me know how it turns out! Best of luck
Did you use an extension cord to power the lights ? I see the power plug was hung up top. Please explain
Hey Judy! I did. I used a black 4ft extension cord. This is an example of what I purchased amzn.to/2QZmQZw you'll want to make sure it's an extension cord that can withstand the elements when outside. Depending on how far your outlet is away, you may need a 4ft, 5ft, or 6ft extension.
So i got 3 10ft string lights from target (i know you are using hampton bay here) and it said you could plug in multiple (i think up to 6) strings to use for one wall plug in but I just hung my string lights and only the very first strang that was actually the one plugged into the wall electrical outlet lit up but the remaining strings did not. Any ideas why? Do both ends of the string lights have to be plugged into an outlet? (Each string has a fuse at each end if this makes sense) - please help!
Hey Whitney! So, majority of string lights are setup and act the same way. Even those cheap Christmas lights that you can plug on into the next into the next and there is only 1 that actually plugs into the wall. If you have them all properly plugged into each other, and only one of the 6 stands actually light up, i would check the the fuses, make sure they are good, and then check that each bulb is tight. String lights often depend on the first bulb before it to work. That flow of electricity needs to be complete. Think of it as a chain of electricity. If one bulb isn't working, it may disrupt the flow of current.
I don't want to drill and I don't want to use any adhesive/glue. Your ceiling is like our ceiling. I am thinking I could use some sort of clip on the vinyl ceiling, but am having an issue finding. Any suggestions?
Mm.... that's hard. You could maybe get away with some form of 3m tape and hooks? That's hard without drilling or using an adhesive and having some sort of texture that tape might not fully stick to
Thank you for the guide! I’m going to do this for my gf, but I’m going to measure off the floor and use a laser instead.
Great idea! Best of luck!
Hey when the wire starts the bulbs very close to power source , it means the bulbs will start even before I hang them and it’ll come on the wall vertically too .. what tip can we use here
I am kind of confused by your question. I think I can gather some of what you're saying. The distance from your power source (outdoor outlet) to the point of where you want to hang your lights, ideally, wouldn't have any bulbs or places to screw in a bulb. So what would I recommend to not have bulbs on the wall until you get to the point of wanting to hang it? This is a good question. I ran into this not too long ago. Say I had a string of lights that was 3 ft long and there were 20 bulbs attached. When I hang it, I really only want to have 15 bulbs on. So I just left 5 bulbs out of their sockets and it looks like a black string going up. Sure there are places that look like they are missing the bulbs, but when the string lights are on in the dark, no one cares that it was that way. Does that help?
You could also.... if you wanted, cut the sockets off with wire cutters, where the bulbs go, and re connect the wires that you cut and tape over it with electrical tape.
What kind of drill do you have? I have concrete wall.
So I have a compact hammer drill. It's makita. I have a link to it in the description. When you have a concrete wall, having the hammer ability can be nice, but really the ease of drilling comes at the bit. Get a concrete bit or a masonry bit. You can then add in an anchor and screw in your screw.
How do you suggest I hang my lights if the power point is in the middle of the patio. Not the side
Depending on how big your patio is, I would probably approach that one of two ways. Option A would be get an extension cord that runs from your power source down to the ground/floor, run that left or right then start your string lights like in the video. Option B, get 2 similar lengths of the patio string lights you want just shorter than you would have normally purchased, then divide your patio in half and install one, then the other, and put all of the power sources to connect and plug in the middle
I got the same lights and my cord is really crumpled and won’t swoop so smoothly. Yours seem to fall a lot better. Any fixes there? I can send you a picture
Only thing I would recommend is let it hang for a while to see if that unwrinkles or try twisting the cord the opposite way it's curled to try to straighten it out.
Lol love the added notes! xD
Thanks for the vid!
edit: I'm going to be helping my mom with these same lights. Is there a reason you didn't use the holes above the lights? (seen at 3:57)
Great question. I didn't use those because the thickness of the metal didn't allow for the lights to just hang with those holes. I actually tried and it just looked funny. Often those holes are used when there is a guide wire/cable allowing the lights to actually hang. Best of luck with the lights! It's an easy project. Let me know how they turn out
@@ColtonCrumpDIY oh ok! Thank you! :)
Totes!
@@ColtonCrumpDIY All set up now and they look great! :D thanks for the help!
Awesome! Great work! Thanks again for watching and commenting. :)
Did you add an extension cord to the lights?
I did.
Did you use the little hole associated on each bulb rubber housing..? Or just hung the cable on hook.? That’s why the rubber housing with hole is there , so you won’t stress the electrical cable.
Depended on if the hole aligned with my anchor points then yes. If not then just hooked the cable. I was more concerned with the hook positions and then where the first bulb started with my power cord extension to plug in.
This is where I got in trouble -- I hung the string of lights exactly where I wanted them only to find out when I finally plugged the string in-- in anticipation -- the bulbs didn't light up -- back to Home Depot -- same brand too.
Just like Christmas lights, check em before you hang em. Best of luck on your return!
@@ColtonCrumpDIY Went back to Home Depot -- brought home a new set and nope those didn't work either - returned them and ordered a set on Amazon.
Aww man I'm sorry!!! Amazon coming in to save the day for you! Hopefully you have prime so you get it fast to enjoy your project you completed
@@ColtonCrumpDIY I do. So I ordered a set on Amazon with incandescent light bulbs and they arrived today. I check one light and yes the bulb lit up and I was so happy. So I hung them then I proceeded to screw in the light bulbs and low and behold one socket has been smashed into the box and it was bent so the bulb would not screw. Not wanting to return them I was able to straighten the socket and now I finally have a string of lit bulbs. Love them.
Niiice work! Great job! I'm sure they look awesome
Upto what length do you think would be ok to do without guide wire. I have a 12' distance between the wall and the wooden beam. Planning to mount two sets of these 48' wire bulb sets in a similar zig zag
Vineet, great question. Guide wires are used mainly for support and stability. It all depends on what you are ok with when it comes to the end result. If you want that string light as non saggy, straight tight lined as possible, I would recommend a guide wire to be used between two points so you can tighten it. If you are ok with some sagging and prefer it, you could use a guide wire and tighten it a little bit so you have that support. If the area you are adding string lights to, will be exposed to the elements like wind, i would recommend using one regardless of how much feet are between points. Having a 12 foot space between zip zag points and having some sag is ok with you, then you should be fine. Long answer. Sorry! Hope this helps. Let me know if you have more questions or what you decide.
@@ColtonCrumpDIY thanks for the explanation. I do have the patio covered and so wind and water is not much of a problem. And I was looking for a saggy look so I guess I can skip the guide wire.
Sounds good! Best of luck. Let me know how it turns out!
WHERE DID YOU GET YOUR SLANTED AWNING
IT CAME WITH THE HOUSE. IT'S PART OF THE STRUCTURE OF THE HOME.
Hi what size were your lights in metres pls
My lights are just over 14.5 meters in length
@@ColtonCrumpDIY tysm for your reply 👍
What music was that? Also, surprising enough... you cannot LINK multiple string lights together if it is solar. you have to have multiple solar panels... If this is an aesthetic issue for you then you have to opt for plug-in... Three solar panels it is for me
It was free music off of UA-cam when creating. I can find the exact one if you want. Interesting info about the string lights with solar! Hopefully you get it all figured out! Thanks joseph
What if u don’t have a plug on your balcony but I need light on my balcony
Extension cords. Then it just comes down to cord management and how long of a cord you need to get to the nearest outlet.
Hi Colton! We just had patio string lights installed by a contractor and it looks unusual to us. can I send you a photo for your opinion?
For sure! Send them to my email homesbycandb@gmail.com
Is this light good to leave outdoor in winter
You can as the cord is fairly insulated and is made to be outside. I would suggest that if there is moisture, that you just make sure that the connections to power are sealed and covered and it won't short anything. Especially when it comes to potential freezing.
Bought the exact ones today, put them up and they dont work . 😩
Oh no!! Did you return them? Or even test them in a different outlet to make sure they for sure don't work and it's not the outlet you're using?
The ending was too dark, I couldn't see how yu hung them which was the reason I wanted to watch
Sorry Wendell, I lost sunlight quick and wanted to get it up the same night. I do illuminate them at the end if you watched the whole thing and you see how I hung them. It's really just as easy as taking the cord and hooking them on the hook screws I fastened.
@@ColtonCrumpDIY NP, I got my lights up yesterday and they look great. Thanks for you help.
Awesome! I'm glad to hear you got your lights up and you're happy with it! Thanks for watching!
U just turned something simple to an entire science project. Chill my guy!!!
these lights are too weak for attic, thanks
Why did you do this video in the dark...was really hard to see what you were doing.
Sorry! Tried to get what I could. If you brighten your screen ALL THE WAY UP you can see a little better :)
Point two to point three . Get to the fucking point
You can skip. Double tap or click to fast forward in the video. Or just skip over my videos. I don't mind that either.
Why consider the neighbors for your quality of life? I'm positive they wouldn't have done the same for you. lol.
That's fine if you don't consider your neighbors and assume that they wouldn't do the same. I try to be nice and considerate regardless of how they would treat me. Thanks for watching