Thanks for the clear explanations, it will help me greatly and save me a lot of money in my own pvc sill replacement project. 4 years later and your video is still out there helping people.
These plastic cills can look good. Not a criticism of this chap, but better to leave the exising cill as-is (do not cut off the overhang) and buy the "bullnose" plastic board, it looks much nicer and end-caps are available to finish it neatly. when measuring for your new board, always measure from the window to the front edge of the old wooden window cill and then add on at least 15mm and buy the size nearest to, but not less, than that. This will avoid the gap and negate the need to add a quadrant bead. Cut the board to the full lenght needed and then cut for the reveals. I fit loads of these so maybe I should add a video next time I do a set...
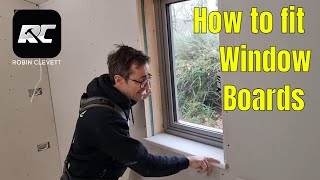
Hi Hammer,only cut the sill from back to front the depth of the old windiw sil. Then cut lengthways to leave the little front pieces to cover the remains of the old sil embedded in the wall.
Prior to 3:30, it looks like you will do a 90 deg cut straight across the piece. At 3:30, the finished cut appears to be installed, but it has a front piece of trim attached. How did that appear? What is it? How did you attach it?
Great video. The only thing that ruins it is you're holding your phone vertically (portrait) when it should be horizontal (landscape ) for videos. On computers there's a massive gap either side and your content looks very small.
It is a shame to cover a natural material with plastic. That architrave will also be an eyesore. I am just about to do the reverse and remove some plastic covers on some window sills.
What a bloody mess this dipshit made ! I would not show myself up putting that crap on you tube ! old sill looked fine to me , time he's pissed about running to the diy shop , could have gave it a coat of paint , been dry in hour !!! NOWT BETTER TO DO I BET !!!


Thanks for the clear explanations, it will help me greatly and save me a lot of money in my own pvc sill replacement project. 4 years later and your video is still out there helping people.
These plastic cills can look good. Not a criticism of this chap, but better to leave the exising cill as-is (do not cut off the overhang) and buy the "bullnose" plastic board, it looks much nicer and end-caps are available to finish it neatly. when measuring for your new board, always measure from the window to the front edge of the old wooden window cill and then add on at least 15mm and buy the size nearest to, but not less, than that. This will avoid the gap and negate the need to add a quadrant bead. Cut the board to the full lenght needed and then cut for the reveals. I fit loads of these so maybe I should add a video next time I do a set...
did you ever do that video?
Thanks for the video mr marshall been a great help, cheers.
You don’t use caulk to stick it down with and certainly not to seal round the edges, caulk goes yellow after a time, always use silicone
Thanks Ray appreciate that video
Thanks, this is exactly what I wanted to know.
Hi Hammer,only cut the sill from back to front the depth of the old windiw sil. Then cut lengthways to leave the little front pieces to cover the remains of the old sil embedded in the wall.
Prior to 3:30, it looks like you will do a 90 deg cut straight across the piece. At 3:30, the finished cut appears to be installed, but it has a front piece of trim attached. How did that appear? What is it? How did you attach it?
Great video. The only thing that ruins it is you're holding your phone vertically (portrait) when it should be horizontal (landscape ) for videos. On computers there's a massive gap either side and your content looks very small.
Caulk isn't a glue it's a flexible filller.
so how much 2ould it ruffly cost to do 2 x4 ft windows 1 X 6ft window.
muchly appreciated
Hi, Where is the best place to buy the sill, surround and beading from? Thanks! 👍
What type of caulk do u use for the gaps?
Thanks that really helpful.
This video was about as much use as Ann Franks drum kit.
It is a shame to cover a natural material with plastic. That architrave will also be an eyesore. I am just about to do the reverse and remove some plastic covers on some window sills.
Bleeding ell ! Had to look again! Awful!! put old one back on , DIY, means ,DON'T INVOLVE YOURSELF !!!
Train wreck of a job
What a bloody mess this dipshit made ! I would not show myself up putting that crap on you tube ! old sill looked fine to me , time he's pissed about running to the diy shop , could have gave it a coat of paint , been dry in hour !!! NOWT BETTER TO DO I BET !!!
Terrible job
Yes a terrible job. Using fascia board that will scratch very easily and not using correct window board.
I really enjoy plans from woodprix.