There is another way. Use the fill all shapes separately. You only used two of the three options. I haven't tested it yet but I believe if you use use that third option you will find you will be able to shave a little more time off.
You don't know what you don't know. For those that know, it is obvious, but for others it is not obvious and valuable knowledge. For future project, I will plan my burns and get back up to 80% of my life. Great information, thank you.
i know, but it was far from obvious. as soon as he started talking about splitting it in 2, it hit me, and i thought, holy shit, this is brilliant. so simple but i had never even considered it before.
@@mrcraftsmith Ah ok. Thanks for the video & sharing your knowledge. I'm also just starting to learn, so was just thinking maybe there was another reason for it. I actually "accidentally" clicked flood-fill in the setting & then realised what a big difference it made to the speed. I really like your idea of engraving / cutting groups together, that really helps reduce time as well. Thanks again.
@@arthureschner9319 I'm pretty sure I have mentioned it in another video possibly - honestly I can't remember - I guess that's what learning is all about - there are 100's of ways to achieve similar outcomes I'm sure and that is what I love about UA-cam as a platform, it gives everyone equal opportunity to share their learnings (wins and losses)
I had just been engraving a compass rose on a tile yesterday and it took 1 hour - and I thought exactly the same thing: why isn't LightBurn smarter and always traverses over the blank middle. By choosing "fill shapes individually" I get down to under 30 minutes. Excellent tip!
I agree Offset fill would be faster, and I did test it, however I was a little uncomfortable with how much the machine was jumping around - seem slie a lot of extra stress on the stepper motors for not a significant gain - with solid shapes happy to run Offset fill though. I may just be erring on the side of caution, who knows for sure, if you are comfortable running your machine like that, no worries :) Thanks for watching
Appreciate you tuning in :) - I did a video showing the offset fill method as well - ua-cam.com/video/qDOiHzl9TEQ/v-deo.html it definitely does work but I reckon there are some instances where it may not be as beneficial - but that may be me just me throwing caution to the wind :)
Great video very helpful. Also while you are only using one layer for demonstration purposes, when it comes to regrouping to let's say 4 quarters of a circle will that work when you have mulitple layers in each quarter that I would regroupe? Thank you.
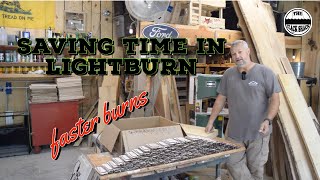
If you look at the image at 9:10 you can see that there is almost no excess traversal time with just the two splits so there wouldn't be any advantage of grouping much smaller. It will depend on each project but generally you are splitting groups to get the most reasonable reduction in travel over white spaces.
@@mrcraftsmith yes you're absolutely right. I've just tried it out myself and it is slower so that information is very very interesting. Thank you very much 👍
@@mrcraftsmith Today I edited my file based on your recommendation and I went from a 5 minute job to a 1 minute job! Thanks so much! Plan on printing about 100 of these things. Not that good with math either 😂but I do know that it's quite a time savings. Thanks again!
Thanks for the tip about breaking them up into layers! I hadn't thought of that, I know it'll help a lot in the future. Some of the other comments in this thread are very helpful too! Sub earned :D


OG Knowledge, you got a subscriber for this one, DONT EVER STOP!!!👍👍👍
Appreciate that Joseph 🙂
Cheers, I’m also new to laser engraving and this is helpful and easy to follow. Will give this a try. Many thanks
Hey Colin - thanks for watching - glad it was helpful - I'm having a blast learning all about what these engravers are capable of.
I just found this. Thanks for the great tips!
You're welcome Charles
Excelent vifdeo & tips. Cheers
You're welcome gareth :)
There is another way. Use the fill all shapes separately. You only used two of the three options. I haven't tested it yet but I believe if you use use that third option you will find you will be able to shave a little more time off.
Thanks Kris - I’ll take a look at that option 🙂
Fill shapes individually, and flood fill will eliminate all white space traversal. I never leave home without this feature.
@@mlarsen77 and the original commenter- thanks for the extra tips! I'll be testing all these settings out later today on my test file :D
Give chaining your Fill to Offset Fill and see what happens.
Hey Charles - thanks for watching - I did a follow up video on exactly that :) ua-cam.com/video/qDOiHzl9TEQ/v-deo.html
You don't know what you don't know. For those that know, it is obvious, but for others it is not obvious and valuable knowledge. For future project, I will plan my burns and get back up to 80% of my life. Great information, thank you.
Hey Edward - you are spot on there - glad it was helpful to you 😀
i know, but it was far from obvious. as soon as he started talking about splitting it in 2, it hit me, and i thought, holy shit, this is brilliant. so simple but i had never even considered it before.
Awesome hay how can you make laser go faster in LightBurn?
Thanks Vincent - I'm not really sure what you mean by the question?
Excellent tip on speed. That's exactly what I needed. Thank you so much for the great class!
Thanks for watching Daniel, glad you found it helpful :)
t h a n k s
you're welcome
Any particular reason why you dont just use flood fill? It seems that would give the same effect, if not even reduce the whitespace even more.
No particular reason Arthur - that was one of my first videos and I was still pretty new to the scene - I was excited to share my findings
@@mrcraftsmith Ah ok. Thanks for the video & sharing your knowledge. I'm also just starting to learn, so was just thinking maybe there was another reason for it. I actually "accidentally" clicked flood-fill in the setting & then realised what a big difference it made to the speed. I really like your idea of engraving / cutting groups together, that really helps reduce time as well. Thanks again.
@@arthureschner9319 I'm pretty sure I have mentioned it in another video possibly - honestly I can't remember - I guess that's what learning is all about - there are 100's of ways to achieve similar outcomes I'm sure and that is what I love about UA-cam as a platform, it gives everyone equal opportunity to share their learnings (wins and losses)
thanks! supercool tricks!
Thanks Gabriel - always learning
Nice video. Have you tried FLOOD FILL? Does the same thing without splitting up the file.
Yes I have tried flood fill and it works on certain situations better than others - simple shapes, no problem :)
This was very helpful! Straightforward and well explained! Definitely appreciated!
Similarly, I appreciate the feedback, glad it was helpful :)
Can the Fill Offset do the same?
it can depending on use case - I cover that in another video
I’m brand new lol
At some point we all were Brenda - enjoy the journey :)
90* scan would be even faster.
I'll have to admit I haven't done much with scan angle
it can make a BIG difference project time. @@mrcraftsmith
good video, way too many comercials.
Thanks David - I have UA-cam premium - no ads :)😀
no thanks. @@mrcraftsmith
I had just been engraving a compass rose on a tile yesterday and it took 1 hour - and I thought exactly the same thing: why isn't LightBurn smarter and always traverses over the blank middle. By choosing "fill shapes individually" I get down to under 30 minutes.
Excellent tip!
That's a great outcome :)
I’ve been looking for a video like this! Thank you so much!!
Thanks for watching Calvin - I’m glad you found it useful 🙂
Brilliant
thank you :)
tq sir
you're welcome
Good tip🎉...
Brilliant use of Lightburn tools! Thanks. You just sold another copy.
glad it was helpful Pony Soldier - it is a great program :)
Thank you again brother! You’re a life saver!! It works!!! 😎👍🏼👍🏼
No problem 👍 glad it was helpful
All your tips are really helpful. I also tried another method called "Offset Fill," the third option, and it also helped reduce the engraving time.
Thanks Sayeed - I think I did a quick video on offset fill as well - but yes it can also reduce engrave time depending on the design
If you did an "Offset Fill" it will reduce the time even more.
I agree Offset fill would be faster, and I did test it, however I was a little uncomfortable with how much the machine was jumping around - seem slie a lot of extra stress on the stepper motors for not a significant gain - with solid shapes happy to run Offset fill though. I may just be erring on the side of caution, who knows for sure, if you are comfortable running your machine like that, no worries :) Thanks for watching
Nice mate! I'm new also. I find that offset-fill helps sometimes. 😉
Appreciate you tuning in :) - I did a video showing the offset fill method as well - ua-cam.com/video/qDOiHzl9TEQ/v-deo.html it definitely does work but I reckon there are some instances where it may not be as beneficial - but that may be me just me throwing caution to the wind :)
To many 26 second adverts you will struggle to get subs with that going on
thanks for the feedback - I'll take that onboard
You could also speed it up by using flat fill
Thanks Colin - I’ll check that out 👍
Great information. Thank you for sharing. Everyone stay safe, warm, happy and healthy. From Henrico County Virginia
G'day Norm - thanks for tuning in - we are travelling at the moment in Europe - much colder (in a nice way) than our summer in Australia 🇦🇺 😀
Fantastic ideas and will have to try on other projects..thank you
Thanks for tuning in - I’m sure the same principles could be applied to more complex engraves for sure 🙂
This is so very usefull to a n00b like me. Thank you!
That's great to hear - thanks for tuning in
Great information and very well explained! Thank you!!
You're welcome William and thanks for taking a look
This is very helpful, I always enjoy your videos. Thank you!
You're welcome - thanks for your support
how can I get this file test for D1pro 20w Thanks in advance
I made it myself in photoshop - do you have access to that or similar - you can google greyscale test and you should find plenty of examples 🙂
Great video very helpful. Also while you are only using one layer for demonstration purposes, when it comes to regrouping to let's say 4 quarters of a circle will that work when you have mulitple layers in each quarter that I would regroupe? Thank you.
the best way to check if that is the case would be to view the preview it will give you a run though how it is going to traverse
If you look at the image at 9:10 you can see that there is almost no excess traversal time with just the two splits so there wouldn't be any advantage of grouping much smaller. It will depend on each project but generally you are splitting groups to get the most reasonable reduction in travel over white spaces.
This is excellent ! Thank you very much for this !
You're welcome Steve - thanks for watching
Darren , you are now on my xmas card list !!!! lol
That's awesome - glad you enjoyed the video
Excellent information! Thank you so much!!
Glad it was helpful!
Thanks Mate you are a life saver !
No worries Peter - glad it was helpful
Thanks so much for the info! I hope to take advantage of it soon
Thanks for watching Bob
I would like a tutorial for the latest version of Lightburn software
I am away till end of January- however what specifically do you want the tutorial on?
This will help a lot, thank you and another subscriber here.
Thanks for watching Jerry - appreciate the sub 🙂
oh dam this is a great video.. dam
Thanks Ken - appreciate the feedback
Flood fill is your best bet just a simple click
Thanks for watching - I tested flood fill and was 3 minutes slower.
شكرا جزيلا لك !
You're welcome 🙂
Excellent video. Thank you very much!
Thanks for watching 🙂
Such an excellent Video
Thanks Nathan - appreciate the thumbs up :)
Saved my butt! TY!
glad it was helpful for you - thanks for watching
Flood fill
Thanks for watching - flood fill is a bit slower, however I may be doing it wrong?
@@mrcraftsmith yes you're absolutely right. I've just tried it out myself and it is slower so that information is very very interesting. Thank you very much 👍
@@colinlee7089 I just tried FLOOD FILL and it cut my times on my current job by 25%. I think it depends on the image
What fantastic information! Thank you!
You're welcome Chris 🙂
@@mrcraftsmith Today I edited my file based on your recommendation and I went from a 5 minute job to a 1 minute job! Thanks so much! Plan on printing about 100 of these things. Not that good with math either 😂but I do know that it's quite a time savings. Thanks again!
That's a great outcome Chris 👍
Thanks for the tip about breaking them up into layers! I hadn't thought of that, I know it'll help a lot in the future. Some of the other comments in this thread are very helpful too! Sub earned :D
I appreciate you tuning in and thanks for the sub 🙏
Please, can you enclose the file?
can you be more specific - which file?
@@mrcraftsmith files used in the video
nice one Darren :)
Thanks Chris :)
The program should be written to give you choices to reduce burn time. Some may not fit your needs, some might. Get on it programers.
Hey Jake - the program does give you choices - i guess you just have to know what those choices are :)
help i have longer ray5 10w when i start up lightburn up the squares are 1/4in how can i resize it smaller
If you go into Lightburn settings, on the right hand side you will see "visual grid spacing" you can change the distance there
Game changer
Excellent- thanks for watching 🙂
cheers
You’re welcome George
Thank you 🙂
You’re welcome Annabel and thanks for tuning in 😀
Thank you for this ❤
Not a problem
Good stuff!!
Glad you enjoyed it