All photos edited with my Lightroom Preset Packs which you can find here: www.digitalfilmactions.com/lightroom-presets#/new-amalfi-lightroom-preset/ Thank you so much for watching!
0:31 lens might be dirty 1:14 filters might be affecting focus 2:00 lens just not that sharp, especially if vintage 3:55 aperture, f-stop too low 5:34 camera motion blur 7:08 subject motion blur 7:53 focal length affecting motion blur 8:41 the focus settings might not be right for the scene
2:52 Most lenses are sharpest between f11 and f8 and in some rare cases f5.6. When she's babbling about f2.8 and f2 to achieve sharpness she unveils how completely clueless she is.
@@UA-cam_Stole_My_Handle_Too No, not really and you did not watched video carefully or just focused on first half of the sentence. Julia is talking about using f/2.0 or f/2.8 over wider apertures (like f/1.8 or f/1.4) because lenses are sharper and have wider focus range WHILE it still offers nice out of focus background, not making everything in focus and, in result, "flat" photo.
@@Stasiek_Zabojca Your explanation isn't the least satisfying. Things usually begin to happen from f8 through f11. If sharpness is needed background blur can only be achieved in post. And no, I don't watch the whole video after a fatality early on. There's a limit to my patience with clueless and stupid.
Had to come on here to say that I used these tips for a client shoot this week and the photos came out INCREDIBLE. May be my best portraits I've ever taken. The bokeh you get from these settings is buttery smooth and everything looks beautiful.
it's pretty iffy if you're taking money for photos and you needed a you tube video to sharpen up your images, so before this you've been taking money for sub par images
You make learning about photography really accessible and easy to understand. I really appreciate your ability to show examples in your videos. Thank you!
I’m really excited to dive deeper into this video. My images are almost always sliiighly out of focus or grainy (even with a low ISO) and it was driving me crazy
Hello, Julia, I am Radmila, from Latvia (Europe) wow, I am so glad that I found you! I just bought a camera and already learned so much from your video. And I like your style as well. Thank you for your job.
That sounds like a highly informative video! Getting sharp photos is such an important aspect of photography, and it's great that there's content out there addressing common challenges. Learning about the factors that affect sharpness can really take someone's photography skills to the next level. Whether it's about understanding camera settings, mastering focus techniques, or even exploring how lighting can impact clarity, there's always something new and exciting to discover in the world of photography! 📸✨
2 роки тому+40
There are 2 more reasons why photos becomes blurry: 1. using optical stabilization, 2. not using optical stabilization :-) 1. When camera is mounted on tripod - always turn off optical stabilization. Otherwise built-in stabilization into camera (eg used by me Sony A7RIV) will slightly shift the sensor. If long exposure is used together with long focal length - taken picture will become completely blurred. This is why old Sony A99 has built in tripod detection and automatically can turn off stabilization. The most modern A7RIV can't do it. Amazing! Isn't it? 2. When camera is hand held always use optical stabilization. Long exposure times and long focal lengths are your enemy. Good quality optical stabilization results sharp pictures even if exposure time is 4-stops longer.
Thanks for the tips. I have slight hand tremors and have upped my shutter speed but apparently not enough from what you are saying. I didn't know about the telephoto rule either. Your video explained a lot. Thanks
If the image is out of focus that means you have AF on. Turn it off and step down a few f's. Read up on the depth of field checker as well. You will LOVE it. My Linhof has one on the lens. I recommend Leitz lenses.
wow, i am totally blown away with the level of detail, not only in the photos shown, but your explanation and the information!! ive just bought a used panasonic Lumix DMC TZ80/ZS60 travel zoom camera as i want to get into photography, and i have found that the majority of my photos have a level of blur or distortion to them, and i really want to move away from setting the dial to auto and just snapping away. i will watch this video over a few times more in the coming days, so i can hopefully prepare myself with knowledge for when the weekend arrives and i head out (hopefully with the tripod i have ordered) to some local places to get some photos taken. thank you for taking the time to put this video together to help people like me! love from the UK!
Thanks for reminding me of some things and teaching me a couple new things. As a 70 year old with slight hand tremors I have been upping the shutter speed but apparently not enough. 😀
I've found that a UV filter sometimes with backlight can have white or grayish circle. This comes from light bouncing around. It's the main reason I no longer use them. But sometimes there is a good reason to use them. To protect you lens from tgr elements.
my dad just recently bought me a new sony a6600 and I was soo frustrated when my images were coming up a bit blurry and grainy compared to his old nikon d5200 this helped alot
I haven't done watching the video but I saw your comment and had to reply. I once had that situation and turns out my viewfinder itself is out of focus lol do look up on how to adjust your viewfinder and then check to see if it's already in focus!
@@saltedjellyfish Do you mean the diopter adjustment? When the camera automatically focuses the diopter has nothing to do with it. On some Canon cameras there is a micro adjustment setting but that's mostly for back/front focus. It's said that in live view it forgo the viewfinder setting and deals directly with the sensor on dSLR. I find that in mirrorless cameras it focuses without problems. When I use a Canon L lens on both the mirrorless and dSLR the mirroless images are shaper. I guess the mirror slap might be affecting the images?
@@kanehi3275 I was. Oh sorry I thought you meant the photo isn't as sharp when u manually focus through viewfinder. Just realized you wrote auto focus. Yea agree, it shouldn't differ
@@saltedjellyfish Sometimes I will use manual focus when the camera is "hunting" to focus. Canon cameras tend to have difficulty focusing in low contrast settings. One point focusing seems to help.
Great thoughts. These are basics though. After doing these, editing with edge and high frequency brightness and colour contrast adds tons of sharpness.
SO! HELPFUL! Ive been shooting portraits & keep thinking Im getting the settings right, but I still have an eye in focus & blurry nose and other eye, and its making me CRAZY! Thank you! (subscribed) ;)
I use crop bodies and full frame. Due to sensor limitations in lower light, the apsc sensor tries to bump iso leading to noise, or lengthen shutter speed leading to subject motion blur, even with “wide aperture“ APSC f1.4 lenses. I find I either have to increase ambient light, add a flash, or stick to full frame wider aperture lenses in more challenging light. Harder to push limits with crop system.
Thank you so much for sharing, lots of useful information explained simply and easy to put into practice. It looks like you have a lot of fun naking the videos as well. Thanks for sharing!
Thank you, Julia. I have resorted to "Auto" for stills and the Olympus does take good Bokeh shots in that mode. However, I will see if my OMD EM 2 Mk 3 has Continuous Autofocus. That was the most important thing I learnt just now. (I aim to better use the Oly for video, but I am learning that skills in stills shooting will cover most of the problems). Bluey Quilty, MA AUSTRALIAN HERITAGE QUANTA
Thank you for these tips. I am a newer photographer and just bought a new Sony A7R III. I will be keeping this video in mind and I do my photo shoots. What would be your number one tip for someone starting out in photography?
Content suggestion: I've got my first digital camera. I have experience shooting completely manual with film. Searching beginner videos for digital photography that isn't just photography fundamentals is pretty difficult. I'm reading the user manual but I like being entertained 😅.
Julia Im watching ur video for a while. You are superb in ur presentation, content timing etc. Not to forget ur pretty smile and excellent camera work with models.
After watching this, all I want to do is photograph Julia :) So pretty and super presentation style! I promise I will be a good student and take super sharp pics :)
Great content. Good to hear the Sydney accent. It’s amazing how you can still get negative comments with pretty informative non-controversial videos. I’ll be saving your channel for our schools photography course for next year. Keep up the good work.
I love your channel... all clear & nice english, easy to understand around all world... and finally great photographer with open mind, good luck and keep sharing your knowledge... thx!
Thank you for the tips! That was really cool to see the shot from Half Dome! I have a shot from that same exact spot except I shot the reflection off the water and then rotated it to the proper orientation. Keep up the great work and you've gained another follower, Cheers.
You are my absolute favorite photographer and youtuber. Your videos are always so informative and detailed. I know you do a lot of outdoor work, but do you do any studio work? If so, can you do a studio video with lighting? I do both but in this Florida heat the summertime are mainly studio sessions and I would love some tips and tricks! Thank you :)
Thank you!! I have a few studio photoshoots up on my UA-cam channel already :D You can try checking out: GM 70-200mm f2.8 mkII Review, Tamron 18-300mm review, iPhone 13 Pro max review, some of my self portrait sessions and my latest one which is titled Macro Lens Portrait Photography. I hope that helps!
I turn sharpness down to -4 on all my in-camera settings. The last thing I want is a digital looking photo. Maybe it’s a fujifilm thing, and of course it’s subjective and depends on what you’re going for, but if you look at the work of most photographers that shoot models, there is always an effort to get rid of sharpness. Big difference between taking a blurry photo and a lack of sharpness.
I use a cinesoft filter sometimes and I like the effect of non sharp image, but sometimes super sharp is nice too: sigma lenses, 3.5-5.6f and good light
That's an interesting point. Especially as in 2022 black mist filters are becoming very popular to give folks just THAT look that you are describing above. Thanks for making your points. It's not just s Fuji thing in my opinion.
@@hazard3020 yes definitly its not just a Fuji thing, but I think in my Lumix -1 or -1.5 its enough to not create that digital look. But I prefere the Pro Mist effect tbh
I agree it really depends what you're going for! Sometimes I love really sharp looking photos and sometimes I use vintage lenses or a pro mist filter for a softer look.
Hi Julia, A quick question pls, Since you’ve used both Canon & Sony. Which one would you prefer & recommend to someone who is getting into the mirrorless system
I loved the video, but just have a counter-point about vintage lenses not being sharp "because they weren't designed for high-resolution cameras". This isn't true. Many old, cheap lenses are just poor, but if you get a good quality vintage lens, like a classic Nikon prime, they will still take incredible images. Glass is glass and doesn't change. Coatings and tech advancements like autofocus and stabilization change, but not glass itself. Nikon still makes the manual-focus 50mm f/1.2 because it is an incredible lens and people still buy it. They still make it the same as they did when they started producing it in 1981. That lens is pretty expensive to buy new, but in case your followers are interested, check out some of these lenses if you want a good quality lens with incredible rendition, micro-contrast or that are just really fun to use. They will give you all the optical quality of a high-end modern lens, just without the autofocus. They also adapt nicely to Sony/Fuji etc with a cheap Nikon F mount adapter: Nikon Nikkor 105mm f/2.5 (This is the lens that was used to shoot the famous 'Afghan Girl' photograph - it is an INCREDIBLE lens) Nikon Nikkor 135mm f/2.8 (Very similar to the above lens - again, incredible!) Nikon Nikkor 180mm f/2.8 (Again, very similar but with a longer focal length) Nikon Nikkor 200mm f/4 (Once again, a great, sharp lens with amazing micro-contrast) All of those lenses above will take incredible portraits and will be mind blowing for both colour and B&W. Nikon Series E 50mm f/1.8 - This is a fun little pancake lens, light, easy to pack and great for travel & street photography. Not the sharpest lens in the world, but it is plenty sharp and a lot of fun to use. Nikon Nikkor 28mm f/2.8 - Fantastic little wide-angle lens. Produces lovely colours and has really nice levels of sharpness for such a wide lens. Helios 44m, Helios 44m-4 and Helios 44-2 - All of these are cheap, 58mm f/2 lenses. They have a cult following for the amazing bokeh they produce and, in my experience, are reasonably sharp too. Due to them being old Russian lenses and not exactly having the best reputation for quality control, I've heard it's possible to get a bad copy of these lenses that won't be as sharp, but my 44m is brilliant. In any case, you can pick these up for around $20 so it's worth risk just for fun! You'll love playing around with it. I know of more great vintage lenses, so if anyone has any specific requests about a good lens for a certain job or focal length, feel free to ask. All of the lenses listed can usually be found on eBay for $180 or less and can be an absolute game changer for a photographer on a budget.
Depends on what kind of camera you are using. Older DSLRs would often be used with single shot to increase hit rate. New mirror less cameras are best used in continues focus all the time. The only reason why you would switch to single shot is when it gets really dark as single shot will male it easier for the camera to find a correct focus. For everything else it’s continues focus all the way, especially for all the new focus features.
Thanks! Like I mentioned in the video, if I am handholding my camera then I will just leave it on continuous AF for group shots. Getting big groups of people in focus is more about what aperture you choose and how you position the group for the photo
Smiling continuously when you are talking is really strange and inauthentic. Breaking out a 10/10 smile when talking about cleaning a filter is weird. You are absolutely stunning. Please don’t feel you need to smile to be in front of a camera and listened to. You don’t even need to smile once if you don’t feel it. Thank you for your videos. I’m not a troll. I support your work Thank you 🖤
Thanks, I'm having an issue with a Nikkor 50mm 1.8 G for some reason my photos look soft I have tried the aperture but I still can't seem to get a sharp image unless I am too far away from my subject that may be the reason.
That should be a super-duper sharp lens. All lenses should focus to infinity, but all lenses have a minimum focus distance (focal plane to subject - the focal plane should be marked on the camera body). The aperture has no effect on this limit. The minimum focus distance for your lens is 17.8 inches. That number is cast in concrete. If you want to get closer, use a wide angle (28 or 35mm), or better yet, step up to a Micro Nikkor. If your camera can use manual focus lenses, then the 55mm f2.8 AIS lens is best because it can be stacked on PF rings and reversed for realllly close up work.
My Canon T7 has AI Servo and I have never used AI Servo before as my previous camera was a Canon 5D mark iii. I mainly shoot still life but I want to experiment and branch out in moving subject photos like birds etc.
Great video! Can I ask you a couple of questions about mirrorless cameras? I'm just upgrading from an old Canon 7d (which I still love!). I'm starting to write travel articles again and sell freelance articles. I need a good second-hand camera on a budget. I have a Tamron 17-50mm, f2.8 which I think will fit a Sony? Do you think a Sony a7iii second-hand camera would serve me for a few years...to do professional photography and some top quality filming (4k etc?). Cheers!
Everything well explained, and demonstrated, only getting into photography due to high-end drones having awesome camra's. Needed to learn this stuff personally. Thanks for taking the time to make this great educational video.


All photos edited with my Lightroom Preset Packs which you can find here: www.digitalfilmactions.com/lightroom-presets#/new-amalfi-lightroom-preset/
Thank you so much for watching!
0:31 lens
might be dirty
1:14 filters might be affecting focus
2:00 lens just not that sharp, especially if vintage
3:55 aperture, f-stop too low
5:34 camera motion blur
7:08 subject motion blur
7:53 focal length affecting motion blur
8:41 the focus settings might not be right for the scene
haha, just exited.
2:52 Most lenses are sharpest between f11 and f8 and in some rare cases f5.6. When she's babbling about f2.8 and f2 to achieve sharpness she unveils how completely clueless she is.
@@UA-cam_Stole_My_Handle_Too No, not really and you did not watched video carefully or just focused on first half of the sentence. Julia is talking about using f/2.0 or f/2.8 over wider apertures (like f/1.8 or f/1.4) because lenses are sharper and have wider focus range WHILE it still offers nice out of focus background, not making everything in focus and, in result, "flat" photo.
@@Stasiek_Zabojca
Your explanation isn't the least satisfying. Things usually begin to happen from f8 through f11. If sharpness is needed background blur can only be achieved in post. And no, I don't watch the whole video after a fatality early on. There's a limit to my patience with clueless and stupid.
@@Stasiek_Zabojca Yes this is what I am talking about if they bothered to listen to the entire sentence ;)
Had to come on here to say that I used these tips for a client shoot this week and the photos came out INCREDIBLE. May be my best portraits I've ever taken. The bokeh you get from these settings is buttery smooth and everything looks beautiful.
That's awesome to hear! Glad you enjoyed :D
it's pretty iffy if you're taking money for photos and you needed a you tube video to sharpen up your images, so before this you've been taking money for sub par images
You make learning about photography really accessible and easy to understand. I really appreciate your ability to show examples in your videos. Thank you!
I'm an non-English speaker and I really like your explanations. So easy to understand, clear pronunciation, and I don't need to use the caption.
Thank you!
I’m really excited to dive deeper into this video. My images are almost always sliiighly out of focus or grainy (even with a low ISO) and it was driving me crazy
Hello, Julia, I am Radmila, from Latvia (Europe) wow, I am so glad that I found you! I just bought a camera and already learned so much from your video. And I like your style as well. Thank you for your job.
That sounds like a highly informative video! Getting sharp photos is such an important aspect of photography, and it's great that there's content out there addressing common challenges. Learning about the factors that affect sharpness can really take someone's photography skills to the next level. Whether it's about understanding camera settings, mastering focus techniques, or even exploring how lighting can impact clarity, there's always something new and exciting to discover in the world of photography! 📸✨
There are 2 more reasons why photos becomes blurry: 1. using optical stabilization, 2. not using optical stabilization :-)
1. When camera is mounted on tripod - always turn off optical stabilization. Otherwise built-in stabilization into camera (eg used by me Sony A7RIV) will slightly shift the sensor. If long exposure is used together with long focal length - taken picture will become completely blurred. This is why old Sony A99 has built in tripod detection and automatically can turn off stabilization. The most modern A7RIV can't do it. Amazing! Isn't it?
2. When camera is hand held always use optical stabilization. Long exposure times and long focal lengths are your enemy. Good quality optical stabilization results sharp pictures even if exposure time is 4-stops longer.
Thanks for the tips. I have slight hand tremors and have upped my shutter speed but apparently not enough from what you are saying. I didn't know about the telephoto rule either. Your video explained a lot. Thanks
If the image is out of focus that means you have AF on. Turn it off and step down a few f's. Read up on the depth of field checker as well. You will LOVE it. My Linhof has one on the lens. I recommend Leitz lenses.
wow, i am totally blown away with the level of detail, not only in the photos shown, but your explanation and the information!! ive just bought a used panasonic Lumix DMC TZ80/ZS60 travel zoom camera as i want to get into photography, and i have found that the majority of my photos have a level of blur or distortion to them, and i really want to move away from setting the dial to auto and just snapping away. i will watch this video over a few times more in the coming days, so i can hopefully prepare myself with knowledge for when the weekend arrives and i head out (hopefully with the tripod i have ordered) to some local places to get some photos taken. thank you for taking the time to put this video together to help people like me! love from the UK!
Came here randomly, just want to tell you that your way of speaking and smile is simply awesome....
Thanks for reminding me of some things and teaching me a couple new things. As a 70 year old with slight hand tremors I have been upping the shutter speed but apparently not enough. 😀
Excellent advice! My colleagues who shoot red carpet with me suggested continuous focus. I started using it and with great results. Thanks again.
I've found that a UV filter sometimes with backlight can have white or grayish circle. This comes from light bouncing around. It's the main reason I no longer use them.
But sometimes there is a good reason to use them. To protect you lens from tgr elements.
Ahhhh Indiarose-Thomas, one of my favourite models to photograph. Nice video. Love your contents. Cheers
my dad just recently bought me a new sony a6600 and I was soo frustrated when my images were coming up a bit blurry and grainy compared to his old nikon d5200 this helped alot
Good points, thanks. Sometimes I find auto focus thru the viewfinder isn't as sharp as live view.
I haven't done watching the video but I saw your comment and had to reply. I once had that situation and turns out my viewfinder itself is out of focus lol do look up on how to adjust your viewfinder and then check to see if it's already in focus!
@@saltedjellyfish Do you mean the diopter adjustment? When the camera automatically focuses the diopter has nothing to do with it. On some Canon cameras there is a micro adjustment setting but that's mostly for back/front focus. It's said that in live view it forgo the viewfinder setting and deals directly with the sensor on dSLR. I find that in mirrorless cameras it focuses without problems. When I use a Canon L lens on both the mirrorless and dSLR the mirroless images are shaper. I guess the mirror slap might be affecting the images?
@@kanehi3275 I was. Oh sorry I thought you meant the photo isn't as sharp when u manually focus through viewfinder. Just realized you wrote auto focus. Yea agree, it shouldn't differ
@@saltedjellyfish Sometimes I will use manual focus when the camera is "hunting" to focus. Canon cameras tend to have difficulty focusing in low contrast settings. One point focusing seems to help.
Great thoughts. These are basics though. After doing these, editing with edge and high frequency brightness and colour contrast adds tons of sharpness.
God, when it came to that 135mm part, I fell in love all over again 😍
Also, on Nikon cameras it's also called continuous AF (and single AF)
I love her accent… “shaapa” “capchaa” “chapness” “shap” “auta focas” “na da shap” don’t take it the wrong way, it’s cute 😂
Down bad 😂
@@MattWoulph down bad? What does that mean lol
Don't get out much?
Bruh 😏💕
absolutely perfect for my ears... pilsen, czech rep, middle europe... to be honest, many britain and us speakers are hard to understand by foreign...
I really love all of your video's very clear and easy to understand! Do you ever make videos with Fuji cameras?
Very helpful video with some simple common sense bits that even some of us shooting for awhile forget about.
I bought Nikon z7ii but I don't know how to use manual mode . Now I am learning from your videos. 🙂
Okay the second film one is so gorgeous!!!! I’m obsessed with that photo
Thank you!! I am working on a whole behind the scenes video with those photos, can't wait to share it.
What a pleasant personality! you're a good teacher..
Thanks Julia, I feel your channel will help my photography.
SO! HELPFUL! Ive been shooting portraits & keep thinking Im getting the settings right, but I still have an eye in focus & blurry nose and other eye, and its making me CRAZY! Thank you! (subscribed) ;)
Aghhhh. The last tip kills me. As a noob I had no idea about those AI Servo settings. So much to learn. Thank you
Glad you found this helpful!
You and your voice is so sweet feel like hearing repeatedly
This was so incredibly helpful. Thank you for your hard work!
I'm mesmerized by you and i can just sit and watch you talk without blinking it's crazy haha but tks so much about your experience shared !
I use crop bodies and full frame. Due to sensor limitations in lower light, the apsc sensor tries to bump iso leading to noise, or lengthen shutter speed leading to subject motion blur, even with “wide aperture“ APSC f1.4 lenses. I find I either have to increase ambient light, add a flash, or stick to full frame wider aperture lenses in more challenging light. Harder to push limits with crop system.
Thank you so much for sharing, lots of useful information explained simply and easy to put into practice. It looks like you have a lot of fun naking the videos as well. Thanks for sharing!
She can explain it so well! Thank you so much! I love learning from you and your accent is awesome! 😁
Thank you, Julia. I have resorted to "Auto" for stills and the Olympus does take good Bokeh shots in that mode. However, I will see if my OMD EM 2 Mk 3 has Continuous Autofocus. That was the most important thing I learnt just now.
(I aim to better use the Oly for video, but I am learning that skills in stills shooting will cover most of the problems).
Bluey Quilty, MA AUSTRALIAN HERITAGE QUANTA
So great!!!
This works. Recommended to try this out. Thanks a lot for your help
Thank you so much for your free advice, I'm just abt to start rekindling my love for photography and this is very helpful! All your videos!
Your voice is so nice to listen to! Thank you for this information :)
Thank you for these tips. I am a newer photographer and just bought a new Sony A7R III. I will be keeping this video in mind and I do my photo shoots. What would be your number one tip for someone starting out in photography?
SO helpful for absolute beginners like me!! Instant subscription earned, well done Julia! 🤗
Glad it was helpful!
Content suggestion: I've got my first digital camera. I have experience shooting completely manual with film. Searching beginner videos for digital photography that isn't just photography fundamentals is pretty difficult.
I'm reading the user manual but I like being entertained 😅.
Once you know the operational bits of your camera, stop looking at beginner videos?
This is by far the most in depth video I've seen on the subject of not so sharp photos.
Thought this was an instant subscribe and just when I was about to do just that, I found out that I am already a subscriber. Nice.
Also, Applying tension to the neck strap dampens camera movement in at least one direction, sorta the way a monopod does.
thanks for the tips! found a few gold nuggets in this vid :)
Great reasons to be thinking about. Thank you!!
Hey Julia, thanks for the video it’s really useful for me and I learned so much more from this video
This was so helpful! One of the best videos on the subject. Thank you!
you for the excellent tips Thanks
Another great video Julia!
She is very knowledgeable. Thanks a bunch for the video!
Your appearance and presentation is amazing
Amazing! Thank you so much for sharing those tips!
Thank you. You are truly a pleasure to listen to and learn from. Looking forward to seeing more from you.
Julia Im watching ur video for a while. You are superb in ur presentation, content timing etc. Not to forget ur pretty smile and excellent camera work with models.
This video was so helpful!! Thank you so much for sharing ❤🫶
Nice work, Julia 👍
After watching this, all I want to do is photograph Julia :) So pretty and super presentation style! I promise I will be a good student and take super sharp pics :)
Great content. Good to hear the Sydney accent. It’s amazing how you can still get negative comments with pretty informative non-controversial videos.
I’ll be saving your channel for our schools photography course for next year. Keep up the good work.
Thank you so much . The way you’ve explained has been more than helpful! I appreciate your style and explanation
I love your channel... all clear & nice english, easy to understand around all world... and finally great photographer with open mind, good luck and keep sharing your knowledge... thx!
Thank you for the tips! That was really cool to see the shot from Half Dome! I have a shot from that same exact spot except I shot the reflection off the water and then rotated it to the proper orientation. Keep up the great work and you've gained another follower, Cheers.
Thanks for explaining this. I am going to try what you said.
simple but very helpful, thanks!!
You are my absolute favorite photographer and youtuber. Your videos are always so informative and detailed. I know you do a lot of outdoor work, but do you do any studio work? If so, can you do a studio video with lighting? I do both but in this Florida heat the summertime are mainly studio sessions and I would love some tips and tricks! Thank you :)
Thank you!! I have a few studio photoshoots up on my UA-cam channel already :D You can try checking out: GM 70-200mm f2.8 mkII Review, Tamron 18-300mm review, iPhone 13 Pro max review, some of my self portrait sessions and my latest one which is titled Macro Lens Portrait Photography. I hope that helps!
Simply Superb KNOWLEDGEABLE Video
I turn sharpness down to -4 on all
my in-camera settings. The last thing I want is a digital looking photo. Maybe it’s a fujifilm thing, and of course it’s subjective and depends on what you’re going for, but if you look at the work of most photographers that shoot models, there is always an effort to get rid of sharpness. Big difference between taking a blurry photo and a lack of sharpness.
I use a cinesoft filter sometimes and I like the effect of non sharp image, but sometimes super sharp is nice too: sigma lenses, 3.5-5.6f and good light
That's an interesting point. Especially as in 2022 black mist filters are becoming very popular to give folks just THAT look that you are describing above. Thanks for making your points. It's not just s Fuji thing in my opinion.
@@hazard3020 yes definitly its not just a Fuji thing, but I think in my Lumix -1 or -1.5 its enough to not create that digital look. But I prefere the Pro Mist effect tbh
I agree it really depends what you're going for! Sometimes I love really sharp looking photos and sometimes I use vintage lenses or a pro mist filter for a softer look.
Wouldn’t turning the sharpness down in camera only effect the jpeg’s? The raw files would not be influenced.
Hi Julia,
A quick question pls, Since you’ve used both Canon & Sony. Which one would you prefer & recommend to someone who is getting into the mirrorless system
Thanks for sharing, I took shaper photos after watching this video. Love South Africa
Love your advice and your smile .thanks
I loved the video, but just have a counter-point about vintage lenses not being sharp "because they weren't designed for high-resolution cameras". This isn't true. Many old, cheap lenses are just poor, but if you get a good quality vintage lens, like a classic Nikon prime, they will still take incredible images. Glass is glass and doesn't change. Coatings and tech advancements like autofocus and stabilization change, but not glass itself. Nikon still makes the manual-focus 50mm f/1.2 because it is an incredible lens and people still buy it. They still make it the same as they did when they started producing it in 1981. That lens is pretty expensive to buy new, but in case your followers are interested, check out some of these lenses if you want a good quality lens with incredible rendition, micro-contrast or that are just really fun to use. They will give you all the optical quality of a high-end modern lens, just without the autofocus. They also adapt nicely to Sony/Fuji etc with a cheap Nikon F mount adapter:
Nikon Nikkor 105mm f/2.5 (This is the lens that was used to shoot the famous 'Afghan Girl' photograph - it is an INCREDIBLE lens)
Nikon Nikkor 135mm f/2.8 (Very similar to the above lens - again, incredible!)
Nikon Nikkor 180mm f/2.8 (Again, very similar but with a longer focal length)
Nikon Nikkor 200mm f/4 (Once again, a great, sharp lens with amazing micro-contrast)
All of those lenses above will take incredible portraits and will be mind blowing for both colour and B&W.
Nikon Series E 50mm f/1.8 - This is a fun little pancake lens, light, easy to pack and great for travel & street photography. Not the sharpest lens in the world, but it is plenty sharp and a lot of fun to use.
Nikon Nikkor 28mm f/2.8 - Fantastic little wide-angle lens. Produces lovely colours and has really nice levels of sharpness for such a wide lens.
Helios 44m, Helios 44m-4 and Helios 44-2 - All of these are cheap, 58mm f/2 lenses. They have a cult following for the amazing bokeh they produce and, in my experience, are reasonably sharp too. Due to them being old Russian lenses and not exactly having the best reputation for quality control, I've heard it's possible to get a bad copy of these lenses that won't be as sharp, but my 44m is brilliant. In any case, you can pick these up for around $20 so it's worth risk just for fun! You'll love playing around with it.
I know of more great vintage lenses, so if anyone has any specific requests about a good lens for a certain job or focal length, feel free to ask. All of the lenses listed can usually be found on eBay for $180 or less and can be an absolute game changer for a photographer on a budget.
Great tips! When it comes to shooting big parties like a family wedding portrait, would you use single shot or continuous focus?
Depends on what kind of camera you are using. Older DSLRs would often be used with single shot to increase hit rate. New mirror less cameras are best used in continues focus all the time. The only reason why you would switch to single shot is when it gets really dark as single shot will male it easier for the camera to find a correct focus. For everything else it’s continues focus all the way, especially for all the new focus features.
@@Seitenwerk I have an a7iii. Thanks for the tips
Thanks! Like I mentioned in the video, if I am handholding my camera then I will just leave it on continuous AF for group shots. Getting big groups of people in focus is more about what aperture you choose and how you position the group for the photo
Thank you, Julia! I’ll try to photograph in continuous. All the photographers that I spoke told me to photograph only in One shot 🤷🏻♀️
Woow nice presentation.. want to become a good photographer like you
Like 2 minutes in and you've solved the issues I was having. I didn't realize that box for showing what was going on was there, I didn't
Smiling continuously when you are talking is really strange and inauthentic.
Breaking out a 10/10 smile when talking about cleaning a filter is weird.
You are absolutely stunning.
Please don’t feel you need to smile to be in front of a camera and listened to.
You don’t even need to smile once if you don’t feel it.
Thank you for your videos.
I’m not a troll.
I support your work
Thank you
🖤
thank for all information you share
Thanks, I'm having an issue with a Nikkor 50mm 1.8 G for some reason my photos look soft I have tried the aperture but I still can't seem to get a sharp image unless I am too far away from my subject that may be the reason.
That should be a super-duper sharp lens. All lenses should focus to infinity, but all lenses have a minimum focus distance (focal plane to subject - the focal plane should be marked on the camera body). The aperture has no effect on this limit. The minimum focus distance for your lens is 17.8 inches. That number is cast in concrete. If you want to get closer, use a wide angle (28 or 35mm), or better yet, step up to a Micro Nikkor. If your camera can use manual focus lenses, then the 55mm f2.8 AIS lens is best because it can be stacked on PF rings and reversed for realllly close up work.
My Canon T7 has AI Servo and I have never used AI Servo before as my previous camera was a Canon 5D mark iii. I mainly shoot still life but I want to experiment and branch out in moving subject photos like birds etc.
Love your content and the knowledge you impart
This was very helpful. Thank you!
Thank you so much for your calm and detailed sample explanations.
How do you change to continuous af in canon camera?! :) Love your videos, you’ve helped me so much learn photography!
what about apsc sensor camera does the rule of thumb apply the double the shutter speed?
Very helpful! I like videos like these who uses real examples instead of just explaining in words! ❤
My problem is that my photos are sharp on my camera but as soon as i download them on my phone or computer the quality is a lot worse
same with me!
Same with me
Thanks you so much Julia for your video.
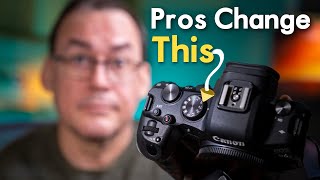
Julia, what is that monitor attached to your camera at the ~8:35 mark? And what is the purpose of it? Thank you in advance.
Some very good tips thanks
Thank you for the excellent tips!
Great video! Can I ask you a couple of questions about mirrorless cameras? I'm just upgrading from an old Canon 7d (which I still love!). I'm starting to write travel articles again and sell freelance articles. I need a good second-hand camera on a budget. I have a Tamron 17-50mm, f2.8 which I think will fit a Sony? Do you think a Sony a7iii second-hand camera would serve me for a few years...to do professional photography and some top quality filming (4k etc?). Cheers!
The best vídeo at the world. U are amazing, very very thanks
Everything well explained, and demonstrated, only getting into photography due to high-end drones having awesome camra's. Needed to learn this stuff personally. Thanks for taking the time to make this great educational video.
Thank you, glad you enjoyed!
Very helpful, I love you 🫶
great video and explanations!
Super helpful, and cohesive delivery! Thank you for this. Also, you have a great smile!
Your lesson use full and helpful