I want to take a moment to admit that I don’t know everything and I’m sure there are many people out there who can accomplish a one day patch and paint. To those who can I tip my hat to you. Personally, I have just never had good luck with them so I won’t do them. Just means there’s more business for those of you who can🙂
This exact same thing happened to me last year! I never ever paint but it was for a friend and they were in a hurry to get it patched and painted because they had family coming over! I went over a few days later and you could see the outline of the patch! I took my paint scrapper and flattened them then put a thing coat of finishing mud over it! I spent some time looking it up and read that it needs time for the exothermic reaction to gas off! 🤷♂️ Id love it if you just did a patch the same way without painting and then looked at it again a few days later to see if it's still the same. I very rarely get to see my work painted and ever since I had that incident I've been stressed out wondering how my patches end up after painting using quickset!
Ben, I have always appreciated your honesty and humble approach on your videos Nothing cooler than watching a guy with extreme talent accidentally mess up using a screw gun or whatever and just letting the camera run! Wish more people would let it roll like you because it happens to everyone
I do one day patch and paint all the time. Your process is a little flawed thou. On the tape coat I use 5 minute mud and just a 6” knife the only thing I’m trying to do is fill the crack and leave the slightest pit of mud on the mesh. Then I hit it with the heat gun for a good 7-10 minutes this issuers the deepest mud is set in the crack. Biggest mistake I see is when people coat the whole repair on the first coat.
Prefill the gaps, no tape. Let the mud harden. Then use tape. That’s technically your first pass. You’ll never have that problem again. Prefill is critical, especially for 1 days. If you don’t prefill, or push a valley through the tape on the first pass, then a few days later the gaps do show up like you’re describing. Due to the paint and final coat’s moisture content, the base layer can pull out once fully dry (few days later).
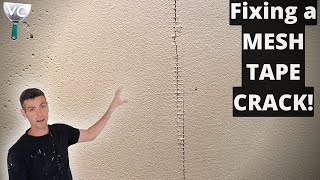
I like to score a square around it and use my multi tool scraper attachment scrape all the paint off so my tape is embedded and I don’t have to float it way out.
I just wanted to say thank you. I've attempted numerous patch jobs after buying my first house and they have all turned out awful. But we recently had a chandelier moved and after watching your videos, I worked up the confidence to try to patch the hole myself. I bought proper mud this time and took my time, learned to accept the fact that I was going to have to patch and paint more than just the little 4" square and that I was going to have to sand and make a mess, and it has turned out great so far. Maybe I'll take another shot at some of these crack repairs now...
@@dys3945 Hard to imagine primer not adhering to hot mud. It's fairly porous. If you can scuff sand semigloss enamel and paint over it, it should be no problem to paint over hot mud.
This is a fantastic video! I’m just a DIY’er so have never had the need for 1 day patches or fixes. I always do these types of projects over days not hours to ensure proper drying, but this is still great info and I am glad to know that I should avoid one day patch & paints. Appreciate the video and I’m glad you vindicated at the end. 😂👍🏼
Ben, I really enjoy your videos. I find them relaxing. I also do drywall for a living and every now and then I do same day patches. I don't recommend it either but sometimes my builders want it done as soon as possible. steps I would do is pre fill 5 min quick set tape and float 5 min quick set skim coat with all purpose heater sand and paint.
It all depends on the lighting conditions I agree with Ben under very strong lighting that 1-day patch won’t’hold up to scrutiny. So it’s not a problem if it is in relative less harsh lighting you won’t notice it. Ben is a perfectionist he wants his patch to be perfect in all lighting conditions.
I have been doing this for many years. I am not going to say anything you have done is wrong.... However in Canada we never use mesh tape over drywall. It is only used for Dimond finish plaster. All in all that is not the point. I do use one day finish. Patching or one small room in an emergency. It is a hot mud however it is a plaster of Paris. It goes hard if 4 min. Even if I drop it in water it is hard at same time. It is a chemical reaction. No fan or heat required. It does not shrink like durabond or sheetrock. It is not sand able. So do a good job and keep edges paper thin. With each coat spread wider and thin the mixture with more water. This way you can achieve a zero edge and it dries faster. I do a finish coat with out the plaster. Just straight up drywall mud (drywall compound) don't use a fan let it dry a couple hours maybe 1 or 2 hours. The compound will dry quickly and have a very smooth finish if done properly. ... I know I have no video to provide. I am thinking of doing a video just to show. However I understand this is for the do it your self. So I applaud your video. It is good advice for people whom are not professional.
Great job. You have to charge alot to keep coming back for every process to complete itself. But i can see homeowner not understanding, because they watch too many HGTV programs.
Thank you for showing what not to do. I am a first time home owner and have been so hesitant to ever try anything involving walls. I've really enjoyed your channel and getting ideas on what I might be able to try myself and what I definitely need a pro for. I appreciate your work!
Paint n Primer products means they'll stick to other paints. Very few will work on bare plaster/drywall, or will bubble up when repainted down the road. Best to hit it with 2 hr dry Zinzer first, then topcoat.
Science, bitch! ...sorry :) So, what I think about while doing drywall: 1) First, the existing drywall (gypsum & paper) is going to swell as it absorbs moisture from the mud. 2) Then, the hot mud sets. Curing is not drying. 3) The hot mud & damp drywall drys, to the inside and to the outside. Forced heat & air will only dry the top few mm. Gypsum is a good insulator. 4) Now, skim coat soaks IN and drys OUT, and the process starts over. ...There is no way to know how all these components are going to shrink. Period. Even the paint will make it swell for a day, and it too has to dry OUT & IN through everything.
Your instruction on sanding and using a coarse grit is very helpful. I always believed that final sanding should be with a fine grit..and my patches always looked polished. Thank you.
What the hell!!!!! How much are you using? The quantity of mud is insane!!!! Even when skimming a wall you do not use this much. You will have a lump and do not tell people you won't. Thin line of mud, tape then mud the tape. Please no one use his method.
As a professional drywall finisher you did everything in this video to do a 1 days patch and paint quite good except for once thing. You are able to do 1 day patch and paint, but you forgot to pre-fill the gaps. You have to pre-fill the gaps and let it dry before applying the mesh tape, then you wouldn’t have that problem of gaps appearing after..
Yes - he should have first pre-filled the gaps with 5 minute setting compound and dried with a heat gun. He could have used a heat gun to accelerate the steps, and/or used hot water while preparing the setting compound.
I remember doing a one day hang tape texture and paint and it looked great. Years later I went back and every joint was seen but the homeowner didn’t even notice. From flawless to rookie.
Ben / Vancouver Carpenter Not saying you are 100% wrong but based on how you did it and if the wall is flat then my take is that's the mud flashing due to no decent primer. I only say this because I've been doing single day small repair and paints for a LONG time and if you A) make sure each coat you do is dry and B) make sure you prime I have had a lot of success in that order I pretty much feel forced to use primer on anything big enough that you need to tape otherwise this will always happen regardless of how many days you spend on it Just my opinion! I think you have forgotten more about drywall than I will ever know but I really think you might be discounting the flashing due to no primer.
It looks like it's just the gap that's messing it up, meaning: there's must be a way to make 1 day wall repair work if the gaps were prepared using different method.
I do 1 day patches all time . And doesn't take that many hours like you. I use 20 minutes mud thin layers and master appliances heat gun to make sure it's dry before applying another coat. And for sure if the wall isn't a flat finish. U need to paint corner to corner otherwise it will flash.
Hey, I own a drywall repair company. Although my techs are very quick and very knowledgeable (this repair would have taken them about 3 hours without painting. Maybe slightly less time), I will definitely say that what we do is NOT easy-peasy-lemon-squeezy. And yes, we leave all repairs seamless.. but it's definitely an art and I've had techs who have been doing drywall forn30 years plus and believe they know how to do it, however they have to have a huuuge adjustment in how they do it. It's doable though and some can't. That's why this is one of the best niches in the system 😉
It could be a 1 day job in cyprus EU we use a coarse/thick granulated plaster for 1st coat. 70/30 mix of coarse/fine plaster for 2nd coat, then fine finishing coat, primer then paint, the hot weather helps in drying times though
See, that's the great thing about 1 day patch and paints. They look great just long enough for your taillights to be out of sight, the check to clear, and to change your phone number. 😉 And you can always tell the customer that you have been doing it this way for years.
The trick is to be a painter and not a drywaller. As a painter I know a million tricks to make the wall look nice again after the patch. My normal routine would be: using all purpose mud (green lid) mixed with some easy 5 or plaster of paris do one solid coat to backfill it, sand it, shellac it, THEN put your top coat with the same mix, sand and shellac, and skim it with all purpose, sand and shellac one more time and check for touch ups, shellac any touchups and paint 2-3 coats. That should take you just a few hours if you do it right and put the fan or heat gun on it. Also, us painters aren't doing huge patches like that either, we typically keep it nice and tight, just big enough to blend but not so big it takes a year to dry. At the end of the day, I really more on my painting skills to blend the patch back into the wall if it's not just right yet. The reason I shellac it after the coats is that the shellac will seal it and stop any moisture from traveling any further in either direction, but it will also let you visually see any ridges or high spot that cast shadows a lot better than without it, which makes the touch ups easier and faster.
I will watch this full video, I love your content and *kanye west voice* "I'ma let you finish" but let me tell you my secret. I do these all the time. Sometimes 2 patches for ac repairs. In one day by using 2 coats of 5 min hot mud, and 1-2 coats of lightweight all purpose. After priming I have to give it an hour but that mud absorbs a lot of it, I give it a 2nd coat of primer and walk away, and when I get back from lunch I deal with paint. It can be done and I'm down to share what I've learned 💪🏽
I do one day patch and paint every day as a Handyman. The secret is - Prefill any gaps with 5 minute mud use Fibre fuse tape and 2 coats of 20 minute mud. 1 coat of topping mud. Dry all coats with heat gun. Sand to smooth finish. 1 coat undercoat / sealer paint top coat wall paint Done.
@@lanway95 It's more efficient for me and less inconvenience for the customer. I charge by the job and not an hourly rate so if the customers happy with the quote, I can get to more customers if I only visit once. Never had a call back for the issues seen in this video and have been do this method for 15 years.
@@EricBanner571 I m with you my man. 2 coats of 20 ,and last coat with 5 min. drying with a heat gun. His tip with the glue mixed has been very helpful. I m out in 2 hrs $175.
Right I do this shit weekly all over Phoenix. Not one call back. And tbh- the quality of work in bigger cities is shit anyway. So shining doesn’t take too much effort.
As a handyman I did them all the time. 5 minute mud, 3 coats. Alternate with heat gun and fan. Never had a problem with painting over hot mud. I think adding the all purpose is what causes the issue. Interesting video.
You know something Chris I'm not sure what happens when you get a failure but I always thought there was a problem about the quick set mud not being able to take paint until it is fully cured which they say is about a month I wonder if anyone else has read the same directions or did I imagine them
Yep, no room for all purpose in a day patch. Done hundreds just as you described adding a prefill and shellac prior to paint with no issue. And yes I have seen many of them years later with no change.
@@marshallwilson8497 you know I almost never hear anybody referring to using shellac or even the shellac based kilz that is by far the best sealer that I believe is available even better than oil-based primer sealers but again you must bee a good painter because only the best painters that I've known would go through the effort of using this material considering some of the difficulties in dealing with it
I'm not the best drywaller, I'm a general contractor, but I usually do most of the work myself. However, my drywall guy is amazing. He can have an entire bathroom done in 3 hours. He uses a wet sanding method. No imperfections, no tape showing, no issues. Have you ever tried wet sanding? It's also a lot cleaner of a process.
Really enjoy your videos….your projects are always well lit, you don’t talk so fast I have to rewind several times, and also you don’t talk TOO MUCH👍. As a new DIY’er with drywall, I am so grateful for your tutorials. Thank you! 🙏🏼
This is really interesting, I have done these patch and paints many times. They always have looked good when I've left the job and never had a call back over it. In my area there is usually texture on walls, so maybe that has something to do with it.
@@migzchevy22 not sure how primer solves this issue. Do you prime before the mud or after? It looks like to me the mud fully dries over a few days and then shrinks, causing the issue.
You’re having success because you’re texturing. If it was smooth wall the use of hot mud as a final coat will always show in certain light. With smooth wall, use topping and a fan to dry as the final coat. The topping will dry pretty fast with a good powerful fan. Then you can sand it and paint. It won’t flash then. It’ll look like nothing happened. He’s right with what he showed on this vid. You just cannot use hot mud as the final coat.
@@Bapuji42 yeah it’s fine to do on a textured wall. So I have a neat little trick I figured out a few years ago for knock down texture and I do it on every patch job. Turn up the pressure on the compressor so you can apply a fine mist all around the patch. Meaning beyond the patch, because if the wall is painted especially in a a sheen of semi gloss it won’t knock down at the same rate as the new mud for the patch. You could prime the patch to make it knock down the same, or you can spray a fine mist on it from your hopper. That will make it all knock down at the same rate. Just put a fan on it to dry it quickly so you aren’t waiting forever for that first coat to dry. But you do want it fully dry before shooting the texture coat. My work is 100 percent undetectable doing it this way. I use red dot all purpose taping mud to texture because I like that it has good adhesion.
Or take the receptacle off, put wire nuts on the wires and push the wires in the box. Takes less than 2min to take off and replace. But its ok. The receptacle has black tape on it. 🙄
Here’s the thing . . . when it comes to painting and drywall, there is a difference in ability necessity. What I mean is this - I’m a journeyman in both trades with over 30yrs experience. I’ve found that professional painting is pretty straightforward. If you serve a two year apprenticeship in the painting trade, when you’re finished, you’ll be a journeyman with all the capacities to do good work No so with drywall! When it come to drywall, unlike like painting, you HAVE TO HAVE A TALENT for it! Period. It’s like singing. Either you can sing or you can’t, and if you can’t, it doesn’t matter how hard you try you’ll NEVER be a singer. Anyone can learn how to paint. Just spend the time, put in the hours, and you WILL be a good, professional painter. With drywall, if you don’t have the “talent” for it, it doesn’t matter HOW LONG or HOW MANY HOURS you dedicate to it, you’ll NEVER be good at it. Tried it with training different people and found out that it is true.
Its just basic construction work... obviously, you have to understand it, to do it. In how many years you gonna be a master? I tell them that you can do a thing for 10 years, but you can also learn better in a day. And then i show them better. That is why i am a master through life.
I have the talent lol. I just can feel the mud thickness as I put it on the wall and just adjust pressure according to how I can imagine it spread, and it is damn satisfying when I do. I had prior clay sculpture experience when I realized I had a thing for making forms with my hands and forming pliable material into solid shapes. What I don't have is the experience of pros and hours of practice to get quicker and not getting tired after 4-5 hours which then need a day break to get back on track. I am busy in other field so doing it professionally is not an option right now but boy I would love to get small projects and make some money while doing what comes naturally.
@@essentialpassion Yes, well, talent , or it will look like “no talent.” Da Vinci wasn’t born with the ability to paint. Michelangelo’s fist hammer and chisel sculpture in marble wasn’t the Pieta.
Lol, yeah I just did the same yesterday, & that pm200 is some weak sauce. Sometimes takes 3 coats of paint. Meaning we prime the patches with pm200 before rolling the wall.
Feathering plaster is an art that requires good eye AND long practice. The first-timers always get eyes glazed after over-repeated passes in an attempt to make it seamless. It is hard to apply diminishing pressure from start of the stroke through to the lift at the end.
First of all make the patch as flat as possible or atleast have patch recessed an 1/8 so you don't have to feathered that far out. Sand wall around area to recess it for mud. Orbital sander works great. One thin coat of 5 min and dry with heat gun. If still recessed do another thin layer of 5 min and dry it. Add some plus 3 not all purpose just to make it easy to sand and dry that with heat gun. When using heat gun also run fan behind it. Once dried hit with quick dry primer. Within 20 minutes of priming you can add wall paint. This can all be done including unloading and packing up tools in 3 hours.
Your idea of a one day patch and paint is better than my 3 day patch and 4th day paint lmao I have learned so much from you. Your the reason I taped my house and with bullnose too. Thanks skater!!
This whole dynamic changes if it's a textured wall. You can pretty much do the whole patch with hot mud if the wall is textured. If you're doing knockdown, just be sure to prime before texturing, and prime a larger area than the texture. Otherwise the texture dries faster on the mud than on the original paint, and will knock down differently.
15:20 oh what fun it is when your work fails spectacular, & you have that amazing feeling that ya “knew were right” but just have to prove b/c “ppl” don’t believe…….does it take time, yes. Does it waste your time, yes. Are you tiny bit bitter about it or holding a grudge….Nah. Do you say: I told you so….YOU BET YOUR BOOTY!😂
The fact that you're trying to give us advice then go full idiot with the paint and primer in one is beyond me, there's no way to have a paint and primer in one, primer soaks in and is a sealer while paint is a topcoat that has no sealing or absorption properties, only amateurs that have no idea about painting don't use a separate primer.
mixing paint and primer for the first coat will tint the wall towards the final color you are applying therefore, you can get away with 2 coat touch up instead of having to apply 3 coat touch up. The last coat and touch up should be pure paint with no primer mixed in for quality and efficiency
Why the heck did you use all purpose? 3 coat with setting type. I worked for a premier company and we always used 3 coats of setting type for 98% of our work. For decades and thousands of jobs. That wouldn't have happened if you hadn't used bucket mud.
One Day Patch and Paint: 1. First and Second Coat - 20 min QuickSet with Light Sanding 120Grit 2. Paint on a single coat Zinnzer BIN 3. Finish Coat - USG Plus3 with Sanding 150 Grit 4. Paint thin layer of Zinnzer BIN as a primer 5. Finish with 2 coats of Paint.
My 1 day & dones definitely do not turn out as well, but I'm very picky about my work. Anyone else working with me generally say that its perfect as I'm getting ready to cut the entire patch out and start again. 15 years and zero callbacks can be a curse when doing production work, making sure everything is done correctly and the repair is erased from the timeline because it blended so well is my goal everytime, needless to say several of my weekends have been donated free of charge to the cause😢. 2 coats of eazy sand w/ glue 20 or 90m depending on time frame, fans & heat, scrape and wet sponge edges to blend, 3rd coat of all purp, fans, wet sponge & scrape. Touch up with all purpose skim coats using super flex stain steel blades and final sponge. Primer, touch up skim w/ all purpose for light textures & re prime, then texture, wet sponge & de-bur texture if need to blend, primer, paint. I prefer my mud dries over night before primer, had to fix bubbled primer before just as I started texturing, sometimes even pulling off as I'm priming after texture, so irritating to have to do things twice because of rushing.... thanks for the videos, I've learned alot!
This guy is really skilled. However, I'm skilled at the one-day patch and paint and do it regularly. His problem; though dry to touch, the compound continued to shrink. That's because he dried it with ambient air! YOU MUST USE A HEAT GUN. Use 5-mn fast set with mesh tape and apply super thin coats. Dry them thoroughly with a heat gun (don't blister paint underneath it). Be patient. The first coat takes longest because it fills the cracks. Bake it well. Successive coats; super thin, and cook it. His coats were much too thick. Though the fast compound gets firm, it still has moisture - bake it out! Sand between coats; if the sander comes off clean, your compound is dry. If the spackle loads up the sand paper, dry it more...even if it FEELS DRY! The key is in the HEAT DRYING. If I move an electrical box, or must patch an access hole, this keeps a one-day job a one-day job. Small drywall repairs suck the $$ out of jobs because of drying time. 5-min fast set and a heat gun keeps me from making return trips over a small repair.
I think the water in the finish mud penetrates the quick set mud and that's why it expands like that. If you seal the quickset mud before the finish coat, I think you won't have that problem. But who knows. These kids have a mind of their own sometimes.
You always only have smooth surface repairs. I wanna see all these on textured walls, which is what I usually have to deal with. Like feathering on a textured surface, I get a lot of chatter, sometimes bumps from texture create huge wedges. I rarely encounter smooth walls.
How you tried wet sanding? Only possible with hot mud (5,20,45,90 min mud) you take a spray bottle with water and a sanding block sponge and once the mud is set spray the wall and the sanding sponge sand away knocks down the ridges you get with textured walls a-bit easier than with dry sanding the water acts as a lubricant for the sander, works like a charm ✌🏻
Painting of wet or noncured material doesn't seem like a good idea. The moisture has to escape and it could/ will lift paint and mess with the bond of the paint
@@travisk5589 Thanks for responding. I wasn’t referring to wet or noncured quickset, I’m talking about not using finishing or all purpose mud as a top coat but finishing a wall with quickset only (fully cured, dry and sanded) and then priming and painting over that. It’s less porous and actually somewhat shiny so I’m using a high quality primer that will adhere to that type of surface. But wondering what the typical reasons are to not prime and paint quickset.
2 роки тому+1
Quickset is not as smooth as all purpose so you are going to have a small texture that will show with prime and paint. Hotmud is made to be really hard so you have a good base for the all purpose not finishing with it.
@ I agree, it definitely doesn’t create a smooth surface on the first coat. On the second coat however I’m getting a smooth as glass shiny finish. I’m doing that by skimming with a lot of pressure with the knife. It actually looks like a really nice finish, almost like Venetian plaster.
The fact that it sands so smooth is why you shouldn't paint over quickset. Even if you get rid of your hard lines, you're going to have a noticeably smoother area where you sanded the quickset. It's usually not an issue in poorly lit areas, but areas that have light shining across the surface, the patch will show very easily
Yes Sir, Yes Sir! The "Hack" comes in and whips this thing out in a day, and hopefully they don't notice. I always ask people, exactly what is wrong with perfect? I can't believe you actually did all of this in a full 8 hour day! Around here, the "Hacks" would have had all of that done in about 2. Ewwwwww!
I do them with my majic wand, changing rooms we call it 24hr make overs! Heat gun all the way baby be brave and hope the paint Gods are smiling on you and dont peel the paint back round your roller....in front of the customer, each and every day....painter the sparky, plumber...carpenter missed again quick little paint Ez....! One day patching
So I take it, you're not into what most are, the 10-10 warranty. 10-steps to vehicle, and-or 10-minutes, whichever arrives first. The when tail lights surpass driveway, warranty no longer applies is played out. Need some modernization towards legacy saonces.
A paint question. I’ve had trouble with the premium cloverdale paints. I’m not sure if flashing is the word. But it goes on thick. Dries too fast on the surface. So with back brushing, or rollering after cutting in. It lifts the top off the just applied paint. It’s sticky dry on the surface, but wet underneath. I switched to Dulux, and have never had this problem since. But I’d rather buy from, locally owned. I tried it again recently in cooler temperatures, same problem. Same paint you have.
I disagree with this video in so many different way. I’ve done patch and paint jobs many times in a day and have gone back to the same home year or years later and you never knew anything happen. It can be done. The trick to patching is and making it looks great in a days time is patients. Many handyman or drywall people speed through and it doesn’t ever look great.
I mean. I use blower fans. However, I have moved back to a two-day job because of A. I am bored by the slower workload. B. I can't get the drywall primer that makes this possible while limiting the chance of paint reaction to the raw mud. For the first time in a couple years, I had paint failure on raw mud. Only in one 5"x5" square on a 2'x2' patch. The paint dried and cracked. Scrapped and put some more mud on the next day and a large section of paint just peeled off to about a 9"x9" square. Don't know if it was the paint, the mud, or a combo of both. Sherwin Williams drywall primer stops the paint problems but it's been out of stock in my area for over a year. I also don't have the gaps as you did and I put the piece on the wall and trace it. Cut it tight and shave my piece with a razor blade to get it to fit snug. Always cut the hole to the piece, never the piece to the hole.
I think the only way to do it and not get imperfections is to pre fill with 5 mins and then 3 coats of 20 mins but the trick is to really do a wide fan. If your patch is 12”x12” your fonal coat of compound should end up around 48” or more. By doing this you’re not building up so much mud in one small area. Not sure I’m explaining it right.
@@samuelbankston2108 don’t even matter. I would never really do one day patch and paint haha. Any job that needs shit to be done in one day is not for me.
@@doug8237 I had to do it a lot for my job my boss always yelling to get the job done in a day. He had unreal expectations most the time. Once asked me to use 20min to do a whole giant walk in panty from start to finish in like two days. Eventually got it done in like a week. I got chewed out too. Even though I told him from the start it was a bad idea and to use all purpose. And would've been done the same amount of days but less time over all cause not constantly mixing and cleaning. Just a couple hours a day. Then they always stuck me with noobs to train them on the job. Then I have to fix their mistakes.
I think this would be a great video to revisit maybe by teaming up with some of the people that do the one day patches and getting a feel for their workflow. and quality. Personally, I won't really do a one-day patch, but I could see where adding a shellac prime after all coats are on might fix things but I could also see where it could trap gases and cause issues further down the line. For me, it's not hard to pass on the painting to the homeowner or swing back the next day and finish her up. But if I live somewhere with our plus traffic each direction to the job site, I might feel differently about that.
I’ve been doing this for 20 years.. if you can’t then your not good enough.. I could have it back blocked, taped in with Proper recommended tape ( not cheap easy tape ) that’s the cowboys way out!! .. sanded and painted in 3 hours .. you are using a paddle pop stick when you could be using a trowel .. stick to being a carpenter .. 220 sand paper!!
You said that you shouldn’t paint over quick set compound. I would say that you can paint over any compound provided you have used the proper primer. Proper and quality materials are needed for jobs that require quick repairs. Otherwise you will always have to come back.
I’ve done dozens upon dozens of patches with nothing but a 40 minute mud and a heat gun. Painted the same day usually. None of them have ever cracked. Perhaps it’s because I’m in southern CA
I keep running into a problem on which I wish you could advise me. People have VRBO properties around here, and all they care about is slapping a coat of paint on and making more money. It is a so-called upper crust type of place, but all the older homes are poorly constructed from an era that existed before law and order and building codes were enforced. They keep giving us a long list of work to do, but then demanding when the job be finished, with no regard as to the time it takes to do the work. They have months worth of remodeling, with things torn down to the frame, and they try to skip inspections and permits and any other lawfully prohibited shortcuts, right down to closing up walls with wet black mold inside. How do I tell them I won't do sub-par work, because I have a reputation and self-respect? These codes exist because somebody died so they made the code to prevent further death. How do I tell them, there are no shortcuts, there are no sidestepping the codes, when they will just hire somebody else who will do a dumbed-down version for cheaper? Yes, it will fail, yes they will have to keep redoing it, and yes, people will get hurt because they chose to take shortcuts. All I can do is avoid being connected to their criminal activity, but how do I avoid starving to death when these people literally make up 98% of the customer base?
I do patch an paint everyday day lol. Not to be mean. But my stuff don't cracked back. I figured u knew that. I work at my church to experiment an my work still holding up 5 years later.
Any advice on learning how to use a trowel ,I can finish with knives but just haven't gotten the hang of using trowels but I really want to be able to finish with them ?GOD BLESS
I have learned to have patience when doing any job. Now I know NOT to rush any drywall problem. Will definitely help me as I move forward with future renovations. Great job as always Ben.
you have to let the tape coat completely cure . Have to let the 1st and 2nd coats completely cure. Skim it, let dry, sand and should be ready for paint . The shrinkage from adding mud onto mud that hasn't cured is what causes the funky stuff as it will show though when it finally cures all the way out. Just because the top layer is completely dry doesn't mean the underneath mud is cured out and dry . quik set still doesn't cure all the way through in 20-30-45 mins . Not enough to prevent that in the end of the video .
As a remodeler, I never use hot mud. I have tried it but didn’t care for it. I use regular all purpose and do maybe 2 coats in a day and 2 coats on another day. Then I put drywall primer on it to get the texture. Then I will paint it. I get pretty good results this way and I just explain to the customer that’s the way I do it for the best results. Rushing drying usually leads to failure (as shown in this video). Thanks for making this, I really had no idea that this would occur because I don’t use hot mud at all. Now I can explain it to my customers better why I don’t do everything in one day. People have no patience lol
If you are patching on a painted wall that has that distinctive eggshell finish, when I've sanded my patches and then painted, that area is too smooth - the surface doesn't blend with the "OEM" eggshell finish. What am I doing wrong?
You patched the heck out of that job. Is it really necessary to apply multiple layers of joint compound, in order to have a great finish.? Just asking.
I just want a white wall and this already exceeds my expectations. If you can skip some steps and still make it halfway decent, I wouldn't want to pay for more, and not for lack of money. You know we used to live in unplastered caves?
I repaired a ceiling that was damaged be a water leak last weekend. I did take 2 days to do it but I used 20 minute exclusively. When the paint dried you couldn't see the repair.
Living in the UK and especially Scotland a sameday patch and paint was a virtual impossibility due to drying times.. Unless it was in a cupboard or somwhere out of sight.


I want to take a moment to admit that I don’t know everything and I’m sure there are many people out there who can accomplish a one day patch and paint. To those who can I tip my hat to you. Personally, I have just never had good luck with them so I won’t do them. Just means there’s more business for those of you who can🙂
This exact same thing happened to me last year! I never ever paint but it was for a friend and they were in a hurry to get it patched and painted because they had family coming over! I went over a few days later and you could see the outline of the patch! I took my paint scrapper and flattened them then put a thing coat of finishing mud over it! I spent some time looking it up and read that it needs time for the exothermic reaction to gas off! 🤷♂️ Id love it if you just did a patch the same way without painting and then looked at it again a few days later to see if it's still the same. I very rarely get to see my work painted and ever since I had that incident I've been stressed out wondering how my patches end up after painting using quickset!
Ben, I have always appreciated your honesty and humble approach on your videos
Nothing cooler than watching a guy with extreme talent accidentally mess up using a screw gun or whatever and just letting the camera run!
Wish more people would let it roll like you because it happens to everyone
Wow. This Ben Degros guy looks just like that Vancouver Carpenter guy. 😂😂
Try using a heat gun with easy sand 45. Pretty easy to have a repair done and painted in a day.
I used to be able too. But the products are crap now so no it can’t be done in one day
Can you do a video explaining why it takes a couple weeks so I can show my wife
My video needs to be 3 years.
I do one day patch and paint all the time. Your process is a little flawed thou. On the tape coat I use 5 minute mud and just a 6” knife the only thing I’m trying to do is fill the crack and leave the slightest pit of mud on the mesh. Then I hit it with the heat gun for a good 7-10 minutes this issuers the deepest mud is set in the crack. Biggest mistake I see is when people coat the whole repair on the first coat.
Why shouldn't you paint over quick set?
Prefill the gaps, no tape. Let the mud harden. Then use tape. That’s technically your first pass. You’ll never have that problem again. Prefill is critical, especially for 1 days.
If you don’t prefill, or push a valley through the tape on the first pass, then a few days later the gaps do show up like you’re describing. Due to the paint and final coat’s moisture content, the base layer can pull out once fully dry (few days later).
I've recently started to prefilled the gaps. It's much better than before.
Does it need to be sanded before adding the tape so it's flat?
@@wwfera00 yes i do
@@wwfera00you want to get it as flat as you can with your knife/trowel so you don’t have to sand. Remember, first coat doesn’t have to look amazing.
With fibafuse you dont even need to
I like to score a square around it and use my multi tool scraper attachment scrape all the paint off so my tape is embedded and I don’t have to float it way out.
I might try that!
I just wanted to say thank you. I've attempted numerous patch jobs after buying my first house and they have all turned out awful. But we recently had a chandelier moved and after watching your videos, I worked up the confidence to try to patch the hole myself. I bought proper mud this time and took my time, learned to accept the fact that I was going to have to patch and paint more than just the little 4" square and that I was going to have to sand and make a mess, and it has turned out great so far. Maybe I'll take another shot at some of these crack repairs now...
Why can’t you paint/prime fast setting mud without a layer of topping compound?
Same question. I've seen plenty of people do that with no problems.
I don’t know the answer but maybe it doesn’t allow the paint to adhere correctly? I’m curious to know the answer as well.
@@dys3945 Hard to imagine primer not adhering to hot mud. It's fairly porous. If you can scuff sand semigloss enamel and paint over it, it should be no problem to paint over hot mud.
I would rather paint over quickset. I’ve had air dry mud rewet and come off when painting.
This is a fantastic video! I’m just a DIY’er so have never had the need for 1 day patches or fixes. I always do these types of projects over days not hours to ensure proper drying, but this is still great info and I am glad to know that I should avoid one day patch & paints. Appreciate the video and I’m glad you vindicated at the end. 😂👍🏼
Ben, I really enjoy your videos. I find them relaxing. I also do drywall for a living and every now and then I do same day patches. I don't recommend it either but sometimes my builders want it done as soon as possible. steps I would do is
pre fill 5 min quick set
tape and float 5 min quick set
skim coat with all purpose
heater
sand and paint.
That’s what I use too, never had a problem. Using 20min is a big no no
Same. I use durabond for 1st fill.
It all depends on the lighting conditions I agree with Ben under very strong lighting that 1-day patch won’t’hold up to scrutiny. So it’s not a problem if it is in relative less harsh lighting you won’t notice it. Ben is a perfectionist he wants his patch to be perfect in all lighting conditions.
Just remove the receptacle. It's faster, safer, and better. Gheezh.
There's always time to do it right the second time
I have been doing this for many years. I am not going to say anything you have done is wrong.... However in Canada we never use mesh tape over drywall. It is only used for Dimond finish plaster. All in all that is not the point. I do use one day finish. Patching or one small room in an emergency. It is a hot mud however it is a plaster of Paris. It goes hard if 4 min. Even if I drop it in water it is hard at same time. It is a chemical reaction. No fan or heat required. It does not shrink like durabond or sheetrock. It is not sand able. So do a good job and keep edges paper thin. With each coat spread wider and thin the mixture with more water. This way you can achieve a zero edge and it dries faster. I do a finish coat with out the plaster. Just straight up drywall mud (drywall compound) don't use a fan let it dry a couple hours maybe 1 or 2 hours. The compound will dry quickly and have a very smooth finish if done properly. ... I know I have no video to provide. I am thinking of doing a video just to show. However I understand this is for the do it your self. So I applaud your video. It is good advice for people whom are not professional.
agree 100%. I don't know why people say you need to topcoat with compound and also yes, mesh is junk.
Great job. You have to charge alot to keep coming back for every process to complete itself. But i can see homeowner not understanding, because they watch too many HGTV programs.
Thank you for showing what not to do. I am a first time home owner and have been so hesitant to ever try anything involving walls. I've really enjoyed your channel and getting ideas on what I might be able to try myself and what I definitely need a pro for. I appreciate your work!
A drywall guy told me once that when doing mud...less is more and don't fuss with it too much.
Paint n Primer products means they'll stick to other paints. Very few will work on bare plaster/drywall, or will bubble up when repainted down the road. Best to hit it with 2 hr dry Zinzer first, then topcoat.
Science, bitch! ...sorry :) So, what I think about while doing drywall: 1) First, the existing drywall (gypsum & paper) is going to swell as it absorbs moisture from the mud. 2) Then, the hot mud sets. Curing is not drying. 3) The hot mud & damp drywall drys, to the inside and to the outside. Forced heat & air will only dry the top few mm. Gypsum is a good insulator. 4) Now, skim coat soaks IN and drys OUT, and the process starts over. ...There is no way to know how all these components are going to shrink. Period. Even the paint will make it swell for a day, and it too has to dry OUT & IN through everything.
Your instruction on sanding and using a coarse grit is very helpful. I always believed that final sanding should be with a fine grit..and my patches always looked polished. Thank you.
VC: feather those edges
me: feathers the like button
I should have my wife watch this then maybe she will understand why I don’t rush a project. Lol Thanks for the video
What the hell!!!!! How much are you using? The quantity of mud is insane!!!! Even when skimming a wall you do not use this much. You will have a lump and do not tell people you won't. Thin line of mud, tape then mud the tape. Please no one use his method.
So anytime you patch with all purpose compound, you should use Killz or some primer first before you paint, correct?
When are you going to start selling Feather Your Edge merch? 😎 it’s October I’m ready for a beanie
Done hundreds of repairs and paint in three hours or less.Never had a callback.Five minute mud is the only way to go. Thats a fact Jack!
So you only use 5 minute for all the coats then paint? Or you use all-purpose for the final coat? Thank you!
So what is the correct process? Repair, mud with quickest, allow to dry fully, add a decent amount of all purpose, wait a week then paint?
Total click bait. Carpenter of 10 years and you never make a living if you don't do a patch in one day. Bad info bro
As a professional drywall finisher you did everything in this video to do a 1 days patch and paint quite good except for once thing. You are able to do 1 day patch and paint, but you forgot to pre-fill the gaps. You have to pre-fill the gaps and let it dry before applying the mesh tape, then you wouldn’t have that problem of gaps appearing after..
Yes - he should have first pre-filled the gaps with 5 minute setting compound and dried with a heat gun. He could have used a heat gun to accelerate the steps, and/or used hot water while preparing the setting compound.
100% agree, also calling a rusty square a straight edge and putting it on a fresh wall hurt me deeply inside.
I remember doing a one day hang tape texture and paint and it looked great. Years later I went back and every joint was seen but the homeowner didn’t even notice. From flawless to rookie.
Holy cow, that's a long day!
Probably from the house settling dude
@@four4four636 I could see every joint clearly and not a crack in sight. But a lot of times other jobs looked really good. It’s just risky is all.
@@williamwinsor7376 ah I see
Ben / Vancouver Carpenter
Not saying you are 100% wrong but based on how you did it and if the wall is flat then my take is that's the mud flashing due to no decent primer.
I only say this because I've been doing single day small repair and paints for a LONG time and if you A) make sure each coat you do is dry and B) make sure you prime I have had a lot of success in that order
I pretty much feel forced to use primer on anything big enough that you need to tape otherwise this will always happen regardless of how many days you spend on it
Just my opinion! I think you have forgotten more about drywall than I will ever know but I really think you might be discounting the flashing due to no primer.
I'm going to make a video using the same paint on the rest of the patches. Let's see how it turns out :)
@@vancouvercarpenter awesome definitely I'd be curious if primer makes a difference or not but either way this is great content!
It looks like it's just the gap that's messing it up, meaning: there's must be a way to make 1 day wall repair work if the gaps were prepared using different method.
12:07 Ben's Drywall "Woman" 👐🤣
PS- Great job Ben, I don't even mess with quick set, just AP, but I'm never in a rush 👍
Youre just gonna tell.us to not paint over quickset and not give a reason?? Sheesh
I do 1 day patches all time . And doesn't take that many hours like you. I use 20 minutes mud thin layers and master appliances heat gun to make sure it's dry before applying another coat. And for sure if the wall isn't a flat finish. U need to paint corner to corner otherwise it will flash.
Hey, I own a drywall repair company. Although my techs are very quick and very knowledgeable (this repair would have taken them about 3 hours without painting. Maybe slightly less time), I will definitely say that what we do is NOT easy-peasy-lemon-squeezy. And yes, we leave all repairs seamless.. but it's definitely an art and I've had techs who have been doing drywall forn30 years plus and believe they know how to do it, however they have to have a huuuge adjustment in how they do it. It's doable though and some can't. That's why this is one of the best niches in the system 😉
It could be a 1 day job in cyprus EU we use a coarse/thick granulated plaster for 1st coat. 70/30 mix of coarse/fine plaster for 2nd coat, then fine finishing coat, primer then paint, the hot weather helps in drying times though
See, that's the great thing about 1 day patch and paints. They look great just long enough for your taillights to be out of sight, the check to clear, and to change your phone number. 😉
And you can always tell the customer that you have been doing it this way for years.
Ah, the "tail light warranty".
As in; the warranty ends when my tail lights disappear. LOL
@@slatsgrobneck7515 should be more like outofsight warranty , once I’m out of sight that’s it.
Unless there's texture. Then you can do it.
The trick is to be a painter and not a drywaller. As a painter I know a million tricks to make the wall look nice again after the patch. My normal routine would be: using all purpose mud (green lid) mixed with some easy 5 or plaster of paris do one solid coat to backfill it, sand it, shellac it, THEN put your top coat with the same mix, sand and shellac, and skim it with all purpose, sand and shellac one more time and check for touch ups, shellac any touchups and paint 2-3 coats. That should take you just a few hours if you do it right and put the fan or heat gun on it. Also, us painters aren't doing huge patches like that either, we typically keep it nice and tight, just big enough to blend but not so big it takes a year to dry. At the end of the day, I really more on my painting skills to blend the patch back into the wall if it's not just right yet.
The reason I shellac it after the coats is that the shellac will seal it and stop any moisture from traveling any further in either direction, but it will also let you visually see any ridges or high spot that cast shadows a lot better than without it, which makes the touch ups easier and faster.
I will watch this full video, I love your content and *kanye west voice* "I'ma let you finish" but let me tell you my secret. I do these all the time. Sometimes 2 patches for ac repairs. In one day by using 2 coats of 5 min hot mud, and 1-2 coats of lightweight all purpose. After priming I have to give it an hour but that mud absorbs a lot of it, I give it a 2nd coat of primer and walk away, and when I get back from lunch I deal with paint. It can be done and I'm down to share what I've learned 💪🏽
Dude! Wear a mask when sanding drywall. Silica dust is no joke.
I do one day patch and paint every day as a Handyman. The secret is -
Prefill any gaps with 5 minute mud
use Fibre fuse tape and 2 coats of 20 minute mud.
1 coat of topping mud.
Dry all coats with heat gun.
Sand to smooth finish.
1 coat undercoat / sealer paint
top coat wall paint
Done.
Do you charge more to get it done in a day like that ?
@@lanway95 It's more efficient for me and less inconvenience for the customer. I charge by the job and not an hourly rate so if the customers happy with the quote, I can get to more customers if I only visit once. Never had a call back for the issues seen in this video and have been do this method for 15 years.
@@EricBanner571 I m with you my man. 2 coats of 20 ,and last coat with 5 min. drying with a heat gun. His tip with the glue mixed has been very helpful. I m out in 2 hrs
$175.
Right I do this shit weekly all over Phoenix. Not one call back. And tbh- the quality of work in bigger cities is shit anyway. So shining doesn’t take too much effort.
it works if you let the first coat fully dry, use 5min mud and a heat gun and or a fan works well too
As a handyman I did them all the time. 5 minute mud, 3 coats. Alternate with heat gun and fan. Never had a problem with painting over hot mud. I think adding the all purpose is what causes the issue. Interesting video.
You know something Chris I'm not sure what happens when you get a failure but I always thought there was a problem about the quick set mud not being able to take paint until it is fully cured which they say is about a month I wonder if anyone else has read the same directions or did I imagine them
Yep, no room for all purpose in a day patch. Done hundreds just as you described adding a prefill and shellac prior to paint with no issue. And yes I have seen many of them years later with no change.
@@marshallwilson8497 you know I almost never hear anybody referring to using shellac or even the shellac based kilz that is by far the best sealer that I believe is available even better than oil-based primer sealers but again you must bee a good painter because only the best painters that I've known would go through the effort of using this material considering some of the difficulties in dealing with it
Ditto and ditto. I just roll with base coat and top coat. Never failed so far and just let me it cool completely before painting as usual
Ditto. Done loads of patch and paints over the years. Never had a problem or a call-back ever.
Did you say “faffin about”? Is that a Canadian term 😁?
I'm not the best drywaller, I'm a general contractor, but I usually do most of the work myself. However, my drywall guy is amazing. He can have an entire bathroom done in 3 hours. He uses a wet sanding method. No imperfections, no tape showing, no issues. Have you ever tried wet sanding? It's also a lot cleaner of a process.
Out of curiosity, why should one never paint quickset, if you get a smooth enough finish to your liking?
Really enjoy your videos….your projects are always well lit, you don’t talk so fast I have to rewind several times, and also you don’t talk TOO MUCH👍. As a new DIY’er with drywall, I am so grateful for your tutorials. Thank you! 🙏🏼
That may be your problem if you aren’t priming/beforehand because I’ve been doing one day patches for years with help of a heat gun
I agree, priming is needed. Even with paint and primer. Been should do another patch video but prime only half the patch, curious of the result.
This is really interesting, I have done these patch and paints many times. They always have looked good when I've left the job and never had a call back over it. In my area there is usually texture on walls, so maybe that has something to do with it.
I've been doing 1 day patches for years. Only difference is I use B.I.N. primer. No issues or call back
@@migzchevy22 not sure how primer solves this issue. Do you prime before the mud or after? It looks like to me the mud fully dries over a few days and then shrinks, causing the issue.
You’re having success because you’re texturing. If it was smooth wall the use of hot mud as a final coat will always show in certain light. With smooth wall, use topping and a fan to dry as the final coat. The topping will dry pretty fast with a good powerful fan. Then you can sand it and paint. It won’t flash then. It’ll look like nothing happened. He’s right with what he showed on this vid. You just cannot use hot mud as the final coat.
@@wyattsdad8561 That's what I was thinking. With a textured wall there's no reason you can't finish with hot mud.
@@Bapuji42 yeah it’s fine to do on a textured wall. So I have a neat little trick I figured out a few years ago for knock down texture and I do it on every patch job. Turn up the pressure on the compressor so you can apply a fine mist all around the patch. Meaning beyond the patch, because if the wall is painted especially in a a sheen of semi gloss it won’t knock down at the same rate as the new mud for the patch. You could prime the patch to make it knock down the same, or you can spray a fine mist on it from your hopper. That will make it all knock down at the same rate. Just put a fan on it to dry it quickly so you aren’t waiting forever for that first coat to dry. But you do want it fully dry before shooting the texture coat. My work is 100 percent undetectable doing it this way. I use red dot all purpose taping mud to texture because I like that it has good adhesion.
First thing I would do is get a screwdriver and put the receptacle into the box.....
Or take the receptacle off, put wire nuts on the wires and push the wires in the box. Takes less than 2min to take off and replace. But its ok. The receptacle has black tape on it. 🙄
heat gun?
meat bun?
Seat pun?
thank you i learned something the hard ways
Here’s the thing . . . when it comes to painting and drywall, there is a difference in ability necessity. What I mean is this - I’m a journeyman in both trades with over 30yrs experience. I’ve found that professional painting is pretty straightforward. If you serve a two year apprenticeship in the painting trade, when you’re finished, you’ll be a journeyman with all the capacities to do good work
No so with drywall!
When it come to drywall, unlike like painting, you HAVE TO HAVE A TALENT for it! Period. It’s like singing. Either you can sing or you can’t, and if you can’t, it doesn’t matter how hard you try you’ll NEVER be a singer.
Anyone can learn how to paint. Just spend the time, put in the hours, and you WILL be a good, professional painter.
With drywall, if you don’t have the “talent” for it, it doesn’t matter HOW LONG or HOW MANY HOURS you dedicate to it, you’ll NEVER be good at it.
Tried it with training different people and found out that it is true.
Its just basic construction work... obviously, you have to understand it, to do it. In how many years you gonna be a master? I tell them that you can do a thing for 10 years, but you can also learn better in a day. And then i show them better. That is why i am a master through life.
Painting is a 3 year apprenticeship in canada 4 in the uk
@@CHAINGANGCANADA Oh, well, back in the 70’s when I was working it 2 here in the States.
May be longer now.
I have the talent lol. I just can feel the mud thickness as I put it on the wall and just adjust pressure according to how I can imagine it spread, and it is damn satisfying when I do. I had prior clay sculpture experience when I realized I had a thing for making forms with my hands and forming pliable material into solid shapes. What I don't have is the experience of pros and hours of practice to get quicker and not getting tired after 4-5 hours which then need a day break to get back on track. I am busy in other field so doing it professionally is not an option right now but boy I would love to get small projects and make some money while doing what comes naturally.
@@essentialpassion Yes, well, talent , or it will look like “no talent.”
Da Vinci wasn’t born with the ability to paint. Michelangelo’s fist hammer and chisel sculpture in marble wasn’t the Pieta.
I put finish paint on quickset every day. First coat of paint flashes and second coat of paint is perfect. SW Promar 200.
Lol, yeah I just did the same yesterday, & that pm200 is some weak sauce. Sometimes takes 3 coats of paint. Meaning we prime the patches with pm200 before rolling the wall.
@@jeremyr7147 yeah it is. it's what they give me at work. it has no durability and starts to fade after a year.
Feathering plaster is an art that requires good eye AND long practice. The first-timers always get eyes glazed after over-repeated passes in an attempt to make it seamless. It is hard to apply diminishing pressure from start of the stroke through to the lift at the end.
First of all make the patch as flat as possible or atleast have patch recessed an 1/8 so you don't have to feathered that far out. Sand wall around area to recess it for mud. Orbital sander works great. One thin coat of 5 min and dry with heat gun. If still recessed do another thin layer of 5 min and dry it. Add some plus 3 not all purpose just to make it easy to sand and dry that with heat gun. When using heat gun also run fan behind it. Once dried hit with quick dry primer. Within 20 minutes of priming you can add wall paint. This can all be done including unloading and packing up tools in 3 hours.
What type tape you would use, if any?
Have never for decades. Buddy, have you ever heard of a heat gun?
Your idea of a one day patch and paint is better than my 3 day patch and 4th day paint lmao I have learned so much from you. Your the reason I taped my house and with bullnose too. Thanks skater!!
This whole dynamic changes if it's a textured wall. You can pretty much do the whole patch with hot mud if the wall is textured. If you're doing knockdown, just be sure to prime before texturing, and prime a larger area than the texture. Otherwise the texture dries faster on the mud than on the original paint, and will knock down differently.
Nice Amazing and entertaining video also vary helpful. Keep up the amazing work Ben.
15:20 oh what fun it is when your work fails spectacular, & you have that amazing feeling that ya “knew were right” but just have to prove b/c “ppl” don’t believe…….does it take time, yes. Does it waste your time, yes. Are you tiny bit bitter about it or holding a grudge….Nah. Do you say: I told you so….YOU BET YOUR BOOTY!😂
That backhand at 3:49
Ben's ready for Wimbledon.
I dont paint the same day and we exclusively run 5 min mud until regular joint compound
The fact that you're trying to give us advice then go full idiot with the paint and primer in one is beyond me, there's no way to have a paint and primer in one, primer soaks in and is a sealer while paint is a topcoat that has no sealing or absorption properties, only amateurs that have no idea about painting don't use a separate primer.
Agreed. Paint and primer in one is a gimmick for the home gamers who don't know any better. I always prime over patches so it doesn't flash through
mixing paint and primer for the first coat will tint the wall towards the final color you are applying therefore, you can get away with 2 coat touch up instead of having to apply 3 coat touch up. The last coat and touch up should be pure paint with no primer mixed in for quality and efficiency
Why the heck did you use all purpose? 3 coat with setting type.
I worked for a premier company and we always used 3 coats of setting type for 98% of our work. For decades and thousands of jobs.
That wouldn't have happened if you hadn't used bucket mud.
Why go so far beyond the area in need of repair?
One Day Patch and Paint:
1. First and Second Coat - 20 min QuickSet with Light Sanding 120Grit
2. Paint on a single coat Zinnzer BIN
3. Finish Coat - USG Plus3 with Sanding 150 Grit
4. Paint thin layer of Zinnzer BIN as a primer
5. Finish with 2 coats of Paint.
My 1 day & dones definitely do not turn out as well, but I'm very picky about my work. Anyone else working with me generally say that its perfect as I'm getting ready to cut the entire patch out and start again. 15 years and zero callbacks can be a curse when doing production work, making sure everything is done correctly and the repair is erased from the timeline because it blended so well is my goal everytime, needless to say several of my weekends have been donated free of charge to the cause😢.
2 coats of eazy sand w/ glue 20 or 90m depending on time frame, fans & heat, scrape and wet sponge edges to blend, 3rd coat of all purp, fans, wet sponge & scrape. Touch up with all purpose skim coats using super flex stain steel blades and final sponge. Primer, touch up skim w/ all purpose for light textures & re prime, then texture, wet sponge & de-bur texture if need to blend, primer, paint. I prefer my mud dries over night before primer, had to fix bubbled primer before just as I started texturing, sometimes even pulling off as I'm priming after texture, so irritating to have to do things twice because of rushing.... thanks for the videos, I've learned alot!
This guy is really skilled. However, I'm skilled at the one-day patch and paint and do it regularly. His problem; though dry to touch, the compound continued to shrink. That's because he dried it with ambient air! YOU MUST USE A HEAT GUN. Use 5-mn fast set with mesh tape and apply super thin coats. Dry them thoroughly with a heat gun (don't blister paint underneath it). Be patient. The first coat takes longest because it fills the cracks. Bake it well. Successive coats; super thin, and cook it. His coats were much too thick. Though the fast compound gets firm, it still has moisture - bake it out! Sand between coats; if the sander comes off clean, your compound is dry. If the spackle loads up the sand paper, dry it more...even if it FEELS DRY! The key is in the HEAT DRYING. If I move an electrical box, or must patch an access hole, this keeps a one-day job a one-day job. Small drywall repairs suck the $$ out of jobs because of drying time. 5-min fast set and a heat gun keeps me from making return trips over a small repair.
I think the water in the finish mud penetrates the quick set mud and that's why it expands like that. If you seal the quickset mud before the finish coat, I think you won't have that problem. But who knows. These kids have a mind of their own sometimes.
You always only have smooth surface repairs. I wanna see all these on textured walls, which is what I usually have to deal with. Like feathering on a textured surface, I get a lot of chatter, sometimes bumps from texture create huge wedges. I rarely encounter smooth walls.
How you tried wet sanding? Only possible with hot mud (5,20,45,90 min mud) you take a spray bottle with water and a sanding block sponge and once the mud is set spray the wall and the sanding sponge sand away knocks down the ridges you get with textured walls a-bit easier than with dry sanding the water acts as a lubricant for the sander, works like a charm ✌🏻
Hi Ben! What are the reasons for not priming/painting over quickset?
Painting of wet or noncured material doesn't seem like a good idea. The moisture has to escape and it could/ will lift paint and mess with the bond of the paint
@@travisk5589 Thanks for responding. I wasn’t referring to wet or noncured quickset, I’m talking about not using finishing or all purpose mud as a top coat but finishing a wall with quickset only (fully cured, dry and sanded) and then priming and painting over that. It’s less porous and actually somewhat shiny so I’m using a high quality primer that will adhere to that type of surface. But wondering what the typical reasons are to not prime and paint quickset.
Quickset is not as smooth as all purpose so you are going to have a small texture that will show with prime and paint. Hotmud is made to be really hard so you have a good base for the all purpose not finishing with it.
@ I agree, it definitely doesn’t create a smooth surface on the first coat. On the second coat however I’m getting a smooth as glass shiny finish. I’m doing that by skimming with a lot of pressure with the knife. It actually looks like a really nice finish, almost like Venetian plaster.
The fact that it sands so smooth is why you shouldn't paint over quickset. Even if you get rid of your hard lines, you're going to have a noticeably smoother area where you sanded the quickset.
It's usually not an issue in poorly lit areas, but areas that have light shining across the surface, the patch will show very easily
Yes Sir, Yes Sir! The "Hack" comes in and whips this thing out in a day, and hopefully they don't notice. I always ask people, exactly what is wrong with perfect? I can't believe you actually did all of this in a full 8 hour day! Around here, the "Hacks" would have had all of that done in about 2. Ewwwwww!
I do them with my majic wand, changing rooms we call it 24hr make overs! Heat gun all the way baby be brave and hope the paint Gods are smiling on you and dont peel the paint back round your roller....in front of the customer, each and every day....painter the sparky, plumber...carpenter missed again quick little paint Ez....! One day patching
So I take it, you're not into what most are, the 10-10 warranty. 10-steps to vehicle, and-or 10-minutes, whichever arrives first. The when tail lights surpass driveway, warranty no longer applies is played out. Need some modernization towards legacy saonces.
A paint question. I’ve had trouble with the premium cloverdale paints. I’m not sure if flashing is the word. But it goes on thick. Dries too fast on the surface. So with back brushing, or rollering after cutting in. It lifts the top off the just applied paint. It’s sticky dry on the surface, but wet underneath.
I switched to Dulux, and have never had this problem since.
But I’d rather buy from, locally owned.
I tried it again recently in cooler temperatures, same problem. Same paint you have.
I disagree with this video in so many different way. I’ve done patch and paint jobs many times in a day and have gone back to the same home year or years later and you never knew anything happen. It can be done. The trick to patching is and making it looks great in a days time is patients. Many handyman or drywall people speed through and it doesn’t ever look great.
I mean. I use blower fans. However, I have moved back to a two-day job because of A. I am bored by the slower workload. B. I can't get the drywall primer that makes this possible while limiting the chance of paint reaction to the raw mud.
For the first time in a couple years, I had paint failure on raw mud. Only in one 5"x5" square on a 2'x2' patch. The paint dried and cracked. Scrapped and put some more mud on the next day and a large section of paint just peeled off to about a 9"x9" square. Don't know if it was the paint, the mud, or a combo of both. Sherwin Williams drywall primer stops the paint problems but it's been out of stock in my area for over a year.
I also don't have the gaps as you did and I put the piece on the wall and trace it. Cut it tight and shave my piece with a razor blade to get it to fit snug. Always cut the hole to the piece, never the piece to the hole.
I think the only way to do it and not get imperfections is to pre fill with 5 mins and then 3 coats of 20 mins but the trick is to really do a wide fan. If your patch is 12”x12” your fonal coat of compound should end up around 48” or more. By doing this you’re not building up so much mud in one small area. Not sure I’m explaining it right.
Really shouldn't have to pre-fill unless the joints are bigger than they should be
@@samuelbankston2108 yeah true. I was just thinking to prefill so it prevents any shrinkage as you’re putting a whole shit load of mud.
@@doug8237 gotcha, maybe. I haven't had any problems using a heat gun to speed up the drying.
@@samuelbankston2108 don’t even matter. I would never really do one day patch and paint haha. Any job that needs shit to be done in one day is not for me.
@@doug8237 I had to do it a lot for my job my boss always yelling to get the job done in a day. He had unreal expectations most the time. Once asked me to use 20min to do a whole giant walk in panty from start to finish in like two days. Eventually got it done in like a week. I got chewed out too. Even though I told him from the start it was a bad idea and to use all purpose. And would've been done the same amount of days but less time over all cause not constantly mixing and cleaning. Just a couple hours a day. Then they always stuck me with noobs to train them on the job. Then I have to fix their mistakes.
I think this would be a great video to revisit maybe by teaming up with some of the people that do the one day patches and getting a feel for their workflow. and quality. Personally, I won't really do a one-day patch, but I could see where adding a shellac prime after all coats are on might fix things but I could also see where it could trap gases and cause issues further down the line. For me, it's not hard to pass on the painting to the homeowner or swing back the next day and finish her up. But if I live somewhere with our plus traffic each direction to the job site, I might feel differently about that.
I’ve been doing this for 20 years.. if you can’t then your not good enough.. I could have it back blocked, taped in with Proper recommended tape ( not cheap easy tape ) that’s the cowboys way out!! .. sanded and painted in 3 hours .. you are using a paddle pop stick when you could be using a trowel .. stick to being a carpenter .. 220 sand paper!!
You said that you shouldn’t paint over quick set compound. I would say that you can paint over any compound provided you have used the proper primer.
Proper and quality materials are needed for jobs that require quick repairs. Otherwise you will always have to come back.
Task failed successfully.
I’ve done dozens upon dozens of patches with nothing but a 40 minute mud and a heat gun.
Painted the same day usually. None of them have ever cracked.
Perhaps it’s because I’m in southern CA
I noticed our master bedroom has one of those patch lines... Now I know why!
... Now Where's the video for fixing it? 😂
I keep running into a problem on which I wish you could advise me. People have VRBO properties around here, and all they care about is slapping a coat of paint on and making more money.
It is a so-called upper crust type of place, but all the older homes are poorly constructed from an era that existed before law and order and building codes were enforced.
They keep giving us a long list of work to do, but then demanding when the job be finished, with no regard as to the time it takes to do the work.
They have months worth of remodeling, with things torn down to the frame, and they try to skip inspections and permits and any other lawfully prohibited shortcuts, right down to closing up walls with wet black mold inside. How do I tell them I won't do sub-par work, because I have a reputation and self-respect? These codes exist because somebody died so they made the code to prevent further death. How do I tell them, there are no shortcuts, there are no sidestepping the codes, when they will just hire somebody else who will do a dumbed-down version for cheaper? Yes, it will fail, yes they will have to keep redoing it, and yes, people will get hurt because they chose to take shortcuts. All I can do is avoid being connected to their criminal activity, but how do I avoid starving to death when these people literally make up 98% of the customer base?
It'll take as long as it takes. And it'll take a while to feather those edges right.....
Great vid as always.
I do patch an paint everyday day lol. Not to be mean. But my stuff don't cracked back. I figured u knew that. I work at my church to experiment an my work still holding up 5 years later.
Any advice on learning how to use a trowel ,I can finish with knives but just haven't gotten the hang of using trowels but I really want to be able to finish with them ?GOD BLESS
I have learned to have patience when doing any job. Now I know NOT to rush any drywall problem. Will definitely help me as I move forward with future renovations. Great job as always Ben.
you have to let the tape coat completely cure . Have to let the 1st and 2nd coats completely cure. Skim it, let dry, sand and should be ready for paint . The shrinkage from adding mud onto mud that hasn't cured is what causes the funky stuff as it will show though when it finally cures all the way out. Just because the top layer is completely dry doesn't mean the underneath mud is cured out and dry . quik set still doesn't cure all the way through in 20-30-45 mins . Not enough to prevent that in the end of the video .
I’m shocked to hear that rushing a job will cause poor quality. Absolutely shocked
my uncle does them all the time same process.. we never been called back.. now I'm just thinking if it showed up 3 days later😮😅 great video 💯
As a remodeler, I never use hot mud. I have tried it but didn’t care for it. I use regular all purpose and do maybe 2 coats in a day and 2 coats on another day. Then I put drywall primer on it to get the texture. Then I will paint it. I get pretty good results this way and I just explain to the customer that’s the way I do it for the best results. Rushing drying usually leads to failure (as shown in this video). Thanks for making this, I really had no idea that this would occur because I don’t use hot mud at all. Now I can explain it to my customers better why I don’t do everything in one day. People have no patience lol
All purpose as in pre mixed ?
This guy is a great inspiration to us all I’m sure. I’ve done a lot of his suggesting. 😊😊😊😊
If you are patching on a painted wall that has that distinctive eggshell finish, when I've sanded my patches and then painted, that area is too smooth - the surface doesn't blend with the "OEM" eggshell finish. What am I doing wrong?
You patched the heck out of that job. Is it really necessary to apply multiple layers of joint compound, in order to have a great finish.? Just asking.
I just want a white wall and this already exceeds my expectations. If you can skip some steps and still make it halfway decent, I wouldn't want to pay for more, and not for lack of money.
You know we used to live in unplastered caves?
I repaired a ceiling that was damaged be a water leak last weekend. I did take 2 days to do it but I used 20 minute exclusively. When the paint dried you couldn't see the repair.
So there's no type of primer that will cover hot mud, It has to be skimmed with regular mud?
Living in the UK and especially Scotland a sameday patch and paint was a virtual impossibility due to drying times.. Unless it was in a cupboard or somwhere out of sight.