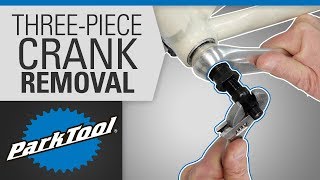
Crank Removal and Installation - Two Piece Compression Slotted (Hollowtech II, FSA)

Вставка
- Опубліковано 10 лют 2025
- How to remove and install a two piece compression slotted crank on a bike, including the Shimano® Hollowtech II and FSA® Gravity cranksets.
Questions or comments? Leave them below!
See all our Crank & Pedal videos in our Crank & Pedal playlist ▶︎ • Repair Help: Cranks an...
Video contents:
1:08 Tools Needed
01:42 Removal
03:21 Installation
➤ Tools & materials used:
• Hex wrench - www.parktool.co...
• BBT-9 Bottom Bracket Tool - www.parktool.co...
• BBT-10.2 Adjusting Cap Tool - www.parktool.co...
• SD-3 3mm Flat Blade Screwdriver - www.parktool.co...
• HMR-4 Shop Hammer - www.parktool.co...
• TW-5.2 Torque Wrench - www.parktool.co...
• PPL-1 PolyLube 1000 Lubricant - www.parktool.co...
For a text-based walk-through of this process: www.parktool.co...
➤ Subscribe: www.youtube.co...
➤ Like: / parktool
➤ Follow: / parktoolblue
➤ Fix It:
Did you know that Park Tool is the #1 resource for bicycle repair education?
• Visit our UA-cam Channel: / parktool
• Visit the Repair Help section of Parktool.com: www.parktool.co...
• Check out The Big Blue Book of Bicycle Repair: www.parktool.co...
➤ About Park Tool:
Since our founding in 1963, Park Tool has been the leading name in bicycle tools. Our UA-cam channel is an extension of our mission to be the ultimate resource for mechanics and riders of all skill levels. Here you will find comprehensive repair help tutorials for a wide range of components and processes, as well as troubleshooting guides, tips and tricks, and information on the latest Park Tool products.
➤ More Crank & Pedal Repair Help:
• Crank Type Identification ▶︎ • Crank Type Identification
• Crank Removal and Installation - Three Piece Crankset (Square Spindle, ISIS, Octalink) ▶︎ • Crank Removal and Inst...
• Crank Removal and Installation - Self Extracting ▶︎ • Crank Removal and Inst...
• Crank Removal and Installation - One Piece ▶︎ • One Piece Crank & Bott...
• Crank Removal and Installation - Campagnolo® Ultra-Torque ▶︎ • Crank Removal and Inst...
• Crank Removal and Installation - Campagnolo® Power-Torque ▶︎ • Video
• Pedal Removal and Installation ▶︎ • Bicycle Pedal Removal ...
• How to Service & Adjust Shimano SPD Pedals ▶︎ • How to Service & Adjus...
• How to Rebuild Crank Brothers Pedals ▶︎ • How to Rebuild Crank B...


I've been fixing my own bikes since I was a kid but I just wanted to say that almost everything that I've learned recently, is from this channel. It is always explained so clearly and expertly. Thanks Calvin!
And well lit 🎉
how did you maintain bike before without knowledge
This is my favorite video on UA-cam - Top notch screenplay and brillant acting.
All jokes aside, this helped me finish the build on 3 of my self-built bikes. Love the detailed instructions from Calvin, the Legendary Bike Wizard.
These videos are remarkable for their clarity -- clear speech, clear words and clear instructions. From one teacher to another, you are very good.
I used to be a bike mechanic in the late 80's-early 90's. I'm getting back into riding after a long hiatus and finally own a modern bike. I'm changing over from Tiagra to Ultegra and realize some things have changed over the years. Thanks so much for this very helpful informational video and now I'm up to speed!
I bought a Specialized Fatboy bike from a bike shop. It wasn't long before the left pedal fell off. I found they had used the wrong spacers which didn't leave enough room on the spindle to fully engage the crank arm; it was only halfway on the spindle. Three botch jobs on this bike, which is why I do my own work, now. I'm grateful for your videos, Calvin. Thank you.
I just serviced my bottom bracket for the first time thanks to this video. The hardest part was ordering three incorrect tools until I found the correct one. Much appreciated Calvin and crew!
This is the only video I've found covering how tight to tighten the cap on the Ultegra arm. Thanks
This video saved us on the road recently - in the middle of nowhere. One of our group had her chain stuck between inner chainring and frame and we could not get it out. I had recently seen this video and was able to disassemble the crank and free the chain. Had to use tire levers to get the cap off, but now I carry the little metal cap remover in my tool bag. Thank you!
Why don’t just break the chain with chain breaker Larry?
@@sabangmerauke_ID Maybe it was wedged. The chain would have been loose anyway, not being around a chainring - so I'm sure if it could have been moved back or forth then someone in their party would have considered that option to break the chain as well, especially if a quick-link was in use.
Brilliant video - my crank had a little bit of left and right play so thought it would need a trip to the bike shop to get them to fix it. But, I watched this video, brought a BBT-9 tool, fixed it myself. A 10 minute job and didn't have to pay any mechanic fees. Happy days!!
So you just remove the crank and put it deeper on?
@@7Dings11loosen the crank bolts to the non drive side crank. Turn the crank cap till the side to side play is removed and then tighten the crank bolts again..dead nuts simple. A bike shop would definitely overcharge for such a 'repair' when its really just simple bike maintenance most bicycle riders should know how to do.
Brilliant video. I followed it exactly and had no problem changing my crank set. This is the only video you’ll ever need!
Calvin, love your videos. Can't make this any more clear. Park Tool is lucky to have you!
These series are easily the best on UA-cam in its kind
thanks!!!
Sir, you are the most valuable person on UA-cam.
Extremely clear, helpful, and complete. Thank you.
Thank you for the video. Especially the torque technique for the final tightening of the left crank.
I did this for the first time today and this video gave me the confidence to carry out the process. Thanks.
Excellent videos from Park Tool!
Another very good video by Calvin. Shimano requiring a proprietary tool? Never!
I have so many questions why they thought that this was a good idea😂
It’s to prevent overtightening. It’s easy to mistakenly assume that the end cap is the only thing holding the crank on.
I love this channel. Calvin Jones is the man.
Thanks to this very detailed and well made video, I was able to change my chainring myself. Thanks.
great job on the videos. hope park tools take real god care of you.
Always love your videos Calvin
Thank you for another great video with amazing focus on details!
My left crank just fell off while riding. Crazy. If it happened 10 minutes earlier when I was descending a hill standing up on them I could have died. Luckily I was just lightly pedaling sitting down at the time so one moment Im pedaling and in 1 second my crank is on the ground behind me. Bike is like brand new 2022 model, all standard, never messed with, never crashed or dropped.
Same happened to me, do you know why it happened?
@@danelaw888 not a clue, nothing looks obviously broken, i just bolted it back on and it hasnt come off yet
Just needed to know how tight to make the cap. Much appreciated.
"Four inch pounds". What 17th Century gibberish is this? 😜
thank you! high quality & professional video!
Brilliant series, I really appreciate it!
Great explanation and run through! :D
I use to put the white (shimano) anti seize paste on the left outer part of the spindle, not the green transparent stuff.
By the way, i think most of that generously applied green grease got pushed off when putting the spindle in the bracket.
I've found that when installing grease to the spindle that 99% of the grease gets squeegeed off by the BB cups and you end up with a huge glob of grease in between the BB and the drive side spider, so I only apply the grease closest to the spider on the drive side then once I have the spindle through the BB I apply grease to the splines on the end of the non-drive side. The spindle is usually made of a rust resistant material so you don't have to worry about rust from not greasing the entire spindle and the only part of the spindle making contact with the BB are the ends where the spindle meets the bearings so those are the only spots that really need any lubrication.
Shimano say grease only the splines and the threads of the preload cap.
The best bike tutorials on the net. Thumbs up guys! Thanks ^_^
Thanks, great video!
What do you do if there is a gap/side to side motion of the spindle and can't fix it by tightening the cap?
You may need to install a spacer inboard of the drive side bottom bracket cup.
I dont usually comment on anything, ever. But this was perfect, great video, exactly what I was looking for.
Oh i love this channel
Really great video, thanks for help
This was so helpful. Thank you!
If I want to replace my crank cap with a new anodized one do I need to loosen the crank arm bolts first or can I just unscrew the cap and screw in the new one? Thanks!
First just try to unscrew it. If it unscrews, simply replace it. If it will not unscrew, loosen the bolts, and re-tighten when the new cap is in.
@@parktool Thank you!!
Thanks paps for this very helpful video
Hi, there is a little ring in the left crank arm that usually stays in the spindle when I remove it (part Y-1F3 16000)... How should that little ring be installed? with the rubbery side facing the bb sealing? or should the rubbery side face the crank arm? Thanks
Thanks - answered every question about my XT crank. Replacing BB30 adapter with a Ninja ceramic bearing adapter and I want to get it exactly right.
@Fellow accelerationist Ninja adapter turned out to be she-it too. It lasted maybe a month and a half, then... crunch. The mounting is some kind of rubber that lets the bearings shift and wears them out. Went back to the aluminum Wheels Manufacturing shell with the cheapo ABEC-3 steel bearings after trying ceramic and angular contact bearings (must be mounted with 5 lbs side pressure to work) that lasted longer than the ceramic but still the only ones I've tried that last are the ABEC-3. Stay smooth for about a year. Now I've got extractors and the 24 mm mounting floats so I can change em out no problem. What a pain in the ass, though. No more BB30 on any bike in the future.
@Fellow accelerationist I didn't mention the seven sets of 30 mm bearings I wrecked in about three months with the original BB30, and the $350 carbon crank that now sits in the closet. The only thing that saved the entire Focus carbon frame was the Wheels Manufacturing adapter. I would definitely avoid BB30, especially on mountain bikes. Everybody hates it.
@Fellow accelerationist I bought a truing stand and have built up wheels but it's hard to get it just right. Love my Mavic wheels, best I've ever ridden by far. Every time I put anything other than Shimano on my bike, I'm sorry I did. Still the best. Good luck with your build
Very helpful. Thank you!
I am going to be uninstalling my crank set for inspection and cleaning is Park Tool High Performance Grease HPG-1 suitable for this purpose?
Yes, HPG-1 will work great to use for re assembly.
@@parktool Thank you very much for your prompt reply have a good day!
Nice video. A question, does end cap of the crank necessary? Because mine drop & lose somewhere when im riding. I notice when cleaning my bike an its not there anymore. There are no plays/movement on cranks whatsoever when im riding it though....
If the pinch bolts are tight then it is not 100% needed. Its kinda like the top cap of your stem. Once you have it set and you tighten the pinch bolts of the stem, you could in theory remove the top cap. The reason you need the top cap and pre load adjusting bolt in the case of your cranks is for future settings. I would get a replacement on the way. It is safe to ride in the meantime though.
Legend !!! Helpful videos as always...
When installing the spindle thru the bottom bracket, should the drive-side surface of the crank be flush with the bottom bracket surface or should there be a small gap? Same question goes for the left side crank. Should there be a small gap between the crank arm and the bottom bracket surface? Should both arms be flush with the bottom bracket surface? I have about .5 to 1 mm gap but have no play in the cranks when testing by hand.
There should be no spindle showing but the crank arms should not physically touch the bottom bracket shell. ua-cam.com/video/OjE1YMj9Al0/v-deo.html
So goddamn clear! Thank you!
Do you always have to tighten the sprocket side of the crank first ?
And is that always tighten to the maximum ?
Tightening adjustment always done only on the non-sprocket side as shown at the end ?
You cannot tighten a two piece crank like this from the sprocket side. The adjustment should be done from the non sprocket side for this type of crank. Most adjustments on this and other types will be done on the non sprocket side.
very imformative thanks
Thanks for the excellent, informative video !
Calvin Jones for president 2020
Great video👌
Great Information As Always !!!👍👌✌️
Another option for removing the crank cap for the shimano is to use an 8mm and 5mm hex key against each other to turn the cap
Neat hack! Thanks for posting
Great and to the point.
Nice video
Which measurements do I need to look out for if I want to upgrade a 105 r5700 crankset with a tiagra model?
You can swap from Tiagra to 105 or 105 to Tiagra without a Bb change.
Super helpful! Thank you very much, Park Tool!
I installed the SHIMANO BB-RS500 bearing on my bike but when I tapped the crankshaft through, the plastic flange busted out of the left side bearing. How do you install the bearing shield on the crankshaft with it being such a tight fit?
I guess another helpful piece of information would be what size diameter crank spindle is compatible for the BB-RS500
This guy is awesome!
Perfect video for me to do it myself, thanks me Zappa
I am trying to get information on, what I believe is called, the bottom bracket O-ring installation, mine fell out of my left side crank arm while doing this service, It seems like there is a rubbery side and a metal? side. I cant find any video or instructions anywhere as to which way this thing should face.
As I have discovered I incorrectly identified the part name, this part is not called the bottom bracket o-ring, I am not sure of the name of the part, it is a o-ring type part that goes into the left crank arm around the spindle hole and sits up against the bottom bracket bearing. Any help with the part name and correct orientation of installation would be great.
Hello Jim, what brand and model of crank and bottom brackets do you have?
@@parktool Shimano tiagra crank with Shimano, outboard cartridge bearings, 68mm shell
Hi I have a question. I am relatively new to MTB at this level of details. I recently bought a 2017 scott genius 720 plus which runs a Shimano Deore M627 Double 2 x 10 Speed 22 / 36 175mm Chainset. I recently noticed that the chainset outer ring is almost woren out and when i tried to replace it, the inner rings just wouldnt move and now i am planning to replace the whole set. Now I wish to upgrade it to something new so that I can find replace for the next few years. Any ideas? Is it possible to replace Shimano Deore M627 Double 2 x 10 Speed 22 / 36 175mm Chainset with something else that is newer ? If yes, what should I look out for?
hi. just wanted to know, what kind of tools to remove the 12 point crank cap cover. like for zrace hardrock crank set.
You may be dealing with a triple square which you can use a standard hex wrench on or some cranks like Rotor use the same pattern as our FR-5.2. You can tell which it is by the shape of the points. the triple square will have pointed points and the FR-5.2 will have square notches.
Extremely helpful but there is one problem I still have. What do you recommend if the right crank with spindle is stuck? I cannot get the spindle out with the mallet and I don't want to make use of brute force. Thanks.
If this is a two piece crank such as Shimano Hollow Tech II, or similar from FSA, etc., then there is not much choice other than impact. Have someone brace against the bottom bracket. Strike the spinde with a large malleet. You can also use a piece of wood over the spindle and strike with a large hammer.
THX!!! 👌👌👍👍
i bunged up the stop plate in between the pinch bolts on the left side crank arm, how badly do i need to find another one, or will I be safe without one?
It is a secondary safety, it is best to have it in place but the crank will function without it.
Great video. is there any reason the cap would come off mid use? I have a brand new bike and while cycling up a hill the pedal arm became lose and is no longer 180 degrees to the other pedal arm. Also upon inspection I appear to have lost the cap somewhere along the way and can't find it anywhere on the road where I had the problem. 800 euro bike and I've had to bring it back to the store 2 times already. I'm beginning to think the the mechanics are incompetent. I thought Giant was supposed to be a good make!
Was this a "Hollowtech II" arm, with compression slots? If so, the lost cap is only an indicator of other issues. The #1 reason any bolt comes loose is that it was never properly tight to begin with. The bike manufacturer did not make the crank, and that is where the issue is to be found. For that matter, the crank manufacturer did not install the arms in the bike. If the arm fell off, it means those two compression bolts were not compressing the slot, and again it is a reasonable conclusion that they never really were.
@@parktoolit's the Shimano FC-MT500-3 I had already returned the bike a week after purchasing due to an annoying creaking sound coming from the crank after the first day of use. The mechanic spent over an hour working on it and had given it back to me 3 times to test before he sorted it out. So from what you have told me I think it's safe to say he didn't tighten something up correctly. The pedal is still hanging on by a few threads. It's pointless to try and fix it myself as the cap is missing. Do you think the threads could be damaged? I'm worried he will not want to replace the parts and I'll have further problems down the line.
Such a shame because I really liked the bike. My friend has the older model for over a year and has had zero problems to date.
Y1F811100 Is the part number for your missing crank arm fixing bolt. You should be able to order this through the shop or online. You will need it. It is not likely that the threads that this piece threads into are damaged. I hope your riding experience improves.
@@parktool Thanks, I really appreciate your help. You guys have a great channel, very informative.
Great video. Thanks again.
Calvin Jones is the best!
Great video! I may have over tightened my end cap. Glad I watched this.
I was a little careless with my wrench and rounded the pinch bolts a little. I am afraid to tighten it anymore in fear of not being able to remove them later. Can i use regular bolts from the hardware store to replace them?
You can. Depends on if your hardware store carries the correct size but they will work well for you.
I take it these 2-piece cranksets are intended to work with press-fit bearings in lieu of a bottom bracket spindle? I've only known 3-piece setups with square tapers, which as a Clydesdale rider I find easy to cam out and ruin, so this new technology appeals to me.
These cranks work on non press fits as well. There are very very few bikes out there that these do not fit on.
Excellent video!! thank you very much!!
Thank you!
Is there also a video how to replace those bearings inside the "thing that holds crankshaft"?
"bottom bracket bearing replacement". type that into google.
Hi,
Is it normal for the spindle to not be fully engaged into the left crank arm after tightening the preload cap and then the pinch bolts?
On my Trek Emonda witht the BB90 I installed the crank just like it should be installed and after that I removed the preload cap just to have a look - the spindle is not flush with the left crank arm surface, missing around 2-3mm.
That is normal and needed. If it was flush with the outside it would not allow the pre load cap to do any adjustment.
perfect! i really needed this
Great video!!! Helped me out
Great video
Hol Up. I got a new two piece crank and I realized it didn’t have a crank cap? Do they sell those separately?
yes
Any suggestions on removing end cap without tool? Screwdriver,, crowbar, dime, not working. LBS don't carry it and a week away on Amazon. Help...
Man thats quite the LBS to not carry that tool
I've installed two new left side crank arms with a new crank set following every step on this video. They both fell off on my lowest gear, causing the threads to strip. I've purchased a third crank arm and would hate to repeat the same mistake. What am I doing wrong here to cause this to keep happening?
Interesting. Is the drive side of the crank all the way seated in the bottom bracket? What is the overall width of the bottom bracket from the outside of the Drive side bearing to the outside of the non drive side bearings? When you say the chain falls off the inside, how does that translate into needing a new left side crank arm? Im guessing there is compatibility issue going on here. Reach out to tech@parktool.com for a bit more help as some images will help for this.
@@parktool Thanks for the reply! I've since investigated with the help of some forums out there that my BB spacers may have caused several problems. 1) misalignment of my chainrings and cogs 2) indexing gears became out of whack 3) the left arm crank no longer sat in place.
I'm learning that the details of bike maintenance are very intricate and one misstep can be a catastrophe!
Thanks for these videos! Wondering why Shimano doesn't include instructions
uhhhhh is it okay to ride a bike if the safety pin thingy in the left arm was lost??? Im kinda worried i mind end up destroying my crank lol
just make sure the pre load is set correctly and the pinch bolts are torqued correctly and you will be fine.
What do you do if the drive side crank won't come off? The spindle won't move at all.
Use a mallet to coax the axle out.
@@parktool thanks, had tried that but didn't want to use excessive force with my rubber mallet and it wouldn't budge. Came out quite easily today once I gave the mallet a good swing it two.
I don't have the tool to remove my Shimano crank cap. Anything I can find around the house?
Update: Butter knife. Job done.
Why is the spindle lubricated? IMO the spindle should be firmly retained by the bearings since it is the bearings that are doing the work of reducing friction while the spindle turns and providing support & alignment..
So you can remove it from the bottom bracket should the need arise
I was removing my crank and bb after a dirty ride andd some very small pebble/debris got stuck in the bb shell threads and i then installed the bb. Is that ok or should i remove the bb and clean the threads?
If the bottom bracket screw in and tightened successfully, it must not have been very bad. The debris is now basically a gap filler. Next time around, clean it out. If this is a cartridge bottom bracket, or if you have a sleeve, the debris will not get into the bearings.
Where can i find those end cap?
my crank cap got stuck. any idea how to remove it? got torque too much
Begin by loosening both pinch bolts. Now put a tool in the cap and press firmly inward and turn counter-clockwise. See if that works.
@@parktool done, failed. Mine using 10mm Allen. Waiting for my breaker bar to arrive
very cool, big help! :)
I watching this because I want to Do Crankset my self
I just used the blade of a knife to tighten the plastic cap on the hollowtech 2 crank
This.
My left crank keeps falling on uphill. How do i fix it?
What if the stop plate between pinch bolt of the left arm is broken. I accidentally broke it while removing the crank. I broke it in half. Is it still ok to use the other half ?
As long as each bolt is pulled up to adequate torque, it should be fine. That is approximately 15Nm.
@@parktool thanks for this.
Hey guys I have an issue. I followed your steps, cleaned and re-greased everything. However, now I'm getting "creaking" sounds from my cranks when I pedal. Do you know what I can do to remedy that? I appreciate it!
Creaks can come from many places and eventhough it sounds as though it is coming from the bottom bracket it may be coming from somewhere else. Check that your pedals are tight, check that your rear and front quick releases or thru axles are tight as well as your seat and seat post. You could also have creaking coming from your suspension if you have suspension. After exhausting a few other potential causes and you find that it is the crank, then it is usually the bottom bracket or a chainring bolt. if it is indeed your bottom bracket then removal of the bottom bracket and cleaning and installing with a retaining compound or grease should quiet the problem. Creaks can be a hard nut to crack. I hope you find the source and fix it.
Parktool guys. I am from a small town in the Northern Cape South Africa. I am really struggling to maintain my bikes and the nearest cycling shop is situated about 350 kms from me. Are there any way that you can perhaps sponsor me and the fellow kids in our club with a set of tools so that we can please repair and maintain our bikes. We are really struggling. Please try and help us to also enjoy your bikes and save some money please
great!!!!
Thanks
How do you know if the arms are installed at exactly 180 degrees? is there a guide or a mark?
The Shimano Hollow Tech II system does have a guide, making it near impossible to not be 180 degrees apart.
Park Tool thanks :)
hi. I had this question too pls. By "guide" do you mean something visual (that I missed) or a guide meaning that it automatically guides it on at 180 degree meaning it wont go on if its not 180 degrees. cheers. great video too BTW. Prob best one on this out there
Ha I just beat the left crank with my hands in, tighten the bolts, then wondered why does that dust cap have threads... of course it requires a specific tool to screw in. Thank god I saved that silly plastic stop plate, was about to throw that in the dumpster. But really does it even do anything ? It doesn't seems to be stopping anything.
It is used to preload the bearings tension and hold everything in place until you tighten the side tightening screws. After that it just protects its own thread from dust. It has the same task as the cap on top of a-head headset.
I can't remove the right cranck i tapped the spindle as shown but it is still stuck help!
Look in the slot. There is often a hinged plate. Lift this plate. Or take out both bolts entirely, and then lift it out. If it is still stuck use a mallet to tap.
@@parktool i successfully removed the left cranck but i struggle with the right one
You need to use a rubber mallet to give it some solid hits while bracing the frame at the same time. I've removed this kind of crankset multiple times and some can be pretty tight in the BB.
@@sbccbc7471 thanks, i was scared of tapping hard with the mallet
@@mohamedzakariachorfi5541 You're welcome. There's nothing to be scared of when you use a rubber mallet.