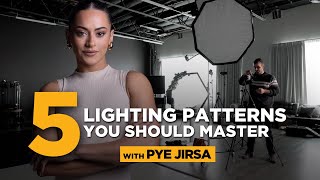
My Favorite TWO LIGHT Studio Setups for Model Photography

Вставка
- Опубліковано 23 сер 2024
- Lightroom & Capture One Preset Packs: www.nathanelso...
A behind the scenes look at my favorite two light studio setups for creating beautiful and dynamic model photography.
____________
JOIN THIS CHANNEL to get access to perks:
/ @nathanelson
____________
FREE Dodge & Burn PS Action: sellfy.com/nat...
BEST Royalty Free Music for your projects: tinyurl.com/2j...
--------------------
GEAR USED IN THIS VIDEO
Strobepro Optical Snoot: bit.ly/3KXckvG
Strobepro Framing Shutters: bit.ly/3lKcJqR
My Studio Lights: bit.ly/48aYTV1
Aputure 600d: bhpho.to/3S1gM3q
Aputure 150 Light Dome: bhpho.to/3S4aCzA
Best Light Stands: bit.ly/2XYhTSh
Profoto Deep Umbrella: bhpho.to/3vlXxm5
Profoto Umbrella Diffuser: bhpho.to/3wr7L61
V-Flats: bhpho.to/3pA5inn
_____________
UA-cam GEAR
Main UA-cam Camera: bhpho.to/2RYVcQA
Main Vlog Lens: bhpho.to/3grQy7e
B-Roll Lens: bhpho.to/2S20BGE
Vlog Mic: bhpho.to/3pTxzVY
Studio Mic: bhpho.to/3gsgrDT
NP-750 Batteries: amzn.to/3d1ctRo
NP-FW50 Batteries: amzn.to/2Of3DVx
My Monitor: amzn.to/3d0vras
--------------------
FOLLOW ME:
Instagram: / nathanelson
Twitter: / nathanelson
Website: www.nathanelso...


Solid, concise video with great info and examples. I also like your calm demeanor. It's refreshing compared to other I-am-so-super-hyped presentations.
Couldn't have said it better!
I love how much effort you put to share your knowledge with the world!!!! Your work is very inspiring and I’m so thankful for your videos 🙏🙏🙏
Thanks!
Amazing work, very well explained and informative. Thank you for making this video
Great video! You totally got me by Squarespace not being the sponsor :D
lol yeah.. refreshing!
Wow, this video is an absolute goldmine of photography knowledge! 📷 Thank you so much for sharing these invaluable tips and techniques. I can already see a significant improvement in my photography skills just from watching this. Your explanations were clear and easy to follow, and the visual examples were spot on. I especially loved the segment about rim lighting and gobo lighting. Keep up the fantastic work and please keep those tutorials coming! You're making a positive impact on so many aspiring photographers like me. 👏📸
Glad you enjoyed it!
totally agree with you
I love the portrait subject, specially woman, and you have achieved such elegants results!
Great short, sharp and inspirational video.
Glad you enjoyed it!
You're an awesome teacher. Thank you for breaking this down. You make it so easy to understand. 👏👏
Anytime!
Lovely camera work, and styling. Great job! Nathan what's your camera setup for a shoot like this?
If you're asking about the camera I am shooting stills with, it's the Nikon z6II w/ the 85 f/1.8 for 95% of my work. For my BTS camera I am using a Sony a6400 with the Sigma 16mm.
Nice video, very informative. I like the first the best. Technically it would be Short lit Rembrandt lighting with the way it's set up in the video.
thats a huge amount of knowledge your're putting in those vids - great job mate
Absolutely stunning work and styling! Thanks for going over so many details on how you got the shot too!
You can mount it on the 300 for sure
Love the sponsor of this vid! haha great set of tips and BTS!
Haha thank ya
Sweet! Thanks for the helpful info!
Anytime!
Another succinct and information filled video Nathan...Two thumbs up!
Glad you liked it!
Lol! As I was telling myself "DAMN those conversion to BNWs are good" you started offering your LR packages. My next purchase for sure!
At it again 😎👊🏾. Nice work as usual Nate.
Thanks bud! Hope you're well.
Your video is straight to the point and easy to understand. Might I add the shots are top tier!
Thank ya kindly.
Tremendous - enjoyed seeing - in the rim light set up is the key light gridded as there appears little light from it on the backdrop
Nope, I don't use grids, it's just in how you angle the lighting.
Excellent video and photos! Thank you!
Glad you enjoyed it
Amazing video! 🔥🔥🔥Just 2 questions. 1: in your next video can you explain a little more about the lights you use? I'm still learning about all the different kinds of lights the difference between them. 2: after you go over all your favorite light setups, can you do one specifically with color leds and / or color strobes? Ty!! 🙏🏾
The lighting I use is the AD600Pro heads. Best bang for your buck on the market. As for color leds, maybe, I don't tend to do a lot of mixed color work :)
Everything about this video is absolute perfection! Style, technique, skill, models...SUBSCRIBED!
Welcome aboard!
Very helpful information in an easy to watch and smooth flowing video. Thank you from Hawai'i!
Thank you, this video will help me a lot
So much great information, dope shots, and clear instructions. Bravo!!
Glad you liked it!
Awesome video, on your rim light light facing forward it looks like you would be getting flare in your lens the way it looks from the video and where you are sitting...
I get that comment a lot, and I've even had my assistants on set ask me about it, but the light is out of frame, so it never flares on me.
Excellent video great deal of information and ideas presented.
Glad it was helpful!
Man oh man those are sick ideas with the gobo. Hell Yeah
Amazing tutorial and photos. I learned so much🙏Suscribed!
Your explanation amazing & work incredible !
Glad it was helpful!
Great stuff, fantastic studio,energetic artist,thanks for sharing!
Glad you enjoyed it
Very helpful tips. I'll be trying these out for myself.
loving your simple way of teaching. thank you so much. i will consider investing in your stuff 🥳🥳
Great stuff as always Nathan!
Glad you enjoyed!
I really like the results of the 4 setups you did. I want to try them all and I will try to use cheaper light modifiers, it would be nice if you could specify the flash power in each setup. Thank you, this clip is accurate, creative and you can learn small things. 🖤🙌🏼
Flash power varies depending on modifier and its distance from the model, but it's typically metered to f/8 in the studio.
@@NathanElson thanks!
Awesome video, Nathan. Thanks for sharing your favourite light setups. I'll use them in upcoming photoshoots for sure.
Cheers from Bashkiria
Awesome! Cheers from Canada
Fantastic images man. Got some nice inspiration. Thank you!
Glad you like them!
Awesome light set ups!! Super helpful 📸
Extremely helpful! Thanks.
Glad it was helpful!
Oooweee I definitely need to try the wrap around lighting setup 🔥
Boy am I looking forward to trying out an optical Snoot! Beautiful work, thanks for the insights!
This video is amazing! Thank you for sharing. I tried out some of the setups and the results are awesome!
Great content as always Nathan! Cheers
Thanks!
my name is Jin from Korea. and wanted to say thank you. this tutorial quality is so great and it was really helpful about set up lights or how to use optical lighting. really thank you. I mean it. of course subscribe you as well. please make more video about your skills please haha.
You're welcome :)
@@NathanElson I wish you could make tutorial about black and white editing from Lightroom or capture one. I really like your black and white mood
I have presets / styles that handle all of that: www.nathanelson.com/store
@@NathanElson Awesooome. Can’t wait to try with that. Thank you for letting me know 👌🏼
Fantastic work, thanks for sharing.
Just found your channel , you are doing amazing job , and the photo i love all of them , great job 👌
Thank you!
A really nice video. You definitely said rim too many times, but the video is perfect.😂
If you don't have a 2nd light for the rim light, a reflector will work. Move it closer or farther away to adjust the amount of light as you would by adjusting the power of a 2nd light.
And choose white or silver (or even some other color if you want to add a color to it) to adjust the amount of rim light as you would adjusting the power.
And for the shot with 2 lights shot into a white background, if you only have one light and/or don't have a background but you have a white floor (could buy what's called tile board that may be cheaper than a white seamless background) or to go super cheap, cover the floor with sheets of printer paper (yes, you'll have to clone out some edges of sheets of paper) and bounce the light off the ceiling.
Man you have such a amazing style !!! wow !!!
Very beautiful and inspiring work! Thank you for all this!!
Helpful and informative as always! Thank you so much Nathan! Good luck!
Super helpfull. Love the style of your videos
Awesome, thank you!
Thank you man! Loved this video as always 🔥
Glad you enjoyed!
La qualité 👌🏽🔥🔥🔥
Great video Nathan! So much useful knowledge delivered so succinctly, along with a great body of work. Masterpiece.
Great inspiration! Thnanks!
Thanks for watching!
Fantastic ideas. Thank you for sharing
Thanks for sharing with us ! great work !!
incredible. Love these setups
Thanks!
Great tips! Thanks for sharing this
wow nice work !
Thank you! Cheers!
you're amazing!!!
beautiful images and nice breakdown!
Thank you kindly!
Also I almost forgot, good tips!
Awesome work!!
Loved this video, subscribed!
Weird question, great tutorial by the way. Thank you again. For your flash, do both the key light and the fill light flash or just they keylight?
Both lights are firing 😉
@@NathanElson Thank you! :D
Magical!! thanks for sharing!!
Beautiful ♡ thank you so much for sharing ♡ I would love to try the second set up but my ceiling is just 8 feet (((
4:50 the size of umbrellas please and did you use diffuser as well?
Many thanks for your videos so educational 🙏
41" umbrellas with no diffuser
Just luved it..
The best 📸
WOW love it❤
Great video! Thanks for posting. I was curious how you prevent lens flare in setup four. Are you further back and using a longer focal length to get out of the throw of light from the rim? Thanks.
Hey Nathan. What’s the difference between wraparound lighting vs. rim lighting? Is it the position of the fill light?
Nice work. It’s not often I can say that about photographers on yt
Your work is great
Thank you! Cheers!
So the gobo Gobo is continuous lighting from my understanding, but what about your main light?. I assuming you turned off the studio lights off?.
Great Technique !!!!!!!!!!!!!!!!!!!
Glad you like it!
Great photographer!! 🔥🔥🔥🔥
Thank you kindly
Nathan, I don’t know but those awesome images as viewed on UA-cam are set in a bright white frame that is twice in area than the photos. Is there a way the photo presentation be set in a gray frame like the old 18% Kodak gray. Your images would be so much more impactful.
Solid thought. I'll give it a go on the next video. Thanks!
Thanks!
OMG *.* AMAZING
Thanks!
great thanks
Welcome 😊
Awesome! Sigma 50 on there?
Thank you for inspiring video
Glad you enjoyed it!
Love these, especially the one with the two medium umbrellas. I'm guessing they are 41" are they White or Silver ?
You betcha, and white all day every day.
awesome video bro
Thank You!
Welcome!
Great Video, Thanks
Glad you liked it!
hello,
Where can I buy that chair you use in the studio?
U SO TALENT !
Thank ya
Hello good! Excellent work! A question, in the spot at minute 3:18, do you use continuous light or flash? If it is a flash, at what power do you shoot it? From already thank you very much!
Awesome
Thank you!!!
Welcome!
Hey Nathan, love your videos and the info you share. How do you avoid flare into the lens when the umbrella is facing you (last setup)?
I typically shoot 85mm and the umbrella is off to the side far enough that it doesn't fire into the lens.
Thank you for another beneficial lighting video again. I will try to find this sweet spot in those two umbrellas to the backlighting. Haven't paid attention to it so far. Why are you using an umbrella for the rim lighting in the last scenario? I always go with my striplight with a grid to avoid spilling in any direction. Using an umbrella seems to me way more tricky. What is the advantage?
The way I position the umbrella makes it so that I don't have to worry about spill, and umbrellas are so much more portable.
Thank you🙏🏽🙏🏽
No problem 😊
amazing
Great!