etrailer | Trailer Hitch Installation - 2015 Nissan Pathfinder - Curt

Вставка
- Опубліковано 11 жов 2024
- Click for more info and reviews of this CURT Trailer Hitch:
www.etrailer.c...
www.etrailer.com
Don’t forget to subscribe!
/ etrailertv
Full transcript: www.etrailer.c...
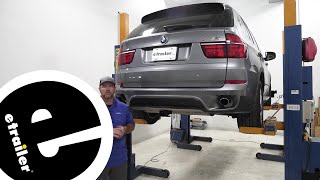
Today on our 2015 Nissan Pathfinder we're going to take a look at and show you how to install the Curtain custom fit class 3 trailer hitch receiver. This offers the 2 inch by 2 inch opening. It's part number is C13126. Here's what our hitch is going to look like installed on our Pathfinder. It's a really clean, nice look as you can see, you're only going to see the plate there for the safety chain connection points and given us some really nice strong support. Got our 2 inch by 2 inch receiver tube opening here. See the reinforcement collar on the end.
That's going to have a flush front to it so it gives us a nice clean look. Also, the hitch is going to be tucked in behind that outermost edge of the bumper; the face of it here. We're not going to have to worry about hitting it with our shins or anything like that while we're walking around the vehicle. I like that the main cross tube is going to be completely hidden up here behind the bumper as well as our attachment points. This is a pretty simple hitch to install. The weld nuts are already there and we're just going to thread in 6 bolts with conical tube washers on them.
The hitch is rated for up to 600 points worth of tongue weight, that's going to be the maximum downward force we can put here at our receiver tube opening. That's going to offer a 4000 pound gross trailer weight rating. It's going to be the total of our trailer and anything we've got loaded up. If we go into a weight distribution style hitch setup, we're going to keep the same tongue weight rating at 600 pounds but the gross trailer weight rating's then going to go up to 5000 pounds. Definitely check the owner's manual in the Pathfinder see what it's tow ratings are. We'll want to go off of whichever numbers are the lowest. We're going to have a 5/8 diameter pin hole that's going to work great for securing cargo carriers, bike racks, whatever it is we want to use on our hitch.
It looks like we have plenty of room on each side here so no matter which of those you choose, you should have plenty of room. Safety chain connection points are going to be pretty good size. Most of your smaller to medium sized safety chain connectors should go in there without any kind of issue. It's pretty narrow there on the front so even those with the smaller throats on them we should be able to get connected there without any kind of problems. There are a couple measurements that are going to be helpful in selecting your ball mount, bike rack or hitch cargo carrier, we'll inaudible 00:02:11 need from the ground to the inside top edge of our receiver tube opening, we've got 14 1/2 inches. Then from the center of our hitch pin hole to the outermost edge of our bumper, it's going to be about 2 1/2. The first step to our installation is going to be to lower down our spare tire.
You want to open up our access panel here in the back and there's going to be this small turn dial thing right over the top. You'll need a 21 millimeter socket or you can use your lug wrench of course. We just want to lower this on down. Now for attaching our hitch to the vehicle, we're going to use our M12 bolts they're going to be threaded into our weld nuts, you can see 1, 2 and 3. This is on the passenger side, just above the exhaust. On the driver side you can see we've got a toe hook here. These the three holes we're going to be using, 1, 2 and 3 but we're going to have to get this out of the way. This is going to be an 18 millimeter socket. We'll pull off these two bolts and also the 2 here on the side of the frame rail. Now we're doing to clean each of our weld nuts out, we'll just use a little spray lubricant then a nylon tube brush this is part number 814092. Just want to make sure our threads are clear of any debris that might keep us from threading our hitch into place. Do the same thing on our passenger side. We've got our fascia brackets that are on the backside here that are secured with the pushpin on the bottom, they'll be one on each side and we'll pop that center section out and the whole thing will pull through. We'll go right above that and into the bumper there's going to be a 12 millimeter bolt that secures the bracket at the top. Get those pulled out and we'll hang onto this so we can put it back in once our hitch is in place. We'll do the exact same thing for our driver's side. Then we'll find the center of our rear fascia here. It should be about right there and we want to center a hole there at 2 1/2 inches so we'll measure from our center point out an inch and a 1/4 each direction. Then we need to come back and inch and 3/8. We'll take out that middle section. All right, we'll start w


The best instructional video ever.
Hello,
I just purchased a hitch form my NP 2015 and this video is perfect ! What an amazing video. No word wasted and yet so relaxed and easy to understand. Please do help with small queries
- what is the torque spec for attaching the bolts ? as a home diy such information tends to be hard to find
- what is that automatic bolt opening tool you used ?
- what brand/make is that yellow highlighter ? I have been looking for something like this that I can use
much thanks
Sunny
We don't mention or publish the torque ratings because they can change over time. The installation instructions list the current torque values, you can take a look at the instructions here:
www.etrailer.com/instructions.aspx?pn=C13126
We're not sure what you mean by 'automatic bolt opening tool'. Could you explain further please? Maybe provide a time stamp from the video?
The pen Randy used is nothing more than a regular yellow paint marker. We use multiple brands, we obtain them from whomever is offering the best deal at the time.
Hope that helps!
www.etrailer.com/Trailer-Hitch/CURT/C13126.html
@@etrailer Thank you very much for replying and the links you attached. What I was inquiring about was the "cordless ratchet wrench" you used ? I found a couple on amazon but am not sure if they are as good and perhaps powerful enough to open the bolts as you were able to.
Great video!! Thanks!
Great video, just did the same thing.
But where do u put the spare tire
The spare tire will be reinstalled after the installation is complete. The installer reinstalled it at the 7:16 mark in the video.
www.etrailer.com/Trailer-Hitch/Curt/C13126.html