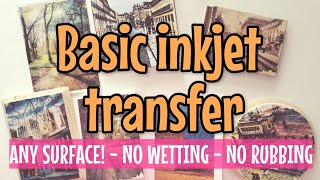
How to Photo Transfer with Mod Podge and INK JET printer / EASY DIY

Вставка
- Опубліковано 6 жов 2024
- How to Photo Transfer with Mod Podge and INK JET printer / EASY DIY
Hi there,
In this video tutorial, we'll show you how to easily transfer your favorite photos onto wood or canvas using an inkjet printer and Mod Podge. This fun and easy DIY project is perfect for anyone looking to create personalized and unique pieces of art.
We'll guide you through the step-by-step process of printing your image onto a special type of paper and then transferring it onto your desired surface using Mod Podge. You'll learn about the differences between inkjet and laser printers and why inkjet printers are better for photo transfers. We'll also cover some tips and tricks to help you achieve the best results.
Some of the topics we'll cover include:
Selecting the right type of paper for your printer
Preparing your image for transfer
Printing and trimming your image
Applying Mod Podge to the surface and image
Transferring the image onto the surface
Finishing and sealing your project for a professional look
By the end of this tutorial, you'll have a beautiful and personalized piece of art that you can proudly display in your home or give as a gift to a loved one. Whether you're a seasoned crafter or a beginner, this DIY project is easy and fun to do.
So if you're ready to learn how to transfer photos with Mod Podge and an inkjet printer, be sure to watch this tutorial and follow along with the step-by-step instructions.
Happy crafting'
Deidre
Homemade chalk paint: • Create Your Own Chalk ...
Ink jet vs Laser jet : • Best Printer for Mod P...
Decoupage with a ink jet printer: • How to use a INKJET pr...
Mod Podge: amzn.to/3fF83jh
Poly Acrylic sealer: amzn.to/3lENeIN
Propane torch attachment: amzn.to/2XaFkg5
Shop my Amazon store for all my favourite craft supplies: www.amazon.com...
Thanks for watching
Deidre :)
If you love my videos please SUBSCRIBE and don't forget to press the bell, 🔔 like, comment and share.
▶️ Please Subscribe: / ourupcycledlife
------------------
▶️ Visit my store: www.etsy.com/c...
▶️ Support my channel: www.buymeacoff...
▶️ Subscribe to my email list for more crafting and DIY content! eepurl.com/hLQBjf
------------------
▶️ Follow Me on:
• Instagram: / our_upcycled_life
• Facebook: / deidrewoodgourlay
• Pinterest: www.pinterest....
• TikTok: bit.ly/3wfznxk
------------------
Email: ourupcycledlife@thestation.io
#trashtotreasure #chalkpaint #OurUpcycledLife #dumpfinds #upcycledcrafts #diycrafts #diy


Subscribe to my email list for more crafting and DIY content! eepurl.com/hLQBjf
You mentioned putting links down below in your video. With all the comments I can't find them, laser printing, chalk paint recipe, can you send me the links?
This email site is not valid
view.flodesk.com/pages/632e2d2fd960dab4eb97c358
As someone that crafts enough to want a Cricut but doesn’t craft enough to justify paying for the Cricut price tag, this is going to give me the look I want on a budget. thank you!
Glad this video was helpful! Thanks for watching
Scan and cut is the best! And worth every penny
I have a cm900 and cincerly wish it had been one of my first craft purchases. It would have saved me tons of ££,space and frustration. I love it and feel no wish to upgrade to the auto blade sdx range at all
@@1thess416and17 what is scan and cut??
Thank u so much for posting this!!! All I ever hear people say when referring to mod podge photo transfers is that u absolutely cannot use ink jet photos because it just simply won’t work at all, or that the colors in the photo will just bleed into each other, another thing is people always say you have to use this insanely thick layer of mod podge on the photo in order to get it to transfer (they state the photo has to be covered with enough mod podge that u can’t see the photo anymore) and this video just proved all of that to be sooo false!!! And honestly this ink jet photo transfer came out BETTER than most laser print photo transfers that I’ve seen!!!! Way to go! Thank u for this 🙏
Glad it was helpful!! If you just take your time it will work great Alexis
You are an angel and just saved my sanity. I'm on a fixed income so I was looking for used on FB. I'm not tech savvy and they all said laserjet but weren't. God bless you !
Glad it was helpful
You are an encyclopedia on DIY transfer of pictures and your narration is excellent!
Thank you! 😊
You never cease to amaze me! Doing this with an inkjet printer with no ink bleeding?!? Incredible! Thank you so much! ❤️
Thanks for watching ❤️ can be a bit tricky but if you take your time it will work
This was really neat and came out beautiful! I have never thought of trying it on wood. I have only done a photo transfer on a canvas first putting down Gesso. It was of my sister in law's mom with her 3 grandchildren sitting on a piano bench and on top of the piano was 2 brass deer. It came out very well which greatly surprised me. I left a boarder of white canvas around and with a rubber roller to replicate wood I used a light brown so it looked like it had a frame. I did this close to 15 years ago and it still looks pretty good and she hangs it away from a window so it will not fade. I do not think she realized it that the photo is backwards and I noticed that as soon as I rubbed the paper off.
My Mom passed away a year ago next week and I am finding lovely photos of her as a child going back to when she was 3 years old. Of course they are all black and white but I would love to make a couple oval small wood plaques such as you have done. I think they would be very cool. I am off to work. My boss is away this week and I work just as hard as when he is there but, a less tense atmosphere it will be this week. I have not had a lunch hour for close to 3 months, I work and eat so hopefully I can enjoy my lunch hour and watch more of your videos. 🥰 Blessings, Rebekah
What beautiful memories! This will be a perfect project for you !
I’m so sorry to hear about you’re mothers passing. You know you can print those out in black-and-white and colorized them or scan them into your computer and use a simple program to change the color also. Blessings to you and all the people who loved your mom.
The polyurethane made the colours pop! I've learned so much from you!
Thank you so very much! 💖
Glad I could help!
I keep expecting to find a "make your own modge podge" video...you've knocked it out of the park with all your other "make it yourself" videos. This one is great!
Thanks for watching! ❤️ hmmm I have never made my own! Maybe I need to try and do a compare video
Mod podge recipe is 1/3 cup of water, 1bottle of school glue. Mix together well. Any cheap school glue dollar tree has it. Enjoy crafting
@@brendalucy8215 Hi, what size bottle of school glue. Can I use clear pva glue?
@@colleenflaherty3443
12 ounce bottle and type of glue.
School glue.
Hello, I'm new to crafting and have had this idea of transferring drawings I have made by printing them from my inkjet and transferring to a canvas. I'm very glad i found this video first. I wanted to say thanks for all your tips on this project. I went out and got some chalk paint since it seems like an important step in the process. It's currently around noon here on Saturday a perfect time to try this project out! I'm excited to begin!
Oh how beautiful will that be! Let me know how you make out :) Thanks for watching
Thanks so much for this video. I have used the inkjet to plastic coated freezer paper for simple images on wood but your idea works much better! After the ink dries, I cut out the image with my scroll saw and sand, paint, and finish it for awesome projects to hang on the wall, make ornaments, etc
Great idea!
I am binge watching your videos while painting my vase and sipping coffee at the same time. I love this kind of night!
Love it! Glad you are enjoying and get lots of great crafting ideas!
I just watched a video on how to use mod podge by another person. At the end of it I just felt disappointed and wondered if I'll even bother trying. She didn't even show the finished product, but looking at the nearly complete product I suspect that was because it was a disaster zone. Then I saw yours - thank you - that's exactly the result and helpful information I was looking for. I know who I'll be coming to for craft tips from now on.
So glad to help out! It can be a bit of a tricky process so take your time and keep trying if it doesn't work first try. Glad to have you here. Any questions let me know
I hadn't known of your channel but You Tube sent this to my recommended videos. This video was great and the channel will be a game changer for helping with my home decor....thank you.
So glad you found me! Love new crafting friends and hope you find lots of good content
If I could like this 100 times I would. This worked great with a dollar tree canvas!
That's awesome! Glad it was helpful!
Really appreciate all the tips and tricks as a multimedia artist it all comes in so handy!!!!
Excellent!
Thank you will try this! My transfers have been misses - love the photo on the wood.
Have fun!
I love the way the finished picture looks. Thank you for the video,I always learn so much. I am happy to see the ink jet printer used. Thats what I have so I am going to give this a try!!!
Thanks for watching ❤️happy to inspire
Great technique! The end result looked terrific. Thanks for showing those of us who have an ink jet printer how to use this technique.
Glad it was helpful!
Thank you so much for showing this wasn't sure if I could do this with my ink jet printer. Going to use it on our night stands.
Glad it was helpful Kara
Have you ever used a Polycrylic instead of a polyurethane? If not I would definitely recommend!! It doesn't yellow overtime like polyurethane does! Also that picture you took is BEAUTIFUL!!
Wow, that frame behind you, in the beginning of this video is gorgeous.
Thanks for watching 🌻
I am a fairly new subscriber and catching up with your videos. I want to say I truly appreciate your sharing your experience and saving us new crafters some time and mistakes! I love your crafts too!
You are so welcome!
That picture is breathtaking! I can not believe there are not more people commenting on how beautiful that picture is. I love reading the comments because there is always extra useful information but, I really expected more awe over it. Can you share where that location is, please? PS- you never cease to amaze with your clever, well presented ideas. Thanks
Thanks so much Melissa glad you enjoyed the video and it is actually a spot here in Ontario Canada that we went camping I think it’s an absolutely beautiful picture too and I just took it with my iPhone
It IS beautiful !!
😻 My mind is blown. I can't wait to make my sister a Christmas ornament with my nieces pictures on it. Thank you for posting this.
Amazing!! Thanks so much for watching Megan, have a great day :)
LaserJet heat sets the ink vs ink jet. I always iron the paper after paper prints and drys before the mod podge to heat set the ink and the colors will pop exactly the same as the laser print.
Thats a great tip! Thanks for watching
I did a project where I didn't have any chalk paint so I put a 2 coats of the Mod Podge over the piece and got pretty results. The results came out almost as good as with the chalk paint.
Oh nice!!
Great video!! I’m wondering why you painted black first on your piece. Why not 3 coats of white? I totally agree with use of chalk paint!! Thanks, Kel
It just gives it a distressed look
Thanks, I’ve tried this technique and never had success. I think I will try again with your technique. There definitely is something special about chalk paint. :)
Thanks for watching! Have fun
I keep watching this because I learn something each time!
Excellent
How Cool and helpful because I only have any an inkjet printer (that also is a cheap one) and I have printed a picture that I took of my garden, but I have to say my picture didn't come out as bright and nice as yours. It seemed to have some dark lines and isn't close to be out of ink. All the same I'm definitely going to try this. I loved your whole process from the chalk paint ( I haven't ever used chalk paint, I Know I Know, CRAZY RIGHT? LOL) to the water rubbing off the paper at the end. Too cool and looks like I'll be buying some chalk paint 🥰 Thank you !!!!!!!!!!!
Glad I could be an inspiration for your Chalk Paint Journey!! Thanks for watching Julie
Amazing, thank you for all your tips! Especially living on a budget now helps greatly!
You are so welcome!
Great stuff Milady!
I also wonder about the thermal transfer process with an electric iron. Is it more reliable?
I’m unsure
Thank you! I've been wondering how to do this and your step by step was helpful!
Glad it was helpful!
By far the best inkjet transfer I’ve seen. Thank you
I look forward to seeing your videos... I agree, you are a very patient calm teacher 😌... I love to see all the inventive tricks of the trade of crafting you come up with... Ingenious for sure.
I hope to visit Canada some day.
Thanks so much!! ❤️ 🇨🇦 beautiful country here , we enjoy all 4 seasons 🌸☀️🍂❄️
After.Viewing several videos yours is the easiest. I make small boxes that I stain then topcoat. You mentioned it works best on milk paint but would it work on stain or would the image be blurry?
I like to use a white chalk paint under my images when I transfer. That give me the best results. You can always experiment with what works best for you though. Thanks for watching
I can not seem to put a postage stamp on an envelope straight. I was thinking about a way to mark the back for the less-level headed among us,🤭. Thank you for the tutorial. Your photo is lovely.
Thanks for watching. Glad you enjoyed.
That turned out beautiful. Thanks for sharing. I had ever thought about this type of transferring but now I’m waiting to do one today.Janice
I love it! Thank you for sharing🙏. Can I use resin(epoxy) as a coat?
Yes you can! Thanks for watching ! Glad you enjoyed
Thanks for that tutorial - even though I'd already watched your other image transfer videos, each one has a few more tips. Could I ask - what is the basin? recessed area? you do your work in. Would you be able to do a shot of your workspace in a future video? Its always interesting to see how other makers set up their workspace. Again, thanks for always sharing resources for Canadian products.
Thanks for watching! ❤️ it is a large metal basin we got at a yard sale years ago!! It is crazy heavy and works perfect for me to contain my mess 🤪 I will definitely do a shot of it in a video or if you follow me on Instagram or Facebook I can send you a pic 🇨🇦
By by Mop
I love this. I made something with a beautiful picture but after watching again I know what I did wrong.
This is really amazing and I like the end result
I only have the satin finish ModPodge - is it even worth trying or should I just go buy the matte finish first? Great video, it's so nice to see this with an ink jet printer!
The satin will work fine it will just have a bit more of a sheen when finished . When you put a poly acrylic sealer on top it will all blend in
Beautiful work. The reward of your skills and your patience.
Thanks!! Some days there are more patience then others 🤪
It takes the mind to bring out the beauty at a cheap cost. Great!!
Absolutely!
After watching several videos of how to transfer ink jet prints to wood yours is the best and the easiest. You said it doesn’t work well on acrylic paint does that include Minwax Polycrilic? I make small boxes that I stain then topcoat with Polycrilic. Do you think I could do it on the stain?
Great to hear! The transfer method need a porous surface to adhere to . If it is smooth and shiny it will wipe off easy. I always have best results with chalk paint
this one looks alive! and so real. Thank you for the steps!
You're so welcome!
I loved the progression of your video and thr final look. I think I will try to do it for my family. Thanks
Thanks for watching Mary
Wow great photo transfer. I have used Mod Podge before - and it was good. I wanted to try the laser print, but like you said, some of us don't have laser printers and I don't want to buy one or can't afford one one.
All I've been using is Mod Podge and some finishing, but I'm going to try your way. Thanks for good info. You have a new follower !!
You are so welcome Janice! Glad to have you following along! Love new crafting friends
@@OurUpcycledLife I need a little advice. You are using Mod Podge Matt. I was buying some Modge Podge and was told to use Photo
Transfer ModPodge. But the container says this was for light or dark fabrics Now I'm confused. Which one should I use? I am transferring a photo to wood.
I only use matte mod Podge. It will work great to do this project ❤️
@@OurUpcycledLife Thank you ma’am. I will try your way.
Hi. Thanks for the video. Question: Can I print the image onto paper and do this a few hours later on? Or should it be done 10-15 minutes after image has been printed onto paper?
Thanks for watching ❤️ can definitely let it sit and do when you have time doesn’t have to be right away
omg...i really love the picture you transferred to the wood plaque is absolutely beautiful!!!
Thanks for watching Debbie
Thank you!! I love your tips and tricks!! I feel like I’m adding something new I’ve learned from you to my list each and every video!! ❤️👍🏻
Haha!! I will keep you busy ❤️
@@OurUpcycledLife haha! For sure! 👏🏻
Hello. I was wondering how long should you wait for chalk paint to dry in between coats and before applying the image. Thank You so much for sharing your knowledge with us. Blessings
The drying time will depend on your temperature and humidity
I enjoy everyone of your videos and save them all in my notes file. I'm having a hard time finding your REVERSE TRANSFER instruction video that you mentioned. Please forward it to me so I can try your video on canvas. Tysvm.
How to DECOUPAGE ONTO CANVAS / NAPKIN GRAPHIC transfer / THRIFTSTORE MAKEOVER
ua-cam.com/video/fmi8mxMPh9A/v-deo.html
Thank you so mich this will definitely help me out when I get started! Just a quick question... you specifically mentioned using chalk paint, would any other paint work or just the chalk paint?
Thanks for watching Lyla! I have the best results transferring with chalk paint. I have tried all the other types and it just doesn't work as well.
Awesome! I love to craft things and love to learn new &updated content. Thank You.
You are so welcome!
That's a beautiful picture you chose to put on that wooden plaque!
Thanks so much glad you enjoyed
If I want my wood plaque to be in black, do I have to apply 2 coats of black chalk paint by skipping white chalk paint? Do you recommend using 1 coat of black chalk paint then any other color that we want in 2 coats? thank you! You have explained it so well. I'm gonna try it.
You will find if you only use the black paint the photo wont show thru well and will be very dark! I always recommend doing this technique on a light background. Thanks for watching
This is a great technique that I totally forgot about.
Thank you so much for reminding and inspiring me :)
Friendly greetings from Slovenia ❤
So glad you enjoyed the video thanks for watching
Wow that turned out absolutely gorgeous, I don't have a printer but if I can get a hold of anything I can give this a go on, well I can't wait. Loved it 😊💕
So glad you enjoyed thanks for watching
Thank you for sharing this . I’ve been wanting to do this for a long time now.
Thanks for watching ❤️
You do a great job on your teaching videos!!! Thank you!
Thanks for watching ❤️ so glad they are helpful ! Happy to have you follow along
Thank you!! This opens so many possibilities!!! I love all of your content ❤️
Thanks for watching ❤️ it sure does!!! I am working on a gallery wall of photos with this method
Thank you for sharing. You answered my question before I asked it. Awesome technic
Perfect! Thanks for watching ❤️
Thank you so much for sharing your DIYS with us, it is so helpful
You are so welcome!
The transfers work well with white primer spray paint. I haven’t tried the chalk paint.
You’ve got lovely hands. Doesn’t that seem a common trait amongst creative people?
Thanks for watching ! Glad you enjoyed
Yes! I love this! I will definitely do this with some of my photos. Thanks for another great tutorial.
Thanks Sharon ! Have a great night ❤️
Th Ankh You...
Very Informative!
A Great Craft
My pleasure
Watching your beautiful video, I’m wondering about the ink in the printer. Any special kind? MyEpson ink seems to smear easily, I always cover my labels on letters with clear tape . Your transfer was perfect! My first try will be soon, on rough ceramic coasters.
Thankyou I am going to try this to make my own artwork for the hallway x
Thanks for watching ! Glad you enjoyed
Hi! Thank you so much for this! Do I have to wait till chalkboard paint is dry from black to white? Thanks
Yes you do! Thanks for watching Melly
Fantastic, I'll have a try and Merry Christmas...
I love this so much ! Can you also do this with glass?
Yes you can ! Make sure to use chalk paint and 2 or 3 coats on glass before doing transfer and very carefully dampen paper. If you use to much water it will lift the paint off glass . I have a tutorial on how I paint glass if interested ua-cam.com/video/i8ETTafLTrA/v-deo.html
Thank you so so so much for all the info
You are so welcome!
Have you tried doing this technique using a matte finish top coat like Minwax Polycrylic protective finish? i have read that it does the same job.
Yep I sure have and have tutorial comparing it ❤️
That photo is gorgeous!! Thanks for sharing your technique!
Thanks for watching Julie!
Hi, Jes' wonderin', what's the reason you put the black chalk under the white chalk? Does it act as a sealer, maybe? Should I buy both colors or can I get away with only the white? Great video, I'm in the process of trying this technique for the first time.
I use it to make a distressed look it’s optional
Great project, I learned so much from your clear instruction. Beautiful results.
Thanks for watching ❤️
You are amazing, thanks so much for sharing your ideas, may Allah bless you❤
Thanks so much 😊
Thank you for the video!!..May I ask what printer u used..print looks great😊
I have a HP inkjet printer
Absolutely awesome video. Thank you so much for sharing. I am going to attack my project with confidence now.
Glad it was helpful Lee thanks so much for watching
That's beautiful!! Thanks for sharing this tutorial..
Thanks for watching 🌸 have a great day
Great video. Question can you use this same method to transfer to glass?
The glass has to be painted with chalk paint for to transfer properly
Hi, beautiful tutorial, can I use decoupage glue and varnish
Thanks for watching ❤️ yes you can put varnish over mod Podge
Beautiful! I will definitely give this a try! Thanx for the great tutorial!
Thanks for watching ❤️
Good video, thanks. What was the purpose of the black chalk paint?
I like to have the base as black so when i sand it will peak thru ! Thanks for watching
I’m wondering if gesso would work like the chalk paint?
I am unsure I have never used gesso
Have you ever experimented with MOAB Desert Varnish spray on the inkjet photo prior to transferring it to chalk painted wood surface? This product is supposed to add a waterproof seal to the photo. I am wondering if this would make the photo more durable when rubbing off the moist paper backing.
Sorry I have not used it
I can’t wait to try this! Thank you so much for sharing !!! Your turned out beautiful!!! 🤩
Thanks for watching! Have fun with it! 🌸 would love to see your project when done
This is great, can't wait to try!
Would rustoleum primer work as well as chalk paint?
Yes it sure will then put chalk paint on top of that and then transfer❤️ hope that helps 🌸
@@OurUpcycledLife thank you! You are so creative, love it.
I knew i was doing something wrong i was staining the pieces of wood, is there anyway i could still use those pieces if chalk base down?
Just found you and I subscribed before the video was over! Can't wait to give this a try!
Awesome!! Love new crafting friends ❤️ happy to have you follow along
Thanks for posting this tutorial. I’m curious to know if the transfer method will work well on unfinished wood also?
Yes it will
You are living the life I dream of…crafts!!!
I’m having lots of fun!
I love your space also! Well done!!
I’m a therapist but Covid (me almost dying from it and others becoming asshats) changed my perspective and joy from helping others. I’m starting to work on my passion for plant photography and I need canvases to hang at “holiday” shops and craft fairs. I tried this on a wood square and it was meh. I love upcycling! I think I have three or four more canvases, so I will try this again! Thank you again!
Love the video and the photo you used, really great. I was excited when I found this because every other video I have found for this project says you HAVE to have a laser printer, & mine is an inkjet like most others. I was wondering tho, I really want the wooden/rustic look, do you HAVE to paint it with the chalk paint in order for it to work well? If I want to put the photo directly to the wood, is the best way by doing so with a laser printer? Thanks!
Glad you enjoyed it! This process works best on a chalk painted base. I find it doesn't rub off or look the best on raw wood :)
Thank you for this video, I'm going to try this.
Love this technique...can you also do this with original photos?
Thanks for watching ❤️ will only work with graphics in computer paper
I love your channel! Can you do a video as to transferring photos to fabric. I’ve tried it and get wrinkles and bubbles. Any tips are appreciated!
Here is one method! ua-cam.com/video/aMhalwW180I/v-deo.html