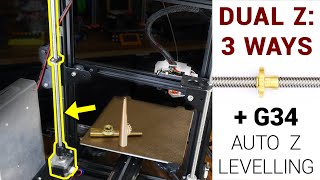
Is the dual z upgrade (with Oldham couplings) worth it?

Вставка
- Опубліковано 29 гру 2022
- As you may know I burnt the stepper drivers on my ender 3. In order to test the Z axis dual z upgrade, I found a workaround. So in this video I will test the upgrade with the dial indicator. The results are definitely interesting.


![Lp. Последняя Реальность #107 РОДНОЙ ДОМ [Финал] • Майнкрафт](http://i.ytimg.com/vi/IK3QKzKUlHM/mqdefault.jpg)


Great work, can't wait to see the results
I just want to say thank you for these ender 3 videos. I have been having major problems with the Z axis on mine and now I fully understand why since you explained all this information so clearly. I'm really looking forward to your next videos when you get the new controller board installed and finalize the Z axis redesign. I think it will really improve my printer. Keep up the amazing work!
Thanks. I am working on some new vids. will upload soon.
If you typically do 0.2mm layers, have your start g-code start at 0.1mm and rise to 0.2mm for the first layer to remove some lash and get you on the consistent path right away 👍🏻
Good stuff man. I commented on your other video prior to this one and all the changes you have in store are good ones. Btw, most motor drivers won't just blow from being wired incorrectly, but usually will die swift deaths if you unplug them while powered. Make sure if you're plugging, unplugging, replugging motors, that you either "Disable Steppers"; or better yet, have the machine off.
Очень замечательное видео, и инженерный подход к решению проблем. Хочу посоветовать ремень оси Z на 9мм. 6мм - мало для передачи движения
Very informative series. Also wonderful cinematography! Keep it up friend, looking forward to your next videos
Thanks
Great video, looking forward to seeing your prints 👍
incredible effort made for doing this video. Thank you very much for your content. You should take a deep look into extruder also like you said at the end of the video. Results might surprise
That Z stepper on the top is basically what I'm about to try on my old Tevo Tarantula. Except I'm using the 2mm lead screws, which are slow AF. I'm going to try a 30 or 40 tooth pulley paired with the 20 tooth pulleys currently on the dual leadscrews. As always, keep up the interesting content!
Very impressive
Amazing videos. I made many things trying to solve Z issues, finally you proved so many misunderstandings I had about all the gadgets I got to try to solve it.
I've seen many making a Z Screw to Belt conversion, it would be interesting to see if that can get rid of many of this Z defects.
it certainly solves many problems but does bring a few additional ones of its own
Awesome video!
Thanks
Thank you for these videos, friend. They are helping us who are entering the 3d print world
Thank you for your interest in the videos :)
Why dont you move the Z stepper more to the left to get more teeth of the belt to grip? (try to get 90° of the gear covered by the belt at the stepper and left lead screw?)
great job. ill probably copy this when i get round to it. i would suggest though, using a idler each side of the z motor, not just one. for better tooth engagement
Thanks. I will need to check the belt length for that because the one I ordered right now would probably only let me use one. But yea, two would be best.
Where ever the gcode moves up and then down like during a vertical hop, can it move up, down (a little further than needed) and back up (a little) to remove the backlash? If the added bit is the amount of backlash, there should be no visible difference.
I'm going the belted z route as mentioned. Starting with it in petg then probably asa. I havnt put a dial on the x axis but I suspect my pro does the same thing. My nozzle likes to rub at parts of my previous layer and this issue is worse with higher first layer heights.
I use babystep on ender 3 pro when i have problem with layer ;)
This is an excellent video, but I got perfect results with just the creality kit. You went the distance though. Good video.
Thank you for sharing. Where did you get the Y axis rigidity supports?
Curious, I have the dual z upgrade from creality (the one that uses dual z steppers) has anyone done a comparison between a setup like this vs that? Next, would it be possible to use 2 z steppers in a setup like this? Dunno if it'd be just redundant, but methinks that having 2 motors split the load may lead to more accuracy?
Can you apply the same test to WobbleX? It would be interesting to see.
Will this upgrade work for the Ender 3 Max?
I will be copying your set up for the most part. I took the suggestion for a 8mm lock collar for the bottom side of the bearing blocks from a comment, but I will be using those spring loaded antibacklash lead screw nuts I think. Ohhh and verdict on lead screws that are Teflon coated I just saw some the other day.
My next video is on the spring loaded anti backlash nuts. They didn't do anything for me other than increasing the friction so maybe it will help you make your decision. The 8mm lock collar is actually a pretty good idea so yea, go for it.
I know this is an older vid, did you ever completely solve your issue? That last bit of the video it look like there might be some slight runout on the belt pulley. I'm thinking of just going dual Z linear guide rails (MGW12) and driving each side directly with a stepper and belt without a leadscrew entirely. Also wondering if, instead of loading the printhead on the front, if it would be better to balance it so there's no extra load on one side or the other of the gantry.
Have you tried removing the springs and only using double nuts?
Hey there, what's the best area for a bowden extruder ? Well, it's in a area no manufacturer installs it: at the back of the gantry, just in the middle. This way you can drastically reduce the bowden tube length and the weight distribution of the gantry is optimal. The only downside is you have to guide the filament behind the gantry to avoid it to interact with the print area.This is no big deal actually: it's just a piece of PTFE tube and few 3D printed clips. Well, feel free to think about it ;)
The middle does make more sense. Just need to verify the clearance between the motor and the nozzle.
@@bluemonxterDIY well, if you keep the Creality's style extruder, maybe an angled mount will solve a lot of problems.
You can set the steps/mm with serial commands in the terminal fyi.
Thanks. But it is not as dramatic :P
Could you not fit the Oldham coupling under the bracket upside down to prevent it fouling on the filament? As long as it doesn't hit the lead screw bracket at the bottom of the lead screw when the Z axis is at its lowest.
No, this mounting position was intentional so it preloads the dovetails of the coupling. If it is mounted under the bracket then there is no preload and because of the clearances in the coupling it will introduce additional rotational backlash.
@@bluemonxterDIY Ah, that makes sense. I don't suppose re-routing the filament is a huge problem anyway.
what was your total budget for this mod?
btw, subbed. love your videos, impressive work. I would love to hear you narrate instaed of the robot thing.
Thanks. About 50 USD for the Z axis upgrades. The BLV kit and linear rails would add approx. 70 USD although I had old rails so I just used them. I do plan to narrate the videos in the future myself :)
Bonjour, beau travail et très intéressant. Avez-vous un lien pour les coupleurs en z que vous avez installé ?
Thanks. All the part links are in the description of my previous video. ua-cam.com/video/RXgwOikiBdg/v-deo.html
@@bluemonxterDIY merci 😉
👍👍👍
Have you considered adding supports on the motor to decouple it from the axial compression, e.g. with a thrust bearing? I'm thinking about doing it - it feels like less work and complexity compared to relocating stepper to the top. Can you see any pros/cons compared to your solution?
Using belts is cheaper and simpler with no possibility of bent parts leading to any of this.
@@BigfootPrinting that is correct, but I'm still inclined to go the lead screw route. It is a hobby so cost and efficiency are not as important as joy of tinkering and satisfaction from fixing the problem. I simply find the challenges in getting lead screw linear actuator right interesting enough to completely ignore kevinakasam's belt conversion kit that I've already purchased a few months ago :)
The author made a good point about plastic creep and absence of the metal belt drive kits.
That could work. You would need a thrust bearing with a 5mm inner diameter, place it between the motor and the leadscrew coupling. But that would be for one side only. Or are you planning to do a dual z motor?
@@bluemonxterDIY That would be for a single Z motor. The non-motor side would either hang on a locking collar, or alternatively be supported and constrained from the bottom. Do you think it is advantageous to let the non-motor side unconstrained from the bottom?
@@MaciejWiercinski It would be better to leave it unconstrained at the bottom especially if the lead screw is bent. Constraining it will increase the wobble
You said that the first mm was affected by backlash, where is that backlash coming from?
I am investigating that and will post a video on it & anti backlash nuts next Friday. I am sure its not coming from the leadscrew. Could be the mounting of the Z or the motor. It is a tiny amount (0.05mm) and can be difficult to troubleshoot.
pronterface to setup estep lol but the drill was funny xD
Did you buy or make those side plates?
I bought them
You should perhaps consider the belted z conversion. It costs like 20 dollars and belts have no possibility of banding
I agree with you, it is a better solution BUT as of now there are no metal kits for belted Z. Plastic parts are less rigid and deform due to plastic creep over time. That is why I did not go for the belted Z.
@@bluemonxterDIY that’s entirely dependent on the plastic. PLA creeps, PETG does not but isn’t stiff, and ABS/ASA are incredibly stiff and do not deform even in high heat. How do you think mostly printed DIY printers like the annex k3 that use belted z print at 50k accel and 1000mm/s? Because what you’re saying isn’t accurate about creeping nor about the Young’s modulus of these materials.
Additionally there are GF and CF engineering filaments which are even more rigid than aluminum when annealed. They’re semi crystalline. Look up PC CF. But again the worlds fastest printers are running fine on “plastic parts” so you’re worrying about a problem that does not exist.
I’ve run belted z on my Ender for over a year and I have no such backlash nor need for gravity preloading (not consistent) and I have no squish or inaccuracy even on my first layers
@@BigfootPrinting well in that case I will probably do the belted z on my other stock ender 3 and make a comparison video on the two. Thanks
@@bluemonxterDIY id love to see the comparison :)
Great content! Immediately subscribed.
Can you post the bill of material so we can easily follow your path of improvement?
Thanks!
Thanks. I have shared all the purchase links in the description of my previous video :)
@@bluemonxterDIY Didnt seem that, thanks!
Hi mate. Have you received your new motherboard?
Yes i have the printer up and running
@@bluemonxterDIY still waiting to watch your next video.
Have you done any testing with belt z?
i plan to do it sometime in the future
@@bluemonxterDIY awesome 👌 I will be keeping an eye out for it.
What do you think about the Z belt mod by kevinakasam?
Belted z is certainly a good mod but it does have its own set of cons
@@bluemonxterDIY can't decide what would be the best.
how much was the total cost?
about 50 USD for the Z axis upgrades &another 50-70 for the blv kit and rails. I had old rails so I used those.
if you flick the knob in the way you want it to go it will jump up in increments.
1:00 well rest in peace the potentimeter. if you are in the uk i can send you my old ender 3 parts. they seem like they will come in useful. pretty sure you could have used pronterface and issued a M92 command.
If the persisting bands aren’t the same between prints then you probably have uneven flow from the turd grade extruder with the single sided brass gear
you know, you just enter GCODE for your steps/mm I have a sprite so ignore my E rate M92 X80.00 Y80.00 Z800.00 E424.90 ; Steps per mm M203 does federates with M X Y Z E and M201 does the same for Max Acceleration and then there is M204 for Acceleration with P R T settings ;)
Sorry, but I think U can solve this problem by changing the Belted Z.
such as wobble, backlash, etc
If i missed somthing, tell me 😊
I actually ordered the parts and the rod for the square satability has threads in the same direction... what a shitty design. But okay. Then I attatcxhed my BL touch wrong, getting trhe same effect as your bad stepper wires... Also toasted 2 stepper drivers. So I followed your video a bit too well, I guess haha
I feel for you. Good luck with your upgrades
@@bluemonxterDIY Thanks!
And btw, I'm still doubting whether I'm also going to install the stepper on top. When the the screw is supported by the extra bearings you advised (great advise btw) The load is transfered there, and not on the motor anymore.
the reason I still want to put it on top is for the precision increase. Less backlash when the motor is in between the screws, rather than on one side, and the forces are transmitted all the way to the other side
@@victorbarrios5162 it is not necessary. my main reason for shifting the stepper was to get rid of the motor/leadscrew coupler. bottom mounted should work just fine.
should ahve bought ratrig minion for that trouble and money
The minion kit is almost 650 usd without shipping.
@@bluemonxterDIY worth every penny tho
kek,drill dial knob
Bondtech? Maybe watch this video first. They have some sloppy tolerances, the idler shaft wobbles. You might wait until they update their design.ua-cam.com/video/moSZ05FkLQU/v-deo.html
This guy is using a BOT voice! Why?
This guy is CAPITALIZING random words! Why?
@@annix493 ARE YOU A bot?
you could have just used the G-code " M92 Y600" xd
but nice hack
@@abo_bandar4375 Lol yea, but there's no drama in that :P