Faux Handmade Textured Paper (EASY DIY) Tutorial

Вставка
- Опубліковано 5 лют 2025
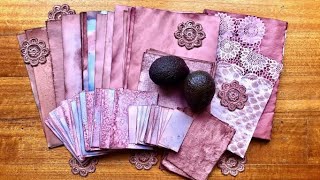
- Easy step-by-step process on making Faux Handmade Paper to use in your crafting projects!
Order my book here: www.amazon.com...
or here: indiepubs.com/...
My Etsy: treasurebookss...
Treasure Books Facebook Group: / 328974088835842
Instagram - / treasurebooks03
Email - treasurebooks03@gmail.com
To view all the videos in the hop please add yourself to their community and make sure to let them know you are coming from my UA-cam channel
/ 221070875335137”


![Lp. Сердце Вселенной #60 РОЖДЕНИЕ ЛОЛОЛОШКИ [Финал] • Майнкрафт](http://i.ytimg.com/vi/YoR0pAV9FVQ/mqdefault.jpg)

I have only discovered you in the last 3 months. Thank you so much for your videos, there are many wonderful artists doing similar projects however in my opinion you are one of the best on youTube, because of your precision, clear teaching ability and a wonderful sense of balance and colour not to mention your artistic flair. You have opened another world for me in my retirement. Well done. Cheers Gold Coast Queensland.
What a great and easy project, not only for me, but for my grandchildren. 🎉. Thanks much.
Brilliant! It's about time someone came up with a way to get around the mess and hassle that is paper-making. You have a wonderful way of teaching, Natasa. Thank you. ~ Lisa
Thank you so much Lisa. I've always wanted to make my own handmade paper, but it seems like such a messy hassle hehe
@@TreasureBooks I tried it back in 1990 I think I was. It is messy but so so incredibly satisfying. I loved adding things to it. Like petals, threads, a couple other materials I found in nature and in my home. Some sheets came out too thick. But I had fun.
Brilliant idea to use a single ply of napkin to keep everything on the page. It really adds to the dimensional look of the paper. I would never have guessed these were just plain paper and card. Such a cool thing to try!
Great technique - using the napkin liner to hold all the material in place is brilliant. Cheers!
What a cool idea! TFS Natasha!! :)
I love the way you always write down the instructions Natasha. Thank you.
Fabulous! Thank you. I have made real handmade paper in the past but can’t anymore. Love this technique
I made homemade paper over 30 years ago and have been interested to dip into this area again! I love the idea of FAUX handmade paper too!! Thank you for teaching us!
Sandy, a friend and I got into making paper, drying flowers and did something like this with the faux papers. Did you ever reverse collage? loved watching eileen's craft show on tv? my friends and I would tape the shows daily. I'm telling my age lol happy memories
So UA-cam suggests other people we might want to watch in this category. I find myself missing listening to you and your ideas. Love your ideas and style and the accent actually helps the creativeness move forward some how. For that I am so thankful I found you!
I couldn't agree more; I find the lilt repeating in my own brain when I see a piece of "papah" in the bin. I rescue it just as our sweetest Natasa has rescued me with her easy-going approach. She's turned a semi-stressful (decisions, decisions!) craft into a blissful creativity session "going with the flow" of her affirmative words!
Love bringing the outdoors in. I was thinking of going on gathering excursions. To hasten drying I have used the microwave oven. Use either a dedicated oven for crafting, or use edible blossoms in a kitchen microwave. Dried herbs do well, even OTC psyllium that I couldn't consume because it was expired. Fresh blossoms are interesting too. Mod podge seals it forever, however better used in clusters or stand alone page decorations. I read in an arts magazine, Art in America, a few years ago (clipped the article), that a Portland, Oregon artist, Yuji Agematsu, went on daily excursions for 25 years to gather small bits of rubbish from city streets and created miniature sculptures, one each day, like a time capsule. In a sense, these handmade paper could be a time capsule too, other than just beautiful ephemera. I'm drifting in my thoughts, but since so much of junk journaling is memory preservation, the paper that is handmade with personal relics could be part of the story. I know 200 years from now, a preserved leaf would be so cool. Awhile ago, you tube artist, PinkOddBird, showed an old scrapbook, I believe from the 19th century, that had a stem of weed preserved, she mused that it was the coolest. So I'm convinced that I should gather more objects from nature and the environment and maybe less purchased scrap book paper into my junk journals, although that also will be retro one day.
L I - - What a beautiful idea! Thanks so much for sharing with us.
Actually you gave me a lot of very cool inspiration and ideas.
You're wonderful.
Happy Holidays!
So many amazing ideas right here. Thank you so much for sharing!
Thank you for your kind words, Damelle and Natasha. Sorry for the misinformation about the artist, Agematsu, he was not a Portland based, but a New York based artist. The article written in 2014 was about an exhibit at Yale Union in Portland, Oregon.
Great ideas. Thx
An old video brought to life through the wonder of UA-cam.
I think making these as Master Boards and Using them for bases for Christmas cards.
Adding a few random small stamped images or text stamps would add to this project. And glitter is a great idea. Tiny stars, bits of tinsel or pipe cleaners made of gold or silver...shaved onto the paper!!!! The variations are going to be endless.
Thanks for sharing your creativity!!!
That would be cool! I love it. Sky is the limit :)
I seem to be on a Treasure Books binge - this one also peaked my interest and you made it so easy to follow. Thank you for the screen shot time, which I took advantage of.
thanks Natasa I used to make paper 35 or so years ago before my children went to school but this looks so much easier, I do like both the papers and I think I will definitely give this a try very soon, I think I have already told you that you have a gift for teaching and sharing your amazing creativity, cheers Jackie from South Oz 💜x
I liked how you went back and showed how to fix a tear in the napkin. This is a beautiful idea and so thankful you shared it.
I made 3 sheets of this paper using some tea bags I can't use and I noticed that on White paper the dried tea spreads colours! So I have a sort of purple, a light Yellow and even the tread spreads colours! I can't wait for tomorrow ! So excited!
Yes I found that too Rossella with my dried flowers, and at first I was like "hmmmm, not sure about that" but then I realized that I actually love the effect!!
Just a note to say WOW!!!!! I can't wait to try your process and HOPE mine turns out as well.
You are amazing, that's what I think!! Thank you for your inspiration
Thank you so much Selina!
I love this. Gorgeous subtle colours. I’ve done something similar in the past using kitchen paper which I had used for mopping up ink, building up layers from scratch, not on a base layer. I added some gilding flakes sprinkled randomly, and bits of threads, metallic and other, and anything that happened to be at hand. It’s such a creative project and I love the texture!
That sounds so amazing!
Treasure Books Thanks! I have a whole pizza box full of glorious kitchen paper pieces in various colours, all ready to tear up and use for collage etc. Every now and then I get them out and stroke them. (Does anyone else do this...?!) I have a box where I put all my thread and fibre fragments ready for use. Not a lot goes to waste chez Shosh!! I love the way you have “sealed” yours with a layer of napkin. That’s genius!
The first tutorial I followed was tea dying paper. I used U.S. standard 8 1/2" x 11" 20 lb. copy paper and 11" x 14" 50 lb. sketch paper. The 20 lb. paper is more difficult to work with than the 50 lb. paper. I used both tea-stained papers to make Faux Handmade Paper.
I did not like the white gauze. I dipped gauze in tea, put it outside in the sun to dry. I also used tea to thin my glue instead of water. I was very happy with the final product. Thank you for your inspirations and your wonderful tutorials.
This is a great tutorial. Tonight I made 3 pages. Each one is unique even though I used the same embellishments. Super pretty. Thanks for sharing!!
How fun! I can’t wait to try it! I want to sprinkle some black pepper on the paper and see how the fine black dots look. Thank you for another amazing tutorial❤️
Awesome idea Nicole!!
Gorgeousness! Thanks for sharing your lovely techniques.
To take air bubbles out use sewing straight pin and pop then glue over , less tearing will happen and less patch work. I do this with contact paper or wall paper. Love your work and your encouragement there are no mistakes.
OMG. I LOVE LOVE LOVE this technique. I have always loved handmade papers, but it is such a time consuming, messy project. This is an alternative that looks stunningly beautiful with a fraction of the mess.
Thank-you so much.
WOW!! What a great idea!! My material boxes are full of all these bits of things, the time has come to use them up Thank you and Hellos from Greece!!!🙋♀️😊
Love the ease of this project and the beautiful results, Natasa!
I have a big plastic box under my desk to catch all the paper bits I want to incorporate into handmade paper when I have a chance to make it, but I know that will be a big, messy project. This project is wonderful and would be easy to do right at my desk; no muss, no fuss.
Thank you for a great idea, dear! 😊
I’ve always loved collecting flowers, I simply put them between pages in magazines. Put them away and forget about them! I just love finding the dried treasures!!!
Yes, I’m easily entertained 🌸🌸🌸! Happy crafting and love your videos ❤️❤️❤️
I love this. I made one this morning on a paper I coffee dyed. Looks pretty good so far.
Thanks for this fantastic idea.
I have been making paper for years, it is so fun and the results can be beautiful. This is a short cut which I want to try. Thanks for wakening my old talent.
Oh Virginia, thank you so much! I'm so glad you feel inspired!
Thank you for this tutorial! I have been wanting to make my own textured paper,but it’s so labor intensive. I dried my own flowers this past summer and I have some that fell apart. Same with leaves. I have lots of eyelash trim and even some feathers. It looks fun and easy! Thank you for sharing!
Thank you Janice. Have fun creating :)
Love this technique! It looks a lot like homemade paper with seeds and herbs,etc. added to it. This is much faster than making homemade paper though! Thank you sweet woman for making and sharing this video! Blessed Be!
Thank you so much!!!!
Oh my goodness, I love this! I love textured papers, can't afford them and making them is a much hard process, so now I can. . Thank you so much!
I have watched this so many times, made so many beautiful pages and covers using this principle, experimented with variations and been inspired. Thank you.
Like Jamie, I too have very few outlets to buy papers...so this is just an amazing idea. Also the opportunity to use what you have on hand and in the garden......Fabulous !!
Thank you Susan!
I pick up so many great ideas from your channel! Love this paper you have created ❣️. Thanks for sharing!
This is amazing!! I can't tell you enough how excited I am to try this out!! Thank you so much for the very easy to follow directions and I appreciate that you write them out too ❤️👍👍
Thank you so much Maureen!!
Natasha, I just wanted to check back in and tell you that I've been making paper this way since I first saw this video shortly after it came out and I'm absolutely thrilled with the outcome every time - in fact making more is on my to-do list for this weekend. After having followed your directions I can tell you that you are spot on in telling us how to carry out this process, right down to patching holes and doing other trouble shooting. You and this process are simply brilliant. Thanks again for sharing - it's even easier and more fun than I thought it would be. With love from the Southern California desert, MK ♥️🌵🏜️
Oh thank you so much!!!! I am so glad you are making some wonderful paper. Enjoy your weekend ❤️❤️
Another wonderful idea... I’ll be doing this for sure! Spices work for this kind of project, also. Probably would look good on text pages.
Just tried this and while I need more practice with those air bubbles, my craft room now smells wonderful! Tea, mint, lavender. Yum. Thank you for all your wonderful and inspirational videos!
This is an awesome idea. Tfs. Your tutorials are so well done...thank you.
Bonjour ! Merci pour cette technique de papier "artisanal" ! J'adore !👍👏
What a great idea! I save teabags and tea, so I can give this a try. I’m going to use some manilla colored craft paper. Thanks for sharing 💜
This is the first paper making diy video that I have ever even Condering trying. So, That said; Best video I've seen. KUDOS! BRAVO, APPLAUSE! SO HAPPY to find one I actually will do! Yayyyyy...
Yay! Thank you!
So pretty! Always so unique and creative. Thank you for sharing!!
I'm just loving this making your own paper .
Hi Natasa!
This is a lovely texture creating technique. Thanks for the constant flow inspiration. ❤️
Thank you lovely Darnelle!
I LOVE this project ❣️❣️👏👏👏…. What an AWESOME IDEA 👏👏❣️❣️…. I just recently started watching your videos… for the last 2 months….. SOOO MANY NEAT IDEAS👏👏👏💖💖💖
What a really interesting idea! I'd never considered altering paper in such a way. Thanks for the complete walk-though of your process.
I love the papers. They look so much like homemade papers. I think I actually like yours better because they have a bit more texture or substance to them. Lovely work.
Thank you so much!
Love the way you explain everything, this is definitely one that I am going to try.❤️
Thank you! This looks way more fun and creative than some of the other ways that I've seen! 🙏🙂
Thank you 😊 Have fun!!
Beautiful paper! Amazing what you can do!
Thanks for sharing I enjoyed watching your video
Ohhh Myyy Gravyyy Natasa!!! This is one of the most inspiring things I’ve seen!!! Love, Love, Love This!!! Thank you so much for sharing!!! This would also be another perfect way for me to incorporate yarn into my craft. I’m always looking for more ideas I can use for yarn - and I think this would work beautifully!!! I am truly grateful to you!!! Big hugs, Sharon 🌷💜
Ohhh - and I knew I was keeping those dried tea leaves for a good reason. Lol. 🌷💜
I'm so glad you like it! Thank you Sharon, and big hugs to you too!
This paper is unique and marvelous! I haven't seen the process done before! Will be using these gorgeous papers in my journals! Thanks so much for sharing!
Thank you so much!
I love how you teach! Thanks so much for this
Thank you so much Glenda!
So excited again!! Homemade paper. Thank you.
Super fun project I may give this a try once I can put somethings together to put on the paper. Thanks for sharing 🤗😊!!
Yes I did this and then repeated on the back. It turned out really well. I started with thin "butchers' paper", thinner than copy paper. Really pleased, thank you x
Oh great idea!!!
What a Fabulous project!!! Thank you SO MUCH for doing this video! I really enjoy altering papers and this gives me another way of doing that. So excited !
Thank you Valerie! Have fun!
Great idea! Would make lovely wrapping paper.
Great project! I love this! The creative possibilities are endless! Beautiful! Tyfs 👏❤
Ingenious technique! I will try it. Thanks!
I have a hard time finding the handmade paper so this is so exciting for me!! I'm def gonna give it a try...thanks so much for sharing!!!
Glad you like it Jamie, thank you :)
@@TreasureBooks I tried it right away and my results were amazing!!! I used a combination of green tea and tazo passion tea which has a beautiful rich raspberry/purplish color that runs when it hits the wet glue...I then added dried blue and white babys breath and silver, gold and purple threads..some turn tea bags and some fibers from some burlap ribbon...my base was tracing paper & im just so blown away with how they turned out!! I'm going to be making lots more!
Your videos are so wonderful to watch, you have a gift for sharing your creative ideas in an inspiring manner, so many possibilities!! Now I'll be saving my tea bags!! Blessings to you 🙌😊
Thank you so much for this wonderful comment :)
Very interesting. I will definitely try this after the craziness of the holidays are over. TY for sparking our imaginations!
Wow, I have just (at 70yrs), decided to start to do craft. Came accross the slow stitching, which in turn landed me on your posts......Thank goodness that happened! Love watching you and especially love listening and following your very easy instructions and beautiful voice. Have just finished 2 paper making tasks, so very anxious to see how they turn out....I'm now a huge fan of yours.
Wonderful! Thank you so much Dianne!!
You are simply amazing! I so love your work! You have inspired me so very much with your seeming unending wealth of creative ideas! I now have a way to use those little bitty threads I have felt guilty throwing away! :) Thank you so much! Blessings! :)
You are a GENIUS!!!!!!! Thanks for sharing this with us!!! Can't wait to get started!!!!! LOVE IT!!!!!!
Thank you 🙏
I already have tea and coffee dyed paper, and dried tea. Can’t wait to try this.
Awesome idea and tutorial. Liked and shared. Much appreciated
Thank you Carol!
I really like this project. I can't wait to see the project linked to this tutorial :) Very good teaching. thank you.
Genius idea of homemade texture paper.
Well done!
I can't wait to try this project. They turned out so unique and interesting.
That was fabulous! Easy, fast and the instructions are flawless ...thanks for a wonderful video
Glad it was helpful! Thank you so much :)
This is gorgeous. I love how free is feels to make these papers. Thank you
A wonderful tutorial!!! Thank you for sharing.
Love this idea! Looks like fun to make. I’ve made hand made paper in the past and this is so much easier with similar results.
Excellent video. What gorgeous papers. They’d cost a small fortune in a nice boutique art store. I’m always making backgrounds and this one was one of my favorites. Time to explore this art form again. Thank you.
Thank you so much Cheryl :)
Lovely! Much easier than making handmade paper. Now I know what to do with those bags of potpourri that I have saved!
So clever Natasha!
Interesante técnica, la pondré en práctica.
Mil gracias 😍
Darling Natasha
Thank you. I hv so many kinds of paper to make. Now I hv to first get all the material I need and then find the time to do it as I juggle two jobs together with all my hobbies. What I do is I take a tray and put all the things I need for a project and then get going as soon as I find sm time. Thanks again . With loads of love and gratitude
Lovely - handmade paper is so expensive to buy (and such a faff to make); and doing this you can colour co-ordinate too... thank you!
I used to make handmade paper, but since I moved into a smaller space I don't have the room. This will be a great substitute, and is even a little easier to control the final look. I will do it on a piece of freezer paper, as I do with my collages. The paper pops right off the freezer paper when it's dry, and the freezer paper can be used again. TFS!
Awesome tip, thank you!
Absolutely love! Will be making some during my Christmas break!!
I can see this being a great solution to using up scraps from sewing, knitting and journal making. Thank you!
This is AWESOME! Thanks for sharing this. Come January, this will be a great project! I will have to start looking for dried flowers now too. Ohhhh, near end of video, the yarns and feathers! I wonder if you put the dried flowers and herbs in a coffee grinder or something to grind them up smaller if it would prevent the larger chunky pieces. 🤗
Thats a great idea, I hadn't thought of that!
Thank you for showing how you made this paper in steps. I really want to try it. I have 6 or 8 dry used tea bags I've saved.
girl - this is amazing oh gosh - I'm doing this - ty so much for sharing
Glad you like it Alicia, thank you :)
Love this! Thank you. So much easier than the process I used years ago that involved paper and water in a blender, a screen and so much more.
I think that I may try this with a book page as the base.
great idea
Awesome idea Bonnie. I tried that too, and it looks amazing!
what a great idea I think that would be amazing tfs your super idea have a blessed day Nicole
OOH Bonnie, now you got me thinking. Maybe a photograph copy or picture of sorts too.
Wow!!! I love how you find a way to create the most fun and inspiring techniques. You are a great teacher and have inspired so many people to create beautiful projects! You are a fantastic creative artist!! Thank you for sharing your talents with us!
Can’t wait to try this! 😍
Thank you for sharing this tutorial! Happy to see you this morning!
Update :). I have had so much fun with this project....I've tried using 'embossed' napkins now and leaves from the garden . I also used kiddies glitter glue mixed with a little water....creates a lovely glitter effect without glitter everywhere . So many ideas...now what else can I use lol??
OMG yes!! Glitter glue! The possibilities are endless!! Endless! Even fluff from the drier would look great! Even hair (but thats creepy, and we are not creeps haha)
Damn! I just threw out all my dryer lint that i havw hasd near the dryer ( about a years worth 🤧)
@@TreasureBooks I had to laugh. When I was first married 1981. I took my trimmed hair and used it on drawings of faces. My husband always laughed because of my outside the box mind. Thanks so much I needed to refresh my creativity and get my life out of stagnant waters
Wonderful project....I will try it !
Beautiful papers, love them. T F S !😊
I tried today and the result is amazing. Have been making papers all day and got them drying. Thank you 😘😘
I'm so glad you already gave it a go Maria, and loving the results!! Thank you