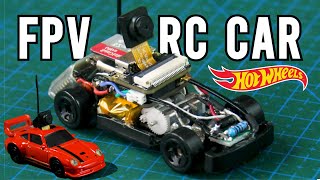
The Sloth - 3D Print your own RC Car

Вставка
- Опубліковано 29 чер 2024
- 3D Printed RC Car
"The Sloth"
True AWD with independent suspension
Each wheels is controlled by its own motor.
This gives the ability to control torque vectoring through programming.
Torque vectoring is adjustable on a fly. Turn on a dime or drift on all 4 wheels.
The top speed is manageable, and torque is just right for running this car indoors.
Build your own RC car at home!
FREE STL files, Code, and Schematics:
www.thingiverse.com/thing:478...
thangs.com/Boxandloop/The-Slo...
Affiliate links:
DC Motors (4)
www.servocity.com/508-rpm-min...
Set Screw Hubs (4)
www.servocity.com/4mm-0-770-s...
Arduino Uno:
amzn.to/30e0jwH
Arduino Nano:
amzn.to/3uWV5Dx
Adafruit Motor Shield
amzn.to/3kTfYLp
Tires:
amzn.to/38c2YLM
Servo:
amzn.to/3rkQZ5Y
Max471 Voltage Sensor:
amzn.to/3uXhZuM
Mini Buck Converter:
amzn.to/2Otb3ow
Lipo Battery:
amzn.to/2NV8pbf
Ceramic Capacitors:
amzn.to/3sPRUM7
22awg wire:
amzn.to/30cwn4f
LED diodes:
amzn.to/30aWoRo
Push Button:
amzn.to/3qgUA3N
Toggle Switch:
amzn.to/3kLTImE
Harness Tape:
amzn.to/3kJ24vm
NRF24L01 modules:
amzn.to/3sIwII2
Deans Connector:
amzn.to/3kJUC39
XT60 Connector:
amzn.to/38bhC5P
Heat Shrink Wrap:
amzn.to/3rirbYt
JST connector kit:
amzn.to/3sP99gH
Springs:
amzn.to/389GzyC
2mm rods:
amzn.to/3ebafza
Potentiometers:
amzn.to/3rkJ48L
Adafruit Powerboost 1000c
amzn.to/3sPTpdh
Remote Battery:
amzn.to/2PA3JIa
6-32 Screws:
amzn.to/3rhLGUY
M3 Screws:
amzn.to/3qg15DR
M2 Screws:
amzn.to/3reRe2y
M2.5 Screws:
amzn.to/3rjpN7S
M3 Countersunk screws:
amzn.to/3kO2tMQ
M3 Nylon Lock Nuts:
amzn.to/2PrF7kC
Tools:
Crimping tool:
amzn.to/3bmuAA1
Soldering kit:
amzn.to/3c7A7JT
Wire Stripper:
amzn.to/3c5bX2j
Voltage Meter:
amzn.to/3rdSVxf
Chapters:
0:00 Intro
0:19 Remote Control Assembly
14:59 Remote Control Code
16:33 Rear End Assembly
23:17 Front End Assembly
29:15 Body Electronics
36:28 Body Code
37:14 Body Assembly
42:12 Results and Demo - Розваги


dude this is amazing, Im impressed that you decide to make your own controller and the way every single component has its own slot and self taping screw holes! seriously cool
Thank you very much. Lots of work went into it
amazing, i just found my next project to get stuck into. i made the iron man helmet and you shared my build....looking forward to this one!
Excited to hear that. Looking forward to your build
Most people would have just glued the LEDs into the controller. I like your solution. More complex, but easier to repair in the future.
Thank you. That was the goal. To make it easy to disassemble
@@BoxandLoop Any plans to revise those front trailing arm joints where they connect to the steering knuckle? Maybe a ball-and-socket design?
The couple first designs were based on a ball joint, but with it being 3D printed it was large and more importantly had to be very precise to avoid too much play. Thinking about people trying to print ball joint gave me headaches, so I scraped the idea
@@BoxandLoop Cool. I wasn't critiquing, just curious. It's a really awesome design all around.
@@andrewsmith1204 thank you very much
so cool
This is top tier. Do you have a recommendation of someone on UA-cam or something that teaches this type of stuff because wherever you learned this made you able to do this much advanced stuff. Might do this soon. Very impressive!
Thank you. There wasn't any one video or channel for me. I tried to break down the project into small problems and google a solution.
This is dope asf homie. I want to make my own circuit for a project I’m working on, do you have a suggestion of what software to use to design a circuit or at least layout a page that guides you on where wires go and where things connect(like your file has in the circuit assembly). Amazing car.
Thank you. I'm rather new to this hobby and just use what's already available. I do hope to get into designing my own boards in the future though
I didn’t understand almost anything but it’s amazing hahahahhhaa
Amazing work! I'm mid-way through the build. Finished the remote, and looking forward to digging into the car once some parts arrive. One observation: I noticed that the low battery LED on my P1000C stays lit when the power is off, even when the battery is charged. I looks like you're seeing the same thing in your assembly video. I think this is caused by the pull-down resistor on the Arduino's analog input pin. If you put a diode in between LBO and A6 (with the cathode facing the P1000) that will prevent the red LED from staying on all the time, and the Arduino can still read battery voltage.
Awesome! Thank you. I'll try that
@@BoxandLoop My pleasure. Also, I noticed you're also seeing the weirdness in the remote control code where pressing the left button triggers both left and right analog inputs, but pressing the right button only triggers the right. This is because the Nano only has one ADC, and all the analog inputs are mux'd into it. Due to how the Nano samples an analog input, when you try to read an open circuit (e.g. an un-pressed button) you can sometimes get flaky behaviour like this where the ADC's buffer holds values from previous samples. In this case, you can solve it by treating A3 and A4 like digital inputs. I can share my changes to the remote code if you're interested.
That would be great if you shared. This is really my second electronics project so I want to learn anything and everything.
@@BoxandLoop Sure. Some very minor changes. I put the modified setup and loop functions here: pastebin.com/5SxwFXyN
Very nice work!! What I would improve is the shocks with oil for amortiguation, it would work much better. Have you tested it?
V2 option definitely. In this version, there just not enough space
I'm just starting to build the Iron Man helmet and I'm gonna do this next! About how much is it for all supplies?
Hi Awsome project. What kind of 3D printer do You used?
Thank you. I used ender 5 for this
How do you make the schematics? What software/app?
im thinking of making this, i just got one question about the bom. the motors are on another site and i usually order from amazon, is there another option of motors on amazon?
I could not find one. Those motors are are great since they come with a gearbox attached
@@BoxandLoop ok and one more question, how long can the battery keep it alive and whats the range of how far you can be from the sloth?
Battery last a long time. I was shooting the driving videos for couple days straight with burnouts and everything without recharging. Distance I have not tested for maximum, but should work across a basketball court
This is great! What scale is the car?
scale approximately 1:12
Around 1/14. Depends on the body you put on it
Is this for sale?
Can you make iron man mk5 helmet please
Looks like a fun build
Where I can get this mini tires??
Just look for tamiya 60d tires
what slicer do you use ?
Cura
@@BoxandLoop thats weird because i couldnt import your iron man helmet files
@@jaffy1048 that's strange. The files has worked for others. Maybe reinstall Cura
@Box and Loop the files are working now but for the helmet could i use this arduino www.amazon.com/REXQualis-Board-ATmega328P-Compatible-Arduino/dp/B07WK4VG58/ref=sr_1_1_sspa?dchild=1&keywords=arduino+nano+every+with+cable&qid=1620094455&sr=8-1-spons&psc=1&spLa=ZW5jcnlwdGVkUXVhbGlmaWVyPUFSUEo5VkxGTU5NR0ImZW5jcnlwdGVkSWQ9QTAwMDQyMTMxUjlCRDY3VVhDN1gwJmVuY3J5cHRlZEFkSWQ9QTA3MjczMzU3RU1RTjFCUlgzQUomd2lkZ2V0TmFtZT1zcF9hdGYmYWN0aW9uPWNsaWNrUmVkaXJlY3QmZG9Ob3RMb2dDbGljaz10cnVl
nevermind
Amazing, you inspire me to built this car with my own electronic (stm32) and with some changes in construction.
only one question: how you synchronize all motors?
Without feedback from all motors it is not working properly. no it is working but some of the wheels are spinning slightly faster/slower
ua-cam.com/video/fWfiE7kfb30/v-deo.html