2G DSM TRUNK MOUNTING THE BATTERY!!

Вставка
- Опубліковано 10 лют 2025
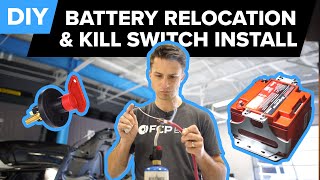
- Hi folks in this episode we will be taking out the battery from under the hood, removing all of the wiring we added and relocating the battery in the hatch to free up some space and clean things up a bit!. This whole process took me about 2 hours from start to finish and freed up a lot of space under the hood. Not to mention it got rid of the annoyance of having to remove the battery/tray/brackets to get to things down below. Hope this vid helps one of your folks out there and untill next time take care!


I'm currently assembling my 2G piece by piece. Although I don't plan on relocating my battery soon, you'd helped me a ton just by showing your wiring connections, as I don't have any experience with it and thus I get a little confuse sometimes with the service and electrical manuals instructions. Thank you very much!
Glad you found it helpful. If you need any help in the future reach out to me at todaysprojectguide@gmail.com or find us on instagram @TodaysProjectGuide
Very clean set up brother! That breaker switch is a pretty cool idea for a battery disconnect when working on the vehicle in the future.
love the vids man! learning alot of stuff i wanted to do to my gst eventually so thanks alot!
great video, please keep them coming.
Great video and detail
Thanks 👍
love the 2g Eclipse videos
Much cleaner in the engine bay👍👍
I’m currently trying to do this job as well. It looks like you have two power cables going to one terminal on the fuse block. I’m assuming one is factory positive cable and the other maybe alternator stuff? Not really sure. Did you also hook up the new 4 gauge power wire to the other terminal on the fuse block? Hopefully this comment reaches you!
Hey there, I added the 4 white wrapped wires for the charging system to one lug with + power and the ground to fuse box and any other grounds to the other side. It’s an inline breaker or safety to kill power from any over voltages
@@TPGDSM So since it’s inline, did you just connect the new 4 gauge power wire on the opposite side of the fuse block from the factory power wires?
@@edmundstyson2755 yes. The battery wire from the trunk feeds upfront through the rubber boot on the passenger side firewall behind the fuse box, that thick red wire feeds into the right side of the breaker, and the lug on the left of it gets all of the alternator, starter wires and anything else i added in that needs power. I also put an inline fuse in the trunk about 12in from the positive post on the battery to fend off any chance of something melting and burning my car to the ground
@@edmundstyson2755 I also really like the breaker under the hood. You can use it as a secondary kill switch if you want the added layer of protection
@@TPGDSM Well I appreciate the help. The previous owner did some weird stuff with some of the wiring coming off of the fuse box so I’m trying to sort that out. Hopefully I figure it out so I can finish this trunk mount!
Guy, how can take the two gold clips off, holding the shift cables under the center console?
There held to the shifter base with two compression fasteners. They are the two tabs lightly hammered in just before the cables unions. They have bent tabs facing towards the shifter. I used a small pry bar/large screwdriver to pop them straight up while lightly tapping them with a hammer. DO NOT ATTEMPT TO UNSCREW THE UNION GOING TOWARDS THE ENGINE BAY!. Just pop the two tabs up and remove the shift cables. Tap them back in to reinstall 👍👍
Great vid man !
Thanks 👍
Looks good bro 👌
love it, i have to do mine soon too
Did you just connect the red wire and thick black wire for positive terminal just sort of extension all the way to the postive of the battery on the back? How thick are the wire did u use red and black. Thanks in advance mate. What is the red wire for if you used the thick wire as positive?
I went to my local parts store and picked up 14ft of black 4awg wire. Then used the first breaker under the hood at the break out connection for the alternator, alternator charging circuit and starter power wire. Ran the new power wire through the car to where I wanted the battery to live. Added a second breaker withing 8in of the positive terminal. I was left with approximately 3ft of extra black wire that I cut off and turned into the ground wire. The red wire you see is 16awg going to power the fuel pump after a fuel pump rewire. Hope this helps👍
I have the same breaker in my supra for my rear mounted battery, seems to work 👍. Where in ny are you?
First off love that you've got a supra, secondly I'm north of the capital region.
Yikes thats pretty far, im in l.i
@@zipone_1726 where's l.i?
Oh long island duh🤦
I'm also doing this work, I'm basically forced to relocate it due to other medications that had to be done.
It's not a terrible job I can honestly say that
@@TPGDSM It doesn't seem like it, at least compared to some of the other painful things I've had to do.
@@Sparkles_x64 today I installed the no lift to shift wiring and that was way more painful trying to reach up behind that clutch pedal but you'll see that one soon lol
@@TPGDSM I took the front subframe off ...... working around those pedals and firewall areas are awful. No matter if you remove the seat and lay under the dash - its awful. But suspension work is probably the worst. I'm so glad that is all over.
My 97 gst has a CD player in that spot, did you remove it before?
The cd player?
Today's Project Guide yeah in my trunk on the right where you put the battery it’s a CD player holds up to 8 cds
@@oscargutierrez970 if I were you I'd pull that out. Follow the wires up to the dash and remove it all. I'm going to install something interesting in the dash shortly. Cds are dead tech these days. It shouldn't be very hard to do.
Same I think the guy I got it off I think welded a coverup plate over where the spare tire should be.i was very surprised.
@@jeremiahborjon9202 I've honestly been toying around with the idea of reinforcing that spare cover or covering it up completely. The cover is all bent up and needs replacement soon.
You ever had charging problems since doing this relocate?
Not really. However depending on how thick of a power wire you run up to the engine bay dictates how much amperage drop you'll have from battery to starter. I actually re wired the blue Gsx with 6awg power and ground wires because he had such thick wire installed it would cause a super slow crank and on occasion the battery wouldn't be able to start the car at all. Could have been a bad connection but once we swapped out to a normal size wire all the issues went with it. Now ecmlink says it's charging 13.6-13.9 volts constantly.
@@TPGDSM ahhh ok. Bc planning on doing a relocate this week. I have 0 gauge wire for the positive side. And I was gonna use the leftover from that same wire for the negative side. So I should just go smaller size wire for the negative side. And keep the 0 gauge for the positive ?
@@djack2058 it's all about preference. I ran 4 or 6 bc it fit under the door trim panel nicely. Totally up to you. If you find an issue later down the line similar to the one I described earlier it may be to big? Not 100% sure that was the reason but it fit the bill that day 😂
@@TPGDSM well I just completed the my relocation. And it didn't work. No power. I used extra 0 gauge wire for power that I had left over from over the years. Connected the stock wires into a power distributor and then ran my 0 gauge to the back. And then I used 0 gauge ground. No power. So I guess it's too big
@@djack2058 no. It should work if the battery is full. I'd double check ground and all connection points. The breaker could be tripped to. Something isn't right just double check things👍
i’m back for another tutorial! unfortunately (i doubt you remember lol) the valve cover gasket on the 1G did not go great! the last guy stripped out FOUR of the outer bolts and now it’s leaking worse! on saturday i will be learning about heli coils now lmao hopefully this goes smoother
I just heli-coiled my exhaust stud in my head. Stay straight and drill it out little by little. The heli-coil I added went it easy and was great , tight hold so far. Good luck 👍 lmk if you need any pointers
@@TPGDSM i’m still a “low level” tech at my job so i know some things but your videos have been a great help! hopefully my helicoils will come in tomorrow! only thing i’m nervous about is drilling into the head! but i can’t imagine it’ll be to bad lol. but don’t worry i will definitely be tuning into your channel for more information when i need it! my GSX is 100% stock so i’m just trying to do maintenance items before i try and make it a tad bit faster. i’m shooting for 375-450HP but probably not till next summer!
@@michelangelo5903 you should be fine drilling into the head make sure you measure the depth of the holes that are already there first and get a drill bit stop from Harbor Freight or Amazon that will definitely help you out a lot feel free to ask questions whenever you need 👍👍
@@TPGDSM i appreciate the information man! super helpful! i already thought of ways to measure the depth and the helicoils i ordered come with the tools needed (i’m sure they are crap quality lol) but i’m sure they will be perfect for what i need! thanks again man! i will be tuned in for more information and videos for sure!
NOOOOO! You have to move that breaker back to the battery! if that cable gets worn and grounds out your car is gunna burn bro.
There is. The second ones under hood. It's fused and has a breaker off the + terminal about 6in away and one before all the wiring to the fuse box 👍
Intro music needed to pull this harness out of 95 gst
Gets the blood pumping 👍😂
A thief is way too lazy to figure it out. They just move on.
Damn skippy! Or it'd be my luck its the one with half a brain 😂
Pity about the music as it’s so distracting and makes it difficult to concentrate on what you are saying.
My early editing days. Hopefully this issues been resolved as of early 2021.
Clean your car man it's dirty and nasty af looking.
❤️