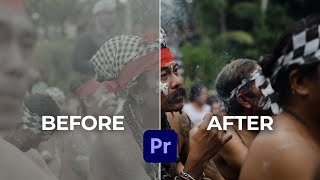
5 Steps to Better Color Grading in Premiere Pro

Вставка
- Опубліковано 15 тра 2024
- Try FilmConvert Nitrate for professional film grades: bit.ly/GalFilmConvert
Use code PREMIEREGAL to get 10% off.
➜Free Log to Rec709 Conversion Luts in Premiere Pro: premieregal.com/blog/2021/12/...
➜RED Log Footage in this video is from Artgrid: bit.ly/ArtGridVideo
______________________________________
ABOUT TUTORIAL
Color Grading can be intimidating at first, but following these steps in my video can help you achieve better results in Premiere Pro. You'll find time-coded chapters below to help you review.
Try a free trial of Adobe Premiere Pro with an Adobe Creative Cloud Subscription: prf.hn/l/pmwLMPW
______________________________________
PREMIERE GAL TOOLS
➜ My Premiere Gal Keyboard is now available!: premieregal.com/keyboard
➜ Premiere Gal Toolkit Plugin over 1200+FX: premieregal.com/toolkit
➜ Use Artlist Unlimited Music & Creative assets for Video: bit.ly/TryArtlist
➜ You can also try Epidemic Sound for Music & SFX: share.epidemicsound.com/gal
➜ General Discord Server: premieregal.com/discord
➜ Support Gal on Patreon for more tips: / premieregal
______________________________________
TIMECODE CHAPTERS
0:00 Intro
0:14 Converting Log into Rec 709
0:59 Lumetri Scopes and Basic Corrections
2:45 RGB Curves
3:50 Skin Tones
5:43 Changing Colors
7:15 Film Grading
9:34 S Curve
10:30 Copying Attributes to Other Clips
11:10 Why I don't use Adjustment Layers
______________________________________
FOLLOW ME ON SOCIAL
➜ / premiere_gal
➜ / premieregal
➜ / premiere_gal
Website ➜ premieregal.com
For sponsors:
contact@premieregal.com
Video Edited by Stephanie Yu
Thumbnail by Rikard Tholen
Affiliate Disclaimer: Some of these links in this description are affiliate links. I'll earn a small commission if you make a purchase and it's no additional cost to you.
#color #colorgrading #videoediting - Фільми й анімація


It's like you handed us the palette and brush to paint our videos with emotions🎨
🎨
Thank you, I learnt a few more things here. Also the Luts you use in basic correction seem to work better than the ones I had previously. Cheers. Will save me time.
Always the BEST PP videos! Thank you!!
Good as always, thank you so much🌹
When adjusting the black levels, I notice that the input LUT crushed the blacks (destructively). When you used the curves tool to raise the blacks, it did not restore the missing shadow detail, it simply raised the crushed blacks by a few IRE. Since the whole point of log is to preserve the dynamic range, this order of operations kind of defeats the purpose of using log. Is there a better workflow that preserves the log DR and doesn't throw it away before color grading?
Love it! ❤ Great video.
informative video on colour grading.
Excellent explanation thanks
love the you talk and thanks for such a good class
Thank you so much, for explaining so simply about the hue vs hue & hue vs sat. I always wondered and was in doubt how to use them properly. But now you solved it for me❤ thank you so much
You're very welcome!
the only three channels that I love watching for premiere pro tutorials is Premiere Gal, GFXmentor and Premiere Basics. Thank you very much Premiere Gal for your lovely tutions. Much respect and love from Nepal
I owe you and Piximperfect my life lol taught me so much over the years. Can't thank you enough for the work you do!
Thank you for explaining some ways to use the curves, which I knew nothing about before today. That said, my preferred way to adjust the skin tone is to apply the Fast Color Corrector effect. Yes, it's old and categorized as "obsolete," but it has an easy to use "hue angle" adjustment that allows one to fix skin tone issues in a few seconds.
Great video tutorial. Thank you for your great job.
Thank you so much for this! What if you don't know what camera the footage was shot on?
Thank you ma'am
Awesome
Thanks for your excellent videos. Sometime in the future, like to see a video that shows best practices when using video clips with different dimensions and frame rates. Also, the best way to color grade the clips to somewhat blend. I often work with video footage that spans 30 years and is shot with many cameras.
That's my Gal. ❤👍
Super explanation. Total beginner here. Very easy to follow. Thanks!
❤️🙌
I was watching some of your previous videos which have unmatched frame rates that reduce the video experience. How did you solve it ? Do you use software or sth?
Damn, very cool video, thank you
Great tutorials, thank you! Sometimes I just come to get relaxed by Kelsey's voice.
Now slowly close your eyes and....3....2....1 Good night :)
@@PremiereGal You could do very well for yourself with guided meditations. Also the tutorial was very helpful. Thanks.
What a awesome video. It helps me so much - thank you😊 where exactly could I find the link to download the luts you describe at the beginning of the clip? Thank you- I‘m your fan 😊
awsome
I am so happy to see that the clunky performance of the Lumetri scopes is not something happening just in my mac, but apparently they work slow and delayed for everyone! I hope Adobe works to get this issue solved, to make them work fast and snappy as Davinci Resolve and FCPX.
It depends on the footage, for this video I was working with 8K log footage, with larger clips like this sometimes the display playback of the scopes can take a second to catch up, on standard 4k though it's much more snappy. I agree though, that it shouldn't be there.
1:01 "but this is just the beginning" -->lol liked and subscribed
Great video, thank you! Shame that my premiere pro 2023 keeps crashing and when it doesn' crash it won't load the project clips after restarting it, so I'm stuck to the 2019 version. My PC is powerful enough (32 giga of RAM), must be something related to the graphic card.
Very good information. I see that you apply the conversation LUT first. I've been adjusting the white and black point first, then the LUT. Does it make a difference? Thanks.
It depends on if you apply the LUT as it's own lumetri effect or in the same lumetri color effect, if you have two instances, you can layer them differently from effect controls to see a difference.
Nice 👍
Is there a way to get the log look back? I’m trying to correct bad color correction and grading. I wish there was an easy way to remove all the color problems and get back to the original image.
good
I really need to get into color grading, but most of what I do the turnaround time for my videos doesn't allow me the time to do so.
I hope this is a key to help you unlock more grading in the future!
be honest we don't have cameras that can shoot in such sorcery
Either do I, but as an editor you can recieve this footage from a client and need to know how to grade it! But the same steps apply to all clips, no matter what the camera
👌👌👌👌👌❤️
how to reduce noise in video in premiere pro like davinci resolve for free?
I believe you can do it in Ae, but not Pr as of now (paid plugin needed)
@@PremiereGal Have you used Topaz Video AI. I have but barely use it. Not sure if I'll re-subscribe.
why is the lut added to the basic correction section and not creative under lumetri.
The Creative Lut dropdown is for creative grading luts, correction or conversion luts are better applied under basic correction - that is the difference. Remember, the LUT I applied was to convert the log color to rec 709, if I wanted to apply a creative look LUT after my corrections, I'd apply it at the creative section.
@@PremiereGal makes complete sense thank you. Love your video much appreciated.
@@PremiereGal I like to apply the conversion LUT in the creative tab so I can still make adjustments to the log footage in the Basic tab before it's been converted to r709. I feel like those adjustments perform better under the LUT (with all the original camera data) than over it (after it's been clamped by the conversion lut). I then still have all the other tools downstream to make plenty of adjustments on top of the r709 LUT if needed.
❤
My respects!
🙏🙏
ItsNotFree
Hate hate hate thr 😮 thumbnails such a trope
Where can I find those log file ??🥹