
- 50
- 244 746
Marc & Tania
United States
Приєднався 18 сер 2021
Hi, We're Tania and Marc. Through the magic of E-Harmony. we met in January of 2019. Four months later, we were walking through the Italian countryside....starting our travel adventures. Two years after that, we were married....and became an instant family of 6.
Our latest project is a 2019 Promaster 2500 van, which we are converting to a campervan. While we have some little bits of construction experience, we haven't tackled anything like this before. So, we know there will be bumps along the way but we are loving the time working together, learning new things....and preparing for more adventures ahead.
SUBSCRIBE to our channel to follow along on our van build and our adventures. We will be posting each step here so that you can learn from both our successes and our mistakes.
Also, please feel free to reach out and say Hi or leave a comment. We so look forward to having you follow along with us :)
Finishing a Van Shower with Kerdi Board and Palisade Tile
Finishing a Van Shower with Kerdi Board and Palisade Tile.: Part 46 - RAM Promaster 2500 Van Conversion
Hi Everyone, and Happy Halloween. Today we are going to tackle one of our last remaining big jobs - the shower. This was. HUGE job that took us almost 2 months to get through. Every bit of it was new to us….from hanging the Kerdi to installing the Palisade tile. We made lots of mistakes, but got it done. Hoping this video will help you along in your journey when you get to this part of your build. Thanks to the Palisade Tile folks for their help along the way.
Timestamps:
Planning 1:14
Framing and Preparing for Kerdi Board 04:30
Kerdi Board and Kerdi Fix Install 06:15
Kerdi Band Install 16:47
Installing Palisade Tile 21:09
Follow along and you’ll see each step that we took to get this huge project done.
If you have any questions, please feel free to leave a comment below, and please give a thumbs-up if you enjoyed this video and found in helpful to you. Subscribe to our channel to follow along on our entire van build series.
Blessings to you
Marc and Tania
---------------------------------------------------
Some products we reference in this episode..
Kerdi Board ½” thick sheets - buy 5
www.lowes.com/pd/Schluter-Systems-0-5-in-x-32-in-x-48-in-Kerdi-Board-Polystyrene-Foam-Backer-Board/4712901
Schluter Kerdi-Band (5”x33’) - buy 2
amzn.to/45YODxg
Schluter Kerdi Hardware Set (Screws and Washers) - buy 2
amzn.to/49gt3XW
Schluter Kerdi-Fix Sealant (9.81 OZ) - buy 2
amzn.to/3EcPi2C
Schluter Kerdi Trowel (1/8 x 1/8” square notch)
amzn.to/49elBMZ
Schluter Systems Thin-set
amzn.to/40fP7hr
Palisade 25.6 in. x 14.8 in. Interlocking Vinyl Waterproof Wall/Backsplash Tiles for Kitchen or Bathroom in Carrara Marble (8 Pack)
amzn.to/3sgMeAo
Loctite Fast Grab Ultimate Construction Adhesive (9 oz cartridge)
amzn.to/3SthS8a
GE Advanced Silicone Caulk for Kitchen & Bathroom - 100% Waterproof Silicone Sealant, 5X Stronger Adhesion, Shrink & Crack Proof - 10 oz Cartridge,
amzn.to/3QDX0tC
Carpenters Square
Rags
Marker / Pencil
¼” spacer
As per the Amazon Operating Agreement, I am a participant in the Amazon Services LLC Associates Program. As an Amazon Associate, I earn from qualifying purchases. This is an affiliate advertising program designed to provide a means for this content to earn advertising fees and commissions by linking to Amazon.com and affiliated sites. This is at no cost to you. Thanks for your support.
Our Promaster 2500 Van Conversion Playlist:
ua-cam.com/play/PLaki5aJZK8qlOXQF1p4GuKeL1QAeiZ03T.html
If you like any of our videos, please consider subscribing. And click the notification bell to be alerted when we release a new video.
#vanbuild
#vanlife
#campervan
#vanconversion
#homeiswhereyouparkit
#vanlifediaries
#homeonwheels
#projectvanlife
Переглядів: 3 882
Відео


Building Shaker Style Doors and Drawer Fronts
Переглядів 2,6 тис.Рік тому
Building Shaker Style Cabinet Doors and Drawer Fronts: Part 45 - RAM Promaster 2500 Van Conversion Hi Everyone and Happy Friday. Well… Today we are going to show you how we built our shaker style cabinet doors and drawer fronts. So far, we have gone through the building of the actual cabinet boxes. We then added face frames and started installing drawer slides. We also finished the butcher bloc...
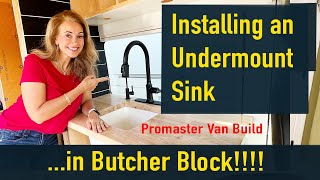
Installing an Undermount Sink in Butcher Block: Part 44 - RAM Promaster 2500 Van Build
Переглядів 10 тис.Рік тому
Installing an Undermount Sink in A Butcher Block Countertop: Part 44 - RAM Promaster 2500 Van Conversion Hey All!! Well… Today we are staying with the construction of our kitchen cabinets. In our last video, we went through the building of the actual cabinet box. We also added `face frames and started installing drawer slides. In this video, we will be concentrating on the installation of the u...

Building a Kitchen Cabinet: Part 43 - RAM Promaster 2500 Van Conversion - part 1
Переглядів 2,3 тис.Рік тому
Hey All. Well… we are getting down to it. Only 2 major jobs left for the van. One is the shower, which we will be tackling next week. The other is the kitchen cabinet…and that is what we’ll be working on today. This cabinet will be made mostly of ½” Baltic Birch plywood with some ¾” Baltic Birch plywood supports. This cost of this type of plywood will set you back a bit, but the structural rigi...

Installing a Webasto Heater (with Smart Temp Controller) in a Promaster Van
Переглядів 6 тис.Рік тому
Installing the Webasto Heater with Smart Temp Controller: Part 42 - RAM Promaster 2500 Van Conversion Hey All. Welcome to the next episode in our van build series. Today we are installing the Webasto Heater along with the Bluetooth enabled Smart Temp Controller. This had been a pretty daunting project for us…..lots of parts….and lots of mystery. But it ended up going really well. The heater is ...

How to Wire 120V Electrical in a Van - - RAM Promaster 2500 Van Conversion
Переглядів 2,7 тис.Рік тому
How to Wire Up 120v Electrical in a van: Part 41 - RAM Promaster 2500 Van Conversion Hey All. Welcome to the next episode in our van build series. Today we are going to wire up the AC side of our van’s electrical system. We didn’t see many videos highlighting this step, so we figured we’d do our best to try and help you along. As always, be sure and consult a professional if you are uncertain o...

Setting up the BMV-712 Smart Battery Monitor
Переглядів 7 тис.Рік тому
Setting up the BMV-712 Smart Shunt: Part 40 - RAM Promaster 2500 Van Conversion Hey All. Welcome to the next episode in our van build series. Today we are going to set up and configure the Victron Energy BMV-712 Smart Shunt We figured this was a good video to do since we didn’t see many of them out there. The Smart Shunt will give you Bluetooth access to all sorts of info relevant to your batte...

Victron and Blue Sea - Perfect Together - RAM Promaster 2500 Van Conversion
Переглядів 1,5 тис.Рік тому
Victron and Blue Sea - Perfect Together - RAM Promaster 2500 Van Conversion Hey All, It’s Marc and Tania. Welcome back to the channel. In this episode, we are getting super creative and combining a Blue Sea Systems Battery Switch, a Victron Energy Lynx Distributor and a Victron Energy Smart battery monitor (BMV-712) into a single kick-butt hub for your RVs electrical system. It’s a really neat ...

Finishing The Headliner Area: Part 38 - RAM Promaster 2500 Van Conversion
Переглядів 2,7 тис.Рік тому
Finishing the Headliner: Part 38 - RAM Promaster 2500 Van Conversion Hey All. Welcome to the next episode in our van build series. Today we are working on the area of the van above the front seats. I don’t think many van builders bother with this area since you can hide it with curtains and stuff, but we thought it was really visible, so we decided to trim it out and give it a finished look. Th...
Grounding the Electrical System: Part 37 - RAM Promaster 2500 Van Conversion
Переглядів 4,5 тис.Рік тому
Hey All. Welcome to the next episode in our van build series. Today we are finally starting to put together our electrical system…and the first thing we will need to do is properly ground the negative bus bar to the vehicle chassis. This is needed to keep the electrical system working smoothly and safely. We start by discussing why grounding is even needed….and what it really means. The we will...
Cabinet Install and Painting Tips
Переглядів 1,9 тис.Рік тому
Cabinet Install and Painting Tips: Part 36 - RAM Promaster 2500 Van Conversion Hey All Welcome to the next episode in our van build series. Do you remember those cabinets we built a bunch of episodes back? Well, we’ve made a few changes to them and, today, we are going to get them installed in our van. Since the start of these cabinets, one of our main goals has been safety……so much so that we ...
Building the Best Bench Seats: Part 35 - RAM Promaster 2500 Van Conversion
Переглядів 8 тис.Рік тому
Hi everyone, we hope your 2023 has started out with many blessings for you and your families. Today we're going to discuss the benches and the bench seats. Since I love woodworking, this has been one of the most fun projects we've done so far. We took the idea from a dude named Greg Virgoe, who is based in the UK. He had this great idea of using inexpensive IKEA bed slats to make the benches, g...
Installing an exterior 120V Outlet on a Promaster van
Переглядів 2,5 тис.Рік тому
Installing an External 120V Outlet: Part 34 - RAM Promaster 2500 Van Conversion Hey All…So, today we fix a problem that we (well, Marc) made about 20 episodes ago. If you have been following along, you know that we accidentally installed the shore power inlet in a really bad spot. We ended up installing a 2nd one currently but, until now, we have had that first one just kind of there….doing not...
Building Upper Cabinets: Part 33 - RAM Promaster 2500 Van Conversion
Переглядів 8 тис.Рік тому
Hey All, wow, What an exciting time in our van build process. Today, we are working on our Upper Cabinets. This has been a really daunting project but we took a very methodical process and are really happy with the way our cabinets came out. We had three goals for this project. The cabinets had to be very strong, very light and very secure. We used different thicknesses of Baltic Birch plywood,...
Fixing a Big Mistake in our Electrical Calculation
Переглядів 1,1 тис.Рік тому
Hey All, while we work on our upper cabinets, we wanted to fill you in on a big screwup in our electrical calculations. One of our viewers was kind enough to bring this to our attention. So, if you are following our build and using our methods to calculate your own power loads, we want to be sure you do it right. Watch this video (and our other electrical videos) and you will be able to easily ...
Plumbing the Shower: Part 32 - RAM Promaster 2500 Van Conversion
Переглядів 2,4 тис.2 роки тому
Plumbing the Shower: Part 32 - RAM Promaster 2500 Van Conversion
Shiplap and DIY Window Frames: Part 31 - RAM Promaster 2500 Van Conversion
Переглядів 5 тис.2 роки тому
Shiplap and DIY Window Frames: Part 31 - RAM Promaster 2500 Van Conversion
Finishing the Area above the Rear doors
Переглядів 5 тис.2 роки тому
Finishing the Area above the Rear doors
Trimming Out the Ceiling: Part 29 - RAM Promaster 2500 Van Conversion
Переглядів 2,1 тис.2 роки тому
Trimming Out the Ceiling: Part 29 - RAM Promaster 2500 Van Conversion
Awesome Roof Deck and Wind Fairing for your camper van.
Переглядів 7 тис.2 роки тому
Awesome Roof Deck and Wind Fairing for your camper van.
Upper Cabinet Safety: Part 27 - RAM Promaster 2500 Van Conversion
Переглядів 3,7 тис.2 роки тому
Upper Cabinet Safety: Part 27 - RAM Promaster 2500 Van Conversion
Installing 400W of Solar on a Promaster 2500 Van
Переглядів 11 тис.2 роки тому
Installing 400W of Solar on a Promaster 2500 Van
8020 Roof Rack on a Promaster 2500 Van
Переглядів 15 тис.2 роки тому
8020 Roof Rack on a Promaster 2500 Van
Installing a Cedar Tongue-and-Groove Ceiling: Part 24 - RAM Promaster 2500 Van Conversion
Переглядів 7 тис.2 роки тому
Installing a Cedar Tongue-and-Groove Ceiling: Part 24 - RAM Promaster 2500 Van Conversion
Running The Electrical Wiring in Our Van: Part 23 - RAM Promaster 2500 Van Conversion
Переглядів 6 тис.2 роки тому
Running The Electrical Wiring in Our Van: Part 23 - RAM Promaster 2500 Van Conversion
Electrical Wiring Design: Part 22 - RAM Promaster 2500 Van Conversion
Переглядів 1,7 тис.2 роки тому
Electrical Wiring Design: Part 22 - RAM Promaster 2500 Van Conversion
Installing a 30Amp Shore Power Inlet: Take 2: Part 21 - RAM Promaster 2500 Van Conversion
Переглядів 2,1 тис.2 роки тому
Installing a 30Amp Shore Power Inlet: Take 2: Part 21 - RAM Promaster 2500 Van Conversion
Installing the Fresair 12V Air Conditioner: Part 20 - RAM Promaster 2500 Van Conversion
Переглядів 8 тис.2 роки тому
Installing the Fresair 12V Air Conditioner: Part 20 - RAM Promaster 2500 Van Conversion
Great!
Does the measurements of the window frames allow for the bunk windows to be easily removed for replacement? Thank you for these videos. Looking forward to an update 😁🙏
What size drill did you use in Gromit? Thank you :-)
DON’T MAKE VIDEO THAT JUST TAKES UP VIEWERS' TIME WATCHING YOU EXPLAIN AND PERFORM...WORK U ALREADY KNOW WHEN U CUT THE VID WILL BE "THIS DIDN'T WORK"
Thinking of you two and your family!! Hoping everyone gets well soon.
Nice intro to the bmv! Fyi your batteries are incorrectly wired. To prevent one battery to be discharged before the other, switch your negative source to the other battery
Thanks for the excellent tutorial....this was a great example of skill in workmanship, and matching skill as a teacher.
You didn’t need to go to the trouble with the corners. Your half inch bit gives you a radius in the corners because a circular bit can’t follow the 90 degree corner.
I totally started to hum the rocky theme song, then wife gave me weird look. I guess not cool for the wives. Looks good. I've always had the CNC shop do our tops, but need to to a couple by hand. To be honest your video is better than most on this topic.
Thanks for turning me on to Greg Virgo. He's become one of my go to guys. Oh - and I really love your videos too !!! I learn so much from them.
Oh man....Greg so rocks. I have learned so much from watching him. Thanks for watching :)
This is great, looking to do this but a wetbath
That is great...best of luck to you :) and thank you for watching
Looks amazing... Is there a reason why you used polycrylic instead of polyurethane for your sealer?
I can’t member what originally drove us to polyacrylic, but we found it really easy to work with, and we really liked the finish. It also dries quick and is easy to clean off. I hope that helps :-)
Wow...Awesome! I learned so much from this video. You are VERY GOOD at explaining steps and tools to use, it is so helpful for a first timer like me, thank you for giving me the info and confidence to do this myself in my van. (using my son's ryobi collection of tools of course) ;). 👍
Hi! I see some comments about parking brake modification below, but are you able to swivel the driver's side with the brake in the "up/parked" position?
Looks awesome, great job
Hey Marc. Great job on this project. I’m at the same point you were. Question: did you leave the spaces on the sides open or did you end up filling them in somehow? Awesome job. Love your episodes!
Where did you buy the shower pan? Who made it etc? Thanks
Love your videos but I would just like to point out a few things. Now there is nothing wrong about your install but these heaters need regular maintenance and usually in the most hash whether times. you have no way of remouving this heater for service whiteout crawling under the van and in minus 40 with 4 feet of snow you will wish you mounted it differently
Thanks for the very concise, step by step instructions! We have a Promaster and want to add rear windows like you did! We are just going to insulate and panel the inside (after some soundproofing!) then build in a garage/pull out bunk for some casual stealth camping!
You are very welcome :-)
Hey guys what gauge wire did you use for your puck lights? Also Ty for your channel. So detailed! ❤
We used 14 gauge....which is probably overkill. The wire on the actual puck lights is so tiny....but 14 is easy to work with and could easily handle the load
Hi guys! how's it going? Enjoying the van?
We just about have it finished. Due to some family and health issues, we had to stop working on it for almost a year....but its pretty much done at this point aside from cutting the mattress and covering the pieces. We expect to be taking it out in the next few weeks for a maiden voyage.
@@marctania2349 that's awesome 👌
Which router bit did you use? My BB is 1.5 inch thick?
Im so sorry it took so long to respond. We used a Freud bit. 1/2" shank. It cut through the BB like butter but wow made a lot of dust
What length?
Or was it the exact one shown in the photo you posted inset.
Looks great!
Thanks so much
The headliner part is so frustrating because there's no place to drill into. Thank you for showing how to do that part.
So glad the video was helpful
Amazing video! Love the positive energy. I am a college student who just bought a van and will be getting to work on it soon. Thanks for showing me the ropes!
Best of luck! If we can do it, you certainly can!!!
Is it real tiles for the shower in ceramic or what? because if it is real ceramic tile, you cannot just put some ciment like that. the whole wall must be covered of cement and then you apply the tiles on it.
Palisade tile is vinyl. The kitchen wall is ceramic....and, yes, it was done as you suggest.
what a beautiful lady. look so young
Thank you :)
Hello Marc and Tania, I just watched your great video on Fresair 12 volt AC install. Could you please tell me where you purchased it and how much it was? Thank you Mike from the valley of the sun.
Hi Mike, So sorry for the late response. Im not sure I can completely recommened the Fresair unit. It works as designed. The problem is that it doesnt do a great job of heating in humid environments. Not sure where you are....it would probably work great in the southwest....but in the southeast....its just OK
Not sure from the video if you did, but you should have a horizontal strut under the joints of the plywood to provide additional support and ensure the edges don't rub up against each other
Thanks for the tip. We actually did not support the joints since the studs were running perpendicular to the plywood sheets. But yours is a great suggestion that we certainly will do next time around
Thanks for this video guys! I’ve been wrestling with van-projects and this was one of my favorite video’s explaining the process… Best wishes! 😅
The whole van build was a wrestle for us.....but it all seems to work out in the end. And many rainstorms have gone by with no leaks
You installed them upside down
You are correct! I installed the passenger side with the release mechanism up and when I swivel the seat, the mechanism scrapes against a metal piece across the front of the seat base. If installed correctly, release mechanism faces down and is located between the seats, I don't have that problem.
You are correct. But they still work fine. We did reach out to the company to ensure it didn't violate any safety issue just to be safe. We may one day redo them right side up
Just wanted to thank you for your video on installing the scopema swivel with modifications to avoid the spacers. I'm off to the hardware store to get the washers, I'll get them installed and then I'll be done. Your video was easy to follow and explained potential pitfalls, so thank you.
So glad it worked for you
Hugely surprised there was such a failure of planning to have not thought through where the lavatory was going whilst the shower was in use. Especially having built out the shower frame.... It isn't like there aren't a plethora of YT videos covering this issue nor, it being a blatantly obvious issue. Perhaps covered elsewhere on why this was such an error.... But meanwhile, a good example of how NOT to build a van.
Not sure I get your message. We built the shower and left room in the studs to run a vent and electrical later........works pretty well for us.
You two are #GOALS 🙌🏼❣ Best couple in the universe ✨💫 Thank you for another informative video that I needed!!!!
Glad the video helped and hope your van is coming along nicely :)
What did you guys use for a paint sprayer? we are just getting into building drawers now.
We used a Wagner that we got at Home Depot. IT actually worked really well, but Tania did have to practice a bit on proper prepping and viscosity of the paint.
I bought those wires from your link on Amazon but both ends have black connectors, I can’t thread it through the cable entry house like you did because it has the black connectors on both sides whereas yours doesn’t. Are they removable?
I am so sorry for the late reply. We cut them and respliced.
The Wire Struggle is REAL over here😭 If I ever make it through this phase, it will be a Miracle. Thank you for another wonderful video, I adore you guys❣️
You are going to rock it!! Anything we can do to help??
I didn’t see how the solar gland looked at the very end when everything was completed and done. Was it under the solar panels? Thank you in advance 😁
Yes, under the panels....protected from the elements.
This was fantastic, guys! Very well done. Saved me some time, frustration and colorful language ;^) God bless...
We did enough colorful language for the both of us. :)
Have to say this is the poorest purchase we've made for our conversion. As already said below (and shame on us for not doing proper research) this unit is not worth the money. We live, and for now, mostly travel in Florida and this unit doesn't change the internal temperature of our van at all. If there wasn't a great big hole on roof, I'd rip it out. We've now started carrying a 120V AC room cooler which our Goalzero Yeti is able to power for most of the night. Hopefully when we start to venture further afield things will improve. But for now, Fresair gets zero stars and nothing but negative reviews from us........☹WASTE OF (A LOT OF) MONEY
Hi...and so sorry for the late response. I cannot completely agree or disagree with you.....the Fresair unit is working as designed. But its all based on evaporation. so humid environments, esp somewhere like FL arent going to see much from it. It does cool the van a bit but nothing like a condenser based unit would.
good video guys - Well done!
Glad you like it
That looks sooooo fantastic!!! Your knowledge and craftsmanship is 👌🏻👌🏻👌🏻✨!!!!
Thank you...lots of practice and recutting....
@15:11 I had same problem with my Unaka roof deck, one would think they would have fixed that design flaw to the wind fairing on the Promasters for the price they sell them at. Anyway - WONDERFUL roof deck!!! It looks so good!!
Thanks so much.
So what if I don't have a dc to dc wire how would i check if I have a good ground connection?
I think you can check any point by checking for resistance between that point at the negative terminal of the battery
Wet nail polish on the bolt heads would have done the trick first try.
Dang...wish I had thought of that.
I just bought a Promaster and one safety item!!!!! Definitely needs a window in the sliding door to see oncoming traffic at stop signs, especially at angled intersections!!!!
Agree. No window on the side would be a big blind spot.
Hi Marc & Tania, Thank you very much for the informative videos! Where can we get mothballs? All the Best !
So glad you like the videos :)
I miss y’all’s videos… but I keep coming back to your vids as I encounter that part of my build. Another super helpful video. Thank you… and COME BACKKKKKKKK
We are so glad the videos are helpful....keep trying to get back to UA-cam....but life keeps throwing us curve balls. :)