Thank you brother. I followed your directions up to the part where you remove the red caps. I found out that the issue was the red caps themselves. So now I just hit the rocker switch directly.
Good video! I bet a lot of people went and bought a new one and didn't have to when a simple repair job would save some money. Thanks for sharing. I just became a subscriber.
I had the same problem with mine and considered doing a swap on the switch. Instead I popped out the large blocky plastic buttons and then drilled a hole in place. Now I have to stick a finger in the drilled hole in order to reach the rocker switch, but it's working well other than that.
I took some plastic and shaped it so it would fit and cover the entire recessed area where the old switch was. Then drilled a hole in the center of it for the new switch. Then hollowed out the area where the old switch was to make clearance for the new switch, made sure everything fit together good and screwed that piece of plastic down to the vac and wired it up.
My stainless steel 6.5 hp Shop Vac had this exact problem a few years ago. I replaced that tiny brass switch under the toggle by installing a receptacle box on to of vacuum with an industrial double pole single throw toggle switch (20amp Leviton). Has worked for years now. That tiny stock switch just fell apart inside. Wonder why they want to open and close the neutral line coming into vac? Plug is polarized and grounded.
I have the same piece of junk switch. took mine apart and mounted a electrical box on the side with a house type rocker type switch. The unit looked brand new when the switch went out. So junk switch is right. Shop Vac has to know these switches are going out left and right. You would think they would recall these units with their name at stake.
this video is pretty sweet....wish I had a zoom in of you manipulating the wiring for the new piece tho so I can really see what's going on but I think I can figure it out
Hey man, good job and good video. Well done, it sure helped me. Shop- vac says heavy duty, they should install a heavy duty American made switch. Thanks bud
Have the same 14 gallon 5.5 HP Shop Vac brand with the gray top and blue bottom. The on/off push buttons failed to work so I removed the cover and used the toggle switch for a month but now it has suddenly failed. The switch isn't even offered on the parts list. I can see why you had to extend the wires to make them reach the new switch. The switch you needed is called a DPST switch (double pole single throw) which basically is two single pole single throw switches working parallel next to each other. It was hard to see where you connected the wires to the switch. The two red wires MUST be on the same end of the switch which appears to be the end where the terminals are closer together. I also use the cheap universal dirt collector bags on my unit to keep the filter clean. Some of the micro particle ones are rather pricy. The bags always seem to tear near the hose filler connection when they get full. It makes it easier to dispose of the debris, but I still have to blow all the crap out of the filter with my air compressor nozzle every time I change bags. My unit also moans when it shuts off. I would be skeptical about using any type of liquid lubricant on it since they just collect dirt and gum up. Might try some graphite powder on it. Thanks for the video. You work fast buy still could edit out all the boring screw removals.
A few drops of 3 in 1 oil to the felt behind the bushing and one drop coating the shaft that goes into that bushing will work that's why the felt is there.
I have the same problem with a Dayton shop vac. I called the company and they said the switch is only sold with a new motor...WTF.... Have had a piss poor time locating a replacement but now I will replace it with a toggle..
Bought mine in 1998. Used it very little in the beginning. Last 5 years i used it every 2 weeks for car cleanup. Needed to pick up lots of dust. Cleaned it out. after cleaning a car it died. Pulled it apart and the rod in the " thermal switch" was broken. But i had bought a replacement on off switch just in case as these are the 2 main fail points on shop vacs. A fuse attached to the 2 posts with zip ties got it working again. How long remains to be seen.
I just sent you a private message on your ReefDVMs Facebook page, hoping to get your attention to answer my question about wiring the new replacement Gardner Bender GSW-14 switch, since your left hand was between your video camera and the switch, thereby blocking the camera's view as to which color of wire goes where on the new switch. Please help. I've already blown a house circuit breaker, and yet -- thank goodness (I think) -- I don't think I did any damage, yet. However, I've stopped trying to figure out how to wire the new switch on my own severely limited knowledge of house current. I am obviously not an electrician, and have no training in AC current -- only DC automotive wiring and home theater/stereo speaker wiring. I'll just sit tight and wait to hear back from you. Which terminals do those two orange wires coming from the motor hook to on the new GSW-14 switch, and which terminals on that new switch connect to the white and the black wires on the power cord? Please help, soonest. Max
Don't forget the yellow bottom/black top ones suffer from the feet breaking/fracturing.The other problem is the top bearings go bad fast (like yours is...), and should be replaced with NON-Chinese bearings (USA-made FTW)
I put this stuff called Crazy Grease in my noisy bearing it's been quiet for a good while now. I think the oil will eventually dry out. Not sure how the grease will last, but longer than oil I think. 3-in-1 makes a special oil for motors, if your so inclined.
Shop vac for some reason likes to turn a simple switch into an unnecessary problem with some gadget that doesn't work, mine from the late 90s had a weird sliding lever thing that got harder and harder to activate, eventually I just bypassed it with wire nuts and plugged it in to turn it on and unplugged it to turn it off.😂
The switch "should" explain that. Or you can take the lazy route and bypass the old switch so the vacuum turns on when its plugged in. Yes, it's cheap but I needed my shop vac right away.
Shop Vac builds these vacs to fail so you will go out and buy a new one every couple of years, or more often in the case of my business. It should be criminal what they are doing. After we replaced the original rocker switch with a heavy-duty toggle it too burned up and we mounted an electrical box with a simple light switch. Then something else burned out. On the motor there is a connection in the winding that has a type of fuse or link that had burned out. I don't know exactly why that connection is there, but it serves as yet another failure point for these vacs, which is great for business for Shop Vac. In this case it is not China's fault, it is a business who will sell you a product made to fail to keep the profits coming in.
Their consumer grade products are rough. The motors are fine, but everything else about it is implemented cheaply. Did you hear the bearing squeal when you shut it down? If you don't oil grease it soon, it'll be dead. You can actually drill a hole in the case to drip a drop or two of oil in every now and then.
I picked up a Shop-Vac off the street it blows air but it does not suck it doesn't have a filter and does over large hole in the side that something one into it can somebody help me how do I make this thing suck again thanks very much
I just push harder on mine and it works I have a shop vac black top red bottom 10 gallons and it works but if mineneer does go bad witch it better not because I have had mine for about 5 years it has never had this issue but this Is good for me I the furcher
ouch your motor bearing need lubrication when you shut it off makes a noise oil your motor bearing bud or it will quit on ya for godo by the way whit such fine dust you should use a high efficiency yellow paper bag your motor fan was cake in dust ------ i had a shop vac crap on me for wrong filters and bag
I finally figured out which wire goes where. There sure isn't much info anywhere on the Internet as to how to wire these GSW-14 switches -- I guess you're just supposed to KNOW! Anyway, it's working well now and suckin' up lotsa dirt! Thank you, that really IS a good, heavy-duty switch.
The two red wires go on the end of the new switch, with the white and black wires on the switched side(s) of the new GSW-14 heavy-duty replacement switch.
It's already buttoned up, of course, and I can't remember. I'm not an electrician by ANY means -- I just figured it out by trial and error; the first time I switched it on, I blew the house circuit breaker.
My switch is getting bad too, thanks. Plus the whine you hear when you turn it off means it needs a bushing replaced. You may have already done it. ua-cam.com/video/KdTgQGFfy9o/v-deo.html
That bearing been sounding like that for years, so I suspect your right but its keeps running daily with no issues=) I should do maybe update video on the old beast
Informative but you could have edited 7-8 mins out of this. We really don't need to watch you unscrew NINE screws from the housing. Other than having to fast forward through the monotonous stuff, good video.
No offense mate but literally slow down the explanation and speed up the video perhaps change camera angle so we can see what you're actually doing, I mean if someone doesn't know is LITERALLY wanting to follow this as a DIY project, there's just no way they're going to do that and potentially electrocute themselves. Camera is so far away cannot see ANYTHING you're actually doing. That's not a dig mate just constrictive feedback as you talk so quick and so far away with camera and 90% of the video is blocked by your hands or the battery in of the power tool if you're going to work on the vacuum switch on the vacuum maybe set the camera up looking down on what you're doing or just do it on teh bench mate, will make it much easier and speed up the taking things apart and doing back up again just like 4x speed it or something bit SLOW down the explanation, there's no need to talk fast teh video is 20minutes 18minutea or so of which you cannot see what you're doing and you're speaking fast as though that's speeding up the video it's not it's just making it not able to follow instead of easy which a switch change should be.. Appreciate the effort, but as a non American, this wasn't easy to follow, bit appreciate the effort and subject you covered.. Basically bit slower more explanation and less watching the back of your hands or drill mate that's all... Hope this is helpful. Cheers


Thank you brother. I followed your directions up to the part where you remove the red caps. I found out that the issue was the red caps themselves. So now I just hit the rocker switch directly.
Sounds like you’re bearing is going on the motor on the first vaccum
I have one still sitting around some painters left behind for the same reason, I'll give it a try. Thx for sharing.
Thanks, man. Great video. Bought the switch and hope to have ours up and running after breakfast. Keep up the good work.
what goes where if a novitiate forgets?
Great Job Buddy, keep it going... This is nice to know that we can save money and our Shop Vac...
thanks for sharing, just about to buy a new shop vac... see if i can fix the one i have now...
Great video and easy to follow instructions!
Hola amigo..great job.its the first video of repairing a shop vac thats really works.thanks body..from Puerto Rico..its help me a lot to save money
This repair works as described. I used a butt connector instead of the clip connector. Thanks for posting.
Good video! I bet a lot of people went and bought a new one and didn't have to when a simple repair job would save some money. Thanks for sharing. I just became a subscriber.
Najja Foluke Thanks
+Najja Foluke and this is how I got a spare shop vac that a neighbor put out for garbage pick up. :p
I had the same problem with mine and considered doing a swap on the switch. Instead I popped out the large blocky plastic buttons and then drilled a hole in place. Now I have to stick a finger in the drilled hole in order to reach the rocker switch, but it's working well other than that.
I took some plastic and shaped it so it would fit and cover the entire recessed area where the old switch was. Then drilled a hole in the center of it for the new switch. Then hollowed out the area where the old switch was to make clearance for the new switch, made sure everything fit together good and screwed that piece of plastic down to the vac and wired it up.
Excellent suggestion and video, thanks for your advice.
My stainless steel 6.5 hp Shop Vac had this exact problem a few years ago. I replaced that tiny brass switch under the toggle by installing a receptacle box on to of vacuum with an industrial double pole single throw toggle switch (20amp Leviton). Has worked for years now. That tiny stock switch just fell apart inside. Wonder why they want to open and close the neutral line coming into vac? Plug is polarized and grounded.
Well done, your video post will save me big time.
I have the same piece of junk switch. took mine apart and mounted a electrical box on the side with a house type rocker type switch. The unit looked brand new when the switch went out. So junk switch is right. Shop Vac has to know these switches are going out left and right. You would think they would recall these units with their name at stake.
this video is pretty sweet....wish I had a zoom in of you manipulating the wiring for the new piece tho so I can really see what's going on but I think I can figure it out
Much more exciting to do with unit plugged in. Off the charts if you do it while it's running.
Hey man, good job and good video. Well done, it sure helped me. Shop- vac says heavy duty, they should install a heavy duty American made switch. Thanks bud
Wonder where you new heavy duty toggle switch was made?
Have the same 14 gallon 5.5 HP Shop Vac brand with the gray top and blue bottom.
The on/off push buttons failed to work so I removed the cover and used the toggle switch for a month but now it has suddenly failed. The switch isn't even offered on the parts list.
I can see why you had to extend the wires to make them reach the new switch.
The switch you needed is called a DPST switch (double pole single throw) which basically is two single pole single throw switches working parallel next to each other.
It was hard to see where you connected the wires to the switch. The two red wires MUST be on the same end of the switch which appears to be the end where the terminals are closer together.
I also use the cheap universal dirt collector bags on my unit to keep the filter clean.
Some of the micro particle ones are rather pricy. The bags always seem to tear near the hose filler connection when they get full. It makes it easier to dispose of the debris, but I still have to blow all the crap out of the filter with my air compressor nozzle every time I change bags.
My unit also moans when it shuts off. I would be skeptical about using any type of liquid lubricant on it since they just collect dirt and gum up. Might try some graphite powder on it.
Thanks for the video. You work fast buy still could edit out all the boring screw removals.
A few drops of 3 in 1 oil to the felt behind the bushing and one drop coating the shaft that goes into that bushing will work that's why the felt is there.
I have the same problem with a Dayton shop vac. I called the company and they said the switch is only sold with a new motor...WTF.... Have had a piss poor time locating a replacement but now I will replace it with a toggle..
Bought mine in 1998. Used it very little in the beginning. Last 5 years i used it every 2 weeks for car cleanup. Needed to pick up lots of dust. Cleaned it out. after cleaning a car it died. Pulled it apart and the rod in the " thermal switch" was broken. But i had bought a replacement on off switch just in case as these are the 2 main fail points on shop vacs. A fuse attached to the 2 posts with zip ties got it working again. How long remains to be seen.
Not the bearing, the bushing. It can be replaced with a 608 2RS bearing. Easy. Took me 15 minutes start to finish.
I just sent you a private message on your ReefDVMs Facebook page, hoping to get your attention to answer my question about wiring the new replacement Gardner Bender GSW-14 switch, since your left hand was between your video camera and the switch, thereby blocking the camera's view as to which color of wire goes where on the new switch. Please help. I've already blown a house circuit breaker, and yet -- thank goodness (I think) -- I don't think I did any damage, yet. However, I've stopped trying to figure out how to wire the new switch on my own severely limited knowledge of house current. I am obviously not an electrician, and have no training in AC current -- only DC automotive wiring and home theater/stereo speaker wiring. I'll just sit tight and wait to hear back from you. Which terminals do those two orange wires coming from the motor hook to on the new GSW-14 switch, and which terminals on that new switch connect to the white and the black wires on the power cord? Please help, soonest. Max
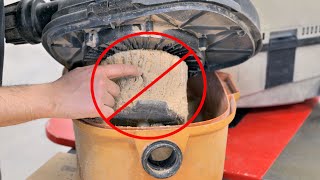
Try placing a stocking over the filter. Keeps a lot of the crap out of the filter
Grandpa Cocky , that's a great idea. Thanks!
Don't forget the yellow bottom/black top ones suffer from the feet breaking/fracturing.The other problem is the top bearings go bad fast (like yours is...), and should be replaced with NON-Chinese bearings (USA-made FTW)
VERY GOOD DETAILED THANKS
Yep, planed obsolescence. It's built into almost everything ESPECIALLY on parts and systems on cars.
Can I use but connectors to extend the wires?
Awesome video. Thanks a lot.
If it's your vacuum you can do whatever you want with it lol.
very helpful video thanks man.
Thanks
What kind of wire can I use to extend the wires? At Home Depot, they sell "primary wire". Can I use that?
A detailed parts list would be nice.
YARG, you have to oil the top bearing of the motor so it won't moan when turned off. Had to do that to my Shop Vac last week, much quieter now.
Hi, my Shop Vac is making that sound. What oil did you use?
I put this stuff called Crazy Grease in my noisy bearing it's been quiet for a good while now. I think the oil will eventually dry out. Not sure how the grease will last, but longer than oil I think. 3-in-1 makes a special oil for motors, if your so inclined.
Shop vac for some reason likes to turn a simple switch into an unnecessary problem with some gadget that doesn't work, mine from the late 90s had a weird sliding lever thing that got harder and harder to activate, eventually I just bypassed it with wire nuts and plugged it in to turn it on and unplugged it to turn it off.😂
gracias man very helpful video ,,,,
you should invest in a bag to keep your filter clean and also better suction.
Or green bottom. My switch lasted 15 years. On way to store to purchase a toggle switch and wire.
What wires go where? I couldn't see what you were doing.
Thanks again.
The switch "should" explain that. Or you can take the lazy route and bypass the old switch so the vacuum turns on when its plugged in. Yes, it's cheap but I needed my shop vac right away.
Finishing touch... add a marine-grade rubber (clear or black) toggle switch boot/cover. Buy from your local marine parts store or on-line.
Shop Vac builds these vacs to fail so you will go out and buy a new one every couple of years, or more often in the case of my business. It should be criminal what they are doing. After we replaced the original rocker switch with a heavy-duty toggle it too burned up and we mounted an electrical box with a simple light switch. Then something else burned out. On the motor there is a connection in the winding that has a type of fuse or link that had burned out. I don't know exactly why that connection is there, but it serves as yet another failure point for these vacs, which is great for business for Shop Vac. In this case it is not China's fault, it is a business who will sell you a product made to fail to keep the profits coming in.
Get a ridgid
Their consumer grade products are rough. The motors are fine, but everything else about it is implemented cheaply. Did you hear the bearing squeal when you shut it down? If you don't oil grease it soon, it'll be dead. You can actually drill a hole in the case to drip a drop or two of oil in every now and then.
Thank you very much.
How to change the filter
GREAT video
I picked up a Shop-Vac off the street it blows air but it does not suck it doesn't have a filter and does over large hole in the side that something one into it can somebody help me how do I make this thing suck again thanks very much
Thanks for the info! Any idea what's causing that whining noise when you switch it off? Mines making that same noise.
Crapy bushings get a ridgid
It’s a bearing. Oil it and that sound goes away
3-in-1 makes a special oil for motors. I think the oil will dry out again so I put grease in mine (Crazy Grease) and it's been good for awhile now.
informative but make a parts list and show the parts close up since the view you gave was terrible !!
I can't take off the hose connected to the blower...HELP!!!
It would have been better had you given closeups of the wiring
I like your vids
Should've put a drop or two of light oil in those noisy bushings while you had it apart.
...or maybe you did. I didn't hear the noise at the end of the video.
Very nice
I just push harder on mine and it works I have a shop vac black top red bottom 10 gallons and it works but if mineneer does go bad witch it better not because I have had mine for about 5 years it has never had this issue but this Is good for me I the furcher
After a month or so, suction is still weak after change a new bag. Filter looks ok.
I hear it has a bearing going out as well!
is this hard to fix? mine does that too
When ya got it apart put a couple of drops of 3in1 oil in the ends of each of the bearings. ( dont over do it tho)
17:36 - now build a filter cleaner, nice fix!
OMG, is there a meal on this flight !! ? cut-em-down boys !
the first vac needs to have the brgs lubed
shop van purposely designed it to use a cheap switch that will fail so you'll buy a new one
It sucks how things made in China (number 1 producer for America) makes low quality stuff. :/ an I was from China lol T^T
ouch your motor bearing need lubrication when you shut it off makes a noise oil your motor bearing bud or it will quit on ya for godo by the way whit such fine dust you should use a high efficiency yellow paper bag your motor fan was cake in dust ------ i had a shop vac crap on me for wrong filters and bag
When he said lowes I thought he said lol
or lulz :)
Obviously you haven't fixed that first vacuum since you can hear the dry bearing when you turn it off
or just turn it off at the wall switch
I finally figured out which wire goes where. There sure isn't much info anywhere on the Internet as to how to wire these GSW-14 switches -- I guess you're just supposed to KNOW! Anyway, it's working well now and suckin' up lotsa dirt! Thank you, that really IS a good, heavy-duty switch.
+Max Guiley - VIDEO MAZAMA
Where do the wires go on the switch?
The two red wires go on the end of the new switch, with the white and black wires on the switched side(s) of the new GSW-14 heavy-duty replacement switch.
Thanks but the switch has some numbers on it on the bottom side. Can you tell me on what numbers?
Thanks but the switch has some numbers on it on the bottom side. Can you tell me on what numbers?
+Max Guiley - VIDEO MAZAMA
It's already buttoned up, of course, and I can't remember. I'm not an electrician by ANY means -- I just figured it out by trial and error; the first time I switched it on, I blew the house circuit breaker.
My switch is getting bad too, thanks. Plus the whine you hear when you turn it off means it needs a bushing replaced. You may have already done it. ua-cam.com/video/KdTgQGFfy9o/v-deo.html
good thing they didnt supply the switches for the Apollo L.E.M!
You can always fix it with a pen...
you need to oil your top bearing . .....
Same problem. Maybe that’s why they went out of business
Sounds like a bearing is fried as well.
That bearing been sounding like that for years, so I suspect your right but its keeps running daily with no issues=) I should do maybe update video on the old beast
@@RMSpeltzFarm Agreed.... I would do the same just saying.
ShopVac couldn't put in a decent switch and they couldn't afford any bearing lube either. Some goofball actually OK'd that design.
Informative but you could have edited 7-8 mins out of this. We really don't need to watch you unscrew NINE screws from the housing. Other than having to fast forward through the monotonous stuff, good video.
how dare he waste 9 seconds of OUR time while he took 9 minutes of HIS time to show us the proper way to UN screw NINE light bulbs with 8 MEN
That what the timeline slider is for.. this is the mentality that is failing our country. Grow up.
! 9
the dont mke that brand any more
No offense mate but literally slow down the explanation and speed up the video perhaps change camera angle so we can see what you're actually doing, I mean if someone doesn't know is LITERALLY wanting to follow this as a DIY project, there's just no way they're going to do that and potentially electrocute themselves. Camera is so far away cannot see ANYTHING you're actually doing.
That's not a dig mate just constrictive feedback as you talk so quick and so far away with camera and 90% of the video is blocked by your hands or the battery in of the power tool if you're going to work on the vacuum switch on the vacuum maybe set the camera up looking down on what you're doing or just do it on teh bench mate, will make it much easier and speed up the taking things apart and doing back up again just like 4x speed it or something bit SLOW down the explanation, there's no need to talk fast teh video is 20minutes 18minutea or so of which you cannot see what you're doing and you're speaking fast as though that's speeding up the video it's not it's just making it not able to follow instead of easy which a switch change should be..
Appreciate the effort, but as a non American, this wasn't easy to follow, bit appreciate the effort and subject you covered..
Basically bit slower more explanation and less watching the back of your hands or drill mate that's all...
Hope this is helpful.
Cheers
Get a ridgid instead
Do you want to sale it