Adobe Photoshop old photo restoration - photo touchup

Вставка
- Опубліковано 2 жов 2024
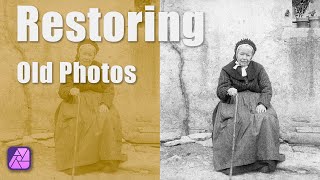
- digitaldesignho... This is a photo of my grandmother . The photo is the only one we have of her at this age . So I did a restore on the photo and increased the photo res from a very small , wallet size to a full 8x10 . This was done in Adobe Photoshop cs3 . The final picture took about 6 hours of touch up and finish work . I just wanted to show the bulk of the initial work for this vid . When I restore vintage photos or just do touch ups,they can be very time consuming .
The music bed or backing track used in this photoshop cs3 example is Aerosmith Dream On acoustic version .
This photo was in extreme decay and bad shape . If you would like more information about Digital Design House , please visit our website www.digitaldesi...


Excellent work. Having restored one of my granddad with Gandhi, I know how fiddly this can be.
Awesome, it was like a major operation. Well done ^_^
Sucks should not use music in these you should talk and tell how you did the this.
I have actual tutorials using this photo on my channel. This is not a tutorial just a recording of the full process.
Digital Design House
Thanks, I will watch those tutorials right away !
Agree, should have no music and speak on how to perform
Incredible. Thank you for sharing.
The hair really got me. I never would have thought that would have worked. I'm definitely going to start trying that on different pictures and get the hang of it. So many times that would come handy.
Steve Etchie Exaggerating techniques and experimentation is how I learn many of my techniques. i teach that in my Restoration course. Never limit yourself to convention.
greate job.
I do use the spot healing brush in this. Now with Photoshop CS6 I use it alot more. If you look at the other videos on my channel I have 2 tutorials on this very image. If you still need help with your image, you can email me a copy. Go to my website, see link above for the address.
A nice job! Digital Design House, this is a fitting tribute to your family. Photoshop - with or without third party plugins - have come a long way in six years. I expect your retouch finessing of aged photographs have, too.
your grandmother is beautiful! will check out your site.
+Betsy H Thank you Betsy
This photo is relatively easy to enhance, because the brightness and contrast is even, it`s not faded and most importantly it`s not out of focus or blurred. There are many photo editing software's that can do the job as well as Photoshop. The most extreme problems arise when a photo is out of focus or blurred or there is fading on certain areas of the photo. In most cases these are virtually impossible to fix, not even the most advanced photo imaging software can deal with it.
Wa Da FRACK! Damn!
@dankhimself - As to the original color, I think its personal preference. I tend to try to leave the photos discolored within reason. Changing the colors too much is just against my taste. By the way I will not colorize a photo for any reason. I have been offered lots of bigger jobs and I turned them down. Colorizing an original B&W photo is nothing more than image rape in my opinion
Nice work. I been getting into some similar restoration but not to the extent you show here. My question is how do you use the clone stamp and remove the repetitive copying? Of course you don't want it to look like you copied what was near it. Also, I tried that on faces and it doesn't work well for me since face color is different all over. I have Adobe PS Elements 2.0. It's quite old. I'm a self learner with no help or books etc.
@acdudec . Go to file , place and choose the file of eye that you want to use . That will create a layer just for the eye . Remember to always use masks ... they are non destructive and can be undone at any time . You can change the opacity of the eye layer to about 40% and then get the center lined up . From there adjust size and shape to match original eye . Change back to 100% and mask out what you don't need .
@userpyromaster Thank you very much for the compliment . Well one of the things I do is to change the flow and opacity of the clone stamp tool . You can see this at about 1:42 seconds into the piece . Another trick I use is "borrowing" swatches from other old photos . I will be doing a tutorial on how I did this piece but if you have any questions ... feel free to email them over .
@BMJSpitteler Yea I know ... I have just been slammed with work . I actually started the step by step but it will be a couple more weeks before I get them posted . I am breaking up the steps into short videos . I just wish I had more time to do this stuff because people send me so many emails about this video .
@acdudec There are alot of techniques involved here but yes that is how the clone stamp tool works . One of the tricks is to not use 100% opacity all the time . You will see that when I am doing the bottom of her dress . You can even borrow patterns and swatches from other pictures .... no rules to it .
@Designing5 I don't use the heal brush at all ... maybe once in a blue moon . I use the clone stamp tool alot at different flow and opacity . I also use swatches from different parts of the photo and even donor photos . Some parts though I just paint myself ... just all depends on the need .
@menmegirlz Really, where does it say "how too"? And just for future use, you used "too" when referencing "how too" which implies "in addition". You were looking for "to" as in "how to" which indicates motion or action. Here endith the lesson.
@tstaylor18 First let me say thank you . It means alot when people like what you do . Yes I do create digital media for a living but rarely photo restore projects . This one was just fun because it was my grandmother ... gotta love what you do .
@ssodangi Just finished our documentary and submitted to sundance so sorry for the late response . I am working on some more of the tutorials ... I have a few requests for certain techniques .. Now that I have time .
@fantasticHorus It cam out a little darker in the vid than it actually was . It does get more rich with the higher gama output and saturation . Your adding color to a very low saturated pallet
I don't and won't add color. Its a personal choice as an artist. Many client ask for that and if they insist I send them elsewhere. Just not something I believe in.
@laysa713 I am working on this tutorial and I will explain how I did everything in detail . I have just been swamped , maybe I can finish it up in the coming weeks though .
@RcUniverseGuy I used clone , brush and some masking . I use a Wacom tablet so when I do fine hair I can get the fine ends to the brush pattern .
@Evocati2008 Oh yea .... I use a tablet . There are some things are much easier and faster with a tablet . Thank you for your comment by the way ...
@LinaArt1 Thank you very much ... I don't know what happened but all of a sudden I am getting alot more views and very kind posts . Very Kind ... :)
O_o this is amazing!
I noticed a small flaw though :(
Her shirt or whatever it is is showing at the top part next to her necklace, but a bit lower you removed it - because it looked blurry...
Tell me if I am mistaking!
I have a program that came with my flatbed scanner that will do the same thing you are so right about it being a very labor intensive thing I had about 5 hours on my class photo from 1966
Just takes a little patience and a lot of time. Pick a spot and work out from there. Photoshop takes time but you will get there
@2007omi I use a whole host of tools that are not avail in PE7 . I also use a Wacom Tablet ....I couldn't live without it .
Your Grandmother was a very beautiful woman, and even though i could not learn much from the video it was still amazing.. keeps me trying harder on PS.
Thx
The hair bit was impressive (even though you changed the original hairdo a bit too much for my liking). I also like how you reconstructed the chair.
Wow! alls I can say is wow how can I add that to my samsung galaxy note 3
Gracias. Tengo videos de tutoriales en este canal que explican exactamente cómo hacer esto. Voy a hacer más. Gracias de nuevo
It's very good, but you really need to work on steering clear of repetitive patterns when you use the clone tool. For example, on the chest of the dress you begin to see the pattern repeated over and over and on the left arm of the chair. I would also go back in and study the angle of the right knob you placed on the chair, as it's a bit off in terms of perspective. I personally wouldn't have touched the hair, but everything else you did was great!
Hi Bryan, thanks so much for the video! Please help! I paused and played so many times, I think I could see that you're using the spot healing brush tool, and clone stamp tool. Is that correct? I'm not 100% sure. I am using Photoshop Elements 10, need to correct my mother's picture (hair was terribly damaged since 1941!). I've used the spot healing brush tool, and clone stamp tool, but still I'm not satisfied. Please suggest if I should use another tool (s).
Great video - ignore the negatives, infact I dont publish comments like them, I delete them. I personally dont see what people are complaining about with the music or the video, I cant see anywhere in the context where it says its a tutorial (and I found it via googling photo restoration!). Very impressive, I have self taught myself PS CS4, and am doing photo restoration but my skills arent that good. Clearly more i need to learn from the clone tool and spot heal tool!
Part 2
When you are cloning from certain areas you have to take small samples and build to the nearest known pixels in that tonal range. Any imperfections n a run sampled with the clone stamp tool can give you the effect of 'snaking', a common mistake. Everyone does it at some point. My advice would be to work in smaller areas, work tight and then when you have a wider range to sample from you can apply a bigger brush range.
Awesome touchup vid, you are really good. I just purchased Adobe Production Premium CS 5.5, it's amazing. I need to take some classes or just do some research to get this type of workflow. Just knowing exactly what to do next and knocking it out step by step.
I have one question though, When these photos were originally printed they weren't yellow, they were black and white. Was this just a physical restoration or is it normal to leave tho photo that way?
You did a wonderful job. I have a picture of my mother-in-law when she was 8 yrs old and my sister-in-law torn it to pieces and missing a piece which is the important part, her arm. I tried to do it. I did what I can by cloning and using the scratch tool thats all I did. It looks ok, just wish it looks as half as good as yours. Great job. I used Paintshop Pro 3, don't have Adobe, wish I did. lol Thank you for your turorial.
the work is impressive but it does come up in a search for tut's on restoring images & the music is really ruff on the ears. Would recommend modifying the title to say it is an example of what your company can do. ALSO, do you have a TUT on the process (w/audio) for sale. Free is cool but I don't mind paying for skill development.
@orirnda I'm Impressed, I know it not a tutorial, but it's going to take me twice the work to figure out all your steps, first I'll start with premier pro, slow you down a little, then it's off the photoshop, to try it on my own photo. Thanks for sharing you talents! Wish I could just play youtube in slow mo....:)
hey.I really enjoyed watching it:) restoring photos myself and I know how challenging it can be.Do not listen to people who do not wish you well( people can be mean and no matter how good you are ,they will always say sth nasty cos they are jealous),you are great at what you are doing x
I am in the middle of restoring a pic of my mother and her siblings, and grandmother in an impromptu family portrait. My biggest issue are the thousands of scratches. I also had to create/restore a new pair of shoes for her. It's so much fun though.
Any tips for the scratches?
BUENO HERMANO YO SE QU TIENES VIDEO PERO NECECITARIA UN VIDEO DE ESE QUE HICISTES MANO PORQUE ESE ME CUADRA PARA YO PODER APRENDER A COMO REPARAR FOTOS DIFICILES PORQUE YO TENGO UNA FOTO DE MSIS ABUELO QUE ESTA DAÑADA Y QUERIA SAER SI PODRIAS SUBIR UN VIDEO UGUAL A ESE Y ENSEÑARLO PARA APRENDER MEJOR GRACIAS HERMANO ESPERO QUE LO HAGAS DALE QUE PASES UN BUEN DIA
parece muy complicado aprender a usarlo,, pero hay que perseverar hasta conseguirlo XD..GRACIAS POR EL DATO
Hello great job,
If you ever have any b/w customers, especially ww2 photos that need color, I would love to do them. I have a website too but.....feel free to contact me if you don't want to do them. I would give you commission of course
Yo, tammibs..
Just stop the video at each step and observe the tools used, the diameter of the brush tips, opacity used, etc. It's all there if you will take the time to review the entire presentation and learn. Thanks, Bryan, for sharing your nice work.
oe hermano pero como le hiciste mano hacete otra mano a ver como la hicistes hermano me urge a prender eso mano porfavor hace un video pero mas explicado porfavor hermano gracias espero que lo hagas y subas el video ok te lo agradeceria
hi...this good...i have two old pics of my parents of their wedding day and i want to 1 have it retouched and two make it bigger to an 8X10...can you send me instructions and pricing info? greatly appreciated!
@orirnda - Thats why I didn't put tutorial in the title or in the description or in the video
@chuvakhenesis Thank you Julie ... I am glad you liked it and greetings from Orlando Florida .
One word - phwoar........ if that really is a word. I love doing photo repairs but this one leaves my efforts for dead!! Amazing. I managed to get quite a few hints from it for future use. Thanks.
There are 2 videos on my channels that do show you my techniques. There are more on the way.
@DigitalDesignHouse: Thanks so much! I'll look for it and subscribe to your channel. I have a very special picture that I'd love to repair for my parents. See you on the "Tube"!
hello there, I hear a house genre song as a soundtrack, not Aerosmith Dream On, and although i dislike this kind of music, this one is nice, what is its name ?
A+ for the restauration.
I also have an old photo of my great grandmother I would love to have restored to present to my mother for Christmas. If you have the time, please let me know what would be the cost.
Gracias ! Voy verlos... porque a la velocidad con que retocas... no hay forma que aprenda... Seguire siendo un DUMMY (bua!!!) jaja gracias nuevamente... Federico
Not bad :)
But, the hair in the restored picture seems a bit weird, don't you think? Especially if you know what it's supposed to look like. Nevertheless, nice job.
My mums birthday is in 5 days. I have an old photo of my nan that she would love to be restored. It would make the perfect gift. Can you do it and what would it cost...
this not a tutorial or even for education purpose,,, he is just showing that he can do it,,,, but since he can do it we can too
This is absolutely amazing. Very beautiful. You are truly talented. I'm curious if you use a graphic tablet to do this or just your mouse? Great job!!
Cheers!
based on the photo it seems that her is supposed to have a shorter bang kinda curving to the left side. but that's pretty awesome work you did non the less
lose the music, very very annoying and distracting from what you are trying to convey. Watched about 30 secs before closing the damn window. How awful.
I have Photoshop Elements 7. Can you do the same process in that program? I have the clone stamp tool. Are you using any other tools?
Got bored watching it, could you speed it up a bit more please .... LOL
Great result by the way
found it
009 Sound System - Dreamscape (Long Edit)+(Lyrics)
pretty strange, i like jazz and rock, but on acid it is really great
Thanks and not sure .. it was just a replacement from the UA-cam library.
@stairwellsinger I will be posting a how to video on restores pretty soon .
I salute you, this is really fantastic work. I would imagine there is good money to be made with a talent like this?
Holy crap
U r pro
#deservesmoreattenion
Amazing. Wish you could do a few of my old photographs. I do not have the patience to spend 6 hours on it haha :)
please can you fix it my father pic and my grand father also ;( ?
great idea, but you should try explaining in a tutorial for those who don;t know the tools within PS too well.
... so easy !!!! loool..... Beautiful your Grandmother !!! ;)
Brilliant. I could tell what they used.
Traducere din Română în Engleză
Yes it is wonderful what can be done with this program
Thank you very much
man, you're really, really, really fast at this!!!!... j/k.... lol... but you are really, really fast....
totally agree with you. Some things are made to stay as they are. Old vintage photos are one of those.
your grand ma is beautiful Bryan..and you have done it so amazing!!!!!!...I just have to learn more.. :)
It's good but the bangs might not look right but still better than most could do including me lol
lol, cry babies. They can't spoon feed you everything! You can still see what tools he uses.
Wow. Can you give us some of the tools you used? I hope you can make a tutorial. Great work! :D
@blurrychix20 wacom tablet , photoshop and a lot of mt dew / kools
She's beautiful. She'd be very proud. You are very talented. Thank you so much for posting.
whenever I do restores I have the problem of those swirls that appear and look like crap.
Thanks Macpicasso! I think I got it now. Can't wait to learn more tips. Keep em coming!
Developed* not printed, my mistake. Please refrain from the usual youtube trashing haha.
Pity about the reversed persepective on the right hand side of picture chair upright :/
@wolfchants This video is about an hour and a half of work ...
Well, I was looking for a tutorial but I definitely enjoyed this video, very good work
Hola yo tengo una foto que se me esta dificultando restaurar, me puedes ayudar?
She was a very pretty young lady. I am impressed, that was awesome.
Any chance you can speed the video up,i fell asleep because it was toooooo sloooooow
Awesome! Do you make commercial videos for this kind of restoration? I'm interested.
This is absolutely brilliant. Just hope I can be as successful with my own family photos,
Practice practice practice and you can do it.
@Evocati2008 Wacom all the way , couldn't live without it .
step 1 click on video
step 2 mute it
step 3 click on video again
Amazing Job .I just started in photoshop hope i can get this good