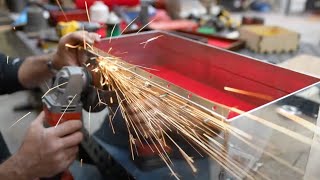
A NEON sign made of EPOXY...Did it work?

Вставка
- Опубліковано 17 лют 2024
- DiResta Brass Hammer: jimmydiresta.com/the-diresta-...
In this video I make a fake neon sign using epoxy! follow along and see how I did it! thank you to Total Boat
My affiliate link for TotalBoat
www.totalboat.com/?sca_ref=32...
Merch IcePicks and Razors
imakeny.com
My patron exclusive content $1 pre month
/ diresta - Розваги


Jimmy- the commentary in this video gives a much deeper insight to the years of your videos I’ve watched and your amazing thought process and learning as you Make. We don’t get the hours of behind the scenes work and thought and mistakes made that go into your projects. I respect your humble confessions of mistakes and errors- we as consumers are quick to criticize if it isn’t perfection on the first go, and take that all for granted 👍🏻 you sir, are a mad genius. The first video that hooked me years ago was the Styrene box you made for the folding wooden ruler back in the underground shop in NYC.
Thank you! going forward I’ll do this more frequently
I'm wary of potting LED strip in resin, as they are not as reliable as the hype, and it's good to build in serviceability. I do like the push-in diffuser strip though. It has an air gap to help with spreading the light. The LED strip often fails at the factory soldered joints every 500mm. You can bridge those with some super-fine wire.
hey Clive
I was thinking the same, the LED's go bad the sign is bad. Where do you find the push in diffusers? I've been looking for some time, not many places to get them.
Another tip for adhering layers of acrylic: I use 3M 9576 tape. It's a clear, very thin double sided tape. I use it in 2" wide rolls. On your acrylic, peel the protective paper from the back side, then cover the acrylic (at least where you're going to cut) with the tape, edge to edge. Cut your parts as usual and when you're done, the back of your part will have a clear adhesive surface. Just peel the tape liner and apply.
That’s what we do. Buy 24” wide rolls and back the whole acrylic before laser. Fast and strong if not worried about getting crystal clear panels.
@@MikeCheung1 Man, that 24" wide roll must cost a fortune.
I like the quote "We win or we learn, we never lose"
I do a lot of industrial type sewing and in the past I would be disappointed in myself when I made a mistake. I would throw the mistake on my failure pile.
Now I call it my learning pile. And that small shift in thinking has been huge in my learning journey.
"The first one takes you to school" - Diresta :)
I love the videos that you do when you show processes on how you get to an end result … the learning curve of this sign and also your casting of the bell a few episodes back is always really cool to see.
I agree with Big L
I've never seen this before. A really cool effect Jimmy!
Trial and error. That's how we learn. Persistence helps. I'm sure there were some frustrating moments (broken solder joints) but you take a deep breath and just soldier on.😊 The sign definitely has '50's vibes! That feeling when it all comes together after all the hard work and you proudly think to yourself "I made that!"😊
i used to use LED strip for theatre sets for theatre sets, but yes COB lighting strip ellimates a lot of the hot spotting. I always love your videos keep up the great work
I really like your content. You are always challenging yourself.
Just a tip for bonding acrylic. If you have a hot press you can put isopropanol between the two sheets and press them at 60°C for about 10-15 minutes. It sticks and doesn't have the "melting" look of that glue.
That's fantastic to know... one more reason to buy a hot press (other than for vinyl, because my crappy "shop iron" just can't get it right)!
I'm too old to explore but I very much enjoy watching you Jimmy. Thank you for sharing.
Nothing that I love more than Jimmy experimenting. Fantastic brother!
I Love being a Patreon subscriber because I get some context before I watch the video. Well done Jimmy
loved watching this process and listening to you problem solve along the way.
I love what you concoct in your mind then make with your hands for us to see as you explain the journey.
Hey jimmy Thanks for the tips on working with cardboard those tips are going to be very useful with our groups project!
Well, and here it is. An anatomy of the creative process. By an artist & master in his art :) There're no good and wrong choices at the beginning, but evaluation of every previous steps & iterations of the final object. I love it!!!
Thank you! 🙏🏼
its given me a great idea for my coat of arms
looks great jimmy
I love to watch you create and share your thought process.
Very cool to see the process! It’d be great to see a video with you learning a new technique and then the technique streamlined and “perfected” with all the experience from the first one.
Have you ever broken a neon sign? What a mess!!! This is a perfect alternative for a shop (or kids' room) where you know there will be a bunch of tomfoolery going on. ❤ this build!! Thank you!!
In modelmaking we would backspray the acrylic and attach layers with double sided tape, especially if it’s not something subject to particular stress. This way the top surface remains gloss and clean. Or, if it needs to stay transparent, we lasercut a gasket in thin acrylic, 2-3mm wide and flood it with the acrylic cement so any bubble or splat is confined to that very small edge. Your final result looks very good, well done!
I used to work at an automotive tint and audio shop and we used similar led stips for accent lighting that you soldered at the cut line. All 12v stuff. This video brought me back! Cool concept thats for sure!
O MAKE, now my brain won't let me unsee it. Thanks for showing the process. COB (also called dotless) Led strips is probably what your patreon's were suggesting.
Great experiment - thanks for sharing and thumbs up.
Making everything a bit better, DirNeon's best Epoxy sign! Really nice work. Go to school one the first one is my new motto. Thank you.
This is why I love you Jimmy, will I ever make faux neon? Maybe, maybe not. But your process and explanation of learning a new skill set is inspiring and will definitely be used in many of my projects in the future
Love your thirst for learning more everyday, it's really inspiring to see and feed off of!
I love this! Since it's resin, maybe Re-on? 😂
I love how you never come off claiming to be an authority. You can do some stuff and you have your intuition and experience to help you, but you're always learning and able to admit when you missed the mark. But that's learning. Stay awesome
It's nice to see someone so seasoned sometimes has to make it up as they go too.
Great film and lesson. Always Iterate. Mahalo for sharing! 🙂❤️🙏
That looks beautiful!!! Dang, I like that more than a REAL neon!!
Thank you Jimmy! Always a pleasure to watch and learn from you.
Thank you for sharing your experiences with your experiments. It takes a lot of time to do I know. You not only save me a lot of time but you get my mind going with fresh ideas. You are greatly appreciated, I could only hope to express my creativity as well as you do. Thank you.
Jimmy I use locktite super glue on cast acrylic, raise the cutout piece 1/8th inch above the sign with spacers, then drop what I am gluing down from the cutout stencil, let set for 10 seconds, no muss no fuss. I like the led lights.
At first glance
I thought it was plexiglass glass routered letters and LEDs
Very low tech anyone tried this ?
Jimmy love the sign
Awesome content
Love all the hard work
Like every video you put up on UA-cam it's very entertaining and educational and skillful done. Your big fan Rod.
Very cool project. I agree you learn as you go no mattter what you are building or doing.
Awesome build. There is always something to learn, isn't there Jimmy
This is exactly the type of work I love, you have inspired me since the beginning of your channel to try and make my own money woodworking (and becoming a machinist) I actualy have bought a cnc router and put it into my best friends shop, I have a few simple projects posted on youtube for now. We have been following you since the very beginning.(I was a cameraman before, machinist now)
Genius idea. it really looks like neon tubes on the video.
Jimmy!
Very innovative -that is One Beautiful Sign!
Thank you for Sharing. 👍❤️
Love how it looks!!! I got ideas on how i could make my own signs!! Beautiful work as usual jimmy
Thanx for sharing your product development/experimentation
It was entertaining
Enough so that I'm gonna pursue in creating my own light
Jimmy - thanks for the endless life lessons and inspiration. 🙏🙏🙏🙏🙏🙏🙏🙏
Awesome job, Jimmy. I love going on these exploratory journeys with you. Thank you for sharing. Love and Respect from North London U.K.
Can't wait to see what you do next with this. It really pops!
The narrative in this one made me think of the videos from the old bassement shop in NY, I enjoyed it! Have you considered adding another removable panel to the back? In case of led failure and potential repairability. By painting it black I would imagine you could get away with it. Just a thought.
I’m loving this new style of video dude. Inspirational 🤙
UV curable glue is used a lot to bond acrylic, being clear the UV can pass through the material and cure the glue.
The more you know. the more you always realize you still don't know. I always admire how you aren't afraid to take off just doing stuff.
Thank you Jimmy ❤
After watching this entire video, I have a suggestion:
Please. For the love of God and all things good, NEVER ever stop doing what you're doing!!
Thank you for sharing knowledge and bringing maker love.
💛
Looks great Jimmy! I’m definitely going to have to give that a try!
Looks great. Jimmy the tinker. Trial and error is the way to go like u say.
Great result!
Love everything about this video!!
Very cool going through the whole process with you. This has given me some ideas that might work to accomplish a similar result.
Enjoy watching the experimentation. Cool sign ideas too!
An advantage to this technique is color control, too! And effects you could incorporate into epoxy that you can't do with Neon.
Thanks for sharing, this was a cool project to learn with your experience!
Quality with Jimmy.
Every time.
Nice job Jimmy.🤗
Awesome result
Awesome job, best way to learn is by doing, very satisfying when you discover better methods during the making process.
So creative, love it!
It looks nice Jimmy
Nicely done, and really nice to follow along your process!
Great project!
Nice to follow the live progress of your project as it evolves into a successful job due to creative solutions on the fly we all learn on the job we never stop lol hope to see you in the UK at the makers fair Birmingham saw you last year
"Different and Better!" Using this as a reminder when I "go to school on the first one!"
Thank you Jimmy!
I've used xylene and toluene as acrylic glue and both work incredibly well.
Very interesting build, NICE
That is really cool - enjoying watching you experiment.
I've done a similar one as the first design but with "EL-Wire" instead of LEDs and it's a pretty convincing effect. I used a V groove bit with the router and put the wire into the groove. I've also frosted the routed groove one one and it looked pretty decent as well. The EL wire is a constant light all the way through end-to-end. It's wired similarly to LED strips but without the gaps between the diodes.
Magnificent looking 👍🏼
Thanks Jimmy 😊😊😊
Thank you for the insight into your process, it's fascinating. The sign looks awesome too. :)
Jimmy is my Hero! 🎉
That looks really good well 👍
I have a Thunder laser that I haven’t yet had the chance to experiment with yet. I can’t wait to start playing and experimenting like this! Beautiful as usual, Jimmy!
I love this! Very cool!
You make this look easy.
enjoyed watching this journey
Damn Jimmy that looks awesome!! It's always cool to hear someone troubleshoot through their process.
very cool I enjoy learning new stuff from u
Something to keep in mind popped up in mine at the beginning of the vid; you mention how somethings don't look as good up close. Unless one just appreciated neon design for the effort and art involved, its not particularly attractive up close or in the daylight; its definitely a nighttime and distance art form. Your work is awesome Jimmy!!
Awesome job man !!
Great example of the design and problem solving process.
I loved this video 👍 It started to remind me of the old school California plates. Could be an interesting take on your experiment
Love voice the over videos. thank you
What a brilliant idea! Should be more durable than a neon tube, offer far more design choice and, if you found a way not to embed the LEDs (say put them behind so they could be replaced) far more maintainable.
The end result is fantastic.
awesome dude
now it just needs the neon hum sound effect... nice work sir
That's pretty sweet Jimmy.🎉
Really great video.
Great! I love this learning process 👍 Cheers
This looks pretty good, I’m not sure if anyone has mentioned this but, you might try E L wire for a sign, it truly looks neon and it’s pretty easy to work with and it chimes in many colors
Hello mister Jimmy Diresta beautiful sign beautifully made good job well done