Extreme Faux Beam Build

Вставка
- Опубліковано 9 лют 2025
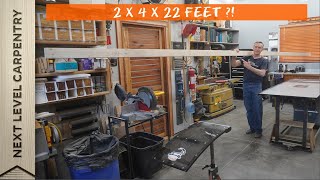
- Learn how to build EXTREME Faux Beams of real wood using an elegantly simple method developed by Master Carpenter Matt Jackson. This in-depth video shows how his method is used to create a one-piece beam 30 FEET long from pecky cypress boards for a discerning client's new home.
If you found this video particularly useful, please click the Super Thanks icon in the video action bar to let Matt know.
Are you considering purchasing any new tools after watching this video? If so, will you consider shopping with Next Level Carpentry at ACME Tools? Any tools purchased through affiliate links here are the same to you but ACME pays small add fees that support video production at the Channel, which I always appreciate.
ACME prices are always competitive and often match other online outlets, plus they add value by offering a higher level of product knowledge and excellent customer service when compared to other sources who focus more on moving product than on satisfying customers.
Sumner 1-ton Chain Hoist: imp.i284638.ne...
Lifting Sling: imp.i284638.ne...
ACME Tools Full Catalog: imp.i284638.ne...
Some tools and supplies you see in use during this video are available through the Next Level Carpentry Influencer's Page on Amazon: a.co/8YEj2LH
Note to Viewers: Purchases made through these links are at the same low online price you expect but Amazon pays small ad fees to the Channel that help justify the time I invest producing videos you watch for free on UA-cam so I really appreciate it.
UA-cam's Algorithm doesn't reward producers of videos on obscure topics like this one very well but you can by becoming a Next Level Carpentry patron through Patreon:
www.patreon.co...
Score a steal of a deal on any of my favorite CA glue products... get 15% off any and all Starbond CA Glue and Accelerator by using exclusive offer code "NLC" during checkout at the Starbond website here: bit.ly/3DzbHpj
Official Next Level Carpentry teeshirts, hoodies, mugs and posters are available through Spring... just click here to get your gear:
teespring.com/...
and find yourself stylin' and smilin'
#mastercarpenter, #woodworking, #woodbeams


Unbelievable! Subscribed/liked! Im just about to tackle a lg project similar in type on a brand new job. Walking onto the job cold simply isnt an option. This & the other video showing 12' section install (mortised) are absolute gold for me to hit the ground running. I'll definitely be checking patreon. Thank you so much for sharing.
Glat to hear it James... always glad to 'pay it forward' and provide a little insight to peers! Hope this helps you out on a successful, rewarding and profitable project! You're welcome for the 'sharing'. I don't push Patreon beyond mentioning it for awareness but there are a couple Patron Only videos there showing behind the scenes stuff from this particular project that might be of specific use for your upcoming job.
Best, Matt
@@NextLevelCarpentry Thx Matt. I will be viewing all of your videos. Its all about an organized approach that addresses everything with a plan so there is no wingin it. Had the gd fortune to wk with some salty old carpenters over the yrs who had similar approaches. So nice to see.
Some are Craftsmen, some are Artists, but few are both. My man, you're both.
I definitely want to see the install video, can’t wait to see the master handle that
Great looking beam Matt! The miters and finishing techniques really cap off a master execution of straight and true carpentry. Thanks for bringing us along while you built this.
Thanks for checking this out Greg... I hope it opens up architectural/design possibilities for those who watch the video. 😎
It is reassuring to see other carpenters putting specialized care into a detail like this.
There is always and has always been pressure to get'r done as quick as possible.
There are people out there who will pay you to use thought and care to solve their problems. And a robust fix is usually the cheaper.
Don't worry about bending over every now and the Matt. That's Tradesman Yoga.
@@markharmon4963 Tradesman Yoga... true dat!!
You should be BEAMing with pride. Very impressive. Truly.
Sick... but perfect! 😂
Amazing
Say hi to Chip ! Nice project !
Also nice Italian accent !
Awesome work! Your attention to detail is unbelievable. I hope you will post a video or photos of it installed in the house.
Did not think it was possible for only one person to do all this work by himself. Great job, one person constructing 30 ft beam and show all the steps in the video.
Thanks
Thanks!
Thank YOU for the Super Thanks, Rob... much appreciated! If you're doing a similar beam project I hope this video really helps. FWIW If I were doing another beam project this week I'd use the same sequence and methods shown in this video again.
Matt once again you have created another wonderful video. I really appreciate all of time you devote in explaining your processes and methods of building your projects. Your one of the best on YT.
I finally got me some Starbond glue a few months ago and wished I’d gotten it years ago. Made my project so much easier and got exceptional results.
Glad to hear you've joined me in wondering what life was even like before Starbond!! I used some of their Brown Medium Thick on a project in the shop just an hour ago!
That is certainly "next level" carpentry. Thank you for showing us how to build such a beam. You are a master at what you do.
Stunning work. No. Really. Stunning. I’m sure the clients have good reason for the color, but I would have loved to see a natural finish.
Had been missing your great videos. Just teasing - I know with the knowledge and effort you put into making these, it's an arduous task to put these together.
Excited to see the new video. Perfect timing as I will now have something to watch and learn over the weekend. Even if you say it's not a DIY project, I am sure I will learn a few tricks, tips and techniques. Thanks for your service to the mankind.
Congrats for posting the first comment on this video after it was released Ashok... hope you enjoy it as much as anticipated... and have a great weekend!
Best,
Matt
Matt, you are an amazing craftsman. I would love to see this beam after it’s installed in the home. Thank you for sharing this with all of us!
I'll try to post a link to pictures after the install on my Pintrest Page Mike. The project doesn't lend itself to shooting video during the install itself for both logistics and client privacy issues but it will be a rather interesting process to be sure.
Incredible build, attention to detail, execution of a difficult glue up and the list goes on. However, I would love to see the transportation, entry into the home and actual install as I’m certain these actions will make the build look like the simple part. I’ve got nearly forty years of high end custom finish carpentry under my belt and I’ve never dreamed of such a build and/or install. You’re on a completely different plane sir.
Kudos on a long career of demanding work Jeff... it's becoming a lost art these days. Since I don't have a video production crew it just wasn't manageable to do an install video for UA-cam although it was certainly worthwhile content. Sorry, but all I was able to do was a short slide show as part of a patron only video on Patreon. With a similar number of years doing this sort of work I can tell you I was very pleased that it all actually worked out in the end!
Best,
Matt
A true master carpenter at work. I always enjoy watching your videos, Next Level Carpentry lives up to its name.
Thank you Matt, you're the best!
I had my doubts about the ability to blend the colors to hide the joints, but it really came through nicely. Fantastic work here.
Thanks Wayne. I was pretty nervous about that very thing until the end of this project because I wasn't able to hand pick the pieces of pecky cypress for this job. Rather, I just ordered a quantity and had to mix, match and blend what they sent so I too was more than pleased with how it all worked out in the end.
There are two things I love about your videos. They are long and indepth.
WOW ! ! ! Very impressive. I watched to the end of the end of the end.
Thanks for sharing.
Excellent!
Now, if you only had a set of sawhorses strong enough to set that beam on....
Ingenuity at its best!
I know what you mean! If only someone on UA-cam would do a video on a super strong set of sawhorses so I don't keep collapsing the ones I got from a local big box store that are stapled together and flimsy! 😂😂
Certainly a next level carpenter. I can feel the passion that went into making this piece of art. I’m learning alot from your videos and very thankful for giving us the chance to learn from you and for sharing your knowledge. All the best.
First, thank you for your video. I’m a DIY type and have done many different things, but I thoroughly enjoy watching you real pros solve difficult problems and come up with what can only be described as a work of
art. I’m 73 years old and can’t take on the challenges I used to so watching folks like you is a great way to spend time and learn.
Kudos for actively learning new things at this stage of your life... it keeps you young IMHO!
Thanks Matt, I now have a plan for putting beams on my cathedral ceiling!! I like your attitude on perfection. There's an old saying that perfection is the enemy of good enough. It doesn't mean we should not strive for perfection, but that we must accept that it is almost impossible to achieve and that at some point the effort ceases to be useful.
True dat, Daniel. At one point in this video I say "... I aim for perfection but settle for the best I can do", my mantra for avoiding pitfalls of perfectionism.
Beautiful work!
Very nice Matt. I've got to make 10 30ft beams for a church we are building. You had a lot of good tips in here I'm gonna use.
Hey Jim, great to see your comment on this video! Sounds like a sizeable project you're tackling and, based on my experience with the project in the video, I'd be inclined to use the same methods adapted to the size & material you need to use for the church project. This won't be news to you but the better the material you have to work with at the start, the 'easier' the project will be because prepping these pecky cypress boards to get them straight and flat was at least half the work for the job overall. If you can START with flat & straight boards then you're way ahead of the game and can start with joining and joinery instead of all the extra milling I had to do to get consistently sized pieces to work with.
I think you'll really get a kick out of how relatively stiff, straight and lightweight the 'beams' are once you've got them made! Best of luck and have fun with the project!
BTW think of you often when using my Llambrich chuck! 😎
@@NextLevelCarpentry Ya, I see that drillpress and chuck in the background 🙂
I'm trying to decide if I really want to make these beams. We have a lot of them to do (and I have to build all the altar furniture too), but the foam ones are soooo expensive.
@@JNWoodworks Curious how costs between faux and foam would actually pencil out in the long run. If it's even close you could save a LOT of work with foam but it would be tough to beat the look of real wood... if they're not installed so high up it doesn't matter...
@@NextLevelCarpentry Ya, mine are 28 ft long and 15-19 ft high. You wouldn't be able to tell its foam at that height. However, they are $800-2000 apiece depending on supplier. At $800 I'd think about it, but I have to see how good they look first :-)
Very nice detailed video. Learned a lot and even though I don’t foresee any 30’ beams in my near future, I will be able to use some of those skills in other projects. Thank you very much!
That's a winner's perspective in my book... thanks Alvaro!
Matt, what a great job, I 'm thankful for all the detail you explained on the joinery used.
Thanks for watching and commenting on this one... I felt bad glossing over some of the preparatory millwork but felt the joinery you mentioned was the key take-away from the project.
Sir, You are absolutely brilliant! As always I enjoy your tutoring videos, thank you!
Another mighty and beautifully crafted piece of Carpentry, Sir! Always a pleasure to watch you make things happen. Thank You for sharing!
I love how well thought out, practical, achievable, plus your attention to detail. I’m a new fan.
Thank you Michael... always nice to hear from someone who appreciates that detail. Makes it easier to handle trolls out there who criticize me for 'talking too much'. 😎
That is absolutley GORGEOUS! (The end product too!! 🤣)
Thanks Garviel... I too was pleased with the way the project turned out.
I´ll have a chance to use this technique next month, thanks for the video Matt, will definitely be very useful as usual
Cool... let me know how it goes?
Phenominal work!! That would certainly fool me, looking up from floor level. Next level work indeed.
and THAT's why your the MASTER!!
Nice design and nice process. The beam looks great.
Thanks James... wish me luck once again tomorrow when I go to the site to install this baby!🤞🤞
@@NextLevelCarpentry
Good luck. Hope you have a couple of people to help you.
@@jameshodgins1937 The beam install is D.U.N., DONE! Went great with the dad and his oldest son working along side... just like a team! Hard work all day but it wasn't a frustrating fight with excellent final results...
@@NextLevelCarpentry
Fantastic. Glad to hear it.
Excellent work mate. Thnks for sharing hole building process of this beam.
Very enjoyable and informative. Thank you.
I really like how you plan your builds and put effort on all the prework that makes the production steps easy and flawless 👍
Thank you... as I say in the video "you gotta make it easy on yourself because no one is going to do it for you!". That pre-planning and paying attention to details goes a long way to making the overall project 'easier'. 😎
Wow! Amazing craftsmanship.
That beam looks great
This video was great! Thank you for sharing your wisdom, vision and craft!!! I have to confess, If I had looked at the length of this video, I probably would have passed on it. It did feel a bit long, but I was shocked to see it was over an hour when I wen to "replay" to see it's actual length...I thought it was maybe a half hour to forty-five minutes! That's just how much I enjoyed it! Anyway, GREAT JOB! Looks incredible! I'm an architect by trade and I've seen faux beams and foam beams made with 2x material, but too long and even those become extremely heavy. Pretty amazing to see how rigid 1x material can be the way you did your assembly. Really cool to watch! Thanks again for sharing!
Now I know where you’ve been!
Always a pleasure
Great stuff
Bro! Theres too too much skill in this vid!! Just too good!
Maybe there's a 'skill filter' app I can recommend to prevent at-risk viewers from a skill overdose... 😉😟😁
@@NextLevelCarpentry 😂😂😂
Great, great video! Well done.
A true Master Craftsman! Semper Fi
I stayed until the end. I'm glad I did :)
Awesome job! Would love to see it installed.
Excellent video! I watched to the end of the end of the end, and the beam looks great.
I've done smaller ones to create faux headers and exposed rafters, but nothing that required that level of complexity. Amazing work!
I mounted the ones I've done on flat surfaces to plates attached to the ceiling. Thanks for the tip on the cathedral peak mounting blocks, as I haven't done that before.
I will say that my dust collection system is a little more advanced than yours though. Mine is a two phased system consisting of a broom AND a bench brush. 😀
Lovin' your comment Magius... thanks for watching and sharing!
I definitely need to upgrade my dust collection system to a two-phase model LOLOL!!😂😂
I'm going to make a floating mantel shelf.. This gave me some ideas on doing a better job.. Thanks ! ! !
You're sure welcome... you might find a few more useful tips in this video:
ua-cam.com/video/-zzo74Agqf8/v-deo.html
Good luck with your mantel shelf project...
I love this!! Great work!!
I built my Son and Daughter in law an 18ft faux beam. They had a main glue lam beam the was drywalled and textured running through the kitchen.
Instead of trying install 1 long piece we divided it into 3 equal pieces and welded some flat bar 3in wide and rounded the welds so it looked like 1 solid piece to coverup the joints. heated the straps and black oiled the steel give it rustic looks . drilled holes both sides welded bottom bolt heads to bottom holes, top holes run long wood screw and JB weld a faux bolt head over the wood screw..
looking forward to see the installation and it's final resting place. Great job!
Sorry Sargon, video production constraints prevent me from doing a full-on install video on UA-cam. I don't like to be pushy but I will mention that I was able to produce a roughly edited 'slide show' of photos taken during the installation for my audience on Patreon in case it's something you're really interested in...
@@NextLevelCarpentry you are not being pushy what so ever. I just had very bad experince with Patreon. Twice my CC was abused as soon as I start contributions on 2 occasions.
@@oclaser Too bad about your experience with Patreon... they're not my favorite platform either but for different reasons. If I find a good alternative someday I'll use it...
Thank you! Extraordinary review. I so appreciate the effort you put into this. It’s confirmed my thoughts about the strength of this track saw. I wouldn’t have made that choice without your hard work. Again, thank you!
Track saw review? 🤔
@@NextLevelCarpentry Hah, I think I see what happened here - because I also ended up here accidentally, when your video autoplayed immediately after a video which reviewed a Milwaukee track saw. That said, as a super-amateur I didn't anticipate sticking around for the end of the end of the end of the end, but I just couldn't turn it off! Hats off for the phenomenal performances, both carpentry and cinematography.
P.S. Ok, I'll buy the primitive "dust collection" for sweeping up 85% of that dust...but how in the HELL did you deal with the rather nontrivial coating of dust which was quite prominently visible after having settled in a nice thick layer over every other square inch of your shop; in every nook and cranny of all your tools, cans of finish and other supplies, storage bins, etc.?! Whatever off-camera magic you put into finishing the cleanup procedure no doubt involved either some serious wizardry, or a painstaking amount of mind-numbing cleanup detail!
@@PlanetFlux Too funny... I should give a shout out to Milwaukee for helping promote this video!
FWIW the key Superfund level cleanup of a dusty shop? Think windy day + leaf blower...
that is incredible well done good job
very smart longitudinal joining method
If you can carry that long beam into a house and set it in place, remind me not to give you any S__t. Great work and Gods Speed. Thank you.
Some man for one man that’s the way to do it 10/10
Looks incredible. It's about time we had another parody video bro.. 😁
Awesome job. Your method made doing it solo possible. Delivery/install will be fun...
Hey Mark,
Doing it solo and 'without clamps' was key to viability of the whole project... plus it's rewarding to clear deal-breaking obstacles on a challenging project like this one.
Amazing , what an effort. .Thanks for sharing with us . Well done , stay well.
This Faux-Beam build is AWESOME. In this world of fake pvc and mdf painted trims or worse foam, this is refreshing! Have you thought of using half laps/scarf joining instead of a 45 miter and plywood to extend the length?
I'm no engineer, but this is basically a box beam and I'm sure it will be solid.
I didn't consider half laps or scarfs Rolf but both are definitely worth considering. I think the biggest challenge would be in achieving acceptable 'grain flow' from one piece to the next with the pecky cypress but with wood like white oak I could see it being an excellent choice. It would certainly be a more 'elegant' solution IMHO...
Best,
Matt
I had this idea floating in my head for my son's house, so it's great to see. I was wondering about the use of glue/jb weld on the end grain - anything I've read through the years says glue on end grain is pointless but here you are doing it.
I used JB weld for this 'end grain' application mainly for its gap-filling property that's superior to wood glue. It would never hold the joint on its own but, combined with the splice block on the back side glued on with Titebond, it's a perfect combination for success. The takeaway it to be careful when extrapolating ideas like this and taking them out of context which will usually lead to failure and disappointment.
Wow. Thank you for such a great video. I have a job coming up where I have a 24 foot span to figre out and this helped reset my mindset. I installed faux beams in my kitchen recently and applied the mortise and tennon look to it in the middle of my longest piece, which I learned from one of your other videos; and it worked out much better than I thought it would. Thank you for your videos and time spent to educate, no matter how long they are. Great looking beam you built there. Looking forward to seeing many more as well as, hopefully, the installation video of that monster beam.
Thanks for your comment, Carl... much appreciated. You are the sort of person I have in mind while producing videos like this; someone who watches to learn compared to those who expect to be taught. FYI this was a nicely profitable project so I hope it works out well for you too.
As it turns out, it was actually simpler to build long beams using this method than it was to build shorter sections using methods shown in that other video. Since you were able to make shorter beams I predict you'll be pleased with the process and results of the upcoming 24'er. FWIW I made two 6x8 beams for this same project, one at 21' long and the other at 24' that helped me 'practice' before doing this beast making it come out better and with less stress. Let me know how you do if/when you tackle that longer beam and expand your horizons!
Best,
Matt
I love that mod roller stand! I've never seen that before but, I'm going to copy it.
Copy away, Abbey: ua-cam.com/video/hdH18asehhk/v-deo.html 😎
Love it, well dun
Very nice work! I learned a lot on this video
Impressive work once again! I’ve learned a lot from your detailed explanations so keep up the educational videos!
That was awesome. I'd love to find a job as an apprentice working for an old school detail driven carpenter like him. I'd never feel like I was actually going to work cuz who wouldn't wanna do shit like this all day!
Brilliant job.
Nice, supper nice. I'd love to see it installed.
very nice job you know what your doing for sure
looks fantastic.
Fantastic job. You do have very nice skills.
Thank you once again for a great video.
Matt, from one old fart to another, I'm not only impressed with your woodworking skills but also with your ability to duck under from one side to the other. Well done Sir.
Awesome video Great work !
Thanks for sayin' William... it was a fun, challenging and rewarding project from start to finish!
Outstanding craftsmanship Matt... near wizardry I'd say, with a touch of ninja skills with all the ducking/sidestepping during the process.
You never fail to instruct and amaze. Looking forward to the install. There I was in the first part of this build, wondering just how big of a truck you've got to have to get this to the job site. Carry on Sir!
Now that is good, thanks for the tip❤
Great video
Genius. A great video and lesson on how to do something that scares all of us. Thank you. One question: how do you attach to a steel beam (to cover up) running across the ceiling.
Thanks Howard!
A common way to wrap a steel beam is to use a powder actuated nail gun to shoot 2x wood blocking to the bottom of the bottom flange and to glue and wedge 2x wood blocking into the web space of the beam. This blocking serves as 'nailers' to use screws or nails to fasten the beam wrap to the steel beam. Hope that makes sense. BTW I would use the same method to create the faux beam to wrap the steel beam with the exception that I wouldn't glue the blocks in during glue up and assembly. That way, after the bottom of the beam is glued in and dries, just simply unscrew the glue blocks and remove them to create a u-shaped beam wrap. It won't be nearly as sturdy but, if handled with care, you should be able to maneuver it into place and fasten it without breaking it IMHO.
You are the best
Brilliant video I would like to see you make a beam that you can bond to concrete and rebar beam, popular in my area 😊
Attaching this beam to concrete wouldn't be all that difficult... assuming the concrete beam is fairly straight.
I'd use a combination of the ideas in these two videos:
ua-cam.com/video/CSCR3dwaDTo/v-deo.html
ua-cam.com/video/OoicKizBKT0/v-deo.html
Impressive!
Thanks Michael... it was a fun and challenging project but I have to say it was time to be done with it and move on, if you know what I mean?
@@NextLevelCarpentry I would have used strips of 1x2...the pocket hole squares were genius!
@@michaelbradford4444 necessity is the mother of invention especially for projects like this. A secondary benefit of the blocks versus continuous strips of one by twos in Corners is that they can contribute a lot to overall stiffness which was important because it's being had to be transported to the job site and installed as a single piece. Hope you're able to put the concept to use somewhere along the way...
good stuff
Color me impressed lol fantastic,I stayed to the end of the end of the end ,how long did it take to fully clean the work shop ?
That looks amazing. Great job.
God dam thats impressive. What an excellent video to watch
When this was done, I could see he was just "beaming" with pride.
thorough
I like the right angle drill, I have that one too. I'm just wondering why you didn't use the Makita right angle impact driver? I like how thorough you are in your verbal explanation of everything write down to the Torx head screws. I love your shop and the work you do.
Thanks for watching and commenting on this one Randy... much appreciated. You might not believe this but I don't own Makita's right angle impact driver. It gets worse: I didn't even know they made one until I checked just now after reading your comment. Do you have both the right angle drill and right angle impact? Question: can I blame you when I tell Mrs NLC about the new tool I NEED for Christmas now?! 😉😂😎
@@NextLevelCarpentry No I don't have it, I have the ridgid right angle impact. I know shame😪 I no longer buy tools made by chinese companies. I now stock my screw box with only torx head screws.
Do you every use construction adhesive? I believe is has some give which helps for wood movement and stays nonbrittle in a range of temperatures.
Another Master Class in finish carpentry Matt,, the final product looked superb. How did you transport the big boy?? I'm guessing that you would use a couple telescoping lifts to put it in place. I build faux beams in a similar fashion but the indexing block is a new wrinkle to me,, pretty clever old man! I usually use cdx for the blocks to help eliminate the screw fractures. In any case my hat is it to you, great job.
Thanks Paul... considering your extensive background I take your comment as quite a compliment. Great minds think alike because if I had this to do over again I'd go with 1/2" Baltic Birch for the exact reason you say. FWIW because the beam weighs ONLY 150lbs or so I'm planning to bolt a couple steel brackets to a couple trusses and do the beam pick with a couple come-alongs to lift it 90% of the way. After the initial lift I'll slide scaffolding under the beast, remove lifting hardware and lift it the rest of the way to the 17' high peak by wedging 16' 2x4's underneath. At least that's the plan, but, as Mike Tyson says: "everyone has a plan... until they get punched in the face!" I'm just hoping the beam doesn't hit as hard as 'ol Mike! 😃😃
Amazing work! Best I’ve seen. I’m assuming this beam will be installed up against a ceiling. If you created a beam (red oak 6” high/8” wide) with the same construction, would that work if they were going to be suspended across a 16’ span where the beam would only be supported on each end (against two vertical walls)? I’ve been researching the best methods to avoid the faux wood box beam from bowing and wonder if this method of construction would work. You may have mentioned this in the video, but are the internal blocks 3/4” plywood? Thank you!
It would take at least 10" of beam height for an 8" wide beam to freespan 16' IMHO.
Blocks can be plywood or mdf.
Great work!! Would you ever consider using scarf joints instead of miters to better conceal the joints in the shorter pieces? A lot more work I know, but a nice detail!
Scarf joints would actually be a better solution for both appearance and strength (they wouldn't need splice blocks for strength) so, if material availability & cost weren't factors I would definitely consider using them as an alternative as you suggest. On a beam with a smooth, stained finish with any level of sheen and installed at a height that was closely visible I think it would be necessary for a convincing 'solid beam' look.
Wouldn’t you need a radial arm saw with a dado blade installed to cut something like that? Or you’re down to hand planes and chisels.
Wow ...
Yikes the glue bottle tipped. Great video
And here I was waiting for the end of the end of the end end of the end of the end.
Sorry to disappoint but I had to cut it short, you know?
Awesome tutorial -As well as the temporary block above the daddo joint would some 18 gauge brads from the back help hold that joint even after epoxy goes off?
Thanks Pinpatch. Personally I don't think 18 gauge brads would help at all in this application. To understand my thinking you could do a little test by brad nailing a 45 degree joint on a couple pieces of scrap. I don't think they'd offer the slightest bit of strength to the connection. I don't mean to be harsh for a very reasonable question but I operate from a mindset that brad nails are over-used these days... probably just an old-school thing. I also think pocket screws are over used though so this project is a bit of a reality check for this old nail bender! 😃🤯
@@NextLevelCarpentry I agree it was just to pin the mitres together until the epoxy goes off where a permanent back plate couldn't be left.
We use this a bit when mass producing mortise tenon joints for sashes. Glue it all up then pin it when in the press and remove it. This keeps the joints solid enough until the glue goes off and frees the press for the next sash (or door)
It would be great if you could show a few photos of the beam installed.
Thanks for your effort and time doing these videos.
@@pinpatchyeah7987 oh okay thanks for the explanation because I misunderstood your original comment thinking you suggested nails for additional strength not for their temporary benefit of alignment.
That said I think the softness of that pecky Cypress would still render 18 gauge nails useless but in something like Walnut Maple or Oak they would serve the purpose.
😎
Insane