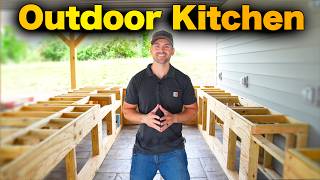
How to Build an Outdoor Kitchen from Start to Finish

Вставка
- Опубліковано 1 жов 2024
- Here I show you how to build an Outdoor Kitchen BBQ from start to finish. My kitchen has concrete countertops and a gas and charcoal bbq built using metal studs with running water and electricity. I am really pleased with the finished result of the kitchen but as you will see, things didn't go according to plan when pouring the concrete!
Parts used
Metal stud www.wickes.co....
Cementboard www.wickes.co....
Composite Decking www.dinodeckin...
Whistler Tetbury Grill www.bbq-barn.c...
Whistler Burford Doors www.bbq-barn.c...
Concrete tarmac-bluecir...
Worktop former concretecounte...
Polishing/Sanding Disks www.amazon.co....
Quick Repair Concrete www.wickes.co....
Cladding www.wickes.co....
Preserver www.wickes.co....
Tiles www.wickes.co....
Concrete Sealer hsealconcrete.com
Paint www.zinsseruk....
Tap www.ikea.com/g...
#outdoorkitchen #bbq #concretecountertops


is there a reason to put the composite decking? also when installing everything do you eventually enclose the frame or will the bottom be exposed?
Hi, i put the decking down for a few reasons. Firstly to keep the metal frame away from the ground to prevent corrosion and aid drainage on the patio. Secondly it meant I could board and clad all the way to the bottom of the metal studs leaving about a 1 inch gap from the floor, again to prevent water damage to the wooden cladding, and thirdly it means i have "floor boards" inside the cupboards which keeps everything off of the floor.
Thank you! Very handy DIY video! Lovely family too. 👍🏾🙏🏾
Thank you so much 🤗
great video, it has given me the inspiration NOT to do something like that as I haven't got a clue, your a better man then me and I'm glad your hands healed up.
Thanks, apart from the cement it really was quite simple
Good to see you looking so well matey .. was a nice surprise to see your face … Stu S xxx
Thanks Stu, good to hear from you. Hope you subscribed😉
A bit later this one! But I can sit down on the evening and watch this with my family!
Love this & it looks amazing. Luke the cat is such a star😽
This dude took the term measure twice and cut once to a whole new level 😅😅
I have to keep measuring until I start to get the same number, I'm sure the numbers on the tape measure move or something!
Hopefully your wife didn’t find out about the kitchen utensils used
Great video, loved the expert narration by the little ones.
Glad you enjoyed it, they are great presenters aren't they
Awesome, I'm about to build one on my patio. Not near as big but thanks for the advice. We have a cat named Luke too lol.
Great. I’d love to hear how you get on. Never thought we’d meet another cat called Luke. Ours had a sister, Leia but unfortunately she succumbed to the dark side!
Inspiring job. Was wondering what is the size of your pool and backyard fence along it in length?
The garden is about 50 ft deep, the pool is about 30X14
Well done, good job
Thanks
great video where are the staineless fronts from??
Thanks Darren, they are Whistler fronts from the BBQ barn in Sidcup.
Great Vid! Ive done my Gazebo (and video 😉) and i'm ready for the kitchen build. Wanted to see how easy metal framing would be, so thanks for documenting and sharing your build. 👍
Looks great. Can’t wait to see your kitchen build. If it’s anything like the gazebo it will be amazing!
Love the video and was making something similar until I got to the counter top former, did you get it delivered from USA? Delivery price is huge
They have a european distributor www.dutchdesignbeton.com/en/shop/
This is brilliant 👏
What software did you use to design the framework?
Thanks for watching and the kind comment. I used sketchup to flesh out the ideas from my head but no expert in it so literally was just a sketch without specific dimensions
Thanks for the great videos. I'm planning something very similar and now want to add a sink like yours (via hosepipe as well). Where did you get that slim sink from?
Thanks, I got it on amazon, think it was this one amzn.eu/d/6GeWEQA The tap was Ikea KALLSJÖN and came with hose attachments.
Great video. We're about to start our build soon and you've convinced me to use a metal frame. Was ot 50mm or 70mm you used? Many thanks.
Great, I would love to hear how you get on. I used the 50mm
Concrete counters are so played out. Too much time and effort to guess at the results when you can just buy big porcelin slabs that look twice as good.
Yeah its like unwrapping a big Birthday surprise and hoping you are not going to be disappointed!
This was a great video. Thank you for sharing.
Glad you enjoyed it! thanks for watching
Morning how high did you cut your c studs to get the height of worktop - you explained you spaced them 600 apart but how high - if you don’t mind
Hi, they are all a bit different as the patio is on a slope and I needed to have the worktop level. I think the average kitchen worktop height is about 90 cm and obviously have to allow for the cement board and then concrete on top.
Hi There.
Great Job you've done here.
Just getting prepared to build my own. Can you tell me where you got your clamps from, which screws you used to fix both the studwork and the cement board. Finally which adhesive did you use for the cement board to the frame. I would be very appreciative if you can confirm these materials and sources.
Many thanks
Angus
Hi Angus. Clamps were from Amazon I think just search for C clamps. Screws for the stud work are wafer head screws, screws for the cement boards are self tapping galvanized screws. The glue was just outdoor no nails I think. Good luck with yours, I found it very satisfying.
Enjoyed the vid thanks. Helpful for my build which I'm just starting. Any chance of a link to your sink?
Hi Richard, thanks. I got the sink on amazon, link here www.amazon.co.uk/gp/product/B00EUAWAJK/ref=ppx_yo_dt_b_search_asin_title?ie=UTF8&psc=1
Thanks for sharing, like the video a lot.❤
Thanks for your comment, I am glad that you enjoyed it
Are you happy that the Wickes studs are strong enough? I've seen similar build using stronger-looking studs but if I can get away with the ones you used that's be great! I'll be going for a concrete top too.
I'm not an engineer but I was completely happy with the strength, especially with some extra bracing and the cement board added a lot of rigidity
I am really interested to hear how your metal frame construction is holding up and how strong and load bearing this has been. Only ever seen timber used so really curious how this compares as an alternative as it appears to be the perfect material for an outdoor kitchen. Any thoughts or updates would be greatly appreciated. Great build. Thanks for sharing all of the details. Glad your hands have recovered.
I am no expert but 2 years on its as good as new. The metal is galvanised so there is no corrosion and the cement board provided lots of strength and rigidity. The metal was really easy to work with and if I were to do it again I wouldn't change a thing. After 2 years, all i need to do is repaint the cladding and maybe give the concrete another coat of sealant. Thanks for watching and the kind comments. Hands healed as good as new after a visit to the burns clinic, they used honey infused dressings which were great!
Thanks for replying and for the update. May well go this route as seems a better idea than timber. Glad you’re fully healed. Keep enjoying the BBQ and thanks for the great content.
Nice video. Is it Belgium Blue Stone that you have on your patio?
Thanks very much, they are porcelain tiles, not sure of the exact spec I'm afraid
Love this! May I ask the nails you used to attach the cladding and also the corner trims and a link for them. Many thanks
Thanks for watching. The corner trims were from B&Q and I treated them before I put them on. I wasn't convinced they would last but they are as good as new after one year. The nails are galvanised 2.36 X 40mm round wire nails from Wickes.
www.diy.com/departments/smooth-natural-pine-angled-edge-moulding-l-2-4m-w-27mm-t-27mm/1821913_BQ.prd
www.wickes.co.uk/Wickes-40mm-Galvanised-Round-Wire-Nails---2kg/p/156705
How did you modify your Weber kettle for it to sit like that?
I just chopped the stand in half with an angle grinder !!
Looks fantastic. I'm also looking into something like this as I own 6 Grills. New subscriber from BRANTFORD ONTARIO. Cheers 🥂
Thanks for the sub and the ind comment
Good job
Thanks very much, I am very proud of it
I'm building one using your video.... well smaller and simpler design. Did you screw holes into the frame and then drill through the cement board to attach the board(and glue)....... I'm confused by that bit in your video!
Yes i drilled pilot holes through the cement board and into the frame and then glued and screwed
Well done mate. You should be proud of what you accomplished.
Not knowing anything about concrete, do you think a mix with less aggregate would have been better in terms of looks after sanding?
Ive noticed that all these outdoor kitchens don't cater for kickboards. Have you had any issues with not being able to stand closer to the worktop?
Before I started I envisaged it to be a uniform grey colour but I am not disappointed with the way it looks with the aggregate especially after sanding.... and in fact after a couple of seasons use I would say it hides any stains or grease marks. As for the kick plates, a bit of a belly and short feet mean its not been a problem, I guess cooking over a bbq you don't stand as close as in a kitchen either.
Oh I knew you were going to be in trouble when I saw you with no gloves. It made me cringe. Glad you healed quickly. Excellent job and good on you for getting the family involved. Thank you for sharing. I've been thinking about something similiar
Thanks for watching, it makes me cringe too everytime I look back on it, definitely a lesson learned. I encourage you to go ahead and do it, for me it was very rewarding and gets lots of use.
Can you please tell whatvdrill bit you used to penetrate the stud work. I had great trouble in finding one that goes through nicely. Also which screws did you use when attaching the cement board.
Many Thanks
I used 2 or 3mm metal drill bits, I got through a few of them but so long as you go in straight and with the metal clamped it should be ok. Screws were galavnised self tapping screws
Great video, love to see how others did it as i am planning to build my own outdoor kitchen. Concrete was a disaster though haha. Needed to send vibration through it or bounce/shake the rebar to knock out the air bubbles and gaps to get the smooth finish and yes the consistency was too dry at the start. but a fantastic effort.
Thanks I did a bit of vibration but I think I was too broken by that stage to do it properly. Thanks for your comments, all good in the end!
You can cut cement board with a knife and snap. Saves the dust grinding in the future.
I know you can do that with plasterboard but the cement board was much tougher
Have you had any issues with rust with the frame material used for your project?
No, no rust at all after 1 winter and a wet summer!
Your concrete is actually too wet which makes it not as strong for a countertop it really doesn't matter though.
I think the first part is too dry and then when it rained at the end it was very wet but all worked out ok in the end.
Looks great ! What was the overhang of your counter in relation to the cladding ? 😊
its about 20 cm
Awesome build, do you have a link to your plans?
No sorry, although I mocked it up in sketchup it was my first time using it so it was never really detailed specification more of a rough guide for me to follow.
Great video, what are the dimensions of the kitchen
What did you use for the wood stud pieces for the cladding and how did you fasten those to the metal frame?
I used treated roof battens from wickes and just screwed them into the cement board
Is your pool heated ?
Yes, in the summer
Where did you find the worktop edging from?
z form
I got the edging from Concrete Countertop Solutions, the link is in the description.
diy amateur several items
Yep 100% amateur, never done anything like this in my life.... pretty proud of it though and hopefully inspired others to give it a go.