CHEAP and EASY CABLE RAILING

Вставка
- Опубліковано 25 лис 2020
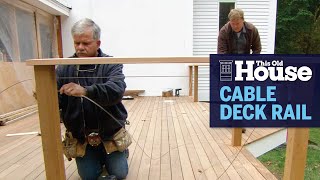
- Mike and Logan demonstrate how to install the Deck Man cable railing system on an interior stair well. This system can be used for deck railing, interior stair railing, balcony guard rail, or anywhere you need a safety railing system that looks modern, clean, simple and visually open and attractive. With all stainless steel parts, the Deck Man cable railing system can be used in the harshest climates without corrosion or rust. It's easy to install, and with minimal components and fittings, it is actually the cheapest cable railing system on the market.
#cablerail
#deckrail
#wirerailing
Deck Man Cable Railing Kit: amzn.to/3tKcZbJ
1/8" stainless steel cable: amzn.to/2QPc772
Crimping Tool ($59): amzn.to/3epFlBz
Hydraulic Crimping Tool ($106): amzn.to/3tH4Ch6
As an Amazon Associate I earn from qualifying purchases. At no additional cost, purchasing goods linked here helps fund our channel and keep the videos coming! Cheers. - Навчання та стиль


I found it easier to use a drill to drill all but 1/8 inch of threads into the wood on both sides, cut the cable pull it tight with hand and crimp then tighten the 1/8 on either side. it went way faster.
Great idea! Thanks for checking in.
I don’t understand you make one side taught what about the other side won’t the rope get tangled
@@zaziz8 The other side is reverse threaded...If you turn each side approximately the same number of turns, you'll avoid twisting the wire. There is a lot of forgiveness though and you don't have to turn each side exactly the same number of turns.
@@bluegorillacookies Spot on. Just installed a system like this and it was pretty forgiving. The only thing I would add from my experience is make the hardware anchors are set decently before cutting the wire to length. I had to recut one of my wire lengths because the wood was a bit softer than I realized at that area and I needed to sink one anchor more, resulting in a slightly longer wire run. Also I bought a manual pneumatic crimper and while not super cheap, even for the one job I think it's worth it in time and labor.
4" on center would easily allow a 4" sphere to pass through because the cable isn't hard like a baluster, would not pass code in any state I've worked in. Standard in industry is 3" spacing, or 11 lines for a 36" guardrail. That gives you 1/2" on any two for play and helps with longer spans.
Loved to see true honest professional. Always learning and different methods are more efficient for many on the fly challenges. It's not a flaw when a tradesman backs up to insure professionalism. Right on donkey kong
Sold im purchasing this same setup great how to video guys
Awesome! Thanks
Looks great and probably the most easy one
For sure.
The cheapest yes, the easiest no. The quick connect connectors are so much easier but cost 3 times as much
I love when I’m thinking of trying something and y’all just happen to come out with a great video on that exact topic. Whatever mind-reading technology you’re using, keep it up!
Ha! That’s amazing! Glad it was helpful.
I think the key to doing them in place is getting one of the hydraulic crimpers, this video convinced me to spring for those :)
Hah! Me too. I just bought one and am eager to try it out.
Ditto
Awesome bro
Great video on how to! I subbed !
Thanks! Welcome to the channel!
Thanks for the vid. I compared many setups and went with these lag swage connectors as well. Big advantage on corner setups, not having to stagger the cable runs or make an impossible bend through the post.
For sure, glad you liked the video
so we're do I get his system. looks great
@@jfromtn7410 there are links to this cable railing system in the video description.
Assembly is better but long term the lags will creep. It's well documented.
@@Burritosarebetterthantacos And is exactly what happened on mine. I left some lag threads exposed to account, but in some cases not enough. Is this cable stretch?
Love this system and the look more than any other method and design I've seen so far. It's very clean looking, but how well does it hold up? Let say someone falls or pushes against the railing - will it hold up?
“Brought to you by TUMS”
Can you get the cable in black for exterior?
Putting in Cable Bullet system this week, I think it looks to be much faster than this system, will have to see as time is money.
This is awesome. Any tips for a staircase railing? How do I get the angle downwards correct?
The grab bar (not necessarily the railing) needs to be 34-38” above the diagonal line connecting the foremost point on the stair nosings. You can run a straight edge or level down the stairs, measure up 36” from there and that’s your grab bar position. The exact angle will be determined by your stair rise and run. You could place a speed square on that diagonal line, plumb the speed square and determine where the diagonal line intersects the angle on the speed square to get the correct angle.
Great job and alternative to other cable rail setups.
Major flaw in your install. You can’t space cable rails to 4”, needs to be every 3” as the cable under full tension can deflect up to a 1/2”.
I'm glad someone else pointed that out. With the deflection factored in, spacing these at exactly 4" means mid-span you'll have a greater than 4" space and it'll fail inspection. No matter how tight you get it, it will deflect some, and that little 4" sphere will zip right through. Just do 3" spacing... done.
If all the cables are the same tension, then the deflection will be the same with all the cables. Spacing would not change.
Great video. 1 question. I plan on putting this on an exterior deck. Would you suggest setting the corner posts in concrete to support the tension or would the concrete blocks be sufficient? Its roughly a 12x16 deck. Thanks again
Thanks, Matt! Yes, I would probably set the corner posts in concrete
Yeah I really like the look of those. Looks pretty simple to put in. I kept cringing when I saw him using the crimper on the floor. One slip and Ben is going to be singing soprano haha. Can you say Ice pack? Anyways great job on this. Looks like you guys do awesome work.
hahahah.
@@HeirloomBuilders lol
Where do you purchase this product
Did you use the pattern to drill the thread holes before the posts were installed? I'm worried about the holes not being perfectly straight. Perhaps a drill press should be used?
What size are the posts?
I watched this a couple times but couldn’t find a link for the cable system. Loved the video, hated having to search for the product link.
It’s in the video description. Let me know if you have trouble finding it.
Where do you purchase this system??
Yeah the crimping is definitely the tough part. Its all about finding that sweet spot. Or just do it Mike's way :)
I don’t know how you did so many of those with just brute force!
Ben, I was excited about not having the turn all the lags by hand until the crimping. I just don't have the shoulder strength like I did 20 years ago. Time to hit the gym!
@@mjheindl I found a hydraulic crimper we might consider buying considering all the cable rail we’ve been doing. It’s in the video description below.
Cant seem to keep my cables tight. Anyone have an issue with these fequently loosening up over time??
What do you suggest when putting lags on opposite sides of the 4” x 4” as it appears they will touch due to their length? Thanks.
We've never had that problem, but you could slightly offset them (side to side, not up and down). For example, the holes/wires would be 1-5/8" from the edge on one face of the 4x4, and 1-7/8" from the edge on the opposite face.
you have Tums as your snack :) Great video guys
Great video! How are the posts supported?
The posts attach to the floor girders with (2) 5/8” carriage bolts. The bottom of the 4x4 post has a 2x10 notch cut out so it has 2” of bearing on the top surface of the girder and a 2” thick x 10” long leg that extends down to rest against the side of the girder where the bolts attach it together.
@@HeirloomBuilders Awesome. Thank you for the information. And for creating these videos. They're super helpful and very enjoyable.
Excellent video! A few questions... Would the hydraulic crimper have bee a better choice? How long did the entire installation take you? For long stretches (21') through multiple vertical pieces, would you recommend a lag bolt at each post, or just a through hole and grommet with lags at the outer-most posts? Really helpful-thanks for posting this.
Thanks, Steve! The hydraulic crimper is the way to go. I would drill holes and make a single 21’ run instead of lags at each post if you can. You may need to lay out the holes from both sides of each post and drill from each side to make sure you have nice straight runs (if you drill all the way through the post from one side, you may come out slightly off your layout on the opposite side of the post if the drill bit doesn’t go straight). Having one wire all the way across makes tensioning the whole stand of cables easier
@@HeirloomBuilders thank you!
The hand crimper used in the video has short “arms”, which give less leverage. You can buy hand swagers with around 36” arms, which makes the job much easier, however, they are around $175 now.
On some jobs you may not be able to swage before the cables are in place. therefore making the hydraulic swager the better choice…though they are slower. They only cost around $95, with the cable cutter, money well spent if you do even two jobs.
I wish you had address that corner post.
would these be a good option for outdoor decking?
Yes, we use the stainless steel cable for exterior applications
Are the threads exposed when you are finished, with that inch and a half shorter than distance, wire cut.
No, the threads are buried in the wood
Happy Thanksgiving 🦃
Happy Thanksgiving, Dianne!
@@HeirloomBuilders 😯 you're amazing to respond!!! 🤩
@@DDL2728 it’s supportive folks like you that I’m most thankful for 🙏
They are left-hand threaded and right-hand threaded screws so that the cable does not twist?
That’s correct
man. sure wish you were close to Hickory. my house would be a quick easy fill in job for foundation, framing, ext trim (7" hardi plank on zip 1/2" R sheathing. 1430sq ft 26x55 rectangle. 9' clgs. all trusses with scissors at great room. 3/2 and managed to include 4 walk in closets with a utility room and a walk in pantry. no garage just off street parking. i have it all priced out but hard getting foundation, framing, elect, hvac (it only needs a goodman 2 ton variable speed ht pump in the stand up crawl space. that's about $3,000 for all the materials. got a bid for $11,400??? nope) and plumbing labor. i'll start next summer when/if all this craziness dials down. the foundation is 12" x 24" cont conc footing with 8" wide stem wall to 6" above grade. just go with the slopes, no steps. all poured monolith. 2x6 pony wall (no cmu block conc filled wall). tji's flr framing with beam mid the 26' span. 2x4 regular walls. crawl space and attic have no vents. open cell under the roof deck. membrane in the crawl space. batts in walls and floor
It’s amazing how much labor costs for trades. Everyone’s gotta have a shiny new truck with 20” wheels, I guess 💩
@@HeirloomBuilders they all smell blood in the water. you could frame and ext side this bldg in a week.
pretty neat. thinking about this for ext deck railing. 1 how far does it span? 2 the crimping tool is extra so how much does that cost? 3 can you get this at Lowes? 4 how much? 5 at 36" rail ht, how many linear ft does this cover? happy turkey etc etc etc day to you and yours!
Happy Thanksgiving to you, my friend! This is a great system for exterior deck railing! I just added all the stainless steel components as links in the description.
1. the longer the span, the more flex the wires will have. We commonly go 8 foot spans with no problem. But we just spanned 24 feet (drilled through a midspan 6x6) with no problems. Just make sure your posts are super solid if you span that far so that you can really crank it tight!
2. Crimping tool is $60 for the manual, $105 for the hydraulic version.
3. I buy it from Amazon, but I think you can get kits from Lowes. Home Depot has a kit, but its much more expensive than this setup.
4. Cost depends on how many lag screw fittings you need. and the length of cable. See links in the description.
@@HeirloomBuilders thanks big guy! i have about 30' max length so will break it up into (3) 10' lengths. btw yer buddy Newsome gives you a big toast from the French Laundry (whatta creep!)
@@HeirloomBuilders might be just what I need.
@@mashoutman it’s a really great system. You thinking about Interior railing or exterior deck?
@@HeirloomBuilders exterior deck, roughly 40ft span.
Ok for exterior railings? Or will the steel rust?
Get the stainless cable and fittings. There’s a link the the video description for those.
Where do you purchase this product??
Check out the links in the video description. Here's the link for the connectors...amzn.to/3tKcZbJ
How long did one panel take to install?
About 15 minutes
How does this do with 4” sphere test? Looks like there is enough slack in the cables that a baby head could squeeze right though.
It passes the 4" sphere test, so long as you lay out the wires at 4" on center or less. You can always go with tighter spacing if its a concern.
I do 3", just in case of cable flex. They check that here.
@@davidtaylor1384 Yes, codes state that the wires cannot spread more than 4” when some force is applied. Therefore most space the wires at 3-3.5”.
It would really suck to do a big job, then have some anal inspector not pass it.
What size are the posts and top railing?
Good question. The post in the middle of the thumbnail image is a 4x7, notched down from a 7x10 post that holds up the stairs and beams that make that stair opening. All the others are 4x4 with a 2x4 top rail (all sizes are nominal - actual 2" x 4" and 4" x 4"
NO NEED TO CRIMP. Use "swageless" fittings. Same as these but 3 set screws and no swaging... ;-)
So what's the cost?
I wish I knew what these guys were talking about,
We by the cable and thousand foot rolls there are 2 connections only passes through I bolts one continuous piece that is the cheapest and the easiest
Does that system stay pretty tight?
Can this be done with vertical cable wire ?
Yes it can
It can, BUT, You will use a ton of connectors, (every 4” is code), that will greatly increase the cost. Of course connectors vary greatly in price.
Also think about the loads. Unless your top & bottom rails are very stiff, you will bow the Center.
Has anyone installed this in a vertical position??
Did yall test any to see how hard they are to pull out? You can bet that someone is going to climb up them like a ladder one day
They are tight like bowstrings! They’ll bend under weight, but they won’t pull out. 💪
Where can I order this product?
There are a few links in the video description where you can buy this system and the installation tools.
Horizontal wires/bars aren't allowed where I live (New Zealand). Because kids can climb them like a ladder.
Did they not say they are swageless? Am I missing something? They look like they are swageing them to me
What about stair railings? Would they have to screwed in a the correct angle?
Yes, you’ll need to screw them in at the same angle as the handrail for it to look right. We usually cut a wood block with a miter of the same angle as the stairs to use as a visual guide to keep the drill at the same angle.
@@HeirloomBuilders Great idea, the pre made gauges that do the same thing are pricey.
Would this work without sagging on a 7' span?
Yes
@@HeirloomBuilders Hi, Thanks for the Great video. Is there a code for the max distance the posts can be, say on an outdoor deck, when using these cables?
@@ericfine325 there is no code except that it needs to hold back something like 200 lbs of force. 6-12 feet is our typical
Range, depending on structural
Post layout below. 6 ft or 8 ft spacing looks best.
With that span, an inspector might take issue, as it would be easy to spread the cables more than 4” apart in the middle. Most systems state that 48” between posts is max. For a less intrusive look, the Center posts can be much smaller rectangular metal, they’re only acting as cable supportspacers.
Play the harp on the porch to your lover! Ha ha ha ha ga!
Is that tums?
🤣 Fortunately this railing didn’t give us heartburn! that’s an old tums bottle full of 3/8” dowel rod pieces we use to plug the holes we made screwing the wood railing together. Looks out of place huh?!
I love your video! You guys are awesome and I will be doing this at my house! Glad you didn’t get heartburn 😂
As a deck repair guy myself this system looks heavily flawed. I can't tell you how many decks I've repaired because the posts are loose because lag screws were used intead of through bolts. Water will get into those threads, soften the wood, and the leg screws loosen and fail. This cable system would just be a disaster in a few years as all those threads will soften under tension and weather.
What if it is installed inside? Is the water the only thing that makes it a bad design?
Agree, only good for indoor in my opinion
Seems like cheater bars attached to the crimps would make life easier
Good idea
A tip for ppl who don't have a crimp tool. Use bolt cutters or if you have a vice you can use that as well.
Did you only show one crimp/strand…to shorten the video?
Every system I have used specifies 2 crimps on each fitting, the 1st turned 90* to the second crimp. That will give you about 60% of the cable strength.
One will work just fine for railing, but two is definitely better.
So still need to buy a crimp tool of sorts?
That’s right. There’s a link to a couple options in the video description depending on your budget.
Can't hear 2nd guy well.
Professional youtube commenter here. Why couldn't you have just slide some steel pipe over those handles to make a "cheater" setup. Oh well, love the look tho! Think I'm going to attempt this myself!
Good idea
swagless fittings😂
LoL
Get Mike a Mic. Jeez.
not inexpensive tho
Bad technique. You need no more than 4” with the flex of the wire. 3-3.5” max between.
Hi guys you need to practice some more before the next video, , and take off that spray booth filter!
That spray booth mask does not inspire confidence in what you are doing
Cheap AND tacky.