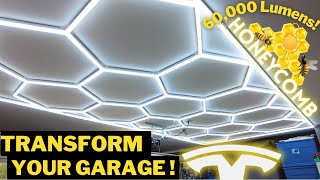
I made my own honeycomb LED Light and it turned out awesome

Вставка
- Опубліковано 14 жов 2024
- In this video I am going to share with you my latest build which is an amazing super bright Honeycomb style LED light. It is ca. 3 x 2 meters :)
STL files can be downloaded under the following link: cults3d.com/en...
Buy Me a Coffee. If you find my work useful and valuable you can support the channel on the following link: www.buymeacoff...


Would the design of this project be changed by the led strip being rgb?
I want to do this build but i don't understand the circuit part, how do you design it so the power runs evenly? And what was the purpose of those extra wires in the middle?
wicked lighting project
What did you use as a diffusor? Great build btw :)
Thank you! The aluminium LED rail came with the diffusor.
Nice. I bought evetything today. I will buy 3D file and I should be good to go :) Thank you for the tutorial
how many pieces do I need to print on 3D printer? Maybe you mentioned that somewhere but I missed it.
@shonescootch it depends on the size you want to build.
@@kikihobbyrepair Same as yours, I bought 20m led strip and around 20m of aluminium pieces
Nice project. Two issues i see with it:
- requires 3d printer for the mounting brackets
- plastic diffusers could be cut to interlock, without the gaps where the profiles join, though that would require finesse to get the angles right
- even so, there are no leds in the joints, so they would appear as dark spots
The last problem could be reduced by using cob led strip and sizing the parts so that gaps between strips are minimal, and using wife enough profiles so that wires could be placed to the sides of the strip without obscuring the LEDs. Such step would also guarantee no bright spots from individual leds are visible through the diffuser (hard to tell if it is the case with this build but often a problem when using bright strips with shallow profiles)
Thank you for your comments.
Basically at the joints the white 3D printed covers are max 20mm wide and they are quite thin so you cannot really see dark spot.
As for the shallow alu profile. There are 240LEDs per meter so there are zero dark spots between LEDs 🙂 Not even on 25% brightness.
Awesome looking project.
Thank you!
Thats look insane :p
Agreed 🙂 Thanks
on a scale from 0 to 10, how painful was it to do the actual ceiling mounting process?
I did it alone, so it was a 7 at least. It is not heavy (ca 3-4kg) but super flexible. For 2 people it is relatively easy.
Wow looks great. Do you have links to the material you used?
Thank you.
This is the aluminium rail I used: www.ebay.de/itm/255213687451
This is the LED strip: www.aliexpress.com/item/1005003091669265.html?spm=a2g0o.order_list.order_list_main.101.7e2d1802ThvcnN
Take care to select the 24V and 240 LED/m.
The rest is just screws and the 3D printed parts.
Awesome project. Loved it. Can you share STL file for petg brackets pls.
Thank you. I plan to share the STLs but I want to make some small changes
@@kikihobbyrepair awesome pls let me know when? Right now I am off from work and it’s perfect time to build this for my pool room. Thanks
STL files can be downloaded under teh following link: cults3d.com/en/3d-model/home/ultimate-honeycomb-led-light
What size square nuts do you use? I know M3 for thread size.
This is the one I use.
a.aliexpress.com/_EzL3pI7
What was the cost of this build, is it worth to build it or its breaks even with the real kit ?
It was significantly cheaper than the "real" kit. For me the rails and LED strips were like ca 90€. The PSU was laying around but it is ca 50€(a quality one). Plus some wires, screws and filament.
Building and designing was a ton of fun, plus the feeling that it looks awesome is great 🙂
The wireless dimmimg circuit is already on the way to make it more versatile and not to burn your retina all the time 🤣
yay ... nice
Thank you!
what's the infill percentage for the 3d parts?
5 walls and 40-50% infill should be fine.
How is this DIY with all the tools and 3D printed stuff?
Nowadays 3D printers are super cheap. You can buy one below 200$. All the rest you can build with a hand saw and a drill. For me this is DIY. The original costs ca 700-1000$ in this size.