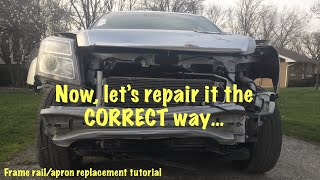
Frame pulling tutorial on our 2015 GMC Terrain salvage rebuild project.

Вставка
- Опубліковано 15 лис 2018
- I'm going to show you a little but about pulling on our project, then I'm going to throw it all away. This gave me a chance to show the basics of what we are trying to accomplish and a few tips that can be helpful. Let me know what specifics you want to see on future pulling tutorials or even tutorials in general. I'm trying to give a broad scope of repairs and will fine tune once we have covered the basics.
- Авто та транспорт


I'll probably never attempt repairing any frame rails but I enjoy watching and learning how it is done, especially when it is done by someone who is very competent and is interested in doing a top quality job. This was very quick, to the point and insightful.
Thanks, there are a lot of people out there straightening things like this and although it might look good in the end, it is not structurally sound anymore. In the next accident it will crumple up with much less force. The scary part is when I see people heating new frames to straighten them. That is a big no no! I have seen firsthand just how weak they become. I am just trying to show people the proper methods. Thanks for watching!
Watched a lot of pulling vids this is by far the most informed vid I've seen very helpful and safety tips
My 99 Tahoe is at the shop having the frame straightened right now, I landed on your video because I was curious to understand how it's done. Thank you for sharing! I can only hope mine is done right.
I like how you had 2 cameras setup instead of moving one all over the place,great explanations on every step. I feel that it was very professional. You nailed it, great tutorial
I have never rebuilt a wrecked car, but i want to give it a try and see if it would be something I can do. I have watched hundreds of rebuild videos on UA-cam and most do them in time lapse. I have been a subscriber of your channel for about 3 years now and doing this video was the kind of ones I look for so I can get an in-depth look at what's involved. So I personally would like to see more in real time. Also thank you for taking the time to do these videos and showing some of use no how's what's involved.
I enjoy watching your videos showing how the work is done. I also appreciate you doing things the right way and replacing the parts. You are doing things with right way.
The right way isn't always the cheapest or fastest but it does allow me to sleep at night! lol Thanks for the support!
I enjoy your videos, you're about the best instructor I've seen so far.
Glad that you mentioned that specialty tools are not needed if you have ingenuity. Sometimes you have to make the tool to get the job done.
Thanks, I'm glad I could pull it off. lol Sometimes the homemade or repurposed tools are better than the "right" tool. People always think of you don't have the fancy tools it cannot be done right but they are wrong. Thanks for watching.
I’ve watched dozens and dozens of videos on this subject and read myriad articles and papers form the manufacturers and comprehensive studies on the metallurgy going on here. Truly incredible what they are doing today with ultra high strength steel. I really dug in when I went to level a dimple on the frame rail of my daughter’s Magnum. I’m a pretty big guy, and known to “make” things submit to my will, strength, and most of all, thorough understanding of leverage and physics. I used to only drive cars made before 1972, and have plenty of experience straightening out “mistakes”. My best friend totaled my 1968 Country Squire, and although he hit a tree at only 35ish MPH, the damage was astonishing, with the right headlight pushed back, massive steel bumper folded in, fender folded in, the works. I took a 28oz Estwing framing hammer and out of anger and curiosity to see what it took to bend that steel, did an overhand swing on a smooth section of that fender. On a modern car that hammer would go through that sheet metal. On this fender, it barely left the waffle pattern of the fresh hammer. Anyway, I used a hand sledge to massage that slight wrinkle, maybe 3/8” tall, where the steel is layered/laminated, and bent just like the vehicle in your video, it made the inner layer wrinkle back towards the point of impact. I don’t know the gauge, but that layer was maybe 1/8” thick. Annnnnnd. Nothing. It was near the brand new strut I had installed, as I replaced the entire front end suspension parts. But I didn’t want to scratch it. So to hit that point from afar I used a tire spoon, about three feet long, round butt end, flat spoon on the end against the rail. I wailed on that thing for three hours. My wife told me the “CHING” got ALMOST therapeutic for HER! Easily over a thousand very hard hit, leaving the end of the spoon mushroomed over. It left marks in the steel, but did not bend it. So I applied some MAP gas torch to it until it got a cherry glow in that area and that helped. That just blew my mind. That’s what led me to learn about the steel used, and found out that section used DP 590, dual phase, two different types bonded together, and the metallurgy used to create each type is incredible. They have figured out how to make relatively light weight steel also ultra strong, hence the name. I have a tow car garage with a support post in the middle. I used that, big ass eyebolts into the far wall, and some floor anchors to keep the car from moving towards the drivers side, all anchored just act of the cowl, under the car and on the pinch welds I used some beam clamps which worked great. On the impact side to pull the apron and rail, I used a two ton electric winch with a pulley to get close to four tons, but not really, plus a come-along, plus two large 2” wide ratchet straps, all progressively attached from behind the strut halfway to the cowl, then at the strut below on the rail, and then two more points along the rail to the bumper mount, of course the bumper was removed, and the headlight support, which is the main cross support framing the top of the radiator, headlights, and binds the fenders together, with the radiator support below that. It was bent slightly annd I fixed that in five minutes. In fact, I really didn’t think the frame was bent, initall, that’s how subtle it was. The hood was saved and the drivers door, with all the impact being at the knuckle and strut zone. The knuckle was bent over and pinched the tire. The upper A arm broke, as well as tie rod end. That headlight got cracked, but almost spared. So it was concentrated. So I rebuilt the front end, all good, easy, took maybe 6-8 hours, doing both sides since she had already been prepping for a front end upgrade before the accident, she already had the parts even before insurance did their thing. On that note, they wanted to total it, of course, but it’s was in the ragged edge. She loves the car which is not replaceable, kinda, and the damage honestly didn’t look too bad. We ordered a new painted fender and bumper cover, easy bolt ons. Surprisingly, the fender bolted right up with perfect gap to the door, and the mount holes on the apron lined up perfectly too. Hmmm. Still not sure why. Cause the hood on these cars has no adjustment, and did show a gap on the passenger side and a little overlap on the drivers new fender. And when I loosened the bumper and the cross support, the drivers side rail snapped back about 3/4”. Everything seemed to line up, except the hood. But I was wrong. BOTH fenders/aprons were pushed to the passenger side about 1”. And hence this story and why I’m watching these videos. I have pulled, and pulled some more, and I can see everything moving, A LOT! Easily more than the 1” needed. But when I release the tension it always goes back to about 1”2 shy of where it should be now. I even had plumb bobs up and down the chassis, and the shop manual has spec measurements in it, so I made a grid under the car to keep track. The grid is worthless if the car moves at ALL, and it always does. Hence your frame rack. I know I can get this right. Question is, how do YOU measure the big picture to make sure everything is where it should be. These pints are so far apart and measuring is so difficult, I even made a tram gauge, but even then, 1/8” here and there is 1/4”, and then combine that with imperfections in measuring a diagonal from one corner to the other, it will never be precise enough to be right. I’ve measured on this car maybe 20+ times. But I am determined. This is my daughter’s baby, and of course I got one new in 2006, and she’s always loved my hot rod wagon, mine is black, she bought a nice cherry one in Inferno Red, Flowmasters, and of course both are RT Hemi cars, cause, why breathe otherwise? I’ve even used my car for reference. Some parts are dead on. But how do you know that your reference points are even correct. At one point I got a perfect isosceles triangle from tow rear corner points to the center front of the engine cradle and was convinced it was square. Went to do toe-in, with a laser down the side of the car referenced off the rear rotors, and even accounting for their own toe-in, and got the same thing as the hood. One inch, on the nose, was how much the drivers side rotor was closer to the rail than the passenger side was. Ugh! It almost like I bend it, maybe three or five inches last where it should be, release the tension, take measurements, and then over several hours or days it returns to near where it started. I have moved it, and of course the whole rail and apron didn’t move proportionally, but it’s still off by about 1/2” in some places to 3/4” in others and it turned out that the passenger side apron was harder to pull than the drivers side. Maybe stress hardening? Help. Just as a point of reference in a pull just like you did in the video, how far PAST the point of being square did you need to pull to leave it correct? I feel like I’m going to rip something apart if I keep pulling so hard. Of course I’ve had bungee cords and heavy blankets strategically placed to prevent any failures from becoming more damaging than needed. What is normal. Also, the papers said that on DP590, heat was not a good idea, but very localized and short term heat could be used to relived shallow wrinkles. Otherwise, it can make the steel more brittle, or more soft, depending on lots of factors.
I was extremely skeptical about this truck a few weeks ago. I am now extremely amazed! You seem to have that touch. Awesome
Thanks for your honesty. We are just getting started. Thanks for watching.
Thank you for your honesty and integrity. Im a shadetree hobbyist and have repaired a few "totalled" cars using a winch, come along, slide hammer, 4 ton porta power another car as an anchor and a great old willow tree - saved a bunch of money, learned a fun skill and had an enjoyable time in the process! Keep up the great videos and in-depth explanation and be sure to tip the Afternoon crew well, ha ha. Merry Christmas from Upstate Ny
I have done similar. There is nothing wrong with a little ingenuity!
I really enjoy when you explain as your going along
Thanks, I'll keep that going!
Great to watch a pro work and explain the process- nice mix of still shots and the live pulls
Thanks, more tutorials are coming when I get a little time to edit them. Thanks for watching.
I'm from Peru, and lately labour costs (which used to be dirt-cheap) have gone up a lot, and I was asking some shops why weren't they investing in state of the art frame machines and the answer was "if a car is so messed up that needs expensive equipment to messure and pull, it's probabbly going to be totaled anyways, so why bother". I really like this tutorial a lot, please keep them coming.
Manufacturers don't want anything to be repairable. They want to keep selling more cars. They make the parts replaceable but the labor to replace them is enough to make a 2 year old car not worth the repair. Frame racks are becoming less useful if they will not let you straighten anything anymore. Thanks for watching, more are on the way.
In the year 2022 with supply issues many people are holding on to the write offs rather then crushing them for a few hundred dollars, if I pull the engine and transmission that's worth 4 grand used 🤷♂️ body work that would usually be 200 dollars is minimum 1000 dollars now unless, you know someone. I'm considering getting into the salvage business 🤔.
@@vehcor that's a good reason to keep your old workhorse frame machine and not invest in a state of the art machine with laser and GPS guidance machine that will be out dated in six months if you don't buy the new programs😂. Hey it got you here this far ,, keep her, kinda like an old wife. LMAO
I'm in the U. S. Where the democrates cheeted the idiot into office and nobody did anything about it...the price of everything here has gone way up .something's are double ... It's the self proclaimed elite trying to destroy the eno
The fact you took your time to share how you did this to show us in a video was fantastic. Thank you and keep that up vehcor
I appreciate the narrative. Seeing and hearing what you're doing in real time really gives insight into how you accomplish these repairs, how much work you put into them, and if it's something that I would want to dare try. You're helping us average Joes, man. Thank you!
(Edit: don't stop making the time lapse videos though, they're unique and strangely addictive.)
I was an average joe at one time as well. We all have to start somewhere. I just kept challenging myself and here we are, nothing scares me now. I like watching time lapses of just about anything so I understand. It is how my channel started and will always be part of it. The time lapse camera was rolling the the whole time so there will be one of this job after the tutorials. That way I can put links in the time lapse to direct viewers to real time videos if they want more info on a specific procedure. Thank you for your support!
My Thoughts as well
Dude I’ve got to say I’ve watched other videos, and always come back here. You do a great job at explaining what you’re doing and approaching it from a beginners view props 👍.
Awesome! Thank you!
Dude this was good. I smashed the rear end on my car and now my rear wheel has been pushed in pretty good. Thanks
This was my first time watching a video like this. Live tutorials were a big help. Thank you.
I will make some more when I have the time. Thanks for watching. I am glad they were helpful.
I used a Chief Easy liner for many years to do frame work. You did a good job explaining what you were doing.
I have used the Chief as well. I do prefer the Car-o-Liner though. Thanks for watching.
both ways you did this was done very well i have been doing this kind of work for well over 30 years and i think you did a tremendous job. I cant decide which way was better so i would try to incorporate both methods. you did a great job my complements to the chef
Thanks, I think the best would be live video with the animation as I explain it. My video editing skills are still a work in progress so I'll keep practicing and maybe I'll get there. Thanks for the support!
It gets hit, it will bend. Really doesn't matter as long as it's in alignment and crinkles worked out. Crumple zones are there to bend. It's a folk lore to replace every bent piece
Great job man. I love the detail and the tutorial aspect of it. It's also good to hear the little secrets!
Thanks, the little secrets are what they don't teach in classes. You get those in the real world. Thanks for watching.
I like how you kept it real and said how the do it yourself we could do the same thing and the truth about manufacturer don't want us to work fix our own cars they want more money to replace it. Very informative thank you
Excellent video and very interesting,I very much enjoy your videos in either format,keep up the great repairs.
Thank you, will do!
Just stumbled across you looking up salvage repair. I'm mustering up the courage to buy and rebuild a salvage truck. Your videos definitely make it less donating. Thanks for all the great content keep them coming and good luck on the siverado! Can't wait to see that one done 👍
Start small, the last thing you want to do is get in too deep on your first build. Even the simple jobs have challenges so you don't want to be overwhelmed. I'm going to get back to these tutorials as soon as the Silverado is done. Good luck on your build if you jump in! Thanks for the support!
Another good video, it's cool that you are showing people what goes into the repair process. Ideally you want to give it a yank before replacing parts anyways. It tends to help the new parts line up better.
You are spot on! Even if it doesn't look like it, sometimes adjacent panels can be moved slightly and it sucks to find out when you have a rail assembly in your hand that just doesn't want to go to its home. Thanks for watching!
Agreed 100% just because it isn't obvious doesn't mean its straight!!!, always verify the straightness of the surrounding areas before mock up and reassembling!!!!!
Great video! You explained everything very well and I like how helpful you are to the every day person.
Thanks, that is my goal! Thanks for watching.
the live video was great, but i also liked the fact that you spoke of it after. Great tutorial keep it up.
Thanks, more are on the way.
Great video!! I liked the mix of both... video of the process and the narrative explaining. My car was recently damaged and IT will be undergoing this process to be restored soon. This helps me understand the work that will be going in. Granted mine is a unibody honda, but I can see the physics of it and how the frame machine can reverse the damages. Thank you!
Thanks, glad it was useful. Hope your car turns out perfect. Thanks for watching.
I caught your very first video AWESOME it was great and very helpful THANKS Every job is easy with the proper tools and proper knowledge
Good afternoon, I think it's a great video, I like the tutorials because you always learn, I hope you keep doing them, greetings from Spain.
Thanks for that, Never saw a frame puller "in action". Great explanation!
I'm like a little kid, I love watching the metal move! Thanks for watching!
Love the tutorials. You are imparting lots of knowledge and I really appreciate it. I really like how you explain the "why's" of what you are doing. That's where the real knowledge transfer happens! 👍👍
Glad you like them. I'm the "question everything" type of person. I must have driven my instructors crazy. lol Since I learn that way, I end up teaching that way. I'll have plenty more tutorials in the future but I have to get my "mistake" videos out and the part 2 of the G8 everyone has been waiting on. Thanks for the support!
An excellent how it's done video. I have heard of "pulling it". I now have a much better idea of what is involved. Thanks. Looking forward to the series. I would have no worries buying a vehicle you've repaired. No cut corners. Hard to find these days.
Thanks, I'm glad I could pull of this teaching thing. With all of the "how much did you make" and "what does it cost" comments and emails I get it is no wonder good work is hard to find. Everyone is focused on money first and the work last. I could make a lot more cutting corners in the short run but it hurts you in the long run. Not to mention I just wouldn't feel right about doing something that wasn't right. I will have a video to explain that as well. Thanks for watching!
Great video, illustration are very helpful. Patiently waiting for next one!
Thanks, and thanks for your patience, I do have some big projects in the works.
I loved this, definitely continue with this method of tutorial with both live video and stills with illustration.
Thanks, will do!
I prefer these over the still pictures with narrative personally. It's nice to have explained as you do and show it. Good work!!
It seems to be the favorite. Thanks for the feedback!
Simply Awesome! This guy is a straight shooter, rare these days!
Keep going. This was very entertaining + informative. Your insight and comments were thought provoking. Be you. We’ll watch.
Will do. Thanks for the support!
This is a good Video, it gives the uninitiated an idea into what it takes to repair damage 👍
I love your video! I just wish you could smile from time to time ... you got the face for it! Keep them coming!
Thanks. I'm not the smiling type. Don't get me wrong, I am a very happy person. I just don't smile much. Thanks for watching. I will get back to the tutorials soon.
Great video I liked the explanation on how you straighten the frame. My Jeep Wrangler needs a whole new frame. Not so sure I want to tackle the job. Keep up the good work
I have done of few Jeep frames. They are not too bad...... if you have a lift. Without it the chance for error and damage increases greatly. I do have some old time lapses of frame swaps that might give you a better idea what you are in for. They do not have narration but there is one with sub titles. I will make a narrated one like this when I have a job that requires it (I have one in my driveway that might). Thanks for watching.
... you did a great job.. both the still photos, narrations, and the live action footage, this was excellent. Thank you for sharing your knowledge. I came across your video, I was searching for Chevy Uplander/Venture front frame repair videos. I own a Buick Rendezvous, which has the same front end, because it's build on the same U-Platform chassis.
I was looking for a way to modify the front rails or subframe, as a Concept Only, to be able to pull the engine, so that it could be slid out a bit, like 8 inches. So repairs can be performed on the side of the engine which is nearest the Firewall. It's just a thought process at the moment, both myself and a buddy of mine think about this, when we talk about working on our cars. We both have front wheel drive vehicles, and they shouldn't be such a PITA to work on, but they are.
Thanks again, Alfredo Keep making the videos.. ✌
Mind blown....never realised there were so many ways to bend stuff.... fantastically informative.. Neil uk :)
Oh, we are just beginning. There are lots more ways to move stuff around. I'll explain them all eventually. Thanks for watching!
Thanks for posting; I really dig your videos.
Thanks, I'll keep making them if you keep watching them!
You are doing so excellent job. The chassis was like new .
Thank you very much. very informative .I never understood how that was done. I do now. Good narrative bud understood you easily. Please keep them coming.
Thank you for watching. I'm glad I was easy to follow. I have been doing this for a long time so I was afraid I might leave out stuff that is habit for me but needs to be clarified to follow along. More are on the way.
That was an awesome video! Thanks for taking the time to make it. I really hope to see more in the future!
Thanks, no problem. If you guys keep watching them, I'll keep making them!
That was good! Doing any type of tutorial video on collision repair is tricky just because no two jobs are the same. You showd some handy tips to know and that's the stuff that saves you down the road!! I think so anyway.
You are correct, no two accidents are exactly the same even on the same vehicles hit the same way. People think fixing a Honda Civic is the same and and F250. lol I'm just showing the basics that apply to most vehicles to give people some direction. Thanks for watching.
Keep them coming,Love learning this type of repairs...............................Fort Worth,Tx
Great video on frame straightening, good to know you have to brace area where rail is kinked when pulling back. Very interesting and informative
Thanks, just trying to save viewers from learning the hard way. lol Thanks for watching.
Thanks for the great vid. I think both methods (live video and stills) is really helpful keep up the great content.
Thank you for watching. I wasn't sure which people would like better but it seems people like both. Maybe when I get a little better at the video editing I can use illustrations on the live videos. Baby steps. lol
Wow,1st video?
No wonder you’re looking at 200k subs already.
I know a good teacher when I see one.Thank you!
Great info, I had a question about if you are a novice but you answered it in the end, thank you 👍👍
Thanks, glad it was helpful! Thanks for watching.
I like all of your videos! Keep up the great work
Great vid for a first try. Succinct and full of graphical aids (the red arrow) to explain. The hammering of pressure stresses was an eye opener. Getting new parts is the way to go, for safety reasons. Save a few dollars on reshaped bent parts will cost more the next time the vehicle takes a hit.
I like the narration and appreciate that you explained why you need to hammer it. I would like to see you do a pull on a 2018 Ford Fiesta that has front end damage on the passenger side. I would love to hear what other tools you could use if you don't have a puller.
First video I've seen and I appreciate it thank you for posting.
Yet another production done right on the sweet spot. Good on ya mate!
Thanks, let's see if I can keep this streak going!
I liked your video with your narrative. Do more, I always liked your stories, even with note crew coming in late
I'll do more tutorials after 100k subs. Thanks for the support.
I’m a brake operator and whenever we bend something you’ve always gotta over bend it a real little bit because steel has memory and we call it spring back, exactly what you just said, cheers.
Over bending is another method they used to use. They no longer recommend it for cars because one person's idea of enough is not the same as another. It does work just as well though. Thanks for watching.
Great video. Keep them coming. Both action and still are helpful . Thanks
Thanks for the feedback and thanks for watching.
I like these live tutorials.
You are in luck, more are on the way. Thanks for watching.
Sir, this video was and still is top notch.
amazing video , really helpful. will be looking forward for more !!
Thank you!
Awesome video, always learn a lot from your vids. Thanks
Thank you, glad to hear that!
Great info. Thank you for being full honest about that the industry is change to.
No problem, I'm here to educate and the truth is education, good or bad. I'm not here to make money, just share years of experience for the people that support me. Thanks for watching!
legit... a good guy. awesome work. great video.
Great instructional video. Enjoy another one of your video.
Thank you for the videos, new subscriber. You are very talented and love the can do attitude. Your making me want to work on something
Thanks for watching and glad to have you here! I'm glad I inspire you. My industry needs people that are not afraid to work!
I enjoy learning. You do a great job.
I think I kind of enjoy teaching. I never thought I would. Thanks for watching.
I really appreciate you showing the first try to bend & pointing out the spots where the weak crumpled areas were and the decision to remove and replace and the reasons why. I have a 2014 chevy captiva with drivers side front end damage and am seriously considering doing it myself. I've already removed the bumper and drivers side fender. I'm thirsty for more videos. When you produce the next video can you include removal of the structural member you are going to replace? Excellent video and information!
i really liked your video and easy explanation
New to the channel. This was awesome! Thanks again.
Great video, keep'em coming!
Thank you, will do!
Great job on the video. You're doing a great job explaining.
Thanks for the feedback! Thanks for watching!
Appreciate your time to make this video.
No problem! I appreciate you watching them!
Cheers mate, very interesting I’ve always wondered what they hammer the box section when pulling it!
Now you know. I have had panels that the pulling equipment was maxed out trying to pull it and a few hits with a hammer and it walked right out. Thanks for watching!
Really informative video. Thank you for taking us behind the curtain to see how this kind of repair is done. Keep the videos coming!
Thank you for watching. Glad you enjoy them, I have plenty more to come.
Live video and still drawing were great and very informational
I think I may use both when I can for a variety. Thanks for watching!
Love it just what we like to see, great detail .. discovery channel will knocking on your door soon
Thanks, wouldn't that be something. I wouldn't have to edit the videos and manage the filming. I could get much more content out much faster. Thanks for your support!
Loved the training videos all of them
Great video you would make a great teacher! Keep up the videos
Thanks, I never thought about it until now but we will give it a shot. Thanks for watching.
Thank you, very informative! Keep 'em coming and I appreciate you posting these! :-)
No problem, will do! Thanks for watching!
You just gained a subscriber!! Thanks for good info
You explain what you are doing well either way. Thanks
Thanks and thanks for watching!
This was awesome! Keep up the great work!
Thanks, will do!
Great video, good narration and explanations
Thank you!
Thanks for sharing. Very helpful
Thanks for watching!
Wanting to learn framework this is a great video
Hope you are well looking forward to the new videos. Have a MERRY Christmas to you and your family as well
I'll keep then coming! Merry Christmas to you and yours as well!
I'm a diy and your talking about how you pull etc is very helpful
Thanks, good luck on the projects!
Thank you bro it was really helpful i understand everything just right thank you
Awesome thanks for the video I like the live video and commentary
No problem, thanks for watching.
I love every video you make
Thank you, I'll keep making them.
Cool video and explanation. Thanks
nice video, really informative, clear and to the point. thank you.
Thanks, the next part of this repair will be out tomorrow.
yes please show more, I am new body repair guy and learning so much everyday so please show more
Just a badass man enjoy your videos!
Thanks!
thank god, refreshing to see someone on youtube that actually knows what the hell they are doing, as a bodyman myself, some of the stuff i see actually scares the hell out of me.
Thanks, I agree. It is sad that some of the more popular channels are doing the scary work and people don't know the difference. Thanks for the support!