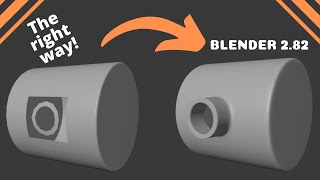
3 methods to extrude faces along their face normals in Blender.

Вставка
- Опубліковано 1 жов 2024
- Here are three methods I have found to extrude faces along their face normals in Blender. It doesn't have to specifically be "face loops" as I state in the instruction either. These techniques will of course work with individual faces or multiple faces of any shape.
Blender 2.73a
brysonjack.com


That was short and to the point. Thank you!
Very helpful. Sometimes I forget the commands to do certain things in blender because there are so many. This helped refresh my memory. Great video!!
Thank you, that was so good. Just what I was looking for.
When I try the 2nd step, it only extrudes in one direction.
So in Blender a proper extrude tool is inset... FACEPALM!
thanks bro... now i feel 3x as stupid for not figuring it out on my own... wait.. be positive... im gladdd i knowww nowwww......:-)
I used to be a Blender guru 10 years ago, but only just started using it again recently for 3d printing models. It's such a pain in the ass for me. Idk if it's because I have the latest version, but it seems like none of the advice I find online works for me. Blender, with everything it has added and it's infinite hidden hotkeys, is just too much. It's modeling, lighting, rigging, animating, and rendering....but I ONLY want modeling functionality. I could do with a simpler modelling program, if anyone has any recommendations.
grate video... but Im still dreaming with a "keep face together" and Normals Trasformation tool (T) from Maya!!
It's a real shame you have stopped making videos.
1:45 was exactly what I was looking for, thank you. Like :)
Thank you very much, that solved my problem)
Great video, thanks! ^_^
very helpful, Thanks
Thanks for taking the time to put this tutorial together. Very useful!
Even but informatibe
Hi Bryson. I'm a beginner using 2.80. How can I extrude edges and maintain an equal distance/spacing with odd shape? As an example, I have edges connected in the shape of a dog bone currently without any faces. I need to scale outward or inward building faces so I end up with a larger dog bone without face or edge overlap and equal spacing between each set of edges. If the extrude tool offered an offset setting, I think that would be my golden ticket.
In the newer versions of blender (2.8+) you can press Alt + E and then pick Extrude along face normals in the menu.
I'm going to upvote you simply because you spoke and explained. So may blender videos just has some guy clicking so fast you can't tell what he did.
Elegantly sufficient. Will watch again and add these 3 tips to my notes. Thank you, Bryson!
Still good stuff as today, F6 wont work anymore but "i" & Depth setting did the trick ty
Had this kind of problem and this video really solve it. Thank you very much and have a nice day!
Thank you. You saved me almost an hour worth of work today. Much love
THANKS A LOT. THIS ONE SAVED ME FROM A BIG BULLET. I WAS STRUGGLING WITH EXTRUDE COMMAND WHICH WAS HELL BENT ON NOT WORKING.
Your videos are amongst the most useful on UA-cam, they're really specific and that's what make them precious, because that's pretty rare. Thank you :)
Super helpful, thank you so much!
Realy your name is Brice and Jack?!
Knew about 3rd one.
Just what I needed.
Thanks for your excellent tutorial!
The escape canceling thing, Yuk. I thought I was going crazy.
Great video, it was everything I needed.
Great video.
Super Noob here. Question. Blender 2.77a. My objects won't extrude along Normals. Choosing "Extrude Region" transforms my selection exactly as "Extrude Individual". It's like Normals is disabled or something. I figured out how to display the Normals on the object so I can at the very least see them. Do you know of some toggle or something that enables snapping/constraining to normals? Thanks
Strange. I think I would have to see a recording of what you are doing or some screenshots in order to really help. You can change the Transformation Orientation to Normal in the 3D View Editor Header, but you shouldn't have to do that I don't believe. Give that a shot and if that doesn't help then I suggest posting the question on Blender Stack Exchange and you should get the help that you need fairly quickly. Sorry I couldn't be of more help.
Thanks man will do
Im having the same issue, did you solve it. When I do a Region extrude with my block the extrude doesnt follow the normals.
This helped immensely. Thanks so much.
Can you tell me what I'm doing wrong? Starting with an already modeled "bare tire" (no treads in it), I am trying to "cut treads" into it. The tire model I'm starting with has a cross section of a Honda goldwing front tire which has been revolved 360 degrees. To cut the treads into the tire, all cuts of tread have to be normal to the surface at every point along the tire. The steps I'm using are: 1) Using the knife tool, create the outline of a portion of a tread to be cut into the tire. 2) Delete the existing mesh edges that are inside the outline of the tread cut, 3) Select all the edges of the tread cutout shape, 4) "f" for face, 5) use your method to extrude faces along their normals. The resulting tread cut is always using a single average normal instead of the normals all along the cut edges. When I follow your "inset method" on the existing mesh edges of my tire model, it works just fine. I'm stumped.
+Ralph Francis I would love to help you, but I think it would really help me if you could use Fast Stone Screen Capture (unless you already have some great screen recording software) and record the problem that you are having so I could see what you are talking about. A blend file would be helpful as well. You could share it through Dropbox, OneDrive or any number of free sharing services and send me the links by contacting me through the contact page of my site brysonjack.com. It sounds like it might even make a great tutorial that I could do in response.
Alternatively, it sounds like something you could probably research/ask about on Blender.StackExchange.com. That is quite a great resource of knowledgeable blender users that usually respond with lots of different methods that are very well explained. Good Luck!
+Bryson Jack Thanks for responding so quickly. I did manage to figure out some steps and settings with which I get the result I was looking for; these steps and settings are: 1) for the "vertex, edge, or face" selector buttons, select "edge". 2) Use the knife tool to create the outline of the cutout shape. 3) Delete all existing edges that are inside the cutout shape, 4) Select the outline of the cut, 5) type " f " (face command), 6) type " i " (inset command), 7) Drag the cursor to increase the size of the bottom of the cut to its original size, 8) Left-click to stop the action, 9) Press F6 to call up a settings box for the inset. Make the following settings: * Boundary=checked, * Offset Even=checked, * Outset=checked, * Interpolate=checked, * all other settings=not checked. 10) apply the "edge split" modifier to the tire object, to get the shaded appearance to look right. Note that, even though this method works, it really isn't practical. I've seen tutorial videos where a mostly flat surface with the tread shapes cut into it (the cutouts have to be arrayed, etc) is bent in two directions to create the tire model. But I haven't yet seen any good Blender videos showing how to do this for a motorcycle tire. Thanks for your video, it got me started in the right direction.
thanks!
So useful, thank you.
ty very much!
:( Why didn’t you show us where to set depth on the tool shelf?
Which method are you referring to? For inset I showed the fixed operator panel and then the alternative floating operator panel that is enabled with F6. Both have identical settings and I showed how to change the depth so I am confused about where I should have elaborated.
Hi Bryson, thanks for this I was stumped. Question: do you know how to do this with inset. By that I mean, if you select two faces, but you want them to individually inset, do you know how to do that? When I select two faces (they need to be side by side) they are treated as one inset, it's driving me crazy :) If I select two that aren't next to each other it's fine. It's just with adjacent faces it seems to treat this as one face when I try to inset... hope this makes sense :) Cheers
+dougieladd When you have selected two adjacent faces and you press I to make the inset, look down at the bottom of the 3D Viewport and you will see some additional menu options. Individual is the setting that I believe you want and you enable that by pressing I again. I hope that helps.
Awesome, thanks for that, been trying to figure that out for a while. Thanks man!
+dougieladd No problem. I am so thrilled that I could help you out!
Thank you!!
Morgan Freeman is that you ?