CONTINUOUS CARBON FIBER vs PLA vs PETG

Вставка
- Опубліковано 16 лют 2023
- Is @markforgedworth it? Let's get an answer to that question! I designed and printed a bracket for my @VarlaScooter Eagle scooter!
#3dprinting #practicalprinting #additivemanufacturing
Varla Eagle Scooter ▶ 3d.pn/varla
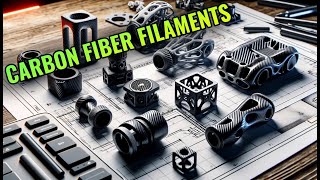
Markforged's 3D printers use a unique process called continuous fiber printing, which involves embedding continuous strands of composite materials, such as carbon fiber, Kevlar, and fiberglass, into a thermoplastic base material. This creates parts that are incredibly strong, durable, and lightweight.
Markforged also offers a cloud-based software platform, called Eiger, which allows users to design, optimize, and manage the production of 3D-printed parts. The platform includes a range of features, such as automatic part orientation, strength analysis, and slicing, which help to streamline the design and printing process and ensure high-quality, functional parts are produced every time.
SUPPORT! 😍
ETSY! ▶ www.etsy.com/shop/3DPrintingNerd
MERCH! ▶ the3dprintingnerd.com/merch
Patreon ▶ 3d.pn/patreon
FloatPlane ▶ www.floatplane.com/channel/3d...
BuyMeACoffee ▶ buymeacoff.ee/3dprintingnerd
KoFi ▶ www.ko-fi.com/joeltelling
GEAR! 🎥🎦📷
Glowforge ▶ 3d.pn/glowforge (aff)
Prusa ▶ 3d.pn/prusa (aff)
Puget Systems ▶ 3d.pn/pugetsystems
Slice Engineering ▶ 3d.pn/slice (aff)
MATERIALS 🦇
Printed Solid ▶ 3d.pn/printedsolid
Amazon ▶ geni.us/shopatamazon (aff)
Matterhackers ▶ 3d.pn/matterhackers (aff)
Proto Pasta ▶ 3d.pn/protopasta (aff)
Nikko Industries 3D Printable Models ▶ bit.ly/3lK0WHi
THE TEAM! 🤟
Host: Joel Telling ▶ / joeltelling
Executive Producer: David Tobin ▶ / david_tobin
The Website ▶ the3dprintingnerd.com
--------------------------------
Find Me Socially!
--------------------------------
Twitch: / joeltelling
Twitter: / joeltelling
Twitter 3DPN: / 3dprintingnerd
Facebook: / 3dprintingnerd
Instagram: / joeltelling
Instagram 3DPN: / 3dprintingnerd
Discord: / discord
--------------------------------
Want to send me something?
--------------------------------
3D Printing Nerd
PO Box 55532
Shoreline, WA 98155
USA
Music in Episodes Comes From:
Epidemic Sound - 3d.pn/epidemicsound
Future Vega - futurevega.sourceaudio.com
Audio Micro - www.audiomicro.com/royalty-fre...
FTC Disclaimer: A percentage of sales is made through Affiliate links - Наука та технологія


![ОРБАН приехал к ПУТИНУ и "отчитался" о поездке в Киев 😁 [Пародия]](http://i.ytimg.com/vi/_0ukDovOWq8/mqdefault.jpg)

just print carbon fiber on the bamboo labs machine???
Bambu Carbon Fiber? #3dprinting
@@3DPrintingNerd 🤔 tbh especially with the markforged being so expensive per part, a good filament to test would be PA-CF instead of PETG-CF. Polymaker's PA6-CF for example has some pretty wild claims for annealed parts and it's only $50~ for 0.5kg, so it would be a bit closer at least to prototyping with the continuous CF for most people who don't have a business budget. (Should be printable on the X1 Carbon too I believe)
It's not capable of printing continuous carbon fiber. Most machines aren't.
Wouldn't it be easier to just CAD in some metal stiffeners and pause the print half way through to insert and then continue the print?
@@kasiya2660 Parts made with chopped fiber are no near close to those markforged parts with continuous fiber. It is really crazy to see and feal how stiff those parts are and how strong they can be. But yes, you are right that a PA6-CF or also a PA12-CF are very good engineering grade materials for a reasonable pricepoint. Besides this there are also PA11-CF from Prusa and PAHT-CF from BASF on the market that also perform very good and are not that expensive as those markforged parts.
Wouldn't some rubber spacers help the tension together when assembling it and than you wouldn't get the cracking when tightening it?
A better design would help it...and I hate tell Joel that deflection of that degree has nothing to do with the Jelly in the footage. He heard cracking because...of a bad bracket design. ANY material shy of something made of steel is going to bend and crack under that sort of load. Even the Carbon Fiber warped up pretty good at the mount point. GIGO though.
@@Theexplorographer Totally agree, when you print it first and then fit it around the clamp, you'd incorporate print in place spacers to restrict the clamping deflection. The inverted T shape of the part isn't the stiffest topology solution, nor is the camera fixing system, but it does demonstrate the "stiffness" of the different materials and how the Onyx system is inherently stiffer. :)
Anyone else want Jole to print and send the appropriate test samples to CNC kitchen for some testing?
I'm sure the cracking could easily be solved with more a correct/tight design, .. or use some nuts as spacer between the two halves
That’s a great idea!
yeah right. why have a gap?
@@dgodrummer8110 I think that there should be a tiny gap at least on one side so that you can actually tighten it. But the gap right now is huge! :D Maybe you could also use a thin rubber band so that you do not not have to tighten it that much? But then it could vibrate again :/
A rubber washer on one side to give you some squish but still have it tight
Spacerssssss! I❤😂
At the job I retired from, we had a Markforged Onyx Pro. This machine could print nylon with chopped carbon fiber and also embed continuous fiberglass fiber in the layers of a part. The machine printed parts that were much stronger than anything out of any commercially available printers, and did it with excellent precision. I can say for us, the Markforged Onyx Pro was worth it.
Using these vanilla materials for such a comparison is a little bit silly to me. No entity that's deciding whether to invest in a Markforged is doing so by comparing PLA/PETG parts to parts filled with continuous strand composites. I love and appreciate you, Joel, but please include some CF polycarbonate/ABS/Nylon when making this type of comparison. Otherwise it just feels a bit like an ad. Cheers.
Haven’t figured out that almost all his videos are ads? If not, ALL his videos are… at least recently in the past few years for sure they’re all ads…and there’s nothing wrong with that, but he should be more transparent about it… this video is a good example, the comparisons are not along the same lines and far from it…
I use a mark two at work, and man it's a beautiful machine and the onyx is amazing on its own even without the fiber fill (and the supports are the best I've ever seen). The problem is just that it's slow, extremely extremely expensive, and the software isn't great. It does work great for what we've been using it for (mainly drone parts), but most parts simply don't need it I've found.
Loved using the Markforged at my old job. Great machine and very easy to use.
I strongly agree with your comments on local (PLA) prototyping and commercial production of strong final items.
Im not sure the machine cost matters for a company to be honest. we did some calculations at the company where I work, and the problem with some vendors are the material vendor lock-in. Like you show here. The markforge part ended up around 50$, in other plastics you can print those parts for a fraction of the cost, and if you outsource the rest of the parts to be made in aluminum or made with carbonfiber plates with different weaving it’s a difficult decision. We calculated with 20% depreciation pr year on the machine so that cost is negligible compared to churning out parts or prototyping for between 100-250$ a day in materials. Anyway, no doubt the Markforge is a great product, just need to find the usecase.
👍 Yes to a tutorial video! This video was great too. Looking forward to your next one!
One thing to be aware of is PLA will creep so the bolts will loosen over time even if there is no cracking. Apart from that and the temperature stability it is a far more useful material than most people give it credit for. And definitely great for design prototyping since it is much easier to get accurate prints.
Definitely do not regret buying my Onyx One, recently passed 1000 hours after a year of owning it and it still prints perfectly with no failures. Will share what I'm working on in an upcoming video but I've printed things like headlight/taillight housings, brackets, structural guides (bonded to CFRP)... Yeah.
Nice real world comparison of materials! One thing to keep in mind is the material cost in Eiger is the cost of filament/fiber but a printing service will want to 2x/3x/4x this cost to make some money. (So this would be a $100-200 bracket ordered from such a service.) Another great material you can get cheap and fast from a service these days is laser-cut aluminum sheet. For a project like this, you can just print your own custom PETG or nylon clamp and get a stiff piece of aluminum in the mail with the same turnaround time as a Markforged provider.
Another way to get your own markforged parts for cheap is to order a bunch of 2mm hex wrenches of various lengths and design your petg parts to use them as structural members.
This is a nice little video, I love these simple projects!
Would love to see your design video…. I always appreciate your style when sharing your knowledge…. Thank you so much for sharing Joel… happy Friday..
Test all the things. Welp, you got yourself another subscriber here, my man. Thank you for helping teach the people. I have too many hobbies to list but I can use the summation of your knowledge and the printer I just got to help each of said hobbies.
I appreciate the content, and I look forward to watching more of it. 🤙🏽
You could add an isolation type washer between the two pieces of the bracket and similar washers on the bolt and washer.
I hope we'll soon see an open source continuous fiber extruder that we can put on any printer. That would be a game changer for home lab engineering!
Unfortunately it seems a difficult thing to get right. We don’t even have a decent and reliable open source filament changer yet like Prusa’s MMU or the AMS. I have read about the ERCF for vorons but I haven’t heard of it working that well either.
it has a nice smooth finish! thanks 4 the vid!
Friendly reminder that as makers, we arent just limited to 3d printing. Its my favorite one BUT if you need a part that 3d printing isnt good enough, theres other ways toi make it. Welding, CNC, etc. CNC definately starts to get up there in cost for anything half decent that can do metal but theres still options cheaper than a markforged. Or when in doubt, just over engineer the part so that PLA gets the job done.
This is awesome man!
As far as the cracking when tightening goes, I would try some foam rubber in the rounded part so that tightening the screws compresses the foam for grip so the plastic doesn't need to flex to hold tight.
Matter of fact, bicycle helmets are only tested to protect against impact at approximately 14 miles an hour in the US.
Great video, and I'll always upvote a Brak/Space Ghost reference
The part needs redesigning so that there is less of a gap between the front and back parts, possibly with a rubber washer between, on the bolts. What was the name of the scooter again?
Yeah reducing the gap is definitely going to be a good thing!
Great video Joel, super informative and educational.
Super glad you liked it!
For the cracking I bet some wider flat washers to distribute the load over more plastic would really help
Have you considered increasing the size of the hole around the center post so that when you tighten to two pieces together, they're actually touching? That could help with the stress cracking you're hearing during install.
I thought about that as well, but that might impact the clamping strength. I'd be curious to see a design shoot out with this similar to when he did his shelf brackets several years ago.
Always offer a tutorial if you can. Someone will find it useful. This reminds me of printing camera mount of the printer itself. Some materials crack, others become loose, more still transfer the vibration too much. Fun video.
5 Minutes outside with PLA bracket where I live, and the camera would be facing the front wheel :)
If you're going to go with a printing service I wonder how this would compare to sintered aluminum. Seems like the cost would be comparable if maybe a bit less from the aluminum from what I remember of pricing out aluminum parts.
Since you want to learn more about CAD, here is a suggestion. Next time you want to use metal nuts for assembling parts create a hex cavity in the model so you don't need a wrench to tighten them. Better yet create the cavity embedded, remove the support material in the slicer software, create a pause statement at the top layer of the cavity, drop in the nuts and print overtop of them create for a super clean part with internal metal threads, BOOM !! , You're welcome, Peace
That gap around the tube is the problem. Way too large for FDM materials not to crack. 3mm might be sufficient for effective clamping. 👍
That makes a lot of sense!
I love brak so much!
Outside of the continuous fiber is it better as a printer in any way when compared to something like the X1C?
At first glance it looks like a regular old printer and your paying several thousand dollars extra just for the addition of a fiber cutter built-in.
The X1 does not do fiber at this level. It actually creates a weaker item with CF PLA than regular PLA
good ol' seattle roads. always use washers under screws so spread the load when screwing it down
Is it worth going back to the golf club printing with Carbon Fibre filament and Resin SLA ABS?
How did you add Brak to the braket? Did you just use two different pla colors ?
That’s right :)
Really cool to see how PLA as a good use case here, but it would have been interesting to see the CF PETG printed in the same design as the other 3. I feel the flex came from that design flaw rather than the material.
It'd be a better apples to apples comparison if all the parameters besides the material were the same as much as possible. The CF PETG model is different than the other ones.
Yea that wasn't fair at all, the support was twice as tall on the other parts. He shouldn't even have used that part.
Something like this would benefit from designing bushings into the model that you could print at a higher wall count, that way they would be replaceable
Dunno if you already considered this, but if it were me, (1) I'd put the bolts closer to the shaft hole, and (2) I'd relieve a bit of the shaft hole near the middle so that it's holding mostly near the top and bottom (in case your scooter shaft isn't perfect). When strength matters I sometimes move the bolts so they're almost touching the shaft they're clamping on, allowing much longer "shoulders" in the print for the bolts to act against. Then again, it's just plastic ;-)
I'd like to see some stress tests. I want to print crossbow risers, so they need to be as strong as possible.
Feels like this is more about vibration dampening properties than stiffness, an infinite stiff part would transfer all vibrations resulting in a bad recording.
a part that has resonancies close to the vibrations encountered would amplifiy them resulting in an even worse recording.
"Worth it" is such an interesting statement. To the right people for the right project OF COURSE its worth it! How else you gonna do fiber reinforced at this price point? ;)
What about adding some Goop to the printed part to increase strength? I have found success with this method in the past.
Painting the Goop onto the outside of the print to increase layer adhesion.
Dude, I watched Space Ghost Coast to Coast so much I completely forgot everything I saw from the original Space Ghost series.
Nice to have a longer video again, it's been a bit.
Every Friday at least!
Could you do a beginners guide to 3d modeling...I have only been 3d printing for about 3 weeks and would love to learn modeling.
After seeing what the Markforged Material is able to (4 Brackets holding a whole harvester) I expected nothing else. 😀 The only thing I miss is a comparison to PC. PC wont break that easy, while screwing it together but for the stiffness I cant say if its good enough🤔
Yeah buddy!!!
So what 360 camera did you use
An Insta360 camera! Not sure the model, it’s a few years old.
To stop the cracking, design a spacer such that the flanges can only deflect slighty past contact with the tube. Vibration here is not a simple game of stiffness. You might find just as good quality with a PETG frame and some TPU inserts. Now, remake the scooter frame in 3DP parts and you will definitely see some clear benefit to Markforged...
Shouldn't you have seen "jitter in the trees" with the stiffest brackets? I'm sure the whole scooter bounces on those rough trails. Did the video stabilization settings change in any of these runs?
Can u also do a review on the Ultimaker 3d printer, using and comparing the same materials used. Thanks
Points for the SG: C2C reference.
but do you know how to design the screw holes for 3d prints so that you dont crack the part?
I do NOW. Heh
@@3DPrintingNerd which do you prefer, chamfers or fillets?
How did you get that Brak first layer at 0:49?!?
In Fusion 360, imported a BRAK SVG I created, then cut it out and re-extruded as a separate body, then colored in Bambu Studio!
What about just plain old abs what is it like ?
The answer is absolutly not UNLESS your extremely specific use case requires continuous strand carbon fibre not to be mistaken with chopped fibers or cf matetials. Or you need plug and play 3d printing. Markforged has simplified 3d printing the most it can be. Still not EASY
did you printed with onyx filament ? which is just a nylon with strands of cf , just like any other cf filament ? if so you can print this filament in any other printer . only if you print with continuous fiber filament then there's really a difference .
Yes, Onyx with the continuous carbon fiber strand.
Did you consider Armadillo TPE by Ninjatek?
Nice, but a stabilizer it 's the solution to this kind of situations i think
Joel, you've been a great resource for real world testing of printed parts! thanks and high five! ✋️
can I just pring the Onyx on my X1 Carbon? I have a Markforged Mark Two at work and use Onyx all the time. we never use the fiber inlay, just the fialment. I have the X1 Carbon at home and could possibly supliment my company when we are slammed. great video ! thanks for your insight. hope to hear back.
This video is the most stable Brak has EVER been.
hahaha. that's a good point.
The cracking during tightening of the part is very obviously a design error. I mean you are literally using a metal screw to bent the part to fit them together. So reducing the airgap, you need some airgap to have sufficient clamping force so it doesn't slid around, would go a long way to make that go away.
I am blown away with the fact we have blue cf petg? Where can I find this??
Atomic filaments!
Hi Joel, again another great video! I'd love to help you design a mount that might increase your confidence level. If your design was done in Fusion, feel free to hit me up with the shared link via Fusion. Also, the diameter of the post that it's mounted on with with 2 decimal point accuracy :)
It wuld have been easier if you had just posted the enginerring strength results?
But, if you print 2 parts on the bed of the marked forge, isn't it not continuous strand of carbon as it'll have to cut it between parts! Correct me if I'm wrong!
It’s still a continuous strand per part. The continuous is per layer, and it varies the orientation of the fiber per layer, make it overlap in ways that help increase its ability to add strength.
Hi Joel - this bracket could be in aluminum for $55. Sure - it'd be good for a prototype, but we can easily prototype in PLA, for a LOT LOT LOT less. As makers, we can't afford to pay five grand for a printer that has limited space and very expensive part, especially when you've given the price for one part not for all of the iterations that it would take to get to that part.
I miss your maker-person / consumer-based / real person content. I really do.
That’s what I said in this video - prototyping in PLA for a lot less. Plus, I did make the point of not needing to buy the printer as well. I’m fact, the whole back end is talking about prototyping in PLA / a less expensive material and then farming out the part for the higher cost material.
I don't understand the problem here. No one's suggesting hobby makers buy Mark Forged, the video even talks about hiring it done, you don't need to buy the machine to buy a print. I also don't think it makes sense to want to exclude machines that hobbyists can't afford because it's confining to not be exposed to things you can't afford. For example, if your employer has a need for something Markforged can meet, now you somewhat intelligently talk about it.
Thanks for sharing your stiffy story. The cost and limited print volume would hold me back from that printer. I am sure some applications have room for this machine, otherwise it would not exist for this long.
Yep ... wheres the control of the tightening force used for each bracket to ensure its only the materials stiffness being tetested
Have your heard of mycelium plastic? You can grow it using a mold or print the skeleton.
What is this sorcery you speak of?
@@davidtobin blast studio, lovely trash. They made a bench in London, among other things.
Try pc cf please. It’s pretty stiff. But idk about the strength.
50% 3D Honeycombed infill would of been my choice of infill on this bracket.
I can't wait to build my submarine with this. Do they sell expired materials i can use?
The rule says that, if the page says "Request a quote", it means that you can't afford it.
TPU spacers
What about PC? I used it in my car for speaker mounts and they are durable and withstand the Vegas Sun
Oh, PC is wonderful, but it's not STIFF. You can create geometry that helps stiffen it up, but with this geometry, the stiffness wouldn't be there.
@@3DPrintingNerd carbon fiber PC exists
Hey Joel, I just found out that Tronxy has released their VEHO-800 Large Direct Drive 3D Printer, with a bed size of 800x800x800mm. Have you seen it yet, and are you going to review it??
Holy cow what? No this is the first I’ve heard of it. Will look it up!
@@3DPrintingNerd I was looking at that printer again on Tronxy's web page. They offer it in sizes up to 1000x1000x1600mm.
Shouln't you always use washers when tightening screws over a plastic part, to begin with?
Wish bambu ot some open source guys would figure out continuous fiber reinforcement to make it cheaper to get the benefits. It’s amazing just a little costly for the hobbiest
Nice title :D
Is it just me or does the Markforge one look a lot thicker than all the other ones? I don't feel like this is a apples to apples test and I feel like bias was given to the Markforge.
It was the same model printed. So, it’s not thicker.
I feel you need longer screw's and a worse fit around the stem.
to be fair, you should be printing CF-Nylon on another printer to compare.
Page Thor for another round of CBAM parts ;)
Joel deflected more than that Markforged bracket did while riding that scooter.
Is the Markdorged worth it? Yes?* Did the Brak reference steal the spotlight? Absolutely!!!
Markforged definitely has a use in industrial small volume manufacturing but this bracket is not the use case I would have in mind...
You should make a separate Video just talking about the design of the bracket and take some input from the comments. Let us help improve on it
Stiffness is in the geometrie as much as in I the material and print parameters.
The mount needs to be improved. Really no surprise this is cracking.
Don't let that opportunity go to waste and please do something on geometrie. There are already too many bad designed parts out there. This is in no way criticism of your skills. We do encounter many bad designed parts in consumer products as well. Just had to repair a Vileda cloth dryer. The hinges are the worse parts ever.
Back to the Markforged.
I imagine it's primary use is parts that are geometrie restrained by design such as functional foils or small parts that lack the design freedom you have with that bracket and other stuff.
I would also be interested in the consequences of fatigue over time. Maybe you could do another video on applications this is used in.
is carbon fiber fumes toxic tho?
That and the microparticulates while printing. Once printed, it's okay unless sanded, use a dust mask...
@@retromodernart4426 is there anything that doesn't requires a mask? pla?
@@0cards0 When sanding the parts, a mask should always be used, and also a HEPA vacuum cleaner (or other HEPA dust extractor) sucking in the dust to prevent microparticles (aka "dust") floating around breathing it.
All the filaments produce chemical gases (VOCs, etc.) when heated and shouldn't be breathed, some are worse than others (ABS, PC, are worse than PLA and ASA, for example, according to published data).
Staying out of the room when printing and a reasonable HEPA with carbon filter room air cleaner (like a Bionaire 360 or similar) running while machine is running and for some time later helps a lot.
@@retromodernart4426 ok thanks.
As an engineer I think the test isn't showing what we want to see or practically see.
The road is rough. The trail is rough. Regardless of stiffness, the vibration showing the road will exist unless the camera is stabilized or you are post processing the video with something like warp stabilizer in premier.
Facing yourself is a better test as you and the camera both are coupled to the scooter.
Either way, the cheaper materials vibration modes can be changed by changing the design. More vertical height of on the beam, longer or shorter beam etc. Freshmen mechanical engineering 101
I look at this as you design the part based on the material you plan to use. Aka a steel and aluminum part need to be designed differently based on their material properties. Same applies here, using the same design of part for all materials is not a fair comparison imo.
Now it would've been more entertaining to see the bambu X1C fail and destroy itself attempting to print continuous carbon fiber filament lol
Or...print with PA-CF
im gonna grab one as soon as my channel hit 650k subs...see in a few years or decades lol
Who made this alleged CF PETG? Carbon fiber is so black that you can't mix it into a plastic in meaningful amounts and still color it bright blue. The better carbon fiber infill filaments are solid black because they have 15 to 30 percent carbon fiber content. Most colorants are added to raw plastic at 1% to 3% rates. I don't think any amount of colorant is going to make a 15%+ CF plastic bright blue.
That’s from Atomic Filamenr