Fire Table Pit DIY (How to build an Outdoor Gas Fire Table)

Вставка
- Опубліковано 21 лип 2024
- Building your own Fire Table Pit DIY style with a concrete fire table top can be an inexpensive and rewarding project that can greatly improve your outdoor deck/patio experience. This video will show you How to Build an Outdoor Gas Fire Table that uses propane gas.
By following the 6 steps below, you will be able to build you own DIY Fire Table Pit in no-time!
Step 1: Build the Concrete Fire Table Form.
Step 2: Apply Concrete to the Fire Table Form and let it cure.
Step 3: Construct a base for your Fire Pit Table Top.
Step 4: Remove the concrete from the Form and seal the concrete fire table top.
Step 5: Install the propane tank, fire pan insert, valve key, etc. and then connect hoses.
Step 6: Place fire glass in the fire pan and the light your DIY Concrete Fire Pit Table!
Each of these 6 DIY Fire Table Pit steps are outlined in detail within this video.
Additionally, check out my Project Blog at ATImprovements.com for more detailed information on this project (e.g. the concrete fire table form dimensions, etc.): atimprovements.com/diy-fire-p...
I used the the following Easyfirepits.com products for my build:
- LP-In-Table "ITCK+ Kit" (easyfirepits.com/gas-kits)
- PAN28x10 which is 28"x10"
Check out easyfirepits.com for more information. I worked with Rick and he made the whole product selection and ordering process super easy. Check them out!
Product links (some are affiliate) to the tools and products used for this build are below:
Melamine Sheet:
www.homedepot.com/p/Veranda-M...
Concrete Dye:
amzn.to/3xB4ykT
Concrete:
www.homedepot.com/p/SAKRETE-8...
Steel wire reinforcing mesh:
www.homedepot.com/p/42-in-x-7...
Drill Mixer:
amzn.to/3e36HOL
Glass Cleaner:
amzn.to/36vnA0c
Drawer Slides:
amzn.to/2T4IdgN
Concrete Sanding Pads:
amzn.to/3wzGKNc
Corner Molding:
amzn.to/3e3777N
Fire Glass:
amzn.to/3yL6tn7
By using the affiliate links above, a small portion of the purchase goes to support Andrew Thron Improvements (and there is NO extra cost to you). Thank you for supporting the channel so I can keep providing free DIY project videos.
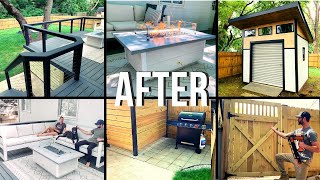
This is Episode 8 in my BACKYARD TRANSFORMATION SERIES.
Check out the other episodes below:
Episode 1: DIY Fence on a Budget
• DIY Fence On a Budget!
Episode 2: How to Build a Fence Gate (DIY Fence Gate Ideas) • DIY Fence Gate Ideas (...
Episode 3: How to Extend a Concrete Slab
• How to Extend Concrete...
Episode 4: DIY Concrete Paver Patio
• DIY Concrete Paver Pat...
Episode 5: DIY Trash Can Screen // Horizontal Privacy Screen • DIY Trash Can Screen /...
Episode 6: How to Build a DIY Cable / Wire Railing:
• DIY Wire Railing Insta...
Episode 7: How to Build a DIY Sectional Sofa
• How to Build a DIY Sec...
Thank you so much for your support and for watching! Please consider dropping a "like" on the video to help my channel grow. Additionally, please subscribe if you like DIY content like this!
Follow me on Instagram at: Atimprovements
#AndrewThronImprovements #DIY #Home Improvement
DISCLAIMER: This is a reference guide only - Build at your own risk. I highly recommend that you have a licensed plumber leak test all connections. Links included in this article might be affiliate links. If you purchase a product or service with the links that I provide I may receive a small commission. There is no additional charge to you! Thank you for supporting ATimprovements so I can continue to provide you with free content each week!


Very cool. In the process of demolishing a house behind ours we bought to build a yard. Fire pit is on the building plan. This one is brilliant! Thanks for the video. I watched your transformation video yesterday. Wow
So cool! I finally found solution for my outdoor propane bathtub 😂😂👏👏👏🤘🤘🤘
Great project and great video! Thank you for sharing!
This was awesome! I absolutely love it. Great work❤
That is 💣. Can’t wait to make ours
You really help me with my project bro ,this is a great made video thank you
Amazing job man!!
This was amazing
Very creative… Looks great!!
Appreciate it, Ash!
Beautiful job dude. I just subscribed. ❤️❤️
Super talented.
Appreciate it, Lashonda 👍Thanks for Watching!
not bad I like the way you built it. Different but perfectly ok and very nice.
That's awesome dude! Looks great!
Appreciate it! Thanks for watching!!
I've looked at a few videos and I love this the best 😀 👍🏿📣
I appreciate it the kind words, Rudy! Thanks for watching 👌
Well done!
Appreciate it! Thanks for watching!
Unique
Thank you guys so much for watching! For more details on the fire table concrete form dimensions, check out my project blog article at:
atimprovements.com/diy-fire-pit-table-how-to-build-your-own/
Thanks!
Cool!
Thought of this but that sitting brick wall fire pit tough to beat
Awesome vid. Definitely will help me when I'm ready. How did you do the sliding door?
Thank you so much!
You're welcome! Thanks for watching!
Very good idea to conect to house gas line but not for propane thank
That’s an awesome build, we’ll done! I want to do one like that but I have a couple of key questions before I go ahead. How hot is the firepit? Does it keep you warm enough to stay out on chill nights? And how long the small gas bottle last? Many thanks
Nice vid man!
Thanks for the continued channel support! I appreciate it!
Hello, could you provide more details on how you installed the drawer slides
Great video very informative only one question is it safe to have the gas bottle next to the heat and flame please.?
This is perfect for those chilly fall nights! Looks amazing, great work! :)
Agreed! I doubt it will get much use this summer. Thanks for watching!!!!!
Appreciate you!
Does it actually give off much heat?
Pretty cool. I noticed there was no venting or was there? Typically venting would be set low for propane on all 4 corners and higher venting for natural gas.
Could bbq parts be substituted since they are more likely available bbq parts would work the same. They have regulators, different types of burners, tank adapters. And could pick up sheet metal from local parts shop and shape it with a metal break and welded it. Just wondering if aluminum dispersal of heat fast then just regular steel. To bring cost downs.
Hello glad to see you again 🙌😄 I was waiting for a new video to see what you are new prepared this is awesome 👏 perfect work 👍why didn't a little closer to make something for me 🙌😄 Greetings and support from Serbia 🇷🇸❤
Appreciate the continued support! Thanks for watching!
Nice video, thanks for sharing. How did the LVP planks hold up over time with heat dissipation?
So do you have to turn on the propane on the tank itself every time? Or can you turn the valve on the outside you installed? Thanks man. Amazing job👍
الله يبارك ما شاء الله روعة😊
Appreciate it!
Thanks a million. What was the BTU on your firepit?
Great build. What is the height of the base?
You rock
Appreciate you watching!
Would love to try and build this myself. What was the total cost of the build?
Great project. How much did it cost?
I really wish you did explain how you built the frame step by step
Great video. really enjoyed how the creativity works here. Question if i may, do you have any form of protection for your deck from the fire table's heat? I was told that there should be a type of protection to prevent the heat from ruining your deck (wood or composite). Any thoughts on this?
Hi Jack! I don't have anything for protection underneath my fire table. So far, the base really doesn't get hot at all. The pan get's a little warm, but nothing I would be concerned about. That said, protection is always good to have. Better safe than sorry. Thanks for watching!
Awesome video thanks, how much did you spend on the project? How far must the burner and pan be from the tank?
The more space between the burner and the tank the better!
I think I spent around $800 for everything - it's a bit pricey. Thanks for watching!
what a nice build! Do you have any closeups how the slides were installed? Can't tell from the video
Hi! Unfortunately, I do not. I just kinda "winged" it. I bought some drawer slides on amazon and then simply attached a piece of cement board to it. It wasn't perfect, but it worked for me!
Nice build 👌 New subscriber 💥🇺🇸💫
Thanks for the support!
what was the overrall cost assuming you have all the tools?
Great Video - Simplest and best instructional I have see
Glad it helped, John - Thanks for watching!
Great job. How much clearance do you have between the base of the burner pan and the top of the tank?
Hi Ed - It's approximately 6" from the top of the tank to the burner. In hindsight, I should have left more clearance. Thanks for watching!
@@AndrewThronImprovements why so?
Hi there ,
Can they ship to Europe ( Italy as well)
How much did it cost you in material?
I really want to make one, but i don’t think I can make the table top out of concrete since there’s no one to help me lift it, sadly. wish me luck! I’m gonna need it!
😂😂😂 I will make one too ...
If you need help tell me ...
It will cost you 700€ at hour😂
What are the base dimensions please?
Is that a horizontal propane tank or a vertical propane tank?
Ok, I'm new to this. Where can I order the fire pit to install it to the diy concrete table?
Hi! I got my kit from EasyFirePits.com. Link in the description. Thanks for watching!
Where did you buy all the materials and how much did it cost overall?
Hi - I bought most of the stuff from home depot but I got the fire pit components from easyfirepits.com. I have links to everything in the video description. Thanks for watching! Appreciate the support!
Cheaper to just have bought it
How long does the gas tank last?
I would say probably for 20 hours of run time. But depends on how much you throttle the gas. Thanks for watching!
That weld on the manifold looks horrible (10:07). Great video on the entire build but that weld makes me question the remaining quality of the fire pit kit.
Do you think the LVT will hold up?
Hi Matt! I am not worried about the LVT at all, that stuff is super durable and waterproof. I am little worried about the longevity of the construction adhesive (I used exterior rated), but time will tell. I am covering it up before every rain, so hopefully that will help with the lifetime. Thanks for watching!
@@AndrewThronImprovements looks really good! Hopefully it stands up. Covering it will definitely help I'm sure. Been watching all your videos- getting ready to do a shower and that's how I found your channel!
@@limpfinger12 Fingers crossed! And right on, Man! Hope it turns out great!
How much would you estimate it cost you to make this?
Hi! It was definitely a bit pricey. I would estimate that you really would be hard pressed to complete this project for under $500. Between the propane, fire table insert kit, etc. It adds up pretty quick. But I love the table and use it all the time! Thanks for watching!
Nice but needs casters
why would you 'calculate' the center rather than just draw lines between diagonal corners?!?
Haha fair point. They both get there but your method is probably a bit easier 👍
Why was the table smoking like a real wood fire at the end of the video ?
I just noticed that after your comment. I couldn't tell you tbh. Smoke is never really an issue at all. That may have just been the angle/lighting. Thanks for watching!
Toller Handwerker
Sorry, but laying a propane tank (with the fill valve on top) on it's side is NOT the brightest idea
and extremley dangerous too.
This UA-camr only copied MrFixIt DIY and just made it longer so it’s not obvious.
Ref: ua-cam.com/video/X5NTMjaHals/v-deo.html
Definitely took inspiration from a lot of the DIY UA-camrs! Thanks for watching!
I used Easyfirepits also. Working with them was easy and people are delightfully surprised by my fire table.