Adjusting height of fill valve when installed in tank

Вставка
- Опубліковано 10 тра 2016
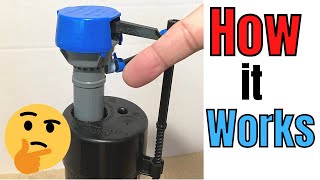
- The 400 model fill valve must stand 3" taller than the overflow pipe for anti-siphon purposes. For all those that didn't read the instructions before placing your fill valve in the tank, here is a video that shows how to adjust the height of the fill valve while it is in the tank.
- Навчання та стиль


MOVE THE PLASTIC RING UP IF YOU CAN'T TWIST THE FILL VALVE!!! I was doing as this guy says and trying to twist the fill valve but it was way too tight and difficult to twist and I stopped once I heard a scary grinding sound. But once you move the plastic ring up, it'll untighten the fill valve and then you'll finally be able to adjust the height. This guy leaves this step out so don't miss it!
I am so proud of myself. There were a couple of mishaps. I didn't put the cap back onto the shaft securely and when I turned on the water, the water shot up all over the place including my head. Next mishap: when I adjusted the shaft, I didn't realize that I also was turning the large locknut under the tank. So water leaked all over the floor when I refilled the tank. However, I fixed all that and my toilet is working perfectly. As a 70-year-old woman, I love learning new things and saving money. Thank you.
Thank you for the useful information. I tried adjusting the long screw on the float cup, but needed less water in the tank. It wasn't until I found this video that I figured out that the shaft needed to be rotated for major adjustment. Very helpful video indeed!
After spending an hour watching various videos to fix a continuous overflowing issue. I was ready to go out to Home Depot to replace the fill valve. Watching this informational video helped me understand that the fill valve height can be adjusted as well and saved me a trip. Thabnk you!
OMG!!! I can hardly believe it. Thank you thank you thank you!!! Thanks to you and all the other UA-cam videos I've been watching this morning, I just fixed the toilet in my guest bathroom!! For five years I have been lamenting all the horribly slow and multiple flushes required to clear that toilet bowl. Eww. The constant cleaning, because even multiple flushes weren't complete. A couple of my guy friends attempted without success to adjust or repair it. So I've been living with it because I wasn't willing to spend my precious little money on an expensive plumber. Finally, and with determination, I spent nearly 2 hours early this morning researching how to fix a slow flush. I also watched videos like yours about a half dozen times until I "got it" and voila! My toilet finally works like a powerful new one! And it was so freaking simple (in hindsight of course). Your video was the best and I followed your instructions to a T. A heartfelt thanks very much to you and all the generous people like you who share information so that people like me can save potentially hundreds of dollars. Who'd a thunk it'd be that simple? Thank you thank you. - An Omaha woman who took initiative, employed the patience to learn and surprised the heck out of herself!
Thank you thank you thank you for a clear, to the point tutorial! I had replaced the fill valve myself and after not using the toilet for a day, discovered water leaking from the toilet handle. The fill valve wasn't high enough, my installation error. Did NOT want to remove it and start over. So happy I came across your video, it gave me the courage to attempt and fix it myself! 50 year old woman with no experience whatsoever.
You Can Also, Drain Water in Tank, and Then at Bottom of Grey Tube, there is a 'Pressure Fitting' That You Can Lift Up On, and It Will Release the Lock. Then Just Pull Up to Desired Height, and Then When reached Desired Height, Push Pressure Fitting Back Down On Grey Tube Sleeve.
This Way You Don't Have to Disconnect Anything.
Thanks for this :D My toilet leaked into my downstairs neighbor bathroom fan because the person who set it up made it fill over the line by a lot. 4 clockwise turn and it's flushing right every time on the line. I am so grateful for all those kind of videos people are taking the time to post that are so useful.
Mine isn't flushing strong so I believ I got to adjust height.
Thank you very much for this! I had a new floating cup assembly installed in my apartment today, and couldn't figure out why the tank wasn't getting enough water to properly flush. Glad it was such an easy fix. I'm not the handiest person in the world, to say the least.
I was a little upset because of the shorter valve and water is not filling up. Now because of your video I know how to adjust the valve. Thank you.
Thanks for taking te time to share this video. No messing around, right to the point 👍
Thank you!! Every video I found was just to lower the float, not the entire thing and my float was as low as it could go. So helpful.
Thanks So Much-IT WORKED!!!! I actually fixed it! Im a 62 year old woman that just bought a house.
Everything about this video was perfect EXCEPT, as some others have mentioned, you can change the height without taking the top parts off and twisting the shank! My Fluidmaster is one of the new ones that has an extra bowl fill attachment on it, and makes the twisting room almost non existant. I was looking at removing the valve from the toilet to change the height when I saw a comment from others in the comments about sliding the plastic lock UP on the shank. That was a game changer, as all I did was move that plastic lock washer UP on the tube, and that allowed me to just pull up on the top part to extend the height! I then puushed the lockwasher back down in place, tested the water height, and VIOLA, my toilet was fixed!! GREAT VIDEO, though, guys, and VERY easy to follow!
Thank you so much for this. I tried the methods shown in three other videos before finding yours. This one worked. The difference, though, is that i couldn't get the top cap off. Had to just twist the shaft a quarter turn at a time, in increments, while alternating re-centering the top parts. Got the whole thing significantly lower, and now the tank doesn't overflow and leak through the flush lever hole. Beautiful. I'm 50-something and not a DIYer. Lived in NYC for 25 years, where the prevailing modus operandi is, "Call the Super!" But, now i'm in the suburbs.... Old dog, new trick.
Your tank should never have a water level that reaches the flush handle to begin with, as there is supposed to be an overflow tube as a safety mechanism for any extra water to drain into. It sounds like if you have an overflow tube-which you should-that it isn’t cut to the right height for your tank.
Thank you so much for such informative video.
My old toilet is 20+ years old and I was super frustrated that all the videos I watched in the last hour were talking about “adjusting the screw” attached to the fill valve. Guess what? There isn’t one on mine. After seriously considering to replace the fill valve, I landed on your video and it only took 10 mins to fix and adjust the fill valve height.
Thank you again for saving me and my family’s sanity😊
I've watched a few videos on YT. Yours was the one that works. My toilet water keeps running. Thanks for the thorough but short and sweet.
Many thanks! A friend "helped" by installing mine before I had a chance to. The float was set too high and the water barely turned off the valve. Often kept running on and off. This let me fix the issue in about two minutes. Great video!
THANK YOU I was able to fix a running tank. For the carefully detailed instruction. I was able to save water by lowering the tanks water line.
Your video was very helpful. Greatly appreciated your guidance, your's was the best DYI video for this adjustment. I've subscribed to you channel for more good videos.
This is a Godsend, solved my weeks-long problem, and on a masterful and amazingly quick and graspable basis. THANKS!
Thank you. Your video gave me the courage to try. Somehow, I fixed it!
I fixed my running tank with this great video and explanation. Thank you so much
Great video man
You're very clear with instructions. Was able to fix my toilet in less than 5 minutes. I wish all DIY tutorials were as clear as yours
Finally! Every other video kept telling me to change the screw to adjust the float height but it was already at its lowest height. This helped me realize that adjusting the mount itself was even an option. Worked IMMEDIATELY! Was probably wasting hundreds of gallons of water… thanks!
Mine is the opposite problem. Both my toilets have barely enough water in the tank to even flush. Water level is over an inch below the top of the overflow tube. Going to try this; hope I don't break the things!
Thank you very helpfull video. Girlfriend had one installed and had to do 2 or 3 flushes most of the time. I adjusted the fine adjust screw all the up but still had to do multiple flushes. Water level in the tank was about 2" lower than the previous valve. Was about to swap it out with the old style before I ran across your video. Thanks again!
Mine too! You can only "save" so much water. Having to flush multiple times is worse for water usage than having a single good flush. Need more water in the tank.
I watched this twice as well as another video. This was very helpful. The only thing missing from this it that you must/should, raise the clear plastic guard at the bottom of the gray shaft which allows the adjustment. Maybe I do not have the hand strength to twist the shaft to decrease the height. Aside from that, it worked like a charm to adjust my water level. Thank you.
i cant get that part to move up
Great vid. Straight to the point and clear video, unlike many other videos that show the valve inside the cister (not very clear and visible)
Thank you! Easier to understand and follow than the manufacturer instructions.
I just put in a new fluidmaster toilet fill valve assembly, but the box didn't really have instructions to explain this adjustment. In fact, my wife tossed away the box as nothing on it really explained much. I could not understand why my new valve assembly was still allowing my water to run as it did on the old valve, so I began a search at UA-cam and found this video clip. Now it makes perfect sense as to how to adjust this part correctly. Thanks for the video.
To add: It was likely the original instructions in the box had been removed by someone in the store where I purchased it for some odd reason.
Thank you! The power of the InterWeb for solving simple problems. I say simple but no real idea where to begin until I found your video. Just do exactly as he says and you're good to go. Earned my subscription!!
Oh my Gosh dude. Thank you so much. I tried a few videos and learned so much about toilets today😂All very helpful, But THIS was the One that finally solved my problem. You helped a single struggling mother today🙏🏼Bless you
`Thanks so much! This explanation was straightforward and easy to follow. Solved our problem right away!
Life saver I hope this works. Will try when I get home, have been trying to figure this out for bloody weeks and procrastinating about calling a plumber. Knew there was a way to do this!
I did it! I can't believe it. I had to adjust the fine adjustment to closer to the middle of its range than at the end in order to get the float up enough to hold the shaft underneath. Then, I had a great deal of difficulty getting the top back on. Extremely frustrating. I finally got it by holding the shaft above the float and turning the thing. Then it didn't even take great strength. Somehow you just have to find the right movement.
Thank you! I was about to buy a brand new one, but I'm glad I stumbled upon your video. I didn't realize they're were 2 ways of adjusting the water level. Now I know!
Thank you Thank you thank you!. was driving me nuts but now it has the proper water level
Thank you. because of your video I learned to remove the cap assembly where I discovered a small particle inside that is causing a small amount of leak. when I remove the small particle, the leak was gone.
Thank you for sharing! This video saved our day!
This was a very helpful tip, and this whole time I was adjusting from the floater . . .
Thanks so much for this video, fixed my water height problem!
Thank you so much. You are a great teacher. It worked like a charm.
perfect, worked like a charm, thank you.
Thank you, your video helped me to set the proper water level.
I almost took the valve out to extend it. Thanks for the tip. Worked perfectly!
Thank you so much from a newly divorced lady who is having to learn all sorts of new things.
The Heretic What's it like being a jerk? I'm glad you're the expert on her circumstances, knowing every detail of her situation which gives you the right to assume things you know nothing about. Maybe you should take a break from the toilet repair videos and look up some videos on how not to be such an insensitive tool. Smh.
See the stem to the side that has screwdriver slots on top (I just used finger pressure)? It's for minor adjustments. Turn it Counter-clockwise a bit (mine about 1/2") to keep water from running after bowl is full. MUCH EASIER! It may be a little stubborn, but I applied a little more pressure and it turned no problem. You may not need to, but I had already popped it out of the retainer ring at the top before adjusting it, then just popped it right back in.
Thank you very much for this detailed information! You made my day!
Thank you! Worked perfectly!
Worked like a charm, THANK YOU !!
You are a lifesaver! Thank you immensely
Thanks! Also had to turn mine to make sure the float wasn't rubbing against the side of the tank. Just turned it one increment at a time until it was positioned correctly
Thank you so much! This was a big help! I set it up too high and thought I was screwed.
I appreciate you!! This was so helpful! Thank you for this.
Thank you for teaching my husband and I how to adjust the fill valve height to help us lower the water in the tank. After we got that corrected, we could easily tinker with the turn knob to slightly adjust the water height. Job done. Best video for understanding fill valve mechanics. Doing it outside the tank allowed us to much better see what you were doing! Bravo!
Thank you for this great tutorial!
Thank you! This fixed it after going over the fill line by a whole inch! You are the Toilet Pro!
@thetolietpro, thanks, adjustment made. Simple and to the point.
Great vid I accidentally turned mine while disconnecting the water hose and this helped me solve why it was just barely over the height it needed to be.
This was SOOOOOOO helpful. Thank you.
Very nicely presented. Thank you.
This was SO useful. Thanks! 🙏
come on people...he was very clear. I knew what I had to do but I just wanted to see someone do it. When I just replaced a toilet fill valve I forgot to turn it up to match the height of the toilet tank; BUMMER. I wasn't about to take it out and I had raised the float arm as far as it would go, Thank you Toilet Pro :)
Get the Korky valve where you can easily slide it up and down in the tank. Problem solved forever. :)
Great video, fixed our running toilet in under a minute!
Thank you. Your video did the trick!
Thank you I got about 1/4 of an inch per rotation on mine.Toilet working great
Wow. Wish everyone could explaon in snipits like this. Ty!
Excellent video! Thank You
great video. I used to remove the valve to adjust it, a lot more work.
Awesome. This did the trick. Thank you!
this helped a lot. Thank you.
Thank you for saving me a call to the maintenance team :)
Thank you. Your video did the trick.
Thanks mate! Very informative.
so easy when you know how thanks for sharing this simple and easy to understand video
Very helpful, thank you!
Thanks, great, short, and concise video. Fixed my problem and saved me a trip to the store for a replacement!
Excellent video, and just what I needed! Problem solved!
Beautifully clear and succint: thanks!
Thank you! So helpful!
Thank you,this works great!!!!
Hurray! Thx to this Video>> SUCCESS! So love a solid DIY that I accomplished! Yippee!
Thanks for the video, I was stuck.
No wasted words or time. Good.
Good man.. best example on youtube
This is brilliant! Thank you!
Thanks, this was helpful
Took care of my problem. Thanks
It's 1 in the morning. Thanks for the help!
Worked great and resolved my issue. Saw another video where the solution was to put rocks on top of the float. Just plain silly. I know where he got the rocks.
Thanks I did this and it worked for me. I needed it lowered so it would cut off sooner
Thank you so much I was tripping until I found your video thanks again
Fixed my toilet by watching you!! Thank you 🙏🏻
This definitely helped thanks!!
Thank you PERFECT FIX!!!
Thanks for the Video.When would I need to raise the height.My toilet isn't flushing well.Will raising the height help? Thanks.
Thanks! Lots of help!
Very helpful. Thanks!
This was helpful but did not solve my problem. But I did follow your steps and it led me to discover another issue that did solve my problem with the running water. On the valve arm in the center of where the gasket is, there is a very small pin that should move in and out ( up & down ), which was stuck. with a little push on the pin it started moving. I don't know what that part is called, but when I put everything back together my running water problem was solved. thanks for your help. btw my toilet is the Glacier Bay 2pc power flush model n2450TL.
Thank you for your video! My plumber told me that I'll have to buy a regulator for the water flow
OMG thank you so much you're a lifesaver. We were in desperate need of lowering ours and your video made it so much easier. :)