It’s not about money, or the cost of how cheap a bulb is.There’s just those of us out there, including myself, that love the challenge of being able to fix anything. I thought it was very interesting.
Hello and thank you so much for your comment! What you say is very true! If you have any other ideas or solutions, feel free to share them with me! Wish you the best!
Removing the led actually increase the voltage on the remaining ones and it is a short term solution. So I would go with the third method, to replacing with a good one. But when the first led is gone, the electronic regulator is at the end of life, so a new bulb is the best solution.
@@creationholic101 That's true, but I always have a box of this bulbs at home. I take the bad ones to recycling and that's it. For expensive worklights I do the repair, by replacing the bad leds, and other components if I have to.
if you're gonna go through the trouble of taking the bulb apart and doing something as janky as what is I. this video. you might as well do it the correct way and learn how to reflow a PCB and replace the burned out led .
Watched this vlog and am well impressed on how to fix an LED blub, but most people would buy a new blub and the ones who repair I hope they know what they are getting up to. The first video I was very surprised that you used insulating tape on the tweezers which is okay but someone who doesn't have that tape could substitute for another tape and could get a shock. But again it's only a few who thinks they know what they are doing and gets in a right pickle.😊
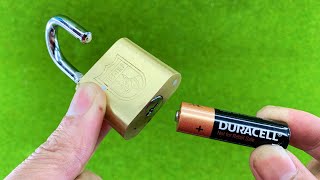
3 very interesting solutions to solve the problem, as a layman I ask you: what is particular about the bottom of the battery that you cut out? Is it just because the metal is thin or is there another reason? Thank you for sharing and for the answer you will give me
1. Изолента со временем скорее всего отвалится из-за высокой температуры внутри лампочки. 2. Нормальный способ - проверен лично. 3. Старую термопасту удалил, а новую не нанёс - плата будет хуже охлаждаться. 4. Далеко не все лампочки ломаются таким образом, соответственно их так не починить.
Thank you. Now leave the globe off, unless you need it for dispersing the light. It just builds up heat and makes things burn out faster. Or drill some holes in it before putting it back on
This is so unsafe. Rubber shoes wont do anything if another party of your body is touching something conductive. They also won't save you if you touch live and neutral at the same time! Also wrapping tweezers in electrical tape isn't that safe, what if you miss a little bit, or your fingers slip down?
Normally, these bulbs already have a voltage conversion circuit, so the output voltage of the LED bulb is quite safe. To be safer, I still equip it with protective equipment.
@@creationholic101 normally? As long as there's no galvanic isolation you're still exposed to mains potential. (I should imagine that any with a transformer would be more expensive, if not prohibitively) irrc, the cheapest ones use capacitive reactance to reduce the current. Which makes them acceptable to transients which is probably why you have a dead L.E.D. My problem with this video is it makes it all too easy for people with little experience to attempt this and put themselves at danger of death.
Hello from Pakistan. Hopefully it works on my Hue bulb that has gone dim. Do you have a separate one to fix Philips Hue bulbs? I could not find any help on the net
1/3 is not the proper way to rectify the issue, this will destroy the other LED's one after one. Completely misguided. Please do not follow this first step.
Instead of putting a tape, just solder that part or if u can buy led from electric shop, just resolder it alinging the negative n positive part of the spare led.. why throw a bulb that can be used again .
Really, they are so cheap, why bother with this time consuming process when you can buy a new one for cheaper than the Duracell battery. Interesting activity however. But not practical
@@userfriendly67 well I can get those bulbs for £1 in the UK. Duracell unless I am buying in bulk is about £4 for 4. As well. Makes more sense to buy a bulb that will probably last 3 years if not more, than go through all that hassle for the same price or less.
@@philipridout2274 Almost all led lights work with 5V, and some of them with 12VDC, the high voltage AC (110 or 220), reach up to the small transformer that is hidden on the other side of the led board.
These videos show how one faulty diode out of so many that are functioning makes the lamp useless. The last video shows how to use two broken lamps and end up with a working lamp - and using one broken lamp as a supply of leds can mean many repaired lamps. Wastefulness is not a desirable quality. David Lixenberg
I look at problems as a challenge to fix it and get a few more miles out of it. And I’m good at it. However, this is not smart. First and foremost for safety reasons,second you don’t have another bulb in the house that you can use to replace the burned out bulb? That is the smart way of fixing the problem, never mind the challenge.
En lugar de usar pila q es mas trabajoso, si se pone un pedacito de papel aluminio y se pega con cinta scoch es mas facil y tienes el mismo resultado. Sds.
I remember when these 1st came out... On the box they stated a 10 YEAR life span... ROFL The 3rd 1 after trying these out... It dam stopped lighting up...
Ok this is not the Great Depression. Don't risk being electrocuted or burning down the house for a $2 light bulb for crying out loud. And the $1000 medical bill after slicing off your finger tip 😅
WHAT PLANET ARE YOU ON MAN...??? IT IS THE DEPRESSION... CHILDREN IN WESTERN COUNTRIES ARE STARVING... FOOD/ENERGY PRICES ARE ASTRONOMICAL... COVID HAS NOT DISSIPATED YET (It will be back with a vengeance as it's just thinking about the next strain)... BANKERS AND CITY MERCHANTS ARE JUMPING OFF THE HIGHEST BUILDING THEY CAN FIND... Open you're eyes dude..👀
I find when led bulbs turn on and off often they will quit working alot soon then ones burn longer period of time the coal room downstairs or bathrooms quit working sooner then living room kitchen and poarch like with photo sensors thst burn for longer periods. The coal room get turned on and off when i check fire in boiler and the bathrooms they have the auto switch that detects a person turns on then off in ten minuets coal room turns of in one minute. One checks fire every 2 hours 1 hour when very cold
E’ inutile ripararle così perché poi è vero che accendono ma durano da 2 minuti a Max 3 gg, poi si bruciano di nuovo e si bruciano stranamente tanti altri Led.


It’s not about money, or the cost of how cheap a bulb is.There’s just those of us out there, including myself, that love the challenge of being able to fix anything. I thought it was very interesting.
Fixing things is an act of sustainably
Why do LED lights become dimmer with time
Hello and thank you so much for your comment! What you say is very true! If you have any other ideas or solutions, feel free to share them with me! Wish you the best!
lol
I’m curious can this step I do believe can be taken with the same process if another location was to go out? Thank you. 😊
Instead of cutting the end of a battery, would putting a drop of solder work as well ?
okay, that's idea number 2
It should be idea number 1. 😎👍
Bravissimo! Grazie mille per il video e la condivisione. Video molto interessante. Grazie ancora 🥰👏👏👏👏🔝👍
Thank you so much for your positive feedback! I'm glad you enjoyed the video and found it helpful
Removing the led actually increase the voltage on the remaining ones and it is a short term solution. So I would go with the third method, to replacing with a good one. But when the first led is gone, the electronic regulator is at the end of life, so a new bulb is the best solution.
Yes, I agree with you, but it will be useful when you haven't bought a new device yet
@@creationholic101 That's true, but I always have a box of this bulbs at home. I take the bad ones to recycling and that's it. For expensive worklights I do the repair, by replacing the bad leds, and other components if I have to.
nambah ilmu lagi..
terima kasih
Thank you! Cheers!
Action incorrecte ayant échoué
Big thanks from SC Philippines
Thank you so much! I'm glad you found the content helpful.
very helpful...thanks!
Glad it was helpful!
Hi n thanks for sharing videos from Italy
Glad you like them!
Grosser Dank aus Deutschland 😊😊😊
Hello! Welcome to Creation Holic channel. I am very happy to read your comment. Have a good day!
Simple and awesome👍thanks for your sharing 🙏usefull👍
So nice of you
Thank you ........from Iraq babylon
Gorgeous ideas man 👍
Thanks 👍
Super, vielen lieben Dank für die schlauen, guten und einfachen Tipps. Weiter so!😊
Show parabéns 👏👏👏
Eu do Ceará Brasil
Thank you for watching
Why were you marking the already marked diodes unless you were reminding to remind yourself, right I get it now!! Fabulous job, all three times 👌
yes I marked it to avoid confusion
Very good. Will try all the three solutions. Bangalore, INDIA
Hello! Welcome to Creation Holic channel! I am glad you like this ideas. Wishing you all good things!
if you're gonna go through the trouble of taking the bulb apart and doing something as janky as what is I. this video. you might as well do it the correct way and learn how to reflow a PCB and replace the burned out led .
Hello! thanks for your comment. Wish you all the best!
Watched this vlog and am well impressed on how to fix an LED blub, but most people would buy a new blub and the ones who repair I hope they know what they are getting up to.
The first video I was very surprised that you used insulating tape on the tweezers which is okay but someone who doesn't have that tape could substitute for another tape and could get a shock.
But again it's only a few who thinks they know what they are doing and gets in a right pickle.😊
Thank you for sharing your feedback. Have a good day!
تحياتي لك اخي الكريم من قناة تعلوم سات
Welcome to Creation Holic channel! Hope you have a good time while watching the video
3 very interesting solutions to solve the problem, as a layman I ask you: what is particular about the bottom of the battery that you cut out? Is it just because the metal is thin or is there another reason? Thank you for sharing and for the answer you will give me
it has high electrical conductivity
@@creationholic101 ty so much ^_^
厲害,我來自台灣Chinese Taiwan
Welcome to Creation Holic channel! Thank you so much for your support
Amazing wow very hard work stay connected🎉🎉🎉
Thank you! Cheers!
All methods are Extremely dangerous for non professional. But its very interesting to see how it works
Thanks so much for watching our video. Wish you all the best
From Nagpur Maharashtra India
Welcome to Creation Holic channel! Hope you have a good time while watching the video
Just buy a new bulb and extend your life...
Great. From Portugal
Welcome to Creation Holic channel! Thanks so much for watching our video. Wish you all the best
Bchelle ja.
1. Изолента со временем скорее всего отвалится из-за высокой температуры внутри лампочки.
2. Нормальный способ - проверен лично.
3. Старую термопасту удалил, а новую не нанёс - плата будет хуже охлаждаться.
4. Далеко не все лампочки ломаются таким образом, соответственно их так не починить.
Thank you for sharing your feedback .Have a good day!
А если все светодиоды целы, а лампочка всёравно не горит?
@@ВадимШлыков-ч4з нужно искать другое видео с объяснением )
Heloo , i am from cluj-napoca .
Welcome to Creation Holic channel! Thanks so much for watching our video. Wish you all the best
Ý tưởng của bạn thật tuyệt vời
Thank you! Cheers!
Gostei da 2/2 com solda é fácil e mais garantido
Fico feliz que você gostou! Hãm và hàn có seus benefícios em situações específicas.
How safe is that?
If you have enough equipment, you can follow method number 3, note that you should mark the correct wire end
It's potentially deadly, but do you want to risk your life for the sake of a few [insert your local currency here]? Assuming you're not a cat that is!
Great! From Germany….😊
Thank you! Cheers!
Thank you. Now leave the globe off, unless you need it for dispersing the light. It just builds up heat and makes things burn out faster. Or drill some holes in it before putting it back on
Thank you! Cheers!
Good 👍
Thanks for watching! Glad you liked the tips.
@ oh yes
This is so unsafe. Rubber shoes wont do anything if another party of your body is touching something conductive. They also won't save you if you touch live and neutral at the same time!
Also wrapping tweezers in electrical tape isn't that safe, what if you miss a little bit, or your fingers slip down?
Normally, these bulbs already have a voltage conversion circuit, so the output voltage of the LED bulb is quite safe. To be safer, I still equip it with protective equipment.
@@creationholic101 normally? As long as there's no galvanic isolation you're still exposed to mains potential. (I should imagine that any with a transformer would be more expensive, if not prohibitively) irrc, the cheapest ones use capacitive reactance to reduce the current. Which makes them acceptable to transients which is probably why you have a dead L.E.D.
My problem with this video is it makes it all too easy for people with little experience to attempt this and put themselves at danger of death.
I will use the third method. It will help the bulb last longer
Yes, it's a good plan if you have enough items
Hello from Pakistan. Hopefully it works on my Hue bulb that has gone dim. Do you have a separate one to fix Philips Hue bulbs?
I could not find any help on the net
I will research and send it to you when there is a good solution
Black tape is used so he doesn't shock his balls!!!! 🤣🤣🤣🤣🤣🤣
سلام عليكم تبارك الله ماشاء الله ❤❤👍🏽👍🏽🔔🔔🙏🏼
Thank you! Cheers!
What are those thin wires on the palm of your hand? are they used on the led bulb??
That's tin wire for soldering
Tôi đến từ Việt Nam
Welcome to Creation Holic channel! Thanks so much for watching our video. Wish you all the best
Good job
Thanks
Very good
Glad you like them!
1/3 is not the proper way to rectify the issue, this will destroy the other LED's one after one. Completely misguided. Please do not follow this first step.
Why would you even bother going through all that when you can just buy a new bulb from your local store.
It will be necessary if you have not yet purchased a replacement device
@@creationholic101 that's why I keep spare bulbs in the bottom kitchen drawer for such situations.. 👍
@@toddhunter3137Quite right, so do I!
Instead a battery just solder over the diode thats burnt out. That's why LEDs don't work is because the circuit is incomplete
Thank you for sharing your feedback
Why go to all of those troubles, with the price of new one is not worth it…
Instead of putting a tape, just solder that part or if u can buy led from electric shop, just resolder it alinging the negative n positive part of the spare led.. why throw a bulb that can be used again .
Thank you for sharing your feedback. Have a good day!
Really, they are so cheap, why bother with this time consuming process when you can buy a new one for cheaper than the Duracell battery.
Interesting activity however. But not practical
Thanks so much for watching our video. Wish you all the best
Other videos recommend using a small piece of aluminum foil. No need to cut the end out of a battery.
Short circuiting one led puts more voltage on the other leds shorting their life. Best to replace the bad led with a resistor.
Yeah, you are right. Thanks for your feedback
How many of them can be shorted out before the IC breaks?
It has been used for quite a long time, I still use it normally now.
Could of just soldered the connection without the tape.
Thanks so much for watching our video. Wish you all the best
aluminium foil or medical tablets wrapper will do the job instead of killing 1.5v battery
Thanks for sharing!
Would you want to do all that, bulbs are cheaper than that battery.
I don't think so maybe
@@userfriendly67 well I can get those bulbs for £1 in the UK. Duracell unless I am buying in bulk is about £4 for 4. As well. Makes more sense to buy a bulb that will probably last 3 years if not more, than go through all that hassle for the same price or less.
I use dead batteries
How long a repaired bulb last?
It depends on the repair, but generally, a well-repaired bulb can last almost as long as a new one.
Bassett california
Welcome to Creation Holic channel! Thank you so much for your support
You don't have to tape the tweezers, it is only 5VDC
Thank you! Cheers!
You have no way of knowing that. If there is no galvanic isolation, and I highly doubt there is, then it could be at mains potential!
@@philipridout2274 Almost all led lights work with 5V, and some of them with 12VDC, the high voltage AC (110 or 220), reach up to the small transformer that is hidden on the other side of the led board.
This secret is very easy to do.
Thank you! Cheers!
ممكن بدل شريط اللحام الحمه بأمير علشان مايسبش.
for the best you can solder
These videos show how one faulty diode out of so many that are functioning makes the lamp useless. The last video shows how to use two broken lamps and end up with a working lamp - and using one broken lamp as a supply of leds can mean many repaired lamps.
Wastefulness is not a desirable quality.
David Lixenberg
Thank you for sharing your perspective, David. I appreciate your thoughts on repair and resourcefulness.
Pay attention to safety (and then he puts on a pair of sandals)
Thank you! Cheers!
A new invention called just buy a new bulb for those who actually have a life..
It will be necessary in case you have not yet purchased a replacement device
nice
Thank you! Cheers!
Buy a new bulb next time you go shopping,a lot safer . They are very cheap why bother risking a shock or a fire.they are not made for modifications.
You will need it when you cannot buy a new device
I look at problems as a challenge to fix it and get a few more miles out of it. And I’m good at it. However, this is not smart. First and foremost for safety reasons,second you don’t have another bulb in the house that you can use to replace the burned out bulb? That is the smart way of fixing the problem, never mind the challenge.
Yes buy a new one is easy, but this is knowledge.. Maybe it's beneficial to someone else, but not for the others..
They emit very small amounts of power over many diodes, it's not that dangerous.
Why does it have to be top of battery that you use why not any other small piece of metal?.
Košice Vďaka ❤
Thanks for your comment! If you have any more questions or ideas, feel free to share!
Repairing with a soldering iron seems more professional to me.
Thank you! Cheers!
I will send you a box of bulbs so you do not get electrocuted. Promise 👌👌
😅😅😅The goal of the video is to help people find solutions in situations where they cannot buy a new device
@@creationholic101 ok!
Can't you check an individual diode with a multimeter? Some prefer to live dangerously, I suppose.
yes that is when you have enough equipment
أحذر ! الخطوط فى كف يدل تقول ان نجمك خفيف .
Thank you! Cheers!
En lugar de usar pila q es mas trabajoso, si se pone un pedacito de papel aluminio y se pega con cinta scoch es mas facil y tienes el mismo resultado. Sds.
Welcome to Creation Holic channel! Thanks so much for watching our video. Wish you all the best
mas fácil en ves de romper una betería que es peligroso ponerle un poquito de soldadura y queda listísimo jajajaja
WHY would you go through the battery trouble? You can literally do that with aluminum foil!
Thanks for sharing!
Amazing sharing ❤❤❤
Thank you! 🤗
I remember when these 1st came out...
On the box they stated a 10 YEAR life span...
ROFL
The 3rd 1 after trying these out...
It dam stopped lighting up...
Aren't you over driving the other LED's when removing one?
No !
Ok this is not the Great Depression. Don't risk being electrocuted or burning down the house for a $2 light bulb for crying out loud. And the $1000 medical bill after slicing off your finger tip 😅
If you take safety measures, and always turn off the power when not needed, then I think this is very easy
WHAT PLANET ARE YOU ON MAN...???
IT IS THE DEPRESSION...
CHILDREN IN WESTERN COUNTRIES ARE STARVING...
FOOD/ENERGY PRICES ARE ASTRONOMICAL...
COVID HAS NOT DISSIPATED YET (It will be back with a vengeance as it's just thinking about the next strain)...
BANKERS AND CITY MERCHANTS ARE JUMPING OFF THE HIGHEST BUILDING THEY CAN FIND...
Open you're eyes dude..👀
I find when led bulbs turn on and off often they will quit working alot soon then ones burn longer period of time the coal room downstairs or bathrooms quit working sooner then living room kitchen and poarch like with photo sensors thst burn for longer periods. The coal room get turned on and off when i check fire in boiler and the bathrooms they have the auto switch that detects a person turns on then off in ten minuets coal room turns of in one minute. One checks fire every 2 hours 1 hour when very cold
Thank you for sharing your feedback . Have a good day!
Wow! Amazing
Thank you! Cheers!
Cost more to destroy the battery than a new bulb lol
I used a dead battery
В Японии в магазинах возле дома лампочки уже перестали продавать, что столько времени автор предлагает посвятить ремонту лампочки дешманской!!!?.
I'm sorry to hear that the video didn't meet your expectations. I appreciate you bringing this to my attention
Под напряжением лезть, ну такое себе занятие ..
Thank you for watching
the battery part is difficult to cut
Thank you for watching
Just bridge the bad led with a 1k resistor
Thanks for sharing!
De Cadiz
Welcome to Creation Holic channel! Thank you so much for your support
Just used solder n paste
Thank you for watching
India
Welcome to Creation Holic channel! Hope you have a good time while watching the video
UK, and i wish i'd have known about this over the years i have thrown them away.
Glad you like them!
E’ inutile ripararle così perché poi è vero che accendono ma durano da 2 minuti a Max 3 gg, poi si bruciano di nuovo e si bruciano stranamente tanti altri Led.
it will be very useful if you have not bought a new device. i have been using it since then and have not seen any problem yet.
All the 3 ways are wrong, totally wrong. You will loose the whole bulb to dustbin.
I did it and it's very effective. You can try it
aluminum foil works easier
Thank you! Cheers!
Die erste Variante ist hoch gefährlich und auch betreff der sicheren Funktion sehr zweifelhaft.
it works very well, try it and feel it
Or you could just use a dab of solder ..
Thank you! Cheers!
Iran
Welcome to Creation Holic channel! Hope you have a good time while watching the video
@@creationholic101 Thank you, you make really informative and entertaining videos, good luck♥️♥️
You don't need the tweezers, just touch your tongue to the LEDs to find the bad one...!
You are truly a person with a sense of humor. I burst out laughing when I read this comment. Wishing you a joyful day!
Damn gotta take a 2 dollar battery to fix a 2 dollar bulb that every other led is just as close to burning out.
I used a dead battery
Why risk your life for a lightbulb just go buy one save your life and save somebody else’s life. I think this video was not safe at all.
it will be needed in those emergencies
This "fix" is irresponsible to say the least. A little bit of knowledge are usually dangerous...
Hello! thanks for your comment. Wish you all the best!
Too much work to save about 4 bucks
it will be needed in those emergencies
Not true it's a Fake video because I've tried it on one of my bad bulbs nothing but a bunch of BS
It's possible that your light bulb has a faulty electronic circuit, whereas the bulbs I repair have dead LED eyes
I did it with led pencil it works.
ma i led hanno +e meno
Could you clarify your comment? It seems like there's more to your thought!