Digital LED Clock DIY with PIC 16F84A - PCB Tutorial

Вставка
- Опубліковано 12 лип 2024
- ► $2 for 1-4 Layer PCBs, Get SMT Coupons: jlcpcb.com/DYE
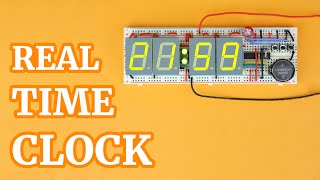
This is a Digital Clock with PIC 16F84A!
The Displays of this clock have a multiplexing connection, this allows to manage multiple displays with a single IC. The BC547 transistors are used to power only one display at time by turning on only the segments corresponding to the number to be displayed. The 4MHz crystal is used by the PIC to have a reference frequency with which to count the time as accurately as possible and the three buttons are used to set Hours, Minutes and Reset.
About PIC16F84A: is 8-bit microcontroller, was the first PIC microcontroller with a serial programming algorithm and an EEPROM memory.. You need a code to make these IC work! For programming the PIC I used this Ludipipo multi programmer, which can be connected to the PC via RS232
After trying the excellent service offered by JLCPCB I recommend it, the quality of the PCB is high, customer service is always available and professional, the time of realization is short and the delivery of PCBs is by express courier. JLCPCB is a great place to get hight quality custom circuit boards at an extremely low price, you can buy 5 PCB Boards (Any Color) for 2$ !!!
Components:
- 1x PIC16F84A (or 16F84)
- 1x DIP 18 Pin
- 4x BC547 NPN Transistors
- 1x LM7805
- 3x Buttons
- 1x Resistor 10Ω
- 1x Resistor 10KΩ
- 1x 100uF Electrolytic Capacitor (10V to 100V)
- 2x 22pF Capacitors
- 4x Common Cathode7 Segment Display
- 1x 4MHz quartz
- 2x 3mm LEDs
- 2x Pin or Power Cable
- PCB & Code: drive.google.com/file/d/1DHIP...
*Don't use my PCB for profit or sponsored videos.
Code credits: WinDis84, (c) Nigel Goodwin 1998
This circuit must be powered with 5-12V DC,
For any other questions you can ask me for explanations in the video comments:)
✅ Subscribe to my UA-cam channel It's FREE!
Chapters:
0:00 - Intro
0:11 - Explanation
1:28 - Circuit Explanation
2:14 - JLCPCB
2:59 - Unboxing
3:40 - Start Assembly
6:04 - TEST
6:38 - END
■▬▬▬▬▬ LINK & Support ▬▬▬▬▬■
✅ UA-cam: / stefano91ste
✅ Instagram: / stefano91ste
✅ Pinterest: www.pinterest.it/Stefano91ste
✅ My STORE: / stefano91ste
Watch another video =)
● Music Keyboard: • Music Keyboard with NE...
● LED Water Level: • LED Water Level indica...
● Police Light: • POLICE LED Light DIY w...
● Vu-Meter Stereo: • Vu-Meter Stereo -20 +3...
● Traffic Light: • Make your own Traffic ...
● Vu-Meter 40 LED: • Vu-Meter 40 LED on PCB...
● Voltage Detector: • AC Voltage Detector DI...
WARNING: This video is only for demonstration. I don't take any responsibility.
#Digital #Clock #diyprojects - Наука та технологія