Titans of CNC might have a thing or two to learn on this channel. Machining is not about running fast and making crazy cuts with crazy tools on crazy machines, claiming to be a CNC expert. This kind of simple video is where the heart of machining truly beats
Great video! Always happy to see a new video on this channel:) Did you make these jaws for this part or did you have them laying around? If you made this for this part why not also bore the smaller diameter in there? Would almost double the clamping surface. How do you preload the softjaws when you bore them? Do you use a plug or a ring? I'm always using a adjustable ring and if i clamped the part they are always spot on. Is it not easier to set the c axis with the haimer? I would measure the key on both sided by only moving the c axis. On the first side you set the c to zero and the second side you know the amount off degrees difference between the 2 sides so you move the c to halve that value and set c zero. But that is how i do things. Love to see how other people do stuff like this.
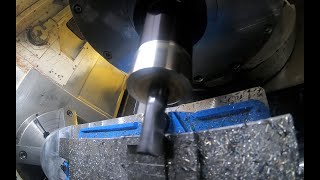
Yes the Haimer could be used to set the C axis. But in this case the key isn't tall enough to get the probes sphere on the sides. What you can do if the Haimer can reach is to just move off center by half the keys width then just jog the C axis into the Haimer until you reach it's zero. That is generally close enough. These jaws were not bored specifically for this part but there were only two parts so I went this way. And yes it would have been better to bore them for both diameters. But I would still check the run out at the parts end. To bore jaws I do use a ring when possible. If that for some reason isn't possible I generally bore a slight taper in the bore getting larger in the back so there is more pressure on the outer ends of the jaws.
I spent 4 hours the other day shimming, clamping beating and prying on a part trying to get the alignment right. If its out to begin with then every operation after that is out too. That is how I look at it.
Hey Peter. Do you have any recommendations for indicating the centre line of an ER32 tool taper in a CNC lathe. I use a coaxial indicator ATM but they all have poor resolution. I have a 1 micron indicator on a flexible noga base but struggle to tell what is gravity and what is real error. Any tips or tricks much appreciated.
Just chuck the indicator directly in the chuck with a straight shank. Maybe you indicator has one of those dovetail straight shanks in it's kit. Then carefully jog the collet chuck up to the indicator and with a mirror rotating the chuck by hand read both sides of the collet chuck to get it centered. The key is to not use a mag base or anything like that. and keep the indicator very short. I have also done this before. Chuck a piece of aluminum in the spindle face the end flat. Then put a short carbide spot drill with its flutes more or less aligned to the X axis. Plunge it into the bars end noting how it cuts on one side or the other. When it cuts on both sides evenly you will be on center. I have done the spot drill thing many times. It is surprisingly accurate. Easily within .001" of center.
This is what I do for tapping cycles. For easier to tap materials I generally use what speed would be for 40 inches per minute. So lets say you have a 3/4-10 tap. So for a feed of 40 inches per minute it would be 400 rpm. Or lets say a 3/8-16 it would be 160 (For 10 inch per min) times 4= 640 rpm. See how that works? So because larger taps generally have steeper pitches this automatically slows the speed for them. For tougher materials like inconel or titanium I cut this in half to 20 inches per minute. The mistake a lot of people make is running the taps to slow. Especially in steels. This can actually be harder on the tap. In materials like titanium or copper and beryllium copper you really need to use the proper tap for the material. These materials close down on the tap and it usually brakes when the spindle reverses. So take the pitch divided into one inch then multiply it by 40 or 20. If you deal in metric you will need to make a conversion of sorts. I'm not sure I am always programming in inches.
I've been tapping too slow all my life 🥲 by the way we recently bought a bunch of OSG "A" SFT taps (the one with the shiny red letter A) and they really changed our tapping game and tapped thread finish
very thorough on setup. I know that on some machines the probe is assigned as tool# 1 and all other tools are offset to that. Is this the case here with your Mazak?
On my machines I always set it in the last tool pot 80 in this case. But what I think you are referring to is a reference tool (As it is called) in some setups. This is a way to offset tools on a machine. Then all tools fallow the reference tool. Sort of as if it was a fixture offset. On machines that use probing the spindle probe is actually setting these fixture offsets. As you saw me manually set in this video. In this video use the Haimer probe to do this. I have set a tool offset for it (Also tool 80.01 (A on the Mazak) and the Renishaw probe is 80.02 (B on the Mazak)). So when I jog the Haimer up to it's zero in Z then go to the offset page and tell the machine to calculate zero. Its taking that offset I have set on the Haimer and using it to calculate the distance of the spindles face from the machine's zero return position and set it in the offset. The spindle probe does exactly the same thing. Just automatically from a program. I have made some videos in the past explaining tool and fixture offsets. But It may be time to make another to more thoroughly explain this topic. Because it can be done in several different ways and achieve the same result. Hope that wasn't to long!
It could if you were interested in ultimate precision. I personally very seldom use such devices. I see people on UA-cam using torque wrenches on vices and fixturing. I think with experience a person learns to feel the proper force to tighten things. There are a lot of variables that come into play with the actual clamping force that is applied and although torque may be a good indicator in some cases, I have personally used many vises in a setup and they all can vary as to the clamping force applied from the tightening torque applied to their handle. Maybe lubrication dirt corrosion comes into play. I don't know.
If the Y and X axis center of the machine move a couple of thousands of inches when it's warm versus cold, does it mean as you start to machine the part and the ballscrews and everything gets warm, the part gets out of center? I have this problem on a Doosan lathe with only a C axis milling. I can't adjust the Y axis (there is none) so all my center drilling tools are slightly out of center the first hours of the day. I can adjust the external X offset for all the turning tools, and this is very effective for controlling the cold/warm tight tolerances of the whole turret, but it doesn't help much when the tool is supposed to be on center and it's slightly "Y-axis out"
@@tristanmaloney7841 i don't feel like running 100% rapids for 10 minutes when the machine is cold. It's extremely fast and will travel kilometers every morning just to adjust a couple microns. Also, I've run series of parts with a lot of rapid needed (like hundreds of 45 seconds parts), and while the spindles get to working temperature in 15 mins, the screws still take a couple of hours to get warm. So I just accept it. I use the external X offset. I wish this machine could automatically offset the axis depending on the temperature, and I think Okuma's do that
The part in this video didn’t have a ID hole. If you are referring to my next video about milling the helical flutes on the parts OO. No I didn’t have to rebore the ID.


Titans of CNC might have a thing or two to learn on this channel. Machining is not about running fast and making crazy cuts with crazy tools on crazy machines, claiming to be a CNC expert. This kind of simple video is where the heart of machining truly beats
True. Elegantly simple.....
Titans of CNC is more of a commercial than anything else. They are a commercial for the equipment manufacturers and for the trade itself.
Good to have you back. I always like your channel.
I learn something Everytime! Distorting the 3 jaw with the adjustment screws. ...
Yeah I tighten the shit out of mine on my 4th axis chuck in my mill lol.
Always enjoy your videos, thanx. I was the same way, closer the better. Nice to see finesse.
Always entertaining and educational. Thanks for the videos.
Great video! Always happy to see a new video on this channel:)
Did you make these jaws for this part or did you have them laying around? If you made this for this part why not also bore the smaller diameter in there? Would almost double the clamping surface.
How do you preload the softjaws when you bore them? Do you use a plug or a ring? I'm always using a adjustable ring and if i clamped the part they are always spot on.
Is it not easier to set the c axis with the haimer? I would measure the key on both sided by only moving the c axis. On the first side you set the c to zero and the second side you know the amount off degrees difference between the 2 sides so you move the c to halve that value and set c zero. But that is how i do things. Love to see how other people do stuff like this.
Yes the Haimer could be used to set the C axis. But in this case the key isn't tall enough to get the probes sphere on the sides. What you can do if the Haimer can reach is to just move off center by half the keys width then just jog the C axis into the Haimer until you reach it's zero. That is generally close enough. These jaws were not bored specifically for this part but there were only two parts so I went this way. And yes it would have been better to bore them for both diameters. But I would still check the run out at the parts end. To bore jaws I do use a ring when possible. If that for some reason isn't possible I generally bore a slight taper in the bore getting larger in the back so there is more pressure on the outer ends of the jaws.
Thank you as always for sharing your approach.
Interesting!! Thanks for your time!!
Happy to see you again.
I spent 4 hours the other day shimming, clamping beating and prying on a part trying to get the alignment right. If its out to begin with then every operation after that is out too. That is how I look at it.
Theamazingsack - and it's master.
Hey Peter. Do you have any recommendations for indicating the centre line of an ER32 tool taper in a CNC lathe. I use a coaxial indicator ATM but they all have poor resolution. I have a 1 micron indicator on a flexible noga base but struggle to tell what is gravity and what is real error. Any tips or tricks much appreciated.
Just chuck the indicator directly in the chuck with a straight shank. Maybe you indicator has one of those dovetail straight shanks in it's kit. Then carefully jog the collet chuck up to the indicator and with a mirror rotating the chuck by hand read both sides of the collet chuck to get it centered. The key is to not use a mag base or anything like that. and keep the indicator very short. I have also done this before. Chuck a piece of aluminum in the spindle face the end flat. Then put a short carbide spot drill with its flutes more or less aligned to the X axis. Plunge it into the bars end noting how it cuts on one side or the other. When it cuts on both sides evenly you will be on center. I have done the spot drill thing many times. It is surprisingly accurate. Easily within .001" of center.
10,000 of a degree step increment on that axis means 3,600,000 steps per revolution encoder. So 22 bits encoder? (2^22 is 4,194,304)
good video peter
Hey Peter, great video!! I was trying to find the video you did on tap speeds and feeds. I was wonder what was you formula for that?
This is what I do for tapping cycles. For easier to tap materials I generally use what speed would be for 40 inches per minute. So lets say you have a 3/4-10 tap. So for a feed of 40 inches per minute it would be 400 rpm. Or lets say a 3/8-16 it would be 160 (For 10 inch per min) times 4= 640 rpm. See how that works? So because larger taps generally have steeper pitches this automatically slows the speed for them. For tougher materials like inconel or titanium I cut this in half to 20 inches per minute. The mistake a lot of people make is running the taps to slow. Especially in steels. This can actually be harder on the tap. In materials like titanium or copper and beryllium copper you really need to use the proper tap for the material. These materials close down on the tap and it usually brakes when the spindle reverses. So take the pitch divided into one inch then multiply it by 40 or 20. If you deal in metric you will need to make a conversion of sorts. I'm not sure I am always programming in inches.
Awesome Tip! Thanks for all the good info@@EdgePrecision
@@EdgePrecision awesome appreciate you!
I've been tapping too slow all my life 🥲 by the way we recently bought a bunch of OSG "A" SFT taps (the one with the shiny red letter A) and they really changed our tapping game and tapped thread finish
I know what you mean about spinning that jog knob the wrong way:)
very thorough on setup. I know that on some machines the probe is assigned as tool# 1 and all other tools are offset to that. Is this the case here with your Mazak?
On my machines I always set it in the last tool pot 80 in this case. But what I think you are referring to is a reference tool (As it is called) in some setups. This is a way to offset tools on a machine. Then all tools fallow the reference tool. Sort of as if it was a fixture offset. On machines that use probing the spindle probe is actually setting these fixture offsets. As you saw me manually set in this video. In this video use the Haimer probe to do this. I have set a tool offset for it (Also tool 80.01 (A on the Mazak) and the Renishaw probe is 80.02 (B on the Mazak)). So when I jog the Haimer up to it's zero in Z then go to the offset page and tell the machine to calculate zero. Its taking that offset I have set on the Haimer and using it to calculate the distance of the spindles face from the machine's zero return position and set it in the offset. The spindle probe does exactly the same thing. Just automatically from a program. I have made some videos in the past explaining tool and fixture offsets. But It may be time to make another to more thoroughly explain this topic. Because it can be done in several different ways and achieve the same result. Hope that wasn't to long!
feel is what I get,,,,depending on what is at hand...all machining ooerations consideed...
Would it be beneficial to use a torque driver on the set-tru screws so they are all the same?
It could if you were interested in ultimate precision. I personally very seldom use such devices. I see people on UA-cam using torque wrenches on vices and fixturing. I think with experience a person learns to feel the proper force to tighten things. There are a lot of variables that come into play with the actual clamping force that is applied and although torque may be a good indicator in some cases, I have personally used many vises in a setup and they all can vary as to the clamping force applied from the tightening torque applied to their handle. Maybe lubrication dirt corrosion comes into play. I don't know.
If the Y and X axis center of the machine move a couple of thousands of inches when it's warm versus cold, does it mean as you start to machine the part and the ballscrews and everything gets warm, the part gets out of center? I have this problem on a Doosan lathe with only a C axis milling. I can't adjust the Y axis (there is none) so all my center drilling tools are slightly out of center the first hours of the day. I can adjust the external X offset for all the turning tools, and this is very effective for controlling the cold/warm tight tolerances of the whole turret, but it doesn't help much when the tool is supposed to be on center and it's slightly "Y-axis out"
Have you considered running a warmup program where you rapid the tool around for ~10min
@@tristanmaloney7841 i don't feel like running 100% rapids for 10 minutes when the machine is cold. It's extremely fast and will travel kilometers every morning just to adjust a couple microns. Also, I've run series of parts with a lot of rapid needed (like hundreds of 45 seconds parts), and while the spindles get to working temperature in 15 mins, the screws still take a couple of hours to get warm. So I just accept it. I use the external X offset. I wish this machine could automatically offset the axis depending on the temperature, and I think Okuma's do that
can i get half dozen centre lines
and a spray on can of pattina
I need a coffee break now. That locating was a job just for one part.
I have not found a video about your miracle clamping device
My miracle clamping devise? If there is a video you are referring to I need more than this to help you find it.
Dem engineers...frigers...
😃
Do you have to rebore ID because it would get a triangle shaped?
The part in this video didn’t have a ID hole. If you are referring to my next video about milling the helical flutes on the parts OO. No I didn’t have to rebore the ID.
@@EdgePrecision oh ok I didn’t realize that it is a solid part with out a bore yet. Good video.
Hey I have a question. Do you write the programs
No I use cam software for this machine. But I have in the past written programs for other machines.