Thank you....thank you .... thank you!!! I really needed this and I found it in the nick of time. Two of your recent videos were like manna from Heaven!! The one that replaces the Dana 44 axles and this one. Today, June 9th I marched into those projects with the utmost confidence. I was so depressed and almost gave up on the axles.....BFH garage to the rescue!
Thank you so much. I took one side of my brakes off after taking multiple pictures before hand. Spent 2 hours trying to get it back together and just couldn't get the adjuster right. Came across your video and watched it a few times, had both sides off and put back together complete with new wheel cylinders in just over an hour. Best Jeep brake video out there
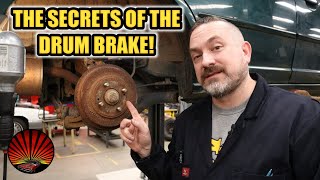
Hi Mike, did this job today with backing plate in situ on the axle. The hard part was getting the handbrake bracket to stay in the correct place through the brake shoe slot. Looks quite easy on the bench but you have gravity helping things stay in place. Thank you for this video it was a true life saver and very easy to follow. Many thanks I'm sure others will have been greatly helped by this excellent video.
Just wanted to say thank you for this video! I'm very much a novice at auto work and was a bit intimidated by my TJ's drum brakes, but this particular video not only showed it perfectly, but also has the exact same brakes as my own (unlike a few others I've watched, which used newer brakes with a different configuration). I think I've watched this video about 17 times in the process of fully disassembling, replacing, and reinstalling, but it's finally there.
Thank you for this video, super clear and helped me immensely. You can take all the photos that you want before disassembly, this kind of step by step is still essential when you’re rebuilding. Couple of things that might help others swearing profusely. When trying to refit the curved plate to the end of the hand brake cable, if you’re struggling from lack of hands to compress the spring sheath of the cable AND fit the plate, it makes things easier if you slacken off the hand brake cable adjuster under the car with a 1/2 spanner and a screwdriver. Also, those little bastard springs with slotted caps that retain the brake shoes - I fully compressed each spring with 2 little nylon zip ties that I then ripped off with the pliers once the cap/pin was engaged. Good luck, and make sure you have plenty of beer for moral support!
You have the best videos out there for Jeep projects. I have rebuilt my wife's TJ with your help. Regeared, air locker, brakes, lift, etc. Thanks for what you do. I'm in Colorado Springs. We should go hit some trails one day!
Thank you for this video! I was in such a demo mode. I disassembled my yj rear brakes without taking pictures. I pulled out the rear to blast it paint it and rebuild it. That’s another video I thank you for!! Thanks again!!
My comment that was very good very informative I love how you showed how you did it all I know it was a lot easier when it's not on the vehicle but that was very helpful I think you're the only person who has showed it as well as you have kudos to you keep the shiny side up
As you started with saying do some research.... That's just what I'm doing. Glad I found this. About to do the brakes on my TJ. Don't have to look any further. Very useful. Thx!
I always enjoy watching your videos! You do such a nice job of explaining AND showing the details. One suggestion I have regarding the final installation of the keeper springs with the slotted plates is to use regular pliers instead of needle nose. I grasp the edge of the keeper plate and push the spring/keeper down onto the pin and then turn the keeper/spring assembly into position. It is exactly like what you did except working from the top of the assembly. It works well for me - perhaps it will be good for you too 🙂 By the way, I own All the "proper" brake tools and I prefer to use regular pliers, small vice grip pliers and a screwdriver for this kind of brake work. I learned that not all specialty tools are really better. Again YMMV .
Since many of us are working on the vehicle with the axle in the way I have a couple of tips to keep you from pulling your hair out. The cable guide (half moon shape) that is held in place by the first large spring likes to jump out of the hole in the brake shoe as you are putting the spring in place. Put some wheel bearing grease on the back of the guide and it will stay in place while you attach the spring. Also leave the cable off the guide and first hook it to the adjuster then lift the adjuster up with one finger and slip the cable over the guide with your free hand
Mike Migell. I wish I watched this video before I did my brakes. Had a hell of a time with the retaining spring clips. I had a special tool but you used the needle nose pliers and looked much easier.
Thanks for posting this. I find that the smaller drum brakes are a lot trickier than say 11" shoes. I just did my rear brakes on my Wrangler. My only suggestion would be to recommend lubricating the threads of the adjuster and the other end using brake lube or Never-seez.
If the self adjusting arm doesn’t make contact or seek to be working. Ensure the silver cable guide is properly seated in its hole. It’s very easy for this to get pulled out when stretching the top aft spring. Mine was just slightly out and caused the system not to work. Whoever rebuilt previous to me made the same mistake.
"somebody is bound to do it." Yep. Had a friend who thought the grease packet that came with the pads was how they made them "anti-squeak" so he coated those pads with that grease. He was like "man, these new pads stop way worse than my old ones" and he asked me to take a look. Hilarity ensued.
Super helpful video, thanks a lot for sharing. I've never done drums before and I'm watching this as I go like a cooking video 😂 now if only it was as easy on the Jeep as it is on the bench haha
A tool I don't currently own. The parking brake cable bracket under the jeep is the same way. I think I don't do it enough to get a tool but I really should. 👍
Is the Parking Brake Lever side specific? I have the same one you have there but I don't see the installation for the other side so I can check if they're the same. Thank you for this How-To video. Excellent.
Good quality video, but have found a number of drum videos for the TJ, but none so far on the process of Handbrake (or Emergency brake as it is also called) cable replacement?
I know this is an old video, but is the hub supposed to be a tight fit going into the housing? My new one slips right in (without the axle in the way) and actually has a slight bit of play. I got the Mevoteck brand. Went by ratings, didn’t see any Timken ones at the time.
oh those little spring retainers are very much frustrating. I ended up compressing them with an open ended spanner, worked a treat. after cursing over and over haha
A old aircraft trick with springs. If you have lace or cord that is strong enough. Take a pair of vice grips and compress one side, then tie it to keep it compressed. Then do the other side. Once the nut/cap is in place all you have to do is cut the lace and the spring expands.
Good afternoon, I bought all the parts (springs, etc.) to install new ones in the brake system of my Jeep Wrangler, but I have three pieces left over that I don't know where they are placed, a washer, a metal clip, and some kind of pin.
Double check everything that came off of the old brakes. If those parts are in the pile, then you'll need to figure out where they came from. Depending on the parts you bought, some kits can be used on several different vehicles and those other vehicles may require the extra parts. If your old parts did not include these parts, then you can just toss them. BUT VERIFY BEFORE YOU DO!
@@TheBFHGarage Thank you very much, in principle I dismantled the left rear brake, but since I have the right one without disassembling, I will do what you tell me, thanks again.
Thanks for the video. New TJ owner. Just did this complete rebuild with Powerstop kit. One drum when back on and tightened adjuster for just a little resistance. The other side has the adjuster all the way in and the drum was tight to get on. Triple checked that everything was installed correctly. At a loss as to why the other side is so tight on the shoes? Any suggestions?
Double check everything that you did it right. It's easy for you to miss your own mistake. If you can't find it, I would disassemble and reassemble everything to rule out something you couldn't see. Make sure pads are in the notches etc.
Gravity keeps you from being able to lay any part in place while you do anything else. Comparing a bench job where gravity is your third hand to doin a job on the vehicle is quite disingenuous. Additionally you are putting enough grease on the parts for a engine assembly video. Grease is to be used very sparingly in a system the requires friction for it to work properly...
@@allenl8322 The main purpose of the video is to show how all the parts go together. I've done these on the axle still. The parts that require friction do not get grease. Grease goes where the moving parts are metal on metal, not the pads where the friction is.
Is that parking brake lever at minute 1240 need to be in there for the rest of the brakes to work? I am missing one on my Jeep and I cannot find the part anywhere. Is it possible to hook everything else up and just bypass the parking brake?
@@TheBFHGarage thanks for the reply, I actually just got home from the junkyard. I found them from a 2000 Cherokee with the 9 inch drums and they are direct fit. I will definitely be watching your video again when I install, it is very informative. Thank you
If drum brakes don't stop as good as disc brakes, then why are they still used? Because they do. There are many reasons why manufactures choose drum over disc. The main reason being cost to produce vs. disc.
By far the best video on UA-cam for these brakes. These brakes are a pain to work on. Without the axels in the way, you can see where all the ridiculous little parts go. Fooling with these drum brakes makes me want to do the disk brake conversion.


Thank you....thank you .... thank you!!! I really needed this and I found it in the nick of time. Two of your recent videos were like manna from Heaven!! The one that replaces the Dana 44 axles and this one. Today, June 9th I marched into those projects with the utmost confidence. I was so depressed and almost gave up on the axles.....BFH garage to the rescue!
Awesome to hear you have the confidence! Thanks for the kind words!
.0
One year to the day, I will reiterate this comment 1000%. Thank you BFH Garage!! Now I can have brakes again. Yay!
Glad to hear it helped you out!
You must have superhuman strength getting those big springs on like that.
Thank you so much. I took one side of my brakes off after taking multiple pictures before hand. Spent 2 hours trying to get it back together and just couldn't get the adjuster right. Came across your video and watched it a few times, had both sides off and put back together complete with new wheel cylinders in just over an hour. Best Jeep brake video out there
Thanks for the compliment! Glad it helped you out!
Hi Mike, did this job today with backing plate in situ on the axle.
The hard part was getting the handbrake bracket to stay in the correct place through the brake shoe slot.
Looks quite easy on the bench but you have gravity helping things stay in place.
Thank you for this video it was a true life saver and very easy to follow.
Many thanks I'm sure others will have been greatly helped by this excellent video.
Definitely easier on the bench. The whole purpose is to show how and where everything goes for reference. 👍
Great tutorial! I took apart and re assembled my YJ drum brake in about 30 min!Thank you!
Just wanted to say thank you for this video! I'm very much a novice at auto work and was a bit intimidated by my TJ's drum brakes, but this particular video not only showed it perfectly, but also has the exact same brakes as my own (unlike a few others I've watched, which used newer brakes with a different configuration). I think I've watched this video about 17 times in the process of fully disassembling, replacing, and reinstalling, but it's finally there.
excellent video - shows exactly what is needed to put these things back together!
Thank you for this video, super clear and helped me immensely. You can take all the photos that you want before disassembly, this kind of step by step is still essential when you’re rebuilding.
Couple of things that might help others swearing profusely. When trying to refit the curved plate to the end of the hand brake cable, if you’re struggling from lack of hands to compress the spring sheath of the cable AND fit the plate, it makes things easier if you slacken off the hand brake cable adjuster under the car with a 1/2 spanner and a screwdriver. Also, those little bastard springs with slotted caps that retain the brake shoes - I fully compressed each spring with 2 little nylon zip ties that I then ripped off with the pliers once the cap/pin was engaged.
Good luck, and make sure you have plenty of beer for moral support!
By far the best video I have ever seen on this job. Thank you for sharing. 😀
You have the best videos out there for Jeep projects. I have rebuilt my wife's TJ with your help. Regeared, air locker, brakes, lift, etc. Thanks for what you do. I'm in Colorado Springs. We should go hit some trails one day!
Glad they all helped out! I'm sure we'll see you out there!
Thank you for this. my parking break broke and I couldn't see how its connected. I can now. thanks again.
I appreciate the time the effort spent putting your videos together.
That was so awesome!! Thank You!!! I was dead in the water without this!!!!
Glad it helped you out!
I was missing a few broken springs and the video helped immensely. Thanks!
Glad it helped out!
Thank you for this video!
I was in such a demo mode. I disassembled my yj rear brakes without taking pictures. I pulled out the rear to blast it paint it and rebuild it. That’s another video I thank you for!!
Thanks again!!
I learned a lot! Thank you for taking the time to make this video. Keep up the good work dude.
Good demo with great explanation. Thanks. Wish you could have put it back on to the car and do the priming and bleeding.
My comment that was very good very informative I love how you showed how you did it all I know it was a lot easier when it's not on the vehicle but that was very helpful I think you're the only person who has showed it as well as you have kudos to you keep the shiny side up
As you started with saying do some research....
That's just what I'm doing. Glad I found this. About to do the brakes on my TJ. Don't have to look any further. Very useful. Thx!
I always enjoy watching your videos! You do such a nice job of explaining AND showing the details. One suggestion I have regarding the final installation of the keeper springs with the slotted plates is to use regular pliers instead of needle nose. I grasp the edge of the keeper plate and push the spring/keeper down onto the pin and then turn the keeper/spring assembly into position. It is exactly like what you did except working from the top of the assembly. It works well for me - perhaps it will be good for you too 🙂
By the way, I own All the "proper" brake tools and I prefer to use regular pliers, small vice grip pliers and a screwdriver for this kind of brake work. I learned that not all specialty tools are really better. Again YMMV .
Since many of us are working on the vehicle with the axle in the way I have a couple of tips to keep you from pulling your hair out. The cable guide (half moon shape) that is held in place by the first large spring likes to jump out of the hole in the brake shoe as you are putting the spring in place. Put some wheel bearing grease on the back of the guide and it will stay in place while you attach the spring. Also leave the cable off the guide and first hook it to the adjuster then lift the adjuster up with one finger and slip the cable over the guide with your free hand
Thank you! I literally couldn’t have done this without this video
Glad it helped out!
Thank you never done this job before so very helpful to watch you work, excellent instruction most appreciated
The previous owner who put our breaks together must have been from the insane assyleum! 😂 You save our lives!
Glad it helped!
Thank you for the video I am a diy guy and this video was great saved my ass. Thank you again.
Thanks for detailed video , I was uncertain witch side the big and small shoe went , now I know , nice video
What brand of break pad kit? This was a clearest instructions of many I have watched and it seems that no one buys any special tools.
Mike Migell. I wish I watched this video before I did my brakes. Had a hell of a time with the retaining spring clips. I had a special tool but you used the needle nose pliers and looked much easier.
Thanks for posting this. I find that the smaller drum brakes are a lot trickier than say 11" shoes. I just did my rear brakes on my Wrangler. My only suggestion would be to recommend lubricating the threads of the adjuster and the other end using brake lube or Never-seez.
If the self adjusting arm doesn’t make contact or seek to be working. Ensure the silver cable guide is properly seated in its hole. It’s very easy for this to get pulled out when stretching the top aft spring. Mine was just slightly out and caused the system not to work. Whoever rebuilt previous to me made the same mistake.
Big thanks I was Forsure puzzled when I didn’t have anything on mine lol
"somebody is bound to do it." Yep. Had a friend who thought the grease packet that came with the pads was how they made them "anti-squeak" so he coated those pads with that grease. He was like "man, these new pads stop way worse than my old ones" and he asked me to take a look. Hilarity ensued.
Great video, thanks for posting it.
Super helpful video, thanks a lot for sharing. I've never done drums before and I'm watching this as I go like a cooking video 😂 now if only it was as easy on the Jeep as it is on the bench haha
thanks heaps for the video. That hand brake cable comes out easier if you use a ring spanner to depress all the tabs at the same time. hope it helps 🙂
A tool I don't currently own. The parking brake cable bracket under the jeep is the same way. I think I don't do it enough to get a tool but I really should. 👍
Dude! You saved my butt. Thank you. One question, How about the washer and U-clip?
Great job explanation. A+
F. This reminds me why I hate drum brakes. Thank you for the video though. Much needed
Excellent DIY video . Thank you for sharing.
Great video, thanks!
Is the Parking Brake Lever side specific? I have the same one you have there but I don't see the installation for the other side so I can check if they're the same. Thank you for this How-To video. Excellent.
invest in the brake drum tools! makes for an easy install!
Great video! Thanks for taking the time!!
Excellent video. Thank you.
Outstanding....thanks
Excellent presentation... Thank you!
Excellent
Awesome video....But whoever invented the drum brake system..was on PCP..
Good quality video, but have found a number of drum videos for the TJ, but none so far on the process of Handbrake (or Emergency brake as it is also called) cable replacement?
I'll put that on the list for the next time I do brakes on one with drums.
Thank you
What about using 13mm box end wrench to remove the e brake cable
I know this is an old video, but is the hub supposed to be a tight fit going into the housing? My new one slips right in (without the axle in the way) and actually has a slight bit of play. I got the Mevoteck brand. Went by ratings, didn’t see any Timken ones at the time.
Excellent job
Excellent video. Thank you!
Big help. Thanks
oh those little spring retainers are very much frustrating. I ended up compressing them with an open ended spanner, worked a treat. after cursing over and over haha
Needle nose vice grips around the perimeter of the "nut"... push, then twist.
A old aircraft trick with springs. If you have lace or cord that is strong enough. Take a pair of vice grips and compress one side, then tie it to keep it compressed. Then do the other side. Once the nut/cap is in place all you have to do is cut the lace and the spring expands.
That's way too much work right there lol. Spring pliers if I had them.
Good afternoon, I bought all the parts (springs, etc.) to install new ones in the brake system of my Jeep Wrangler, but I have three pieces left over that I don't know where they are placed, a washer, a metal clip, and some kind of pin.
Double check everything that came off of the old brakes. If those parts are in the pile, then you'll need to figure out where they came from. Depending on the parts you bought, some kits can be used on several different vehicles and those other vehicles may require the extra parts. If your old parts did not include these parts, then you can just toss them. BUT VERIFY BEFORE YOU DO!
@@TheBFHGarage Thank you very much, in principle I dismantled the left rear brake, but since I have the right one without disassembling, I will do what you tell me, thanks again.
I needed this! Great video
Science
Hooking the EMERGENCY BRAKE back up starts at 13:25 for those that want to see this.✅ the end of that (with a Good Photo is at 19:52…!! 😎👍👏👌🥳
Awesome video!!! Definitely helped me!!!
Was that back driver side?
I have a good feeling my 98 jeep wrangler never had this done.. and I can see why...with million peices.
Great video....same as a dana 35 on a 2000 jeep tj? Thanks!
Yep
Awesome video, explained very well, thank you!!!!
Great job
Bro u are a rock star. Gracias
thanks a lot!! tumbs up!
Thanks for the video. New TJ owner. Just did this complete rebuild with Powerstop kit. One drum when back on and tightened adjuster for just a little resistance. The other side has the adjuster all the way in and the drum was tight to get on. Triple checked that everything was installed correctly. At a loss as to why the other side is so tight on the shoes? Any suggestions?
Double check everything that you did it right. It's easy for you to miss your own mistake. If you can't find it, I would disassemble and reassemble everything to rule out something you couldn't see. Make sure pads are in the notches etc.
Great video
Bench repair is very different from on the car. I couldn’t use most of your tips because mine is still on the Jeep.
It is not very different at all. What was tough that you couldn't do while on the vehicle?
Gravity keeps you from being able to lay any part in place while you do anything else. Comparing a bench job where gravity is your third hand to doin a job on the vehicle is quite disingenuous.
Additionally you are putting enough grease on the parts for a engine assembly video. Grease is to be used very sparingly in a system the requires friction for it to work properly...
@@allenl8322 The main purpose of the video is to show how all the parts go together. I've done these on the axle still. The parts that require friction do not get grease. Grease goes where the moving parts are metal on metal, not the pads where the friction is.
It's a Jeep, roll it over on it's side :)
Is that parking brake lever at minute 1240 need to be in there for the rest of the brakes to work? I am missing one on my Jeep and I cannot find the part anywhere. Is it possible to hook everything else up and just bypass the parking brake?
I've never thought of that or looked at doing that so I can't say for sure .
@@TheBFHGarage thanks for the reply, I actually just got home from the junkyard. I found them from a 2000 Cherokee with the 9 inch drums and they are direct fit. I will definitely be watching your video again when I install, it is very informative. Thank you
I have a 2005 jeep x. Having trouble with the brake shoes not compressing back into place on the driver side after rebuilding. Everything is new.
I would take it back apart and start over. Sounds like you got something wrong.
Doesn’t grease collect dirt, debris and brake shavings or whatever you wanna call it??
Of course it does. But those metal on metal parts have to have grease. It's not like a bearing though where it needs to be packed and sealed.
Many thanks for this excellent tutorial!
"Thank you my fellow Americans"
My son's name is Cullen also!
My shoes do not have the pin in them. Where can I get the shoes that you have?
That was a long time ago. I think they were either from Rock Auto or maybe Napa 🤷
Where did you get the new parts from
I like to use Rock Auto if I'm not in a hurry and plan for a project. If I need something now, I tend to use Napa.
Exelent!!
Great video but why didn’t you show a break spring tool? So much easier
I agree they are easier.... Didn't have one on hand... Just another way to make it work
So if drum brakes have just as much stopping power as disk brakes then why do most trucks have drums in the rear instead of disk brakes all around?
If drum brakes don't stop as good as disc brakes, then why are they still used? Because they do. There are many reasons why manufactures choose drum over disc. The main reason being cost to produce vs. disc.
True. Cost plays the biggest role of all in business unfortunatly.
thx
You got some grease on the pad there buddy
Yep, brakleen took it right off when I was done. Sometimes that happens no matter how careful you think you're being.
How did you get that entire peice off the axle?
When you remove the four axle shaft retaining nuts and remove the shaft, the backing plate will come right off.
what kit is this?
Napa
Definitely got a sub from me. I can whiz through discs in 15-20 min. But these drums…..omg….annoying.
💯💯
14:24 can anyone think of how that bar could pop out of place?
Worn parts or adjustment cylinder not adjusted properly
@@TheBFHGarage I'll look for that, taking the brakes apart later today with your vid ready to watch. Thanks much for posting this.
Bad camera angles.
Not a good video unless you are working on your bench to do a brake job!
Grab your smartphone and make a better video then. This one was fantastic!
Still a good video.
By far the best video on UA-cam for these brakes.
These brakes are a pain to work on. Without the axels in the way, you can see where all the ridiculous little parts go.
Fooling with these drum brakes makes me want to do the disk brake conversion.