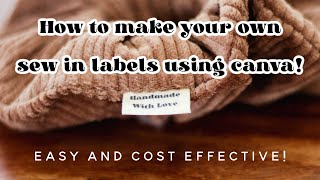
How To Make Your Own Fabric Labels In Your Printer

Вставка
- Опубліковано 9 лют 2025
- Disclaimer! I DO NOT GARENTEE OR TAKE RESPOSABVILITY of any failure in this project. You are taking the risk on your own to put the fabric through your printer. Not all printers are the same. Not all results will be the same.
In this tutorial I will show you step by step how I make my own printed fabric labels. You will see from picking the right fabric to creating a label in Avey.com, to printing the final sheet of labels.


Thank you! I like the way you walk us through ever step. The best tutorial I have seen. You're the best.
Thank you for the video! I used to make my own. It has been a while so great to be reminded. One little tip I remembered from before: you can use Freezer paper vs printer paper. The freezer paper has a shiny side, when you place that on your fabric and press it, it will adhere to your fabric. Then trim your fabric& paper before loading into the printer. Thank you again, very useful information!!!
Hands down the best label tutorial I have watched. Thank you so much.
Thank you for watching, and your kind words. Happy I could help.
This is a great way too make labels! It worked great going through my ink jet printer!
But one thing to note is that if you use colored ink it will wash out, so if your making something that may get put in the washer I recommend just using black ink. And just FYI the black ink didn’t wash out at all. So I’m very happy about that 😁
I"m glad I found this video and your advice on the ink jet printer with black ink because I didn't want to purchase another printer to make my labels.
Re: Ink smearing or being washed out after setting the ink on you labels.
Suggestion: TRY USING Scotchgard Heavy Duty Water Shield spraying it on your labels, dry, then iron set it with a cloth over your labels. After set, you can wash and iron your labels.
Great tut, Tammy. Thank you for teaching us this useful skill. ❤️
I almost bought labels yesterday but I just really wanted to make my own. Thank you for sharing your method and printer experience. From your repeated comments it sounds like someone gave you grief bc their project didn’t come out right. Shame on them.
I found a rotary cutter that pinks the edges. I use it for everything now. I had one quilt top that wanted to ravel and I didn’t want to experience that ever again! I think it would be good to cut the labels too .
Thank you so much for the video. Making our own labels is another way to make truly handmade items and it saves money that can be allotted elsewhere. I had made my own about a year ago... a much more difficult way of making fabric labels. Your version is straightforward and simple to carry off. Btw, my printer had no issues when I followed your instructions. TY!!!
I needed labels asap and came across your video. I've printed on cork fabric and they come out very nice. Thank you so much!!!
OMG!!! I just used your technique and made my own labels after considering purchasing some. They came out fantastic!!! Best explanation about how to create them from start to finish. Can't wait to make more and add them to my projects! You're a ROCK STAR!
Thank you, Happy to hear this.
Thank you for showing this method so easy to follow and understand.
Thank you so much for this information, your instructions were very clear and easy to follow. I have been making individual labels for my quilts with a micron pen, (time consuming) especially since I make two or three quilts a week. This will allow me to spend more time at my longarm or piecing. Thanks again.
Omg ! Tammy this is exactly what I was looking for!😍 I've been paying for my labels thanks to you I can save money! Now printing my own personal Labels I made one sheet to try it out worked great I even put my photo in my label looks awesome 😁 Thank you so much Tammy you Rock!🤩
OMG, I can't wait to try this technique w/my picture. I'm so glad you posted this info. I'm going for it!
So far this is the best trick to making labels at home for me. I tried a couple of different methods, including the freezer paper and I kept getting jammed papers. Thank you so much!
Glad you found something that works. Happy to help.
Thank you so much for sharing. I've done all sorts of things to create my own labels and your method is it. GOD BLESS you for being my Angel.
Thank you. Grad I was able to help.
@@BadBobbin time to save for a brand new computer and printer because mine were demolished..can you give me suggestions on best computer and printer. I know some print shops like fed ex will allow you to print but eventually I'll need my own equipment. Thanks
@@imfinesse7 Sorry that is not my field of expertise.
Hi what kind of paper is that?
I am so happy that I looked at your video... I created my labels yesterday and printed out my labels today... just perfect!!! Thanks again.
Awesome to hear. thank you for watching.
Well I did them and they turned out 👍👍🏾👍🏾👍🏾 great. Sturdy and just what I wanted on them. The software from Avery was a bit tricky to use but it turned out great. Thank you again.❤❤❤❤❤❤❤❤❤
Awesome glad it all work out for you.
Absolutely appreciate you showing how to do this! God bless u!
Thank you. Good information. For those who sew, it's the "straight grain of the fabric" that is the up and down lines and that edge on either side of the fabric is the "selvedge edge" (goes in the same "up/down line" as the straight grain) it is not the bias. The "bias" is a 45 degree angle from the selvedge and has the most stretch. Do you use the fusible for things that will be washed?
Thank you for sharing! First time seeing this way of making labels, pretty cool!
You are welcome, thank you.
You are WONDERFUL for this trick! I didn't have the glue that you had, so I just used the 3M Super 77 since I had it. I also used Microsoft Word. Came out beautifully! Thanks again!!!
Glad you found what works for you, glad to inspire you.
This is the best video l have found on label making! I have been looking for a while to find a quick and affordable way to make labels instead of ordering some online. Thank you so much! 😃
You are very welcome, happy I was able to help you.
Yes thank you!
Great detailed information. Thank you very much for going through all of the trouble to teach us this information. Have a great life!
Thank you for such a detailed tutorial.
Thank you for watching & your support.
just did a trial on satin ribbon -- very pleased w/the result! thank you!
I sure would like to know how you were able to do that on satin ribbon. This should be cool because the ribbon top and bottom is finished so no need to cut with pinking shears.
@@Mickey-jn8hz that's why I tried it. After awhile it kind of peeled away tho...the plasticky part didn't bond as well as I'd hoped
Best diy label vidéo ever .. thank you
Thank you
Thank you so much Tammy! This was such a comprehensive and well taught video.
I recently purchased some labels and they are really nice but after receiving one sheet of 100 labels I kind of feel robbed for the price I paid. I need a few different labels and don't plan to pay that much again which put me on the hunt for how to make my own.
I can't wait to try this! I'm one step closer because I just created my Avery account.
Thanks again Tracey!
Glad it was helpful!
Just stumbled across your tutorial.
OMG!!! Positively AWESOME!!
I really appreciate the detail you went to explaining every aspect of what you did.
I tried another tutorial recently successfully but yours appears significantly easier. Can’t wait to try.
Mega thanks😘
Thank you.
02-20-21: I did it and it came out beautifully with no problems with my printer. Thanks again, Tammy. You have saved me some moolah and I'm a happy girl...YEA!!
So glad I could help you save the moolah. ;)
Thank you for this video. It really helped me to decide on what and how to make my labels. ❤❤❤❤❤❤
ok the silk worked even better and the ink didn't budge once iron heat set even after wash, thanks for this video
Great to hear this. Thank you.
This was so helpful! Thank you.
I iron my fabric unto freezer paper cut to size and it holds to get it through the printer.
I do that two.
Thank you at last someone shows a laser printer version. I did this on my Samsung laser and it worked. I am so happy.
I used a heavy cotton linen that I ironed to the fusable double sticky web left paper on so it was on paper, the paper is slippery though so I kinda had to trick it through my hp, I did read comments and tried color and black ink , color washed out , black ink stayed , super awesome , I'm gna try silk fabric tomorrow , this works in a pinch
02-20-21: Great googamooga, Tammy, this is the coolest thing I've seen in a long time. I'm so loving it and can't wait to get busy. You go girl and TFS!
thank you.
Thank you so much! I enjoyed your video. I was able to create my own labels with no problem. Your instructions were very clear.
I liked going to JoAnnes with you! I’ve sewn for years but had no clue about the premium muslin, or the grades of it. Nor would I think to look in the remnant pile for it and the fusible goods too! Also I didn’t know about the Aileens tacky spray. This is a game changer for me! Thanks!
Awesome, so glad I could help you. And make shopping a bit easier for you ;)
Aloha😊
I was going to order labels but you made it look simple. I will let you know how it turned out when I'm done. God Bless
Great job on the instructions. I wondered about the spray glue. I think the kind you have is what I will try. also will try freezer paper.
Excellent, thank you. The labels look great x
You are very welcome, and Thank you.
@@BadBobbin I'm just re-watching this video again, taking notes. I'm moving into making handmade soft furnishings to sell and I've got several things I need to check out first, one is a sewing machine, the other is 'safe/reputable' fabric and the other one is making my own fabric labels..Videos like this, they're so great - thank you for taking the time to put it all together. I appreciate it x
- Thanx 4 sharing. VERY helpful. Info was clear & "digestible."
Thanks! It worked perfectly in my ink jet. I used my homemade quilt basting spray...
Which brand did you use?
What's in your honemade quilt basting spray? Can you share the recipe?
Tammy, you are a great teacher. You are very easy to follow. Can these be done if you have a Scan&Cut? I have fabric labels that was done in Bangkok, Thailand 15 years ago for $100 for 7,500 minimum but have designed my own art on the labels. I have been sewing for 51 years and was garment sewing for a long time. I sewed scrubs, doctors and nurses scrubs hats and many more long time ago. Now, I would like to start making personalized custom embroidery hoodies. I am now semi-retired and would like to start this home business, maybe after they let me retire from giving Covid vaccines at work. Thank you for sharing your talent to us. Creative minds works in mysterious ways.
thank you, Not sure what you will use the scan & cut for? I'm not familiar if they print or not? Sorry I'm no help on that part.
I just wanted to say the Aleene's tacky spray is super tacky and after I printed on the fabric the paper was so stuck to the fabric I wind up ripping the paper and stretching the fabric. Ironing did seem to help. The Aleene's spray also has a foul odor that smells like rotten onions. I used Spray and Bond Basting adhesive. No odor and the paper peeled right off. Anyone else have any inconsistencies with the spacing of the printed label when it comes to cutting? I set this up to work with my Cricut, didn't cut properly due to inconsistent feed through the printer. But all in all a really great idea Tammy has here. Thanks for sharing Tammy.
I know that since this video they have changed their glue formula and spray nozzle. Quilting basting spray will work.
@@BadBobbin Yes, I was surprised how the glue came out, was all bubbling and gloopy. The paper was soaked through just about. Basting spray is much better. Thanks for the reply. 👍
Great work and very creative 🤩👏👏😎
Thank you.
I REALLY appreciate you. I was able to print my logo off with no problem! ♥️
Nice video. You gave more than enough warnings 😳. Thanks for the information 😊👍💕
Gday, here in australia, i think we call muslin , calico……thanks for great video, xx
Excellent! Thank you so much! I’ve been wanting to learn this for the longest time! Next, I want to learn to print labels that can be sewn on a baby item ex- Sweet One, Daddy’y Girl, Angel, names.
I’d plan to print, cut out and sew them on the front of the toy or garment. Same process just different sized text! What fabric? This is my favorite video ALL YEAR. Thank you. So much!
Thanks your video has been the best I’ve seen regarding this. It has been very helpful.😊
Great instructions. Enjoyed. Thanks!
Very informative, thank you!
Usually a good 200 thread count muslin is also good. Lately 100% cotton white ticking fabric is really nice for me, I also paint my own fabric sometimes.
hi this worked perfectly for my injet printer thank you so much for the tip how to make labels will the black ink run when hand washed amazing tip :)
Different printers and inks are not all the same. I know some printer companies make a water proof ink. That you will have to do your own research on. Try to wash a few of your labels to test them out. you can comment back here to let up know the results.
cool!!! hope it works as well for my printer! I will give it a try! Thanks for sharing!
This is amazing! Thank you so much ☺️
Omg this video is super awesome. New subscriber here🙋🏻♀️ Thank you for sharing. I’ll definitely be trying this method!
Thank you, I appriciate it. If there is anything else you would like me to make a vidio about, feel free to shoot me a message any time.
Tammy Ozturk
Of curse dear! I love making new friends. Please stop by at my channel sometime!💖
@@handmadechiccrafts3463 i did and subscribed 😉
Tammy Ozturk 🙌🏻🥰
Thank you so much!! It worked!!
Great share video Tammy. PS JoAnns
Great info thank you
Hi Tammy. This is quite interesting and I think I'd like to experiment with my Epson Inkjet printer. I was thinking after the labels were heat set, why not use lightweight interfacing to limit fraying and that way you can have straight edges rather that ones cut using the pinking shears. Anyone try that yet?
I do use SF101 interfacing on the back of my printed labels that will be sewn flat. This minimizes the fabric project from showing through my labels. Since I used interfacing I will use a school glue stick to attach the label in place while I sew it down.
Great video! Thank you! Are these washable? I am wondering if I can use them on clothing that will be washed ..? Thank you for any additional information you can provide. :)
Thank you. As for washing, if you use water proof ink. Some printer do have that type of ink. you can always test a sheet & wash it a few times.
Awesome😃thank you for sharing❤️
You are welcome, thank you for watching.
Thank you Tammy!!!
This looks great! I was wondering if its possible to print on different types of fabric such as another type of cotton that has a shiny finish? Thank you!
I don't know, but if you try it let me know how it turned out.
This worked beautifully! Thank you so much!
fantastic video, thanyou so much
worked fab, thank you
Hi Tammy. Thanks for your time in explaining the how to. I would like to know HOW do you add text into the other half of the lablel, please?
make a second text box.
Great info. Thanks for this!
Fantastic video! Thank you so much!
You are welcome, and thank you for watching.
Thank you. They came out great!
thank you so much!💜
What kind of printer are you using. And when you are loading the paper did the blue paper go down or up. Thank you. Great video
My printer is a Canon Laser Printer. each printer is different as to loading you paper, you will have to run a test on your own paper as to how to load it. put a mark on the top facing up & see which way it comes out and prints.
Love this I just made mine
I iron the fabric onto a4 freezer paper then run it through my printer then peel off and reuse. Easy Peasy.
Thanks, I can't wait to make some labels!
Thank younso much for sharing , great video!!!!❤
Thank you so much for sharing this. I will be doing it this way!
thank you for the information
Thanks!
Hello tammy
U asked us is there anything we wood like to c u make and i were wondering wood it b possible for u to make an apron a halagen oven cover and a food mixing cover please?
Thanks again 4 ur great vlog❤❤❤
Just the thing i was looking for. Thank you for the detailed video with step by step instructions
I have created my account on Avery today and will be trying to make these labels soon. Cant wait to make them.
I jad a question about the tacky spray though, is there an alternative for that ? Would the basting spray work too ? Please reply if you know it. Thanks a million in advance 🙏🏻🙏🏻
Hey Tammy: I was trying to follow your steps to create my labels. But I got stuck at 19minutes into it where you type in text. You entered only the left side but how is it that you enter the right side? You just jumped into an existing file you had to print out but doesn't help me on completing it as mirror style. Please review it and advise, thank you.
@@NiSeLiA2 The right side and the left side are two separate text boxes.
Hello tammy
Im new here to ur vlogs and im inspirered by u so thank u so much
Where do u get ur material from as i live in the uk?
I have a canon printer so will it b ok to try it on there as im new at this but wood love to try this out?
Do u have any tips 4 me as iv got dyslexic?
I need all the help i can get too try it out
Great vlog and iv just liked ur vlog and now im going yo look at some of ur other vlogs
Thank u ❤❤❤
Thank you for liking my video, as I have mentioned in the video this would be done at your own risk. I do not know your printer, but I have done this on an Ink Jet & this video is done with a Laser printer. You can use Waxed parchment paper as well as the tacky spray on printer paper. I do not know what is available in the UK. I am in the USA. Good luck.
Thank u very much, great tutorial .
You are welcome!
It’s very helpful thanks a lot
Great video. Thanks!
I was waiting for the Iron On, is the remnant iron on or do you do the adhesive?
I use heat & bond after printing. the printer is too hot & the glue will melt in the printing process
I have ab inkjet wanna to iron on
Can you share what printers you all have used?
Thank u so very much, great tutorial !!! Blessings
You are welcome, thank you for watching.
Wow. Thank you.
Thank you for the video. Are they washable n won't smear ink?
depends on your printer and if you have water proof ink. You may try ironing after printing with a wax paper or a waxed parchment paper and test it first.
yeah, we get it. No guarantee.
Hello, after ironing them, the labels/wording will be waterproof? It can be washed without problem?Thank you
If I wanted to do the iron on instead of sewing the label, do I have to use fusible ink?
not sure what fusible ink is. I use the same label & put a heavy fusible web on the back & then iron onto my products. If you plane to wash you will need a water proof ink.
What is the best cloth to use to keep from fraying? Straight cut.
Have you tried using freezer paper to iron your fabric to, to go through the printer....It can be reused many times too! TFS
Thank you so much .