How do you draft a cap sleeve? Method 2

Вставка
- Опубліковано 26 сер 2024
- How do you draft a cap sleeve? method 2@FASHIONACADEMYMJ
free fashion design course at home Hindi class
Cap Sleeves are small sleeves that just extend over the shoulder. They do not reach the bicep line of the Sleeve Block on the outer side, and they may or may not reach the bicep line on the inner underarm side. Sometimes they have a short length below the underarm.
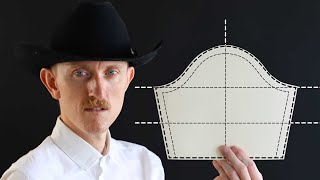
Image A - Examples of Cap Sleeve Styles
In Image A below, there are three variations of the Cap Sleeve superimposed on the Sleeve Block. You can see that the Cap Sleeve stops well short of the Bicep line at the outer level (the dashed colored lines) for all three styles. The Cap Sleeve can extend below the bicep line at the underarm level for a small amount (the third style). If it passes the bicep level on the outer side it would no longer be a Cap Sleeve.
These example sleeves, as they have the same shape as the basic Sleeve Block, obviously have no added fullness. Cap Sleeves also often have fullness added so they jut out more from the arm.
The Cap Sleeve can be created with the standard Sleeve Block or the Dartless Sleeve Block.
Creating these styles are fairly straightforward, but there are a few things to keep in mind:
the ease in the sleeve cap of the Sleeve Block is not required, so you need to reduce the cap height
if you want the cap to jut out you need to add fullness to the armhole side
if you want gathers on the sleeve cap you add fullness to the sleeve cap
Below find an example - I will use the bottom of the three styles in Image A (the yellow shading) for the example.
Figure 1 - Drafting a Cap Sleeve
I am using the Dartless Sleeve Block.
Trace the Sleeve Block to a depth of 0.75-inch below the bicep line. (The traced block is shown in black on the image).
Measure in from both sides on the sleeve edge line for 0.25-inch and make a mark. The marks are labeled A & B on the image*.
Measure down from the sleeve cap mid point for 0.75-inch and make a mark - this is labeled C on the image*.
*You do not need to write the letters A, B, C, just make the marks.
Figure 2 - Drafting a Cap Sleeve
Draw the new sleeve edge line from A to B - the curve of this line is a design choice.
Redraw the sleeve cap line between the notches to touch point C.
Before we continue drafting this sleeve and adding some fullness from Figure 3, I will just explain this reduction in cap height in Figure 2b. The reduction amount of 0.75-inch is a generic amount and you should check this and make an adjustment if necessary. I will show you
Figure 2b - Drafting a Cap Sleeve
Draw the new sleeve edge line from A to B - the curve of this line is a design choice.
Redraw the sleeve cap line between the notches to touch point C.
Before we continue drafting this sleeve and adding some fullness from Figure 3, I will just explain this reduction in cap height in Figure 2b. The reduction amount of 0.75-inch is a generic amount and you should check this and make an adjustment if necessary. I will show you
Figure 3 - Drafting a Cap Sleeve
We now have the basic shape as in Figure 3.
We could use this sleeve as is (and if so we’d mark the grainline etc at the point. As we are going to cut it up, and therefore have to draw the final sleeve on another piece of paper, so we won’t both marking the grainline, or labeling it etc., yet. We will do that from Figure 4.
Figure 4 - Drafting a Cap Sleeve
Draw a line down the center of the sleeve.
Draw a second line half-way between the center-line and the notch mark on the back.
Draw a third line half-way between the center-line and the notch mark on the front.
Cut along these lines.
Figure 5 - Drafting a Cap Sleeve
Cut and spread for the desired about of fullness*.
*As shown in the image, you could extend it out until you get a curve, or until you have a straight line for the sleeve edge.
Figure 6 - Drafting a Cap Sleeve
Mark the notches.
Mark the grainline.
Label the pattern piece.
Mark cutting instructions (not shown), and
Add seam allowance (also now shown).


I am sorry Will make next video slow 👍
Sobrang bilis wala akong maintindihan