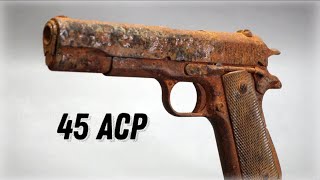
Sonoran Desert Institute Rock Island Armory 1911 Detailed Strip (Disassembly and Reassembly)

Вставка
- Опубліковано 18 чер 2022
- My submission for FTT 104 Week 4 Practical Application. In this video I completely disassemble and reassemble the Rock Island Armory 1911 A1 .45 ACP.
References:
Armscor. (2016, September). 1911 A1/A2 Pistol User's Guide. Armscor. Retrieved June 5, 2022, from cdn2.hubspot.net/hubfs/559399...
Armscor. (2022). Rock ultra FS 10MM 8RD. Rock Island Armory. Retrieved June 5, 2022, from www.armscor.com/firearms-list...
Sonoran Desert Institute. (2021). Fieldstripping and Reassembly . In Gunsmithing Tools Lab
(pp. 31-44). essay, SDI Tempe, AZ.
Sweeney, P. (2009). Ch 19 - Advanced pistolsmithing the 1911 . In Gunsmithing Pistols and Revolvers 3rd Edition (pp. 305-338). essay, F & W Media, Inc.


Years ago before UA-cam I did take down a 1911…. I suppose it took me 2 weeks to get it back together…so thank you for this. I have one trick that has served me well over the years and that is the ball cap trick. Best is the screen type cap that you can see through. When you have a spring that wants to fly across the room….put you ball cap over what your doing and most of the time it will catch those mini missiles.
That’s a great idea. I have a blooper reel of one sproinging up right into the camera. Glad it wasn’t my eyeball.
@@scottbozarth8459 :
Good one, I use a
Large plastic bag so you can see what your doing. Cheers
@@jerryrichards4300 ,
I could have used this video 2 weeks ago... I took mine apart just to clean up the inside a bit... And I watched 10 different videos.. taking it apart was easy... Getting it back together, with terrible photography was awful. Took me awhile to realize what I was doing wrong. Thanks for the video!
But now you know first hand. Sometimes learning the hard way is what makes it stick. God luck to you, Sir.
Rock Island 1911 GI is the first handgun I ever bought. It will never leave me. Best cheap 1911 for the money.
I fully agree. I’ve been tinkering on mine and it doesn’t really look anything like it did in that video. Maybe I should do a follow up. Point is, they’re great and a good platform to start practicing your 1911 parts fitting skills on.
The safety plunger tube comes with two small hollow tubes that protrude through the frame and a special tool is used to press them over to hold the tube to the frame, once removed you would most likely require replacement tube because the flared small tubes will break when removed.
The extractors on every Ceracoted RIA 1911 I ever saw come out with difficulty. I think they Ceracote them before assembly. Breaking in an RIA involves wearing off the Ceracote as much as anything else. I prefer blued or bare metal, since I work molybdenum disulfide into every last bit of metal. (My firearms don't rust.) Most Viet Nam vets know about this. The guys that didn't learn the moly trick were the officers.
That’s an interesting trick, but both of my RIA 1911’s are actually Parkerized, not cerakoted. I just keep them covered in a very light coat of regular Hoppe’s gun oil. Rub on, wipe off. Seems to do the trick, then again I’m not slogging through the jungle for weeks on end with them either. Thanks for watching!
I've been wanting a better beaver tail on my 1911 and a skeletonized trigger with a cool trigger from Wilson combat.
This video gave me the courage to try it my self instead of pat ng some one
I'll watch it a few more times to feel more comfortable
That’s awesome! Good luck on your project. Keep us posted with the results.
This is an excellent presentation from the photography to the narration...thank you!
Thanks for watching!
I recommend putting a card or a plastic pry tool under the safety as you pull
Yessir, I’ve since learned my lesson. Ordered some plastic pry bars used for interior body panels in cars. Works great.
Thank you for the video!
It worked great to help me with disassembly and reassembly of a recently purchased 1919 government model.
Got it completely cleaned and back to working order thanks to your guidance.
Wow, score on the classic! Just shows how well made those old pistols were. Over 100 years old and still going. Hoped it lasts another 100. Glad the video helped.
Hey thanks brother I have this exact 1911a1 and I made a mistake. Your video helped me greatly appreciate your efforts 👌
Awesome, glad it helped! Thanks for watching.
Thanks dude👍🤘! My slide was getting stuck & I figured maybe my internals were disgusting(they weren't), your video really helped me understand each piece. Dry firing my 1911 ended up mushrooming a bit, that was the problem, ended up gently filing down that bit smooth & works great now. Found out after I took everything apart, cleaning it & putting it back together lol. Process of elimination.
Glad the video helped! I’m a big fan of dry firing for practice but it’s a good idea to use snap caps or some other dummy round to avoid exactly what you experienced. You can find them online for around $20. Good luck, happy shooting!
@@scottbozarth8459 I have them, I didn't realize around 5 dry fires without would do so much damage. Lesson learned lol
this video just helped me out immensely! i had to put a new trigger in my ria M1911 a1 FS(the exact gun in this video) because i bent my ill fitted wilson combat trigger that wasnt quite fitted right loading a mag. so i put the original trigger back in but then after reassembly whenever id let the slide go, the hammer would follow the slide home, sending a round into the dirt. im admitting my inexperience and glad no one was hurt. tonight i decided to take it apart again and see where i had something misaligned. your video helped me correct the issue and now its back to working flawlessly! thank you and this video has gotten me more interested in SDI classes! win win!
Man, I’ll bet that got your heart pumping pretty good! Glad nobody was hurt, and that the video helped you out. Thanks for watching!
I bought one of these the other day brand new, ran 50 rounds through to test it and my extractor actually was able to push out with just my thumb, got it at Murdochs with a free revolver, 400 for the set
That’s a smoking deal!!! What caliber is the revolver.
@Scott Bozarth 38 special/38spl+, it's their M200 DA/SA 4" that was patterned after the old Colt D frames, super impressed with it, I put a Hogue grip on it for my wife, but otherwise excellent for the deal
+P*
just went and looked at a RIA a1 and a FS Tac Ultra, which I think you have here with the ambi safety. definitely some good insight on the budget options, great explaining on the take down and re-assembly. TY
Thank you for this video it gives me an idea on how to clean mine also.
I had an older 1911, one with the giant billboard on the slide. It’s ambi safety shattered while firing. I just bought a cheap one from Numrich gun parts and it was back to rocking and rolling.
I ordered a replacement from RIA for that pistol and replaced it. Good to go now, but it’s still just a MIM part. I think a solid steel, machined part might be in the future for this pistol.
I bought one of these GI models USED at a gun show a few years ago. It was cheap and I was basically looking for a base gun I could tinker with and not feel bad about messing up. With the exception of the extractor, which I had to order from the factory, almost all aftermarket and take-off parts from other 1911s I've tried, fit and work fine with it. Great gun for money in my opinion.
I’ve only got 50 rounds through my GI, but zero complaints so far. Hundreds if not thousands through the 10mm. I can’t believe how well these things shoot for the price.
Love the content. Keep it up!
Mainspring housing disassembly is easy. To depress the mainspring plunger (cap) put a proper size punch in a vise. Press the cap against the stationary punch and use the proper size punch to push out the retaining pin. Then relax the pressure on the mainspring and allow the mainspring plunger to come out while contained against the punch in the vise. Reassemble in the reverse order.
I suspect any difficulty you are having with parts being "tight" is because of the parkerized finish and the gun being new. A little light buffing with some 600 grit paper on pins and such should make them easy to disassemble/reassemble.
If you replace the firing pin spring and firing pin (see my comment above) you can also install a "reduce strength" mainspring from Wilson Combat. This makes it easier to disassemble/reassemble the mainspring housing AND reduces trigger pull AND reduces the effort needed to operate the slide. DO NOT install a reduced strength mainspring if you have the original "extra strength" firing pin spring and steel firing pin. This will cause "failures to fire" with "light primer strikes" with some ammunition.
Great video! I like it. I hope you do a lot more of these
Glad you liked it, thank you! More to come!
the plunger tube is staked in with a special staking tool just for that jobby.....
Great video, thank you very much for sharing your knowledge!
You’re welcome and thanks for watching!
Sig Guy has a great 1911 disassembly/reassembly video on UA-cam using a ambi safety Sig
I’ll check it out. Thanks.
I learned alot today! Thank you for sharing
Thank you for watching!
If you push the slide back and remove the slide stop first, a barrel bushing wrench is not necessary. Maintain the recoil spring until slide is removed. This pistol is designed to be completely disassembled without tools.
GREAT PRESENTATION SCOTT 👍 ,
Thank you, and thanks for watching!
This is so much easier thanks for the video
Glad it helped!
Nearly all manufactures use MIM (metal injection molding) parts for some parts such as pins. I had a firing pin which snapped, it was MIM part from an after market company. To remove the safety use a plastic wedge (do not wiggle)
thanks for posting this
Thanks for watching!
ambi safety removal-> use guitar pick and slip it in the top then rubber hammer the front end it will split the connection and should pop right out!
Thank brother 👍🏻 it did help.
Glad it helped! Thanks for watching.
Nice work. Very helpful
Thanks for watching!
Here's a trick for everybody that's watching what he's doing here at the installing the firing pin and the firing pin stop and the extractor put your extractor in. Get it lined up. You may have to use a punch to kind of line it up a little bit. Do not put your firing pin in. Put your firing pin. Stop in to help kind of line that firing pin up and make sure you got it lined up. Once that extractors lined up it should hold in place on most. I've had one that was really loose. Then you can put your frying pin in the spring and the firing pen in and then put your frying pin stop in and everything should go together. But you want to fit the firing pin, stop and the extractor and get those into position. Before you put the firing pin in, you'll find that it makes it a lot easier when you put it all together first. I know it's an extra step but when you put that firing pin stop and it kind of helps line up the extractor just right
Back in the olden days I polished the trigger/sear with tooth paste ….. it worked btw.
I believe it would! …and cheaper than Flitz.
Man this is crazy amazing
Got to love the 1911. Such a great work of engineering.
@@scottbozarth8459I was watching you disassemble this 1911 basically with my jaw on the floor. A true feat of engineering to say the least, thanks for the great content!
"John Moses Browning, Ladies and Gentlemen" Hear Here!
I was passing through Ogden, Utah last month and stopped at the John M. Browning Firearms Museum. They have at least one of every gun he created and a ton of his early prototypes. Highly recommend if you’re ever in that area.
When you remove an ambi safety you remove the right side lever first, not the left handed or ie right handed safety lever, it will need to be wiggled after the right side is removed.
It doesn’t matter what side you remove first. It’s the same either way. I’ve had this thing apart dozens of times since making this video and I’ve done it both ways. What matters is making sure the hammer is fully to the rear with the safety in the down position. You then slightly raise the safety lever while gently wiggling and pulling or applying pressure from underneath with a plastic wedge. Works like a charm every time.
Plunger tube is staked in you do not take it out. You do it will ruin it just like the front sight. If it's staked on, you have to break it to take it off. They're not intended to be removed
Yeah, you could find burrs and things like that that we're not caught in the deep burning process, but you can find that on any metal frame or even plastic. I've even found over mold on plastic, even glocks. It's kind of rare but it's been there. I've had it on a couple of them. Doesn't take much. Just a little bit of a file. Trim it down. Taking care of
Unless you have the staking tool, do not remove the plunger tube or the front sight. Both each item requires a specialized tool to put the new one on and yes you have to replace both if removed.
Thank you
My Rock Island armory I changed out that and be safety as fast as I could. I didn't like the way it came apart. I didn't like how hard it was to take apart. Had to have tools and it just I just didn't like it like the gun. I just walked it out with a Wilson combat safety. Not any issues. Very easy to put in
Good idea. I relaxed mine with another RIA safety. Funny enough, these ones went together MUCH easier than the one I broke. I think I just got a bad part on the first set.
Good time to upgrade and fit a wilson, kc custom(kings), s&a, etc etc etc so you can practice and have piece of mind.🇺🇸👍🇺🇸
I just ordered and installed the OEM safety. This is a range toy for me, but if it were a daily carry I’d definitely upgrade. Actually I’d probably upgrade the whole thing to a different gun. Haha
Man, I am pretty sure I never saw you clear your weapon. The whole time I'm waiting for it to go off. Be safe brother!
Well Sir, while I appreciate your concern for firearm safety, I can promise you it was cleared long before this video was recorded and safety checked before I started working on it. Just because you didn’t see it in the video doesn’t mean it didn’t happen. Thanks for watching.
As far as ammo, yeah they used to say you needed to shoot 500 rounds through any pistol before you trust it. I find you can get away with about 200 rounds. It's not ideal but the fact that ammo is hard to get at times and is expensive at times. 200 rounds is better than 50 rounds. Really get to know the weapon but they call it a break in time and it was the get the the weapon moving and things burrs wore out things like that. But I find 200 rounds works good my 1911 I find my fire $200 rounds. They were great and the feed ramp on the GI issue and most 45 ACP models is kind of a two-piece ramp. You'll find that the frame makes it part of the ramp feed ramp and barrel has a partial feed ramp. That problem comes with that partial and the frame of the barrel. Meeting up and hollow points and flat nose. Have a tendency to catch on that. If you have a full-size feed ramp feed ramp, doesn't it allows to defeating of hollow points a lot better. There is a process but barrel when it sits down with a slide all the way back needs to be a little bit of a gap and forward of the frame. Just a tiny bit. Not much just enough. So as the bullet slides off the frame, it slides onto the the barrel ramp easily and there's nothing there to catch. And sometimes you have to worry about taking a burr off of the frame right there at the ramp too
Wow good
These pistols (Armscor imports of whatever name, and maybe others) pass the "drop safe" test required for importation by using an extra strength firing pin spring. They avoid the extra expense of a "series 80" system by doing this. A stronger spring is far cheaper than a series 80 design or even a titanium firing pin.
While this works, it is a pain to reassemble and very easy to launch the firing pin and spring into outer space where it seems to orbit forever, never to be found again.
My suggestion is to get a standard strength spring and titanium firing pin (about $20 total) and install them the first time you detail clean the slide. Your gun will be drop safe and MUCH easier to clean and maintain.
Another thing I do with ALL my 1911s (6) is install a Wilson Combat "Bulletproof" extractor and use Wilson Combat magazines.
That is great advice, thanks. Do you have a preferred brand or vendor for the spring and pin? It’s funny you commented on this video just now as I got an email two minutes ago that the new safety was delivered. It’s literally sitting in my mail box right now. Time to get the 10mm back up and running.
@@scottbozarth8459 I use springs from Wolff Springs and I use a titanium firing pin from Wilson Combat. I generally get any and all springs from Wolff, except 1911 recoil springs which I get from Wilson Combat.
Wilson Combat 1911 parts are top notch and provide a cheap upgrade to any 1911.
I have no interest in promoting Wilson, just 50+ years experience working with and owning 1911s.
I use only Wilson Combat magazines in all my 1911s.
Another bit of advice...unless you are left handed, lose the ambi safety and just use a regular (or extended) left side safety only. I prefer extended safeties, but any guns I ever had with ambi safeties...the safety is in the factory box as a spare part (along with the factory magazine, extractor, firing pin spring, firing pin and mainspring) and replaced with a left side only safety. Keep all the original parts in a little bag in the factory box.
Tip: If you change the extractor and use Wilson Combat mags you can skip the "break in" of the gun and the parts will cost you about the same as a box of ammo.
I own quite a few 1911s and add a new (or used) one to the collection from time to time. I keep extras of these parts on hand and just assemble them into the gun as soon as I get it, then order more spares.
Never heard of titanium firing pin helping in drop safe, interesting. What would make it so? I am not a series 80 fan, I convert any I have to 70.
@@markymark6108 Light weight. The problem with 1911s firing when dropped is caused by the firing pin flying forward under inertia if the gun is dropped on the muzzle. The weight of the firing pin, under inertia of falling, can overcome the strength of the firing pin spring, just as it does when the hammer hits it when firing.
The Armscor imports overcome this to pass the required import drop test by installing an extra heavy firing pin spring to resist the inertia of the steel firing pin if dropped on the muzzle AND and extra heavy mainspring to overcome the resistance of the heavy firing pin spring when fired. A titanium firing pin costs about $30. The cost of two heavier than normal springs is little or nothing. They meet the import qualifications and maintain their market price point.
The extra heavy springs make firing pin removal and replacement a pain in the @ss, and the extra heavy mainspring increases trigger pull and increases the effort required to operate the slide (because cocking the hammer is more difficult against a heavier spring)
Installing a standard power firing pin spring can make the gun unable to pass a drop test. if that concerns you, installing a titanium (lighter) firing pin fixes that problem. The lighter firing pin spring and lighter firing pin allow you to install a "reduced power" mainspring. This reduces trigger pull (because of decreased pressure on the hammer/sear connection which must be overcome by pressure on the trigger to fire the gun) and decreased effort to operate the slide because the hammer is easier to cock.
The whole conversion takes maybe 10 minutes and requires a couple of appropriate size pin punches which you should have if you own a 1911 anyway.
Why didn't Colt just install titanium firing pins back in the early 80s instead of the whole "series 80" thing?
Because, at the time, titanium firing pins were not in common supply, were very expensive AND the attorney's preferred a mechanical system for liability protection rather than trusting Newton's laws of motion.
@@garyK.45ACP Thanks for the info. Makes good sense. I have built 8 or 9 1911's from 80 % frames.....I have several with springs set for Plus P so I defenatly understand the springs. I will be ordering titanium pins and reduced springs for a couple of them. I EDC cocked and locked so I dont think it will ever come to be a thing for me but its worth the effort. Thanks again for the info.
no surprise you broke the thumb safety, you handle the strip of that 1911 like a old truck
Thanks for the constructive criticism, friend. Maybe you could do your own video and show us how it should be done.
@@scottbozarth8459 im sorry i dont meand no disrispect for you, i may be a little harsh on you, the thing is i do the same myself wen i started on 1911, may be i am too obsecive disassembling and assembling the pistol, i wish have 2 1911 like you do, so im very sorry please have in mind here there is nothing but rispect for you...
While you have it apart polish the feed ramp and first part of the barrel and it will feed anything right away.
Good advice. The 10mm has fed everything I’ve thrown at it with no problems at all. I’m hoping to test the 45 with different HP loads soon now that they’re starting to show back up on the shelves here and there.
ดีมากครับ ต้องมีทักษะในการทำ การใส่เข็มแทงชนวน สำหรับผมมันคล่องมาก ทำซ้ำถูกขั้นตอน ซื้อมาใช้ก็ต้องรู้จักทุกชิ้นส่วนของปืน
ขอบคุนครับ❤
Thank you for watching.
The standard recoil spring and outside guide and inside guide that's on a standard Government model supports the spring from both ends therefore the entire spring is supported in recoil, negating the need or the desire or for whatever reason people put full length guide rods on these guns. It is waste of time money and effort to put on a 1911. It removes the ability to rack the firearm by putting it against anything and just racking the firearm one handed. A required element of the firearm at the time it was designed because it was designed to be a horse pistol and you cannot use both hands when you're on a horse because one of your hands has to be holding the reins of the horse. This firearm was designed so that you can empty it drop the magazine put the firearm in your holster put a new magazine in it and should you have dropped the slide during that action you could just put the nose of the slide against the Horn of the saddle or against anything that you can find and rack the slide and now you have a loaded firearm.
I wonder if they are making those parts out of the powdered Steel and baking it. I don't understand those parts if they made that that way it's not a good idea. At the very least the tempering process that they used left it a bit on the hard side.
I've seen as many problems with clocks as I've seen with 1911. And most issues are caused by either a magazine problem or operator error. But I have seen Glocks blow up shooting stock ammo. I've also seen the Detroit police decide that they were going to use lead bullets for their practice ammo to save money and they blew up a good number of Glocks.
If I were you I'd polish down that extractor and leave just enough Dielectric grease on your fingers to know that this got a little bit of grease on them and wipe it down with that. Because the tiniest amount of rust and that extractor will be a part of that slide forever.
Good info, thank you. And yes I found out the safety selectors are MIM parts, (sintered powdered metal) but that’s not always a bad thing. Now days they’re pretty good at it. I think I just got a bad part because the replacement parts fit together much more easily than the originals did. I’ve been meaning to do a follow up video, just busy with work, school, kids, life… excuses excuses.
As far as the full length guide rods, that’s a debate I won’t even get into since I’m not knowledgeable enough. It makes sense though that you’d want to be able to rack off of any object like a saddle or whatever’s handy. I didn’t know that was an actual MILSPEC requirement when it was designed. Guess I need to read a book on the 1911. John M. Browning, what a genius.
Put gun back together but hammer sometimes doesn’t cock back when I rack the slide
I would check your sear spring alignment. (The three fingered leaf spring under the main spring housing). It is very easy for the spring to slip out of place when sliding the mainspring housing back in. Give that a check and make sure the left finger is aligned under the foot of the sear and be very careful it doesn’t shift while you’re reinstalling everything.
I have the budget ria, where do i find upgrades and what is everyone using? Mags, sights, grips, etc
Any 1911 grips and 45 ACP 1911 mags will fit it. Sights are a bit trickier because they need to fit the dovetails already cut in your slide, OR you can have a gunsmith cut new dovetails to install aftermarket sights. Might cost more than you want to spend on a budget pistol. Your call.
This is an excellent how-to video. I have the exact same RIA ACP 1911, and the most frustrating thing was lining up the barrel link for the slide stop. The recoil spring guide was also a bitch. I suppose practice makes perfect, neh?
Before I venture to disassemble the receiver, firing pin, and extractor, and all of the lower gear, how does one know WHICH pins go where? are most of them the same size? Does one have to label them?
No, it’s pretty obvious where they all belong. If you wanted you could record yourself taking it apart and go back to see what came from where. But just Google “exploded view” of your specific 1911 and you’ll find a good schematic drawing that will help tremendously. I have printed off exploded diagrams of most of my guns in a folder for reference. Good luck!
Do you use penetrating oil to loosen parts?
I do if needed. I have found Kroil to be by far the best option. Don't go overboard, it doesn't take much! You really don't want to get it on a wood stock.
Putting the disconnecter and sear in was a bitch to put back in. Also the ambidextrous safety’s tend to not reset the trigger. I learned this when I built my RIA
It really does take some finessing. I’ve got the 10mm back together with a new safety and will do a video on what I learned in the process. Slow and steady is the key.
You can probably take it out with a L hook pin pusher if it exists but that’s if it’s not sadered cause it might be pressed into the frame but I don’t know I haven’t taken it apart that far
The safeties aren’t soldered together and are definitely intended to come apart easier than how mine did. I’m hoping that maybe something was wrong with mine and the new safeties I ordered go together and come apart easier than the originals. We’ll see.
@@scottbozarth8459 the part that connects to the safety when you stripped the whole frame the last part that couldn’t come out sorry
👏😎👍
Thanks for watching!
Too bad the school doesnt have the 1911 course. I went through the Associates for that course but they took it out.
I’ve actually seen people on the SDI student Facebook page recently talking about taking it in the future. From what I gather, there were some legal issues with the 80% AR lowers and 80% 1911 frames. So they just started sending out complete stripped lowers for the AR class and dropped the 1911 class. Now that the legal issues are cleared up they are offering it again… but I’m not 100% on that since I signed up for the AR10 course.
29k 😮😮🎉
The next Pewdiepie
Looks like cast molding parts
Sintered powdered metal. Not a bad method, I think I just got a bad part. The only issue I’ve had with either of my RIA 1911s.
i never had seen that happen before maybe by better safety for your 1911
I ordered a replacement and it seems to be working fine now. The two pieces still clip together but nowhere near as tightly as the originals. I think the tension on the original was caused by a defect, but that’s just a guess. They sure were a whole lot tighter than the new set is.
@@scottbozarth8459 cool man that's good that you got that back and running
@@scottbozarth8459 and a subed i do have my own gun channel to
Totally would have lost that pin @ 7:17
They’ll skeedaddle on you if you give ‘em half a chance.
Relax, man! When you are nervous and fidgety it makes the viewer nervous and fidgety.
Ha! My apologies. Working through a camera and trying to explain what I’m doing while I’m doing it is way harder than just working on a 1911 all alone in the comfort of my fortress of solitude. Thanks for watching.
MIM parts for ya
I’d say “cheap MIM parts for ya”. The metallurgists have figured some pretty darn good MIM compounds and methods now day, but they ain’t cheap.
I like gun😅😅
project one, convert a airsoft 1911... mar it up, its di cast blu anyways. "thoughts of printing recycled garbage bags" di cast is better.
9:11 peened lol
You gotta practice and get good if you want to be a professional peenist.
1.8k gg
You forgot to clear your weapon before proceeding! LOL, I am sure you did before the vid started.
Safety first!
I hope you watched the Wilson Combat video again. He specifically says take the right side safety lever off first
In the Wilson combat video entitled, “How to disassemble a Wilson Combat 1911 with a ambidextrous thumb safety” published December 30 2013, Master Pistol Smith Steve Kelly says, (at precisely 1 minute 51 seconds into the video), “remove the left side first”.
But thanks for your comment.
Probably not a good sign that your part broke so easily.... Rock Island needs to focus on quality parts.
It really is a good pistol for the money. That’s the only issue I’ve had with it and I’ve had zero problems with the GI model. I’m a Rock Island fan.
This video is not clear enough for a beginner who has never done this before. It moves too fast with too little clear views of precisely what is happening. You need more close-ups and detailed explanations. Fore example the hammer sear and disconnect are not shown until they fall out. The viewer never sees them in position in the gun. The sane is true of some of the other small parts.
Thanks for the feedback. This is just my submission for an assignment, I never expected people to actually watch it as a tutorial. Maybe I’ll go back and do a more detailed one. Thanks for watching.
Mmm
This is all good information but is this. I'm a little confused on a few things here. Are you associated with Sonoran desert institute? Are you? Have you taken the course because you're very unfamiliar with the 1911 pistol. There's a much better way to take the mainspring apart and you're lack of knowledge of things that are staked in. And I don't know I'm not criticizing I'm just not understanding. I guess your level of experience here
I'm a student. This was an assignment. Thank you.
I have a better idea. Don't get a gun with left handed controls when you are not left handed.
Good luck finding a 1911, other than basic GI model, that isn’t ambidextrous safety.
@@scottbozarth8459 I have 2.
The first time I ever tore down a 1911 100% of the way... I was a bit nervous. I mean I had taken the polymer Wonder guns apart but this was a little different...
Now I do all my own gunsmithing when it comes to my 1911's and my baretta's. Am I an expert or a master? Absolutely not. I will always be a student when it comes to Firearms. But I'm very very comfortable doing work on my own 1911 pistols and anyone else's.
This was an excellent video. 🇺🇸🇺🇸
It’s always a little nerve wracking when first taking apart a firearm I’m unfamiliar with. You know there’s always at least one spring or detent or something that’s going to rocket away like a can of snakes if you’re not careful. Haha thanks for watching!
My barrel bushing in the beginning of the disassembly is completely different
What make and model is your 1911?
@@scottbozarth8459 rock island 1911 a1
Where's the recoil spring?🤔🇺🇸🇺🇸
3:18 - out it comes
28:24 - in it goes
????????? where`s the spring???
Which spring are you referring to?
i didnt see the guide rd spring go back on,, dont matter i just got an older compact and they are different. was havin troubles dis & reassembling it for the 1st time and everything was confusing me :) , but i got it. thank you sir.@@scottbozarth8459