PRINTING WORKFLOW - How I prepare my film scans for print

Вставка
- Опубліковано 31 лип 2024
- My '35mm Film Photography Course' on Skillshare (FREE with this link): skl.sh/2JrGhFs
►*DISCLAIMER*
Some of the links below are affiliate links, where I earn a small commission if you click on the link and purchase an item. The money I earn helps me make this type of content consistently.
Videos on this channel are filmed using the Blackmagic Pocket Cinema Camera 6K: bhpho.to/2SWPBqO
And the Fuji X-T4: bhpho.to/3n91yYk
My go-to for music (FREE Trial with this link): bit.ly/35aQELa
►GEAR(*these are affiliate links):
My go-to medium format camera: ebay.us/GaK9Kp
My FAVOURITE medium format lens: ebay.us/m5PTvK
My favourite 35mm film camera: ebay.us/82WyVI
My favourite 35mm film lens: ebay.us/u0V817
The BEST medium format travel camera: ebay.us/FVcfWk
The film scanner that I use for my work: ebay.us/RwKM4c
Best entry-level film scanner: ebay.us/Qp3ZEz
The film camera that started it all for me: ebay.us/qewXkD
My go-to light meter: ebay.us/QIFXF0
My favourite film stock: ebay.us/orbudp
My favourite 645 medium format film camera: ebay.us/ydY4HK
Awesome strap for large cameras: ebay.us/pY8mV2
Rope style strap for smaller cameras (cheap but great!): amzn.to/33hrRDO
Camera I use to film my videos: bhpho.to/3gY9yak
Camera that I use for vlogging: bhpho.to/3n91yYk
The gear I use for UA-cam: bit.ly/3j5vd1L
My favourite film cameras: bit.ly/3hm6MN6
Essential film photography accessories: bit.ly/34o3Uvt
→Instagram: bit.ly/2GuYV21
→Website: kmcdougall.com
→Podcast:
..................................
DISCLAIMER
Some of the links above are affiliate links, where I earn a small commission if you click on the link and purchase an item. The money I earn helps me make this type of content consistently.


Pro tip: convert your second layer to B&W before applying high pass filter, that way you avoid color halos around the contrasty edges. You'll still get luminance halos, but they are much less noticeable, so you can either get away with higher radius, or get better looking result with the same radius.
nice tip! thanks!
Awesome. Thanks for the tip Alex!
Can you please briefly explain the process? With what method you convert to bw and what blending mode you use to return to the initial colors? Thank you very much
@@edoschena6279 I usually just use "Black & White" tool (Image -> Adjustments -> Black & White or Ctrl-Alt-Shift-B/Cmd-Option-Shift-B) with default settings, that works most of the time (I'm sure you can tweak the settings for best results, but that would have minor effect really).
Blending mode is the same Overlay. It basically acts like a blend of Multiply and Screen, darkening the underlying layer where the top layer is dark, brightening were it's light and doing nothing where it's middle gray (that's why it is important to keep most of the layer gray when choosing the radius, showing something only in the areas that you actually want to sharpen). Initial colors are preserved automatically. You can also play with other blending modes from that group (Hard/Soft/Linear/Vivid/Pin Light) - I sometimes use Soft Light for more subtle effect.
If you don't want photoshop to add or remove pixels, you can deactivate "resample". In That way you can change image dimensions without pixels being added or removed. The PPI will adjust according to dimensions you choose.
Emile Mosar yeah I was surprised as to why he was talking about this convoluted method to change sizes instead of doing just that.
Good to know, thank you!
@@KyleMcDougall you're welcome :)
Soooooo 50% of the video content was “deactivate resample image”?!
I was getting tilted watching him explain this when the resample checkbox was right there!
The good old petrol station on film is so cliche but they just look so good.
The whole of America is a cliche because a) it's the foundation of our modern pop culture and b) it looks so amazing. Every photographer in America fights this same battle. Don't do something because it's not a cliche. Do something because you love it and if you're lucky enough you might find a way to show it that is't a cliche.
I'm printing a lot, no real reason to watch yet another video about printing - BUT the way you explain things is so easy to understand and you put things so nicely, I'd say "watch it for the sake of watching it", even if you already know what's up. Thanks a lot for all the content!
Thank you .. and an aside: I love the grey-scale interior you have created to work in .. I mean your workplace, the room, the office, .. whatever. It's what I try to do wherever I am, when permitted.
Thanks for showing how to use the work flow for graphic repro. What you have illustrated here is EXACTLY what's needed to get the best result for a printed image on paper, whether it's photo repro or photo mechanical. You are spot on & that comes from a graphic reproducer who's been in the graphic arts industry for 55 years, Congratulations & well done. I did my trade in Australia.
Thanks, John. Glad you enjoyed!
I struggled for what felt like forever trying to figure this out online until I saw this video. Thank you so much dude this was super helpful
Kyle, I want to thank you for this video. I print regularly - but I do wet prints in the darkroom. However, I do have many color negative and slide film scans sitting on my hard drive waiting to be printed, but I never found the time to really get into «digital» printing. Now, with your video, I took the opportunity to get behind it. My prints just arrived in the mail and they look stunning!
Thanks also to the community who helped sorting out the resizing part of the video, which was a bit confusing to me. Prints look very crispy!
So awesome to hear! Thanks for letting me know. I'm glad the video helped you out.
Thank you so much for the video, I am thinking about printing my images and this helps it feel achievable!
The high pass filter idea was so good.
Great information and right on time for me. I'm getting ready to start making prints in the next few months. Thanks for taking the time to put this video together.
Glad you found it helpful!!
A super informative video. Thanks Kyle.
amazing man, thank you for the great tutoorial!
Great tutorial! Finally a real good one! Easy and simple to understand !
Thank you!
This is an excellent tutorial, I learn a couple of nuances on resizing I had been confused about. Thank you.
Thanks, Virginia. Glad you found it helpful!
This is an amazing video. I have learned how to correct so many issues I have been struggling with. Thank you!
Really glad to hear it helped!
Brrrooo, amazing content. Just found your channel. I’ve been printing off Lightroom, but editing in photoshop. This answered all my questions and is suuuuch a better way to print. Keep up the hardwork!
Glad it helped!
very informative.. thx alot kyle
It makes perfect sense... Thanks!!!
An excellent video, like many of your uploads. Many thanks for the information and look forward to more
Thank you!
So helpful and clear! Thank you
Just discovered your channel. Really great content, Kyle. Totally love your style and vision. It's nice to see photographers still using the analogue medium. Sounds like you're busy but I do hope you keep up the great videos.
Appreciate that, Rene. Thanks for watching.
this was a VERY helpful video. thank you!
Thanks!!! Great and very helpful videos!
Stellar video Kyle! Extremely helpful for a printing novice, like myself
Thanks, Steven!!
I've been around and back again with monitor calibration and printing, and there are a couple of things I've learned.
One, adjusting display brightness for print can improve your overall photo processing workflow. Reason being, monitors set to their default brightness (as you mentioned) to super-high levels which can cause unrealistic luminosity in blacks and shadows. Edited photos can then turn out darker than you may intend. Calibrating my display didn't change color all that much, but it had a huge impact on brightness and changed how I approach photo processing.
Two, if you're using a Mac and need to set brightness to 120/cdm as part of the calibration process, the standard increment of +/- brightness on the keyboard is too large. You can use smaller increments by holding down Shift-Option when using the brightness keys. That will help you get very close to 120/cdm.
Thanks for sharing your experience, Todd!
Amazing, thanks.
Thank you very much.
This is really helpful for me!
Gosh, what a complete explanation!!! Great video, sir.
Thanks!
Doing professional retouching for years and I find the emboss filter sharpening way better than the high pass due to the halos/hdr feel of the later. Technique is the same, copy the flattened image and apply the emboss. Use a low pixel height (1 or 2). Desaturate the embossed layer completely to remove fringe-like effects and then set it to overlay. Play with global lighting when applying the emboss filter for slightly different look, i usually match the light source of the image. If you find the effect too much, lower it’s opacity. Cheers
Cool, thanks for the input. I'll definitely check that technique out. Cheers.
Great points on your printing workflow. With regards to the image size dialogue box in PS - you need to turn off “resample” as it’s going to be throwing away or adding pixels of its bigger. Its best to let the PPI go where it wants to go, within your parameters of fine detail/print size/viewing distance parameters. Turning interpolation option OFF means you won’t need to worry about PS adding or throwing away pixels. Your original image resolution stays the same and all you have to think about is the image size you want to print at and let the PPI go where it wants to go.
Nice video! I love printing my own work and framing it around my place.
It's a necessary part of the process, IMO!
Very clear video - thank you! A question though about margins: you are not adjusting anything here and I have had issues in the past with PS not centering the picture correctly when I print and having to add an adjustment to reflect that. Any tip / advice to make sure pictures are centered?
Great video! Summarized it well, I would love more printing videos. I got a nice printer myself, but I sadly dont use enough time for printing. But these kind of videos inspire me to print more. I use lightroom for printing though, I find that to be easier, especially if you want to add borders.
Glad you enjoyed the vid Martin.
Great video thanks for the tips !
I printed all my photos thru Photoshop for many many years. When I finally made myself learn Lightroom I was especially slow learning to use the print module. When I finally nailed it I would never go back to printing thru PS. Simplicity of use printing thru LR is just so much simpler and my printed results are as high a quality as I have ever achieved. Never need to set resolution as it's always optimal. That said my workflow generally runs a finished file thru PS for sharpening, save the file (which was opened inside LR), then go back to LR and take the file into LR to print it.
Just have been using qimage to automatically take care of all these issues of upsampling and print sharpening. Made many comparisons and it always looks best. Just an impressed and happy user.
Very informative video, thanks!
Sure made it look easy, great video Kyle.
Thanks Francisco!
Holy shit, such a good video, I haven't seen anything like this online and this was EXTREMELY helpful. Thanks legend!
Thanks, man.
Yep agreed this area has been a minefield for me
Great video, thanks!
I work on my art academy's print shop and we use the program Mirage which is far more accurate then Photoshop. Or well at least for our large format printers.
Super useful vid. man. Thank you.
Glad it was helpful!
Do you have a video that discusses RGB and CMYK profiles? What do you work in? Do you stay in RGB and just use the profiles for your paper and printer/ink? Thanks!
Found this useful, thanks.
Glad it was helpful!
Great Video
Sorry if I didn't see it what resolution did you scan those images at?
AdobeRGB or sRGB if I deliver files to a client who maby Is going to print at some lab or at home. I know some lab doesn't print AdobeRGB and when sharpening for print shall I zoom In 100% on a portrait or look at the whole image. If it's a full body portrait.. and It looks way oversharpened att 100% but looks nice at about 25-30% ? Will the print look like that or oversharp like the 100% zoom?
I just started printing my work and it is honestly eye opening. I never knew how nice it would be to have a physical copy of my work
That’s awesome. Yeah, IMO, it’s a must!
Ya, as an older guy, I’m surprised how many digital photographers have never printed an image. There is nuance in the paper pixels wash out.
Really useful video, thanks.
Glad you enjoyed!
I have always used a simple guide for sizing images for either internet viewing or prints.if the image will be view exclusively online, I never bother to take the file resolution above 72 dpi. Anymore and people’s monitors will be unable tell the difference. For printing, I stick to 300 dpi. I simply use PS and set my dimensions to those I want for the real ultimate print size, say 16 by 20, and use a resolution of 300 dpi. Again, my printers are unable of exploiting any more resolution than that. Does this make sense? When I scan with my Nikon 8000ED I routinely scan at the max of 4000 dpi so that I have a massive file to do very detailed clean up prior to saving and then sizing for either printing or internet usage.
Awesome
Hey man - thank you for another great video! Always super helpful.
I was wondering if you'd tell us how you go about preparing / resizing and adding borders to your photographs for instagram? How do you stop from getting blown out blurry images and how do you keep your borders consistent sizes?
Many thanks in advance!
Thanks so much. As for the IG images, I just use an app on my phone called 'Whitagram'. I just export a 2000px wide image from LR, transfer to my phone, and then add the border on there.
Great video!
Thank you.
Great vid Kyle, thank you! Do you ever use on one resize for up rezzing images?
Never tried that one, Jason.
RA-4 forever!
That's awesome. Excellent video! What is the monitor you use? I couldn't find anywhere mentioned. I guess is a 27'. Thanks
Thanks. It’s actually a 32”. BenQ PD3200Q
What's your lab of choice for printing?
Here from your Fuji X100V video over on Vistek. Liked. Subscribed. Commented. Bam.
Awesome! Thank you. Welcome. 😁
I cannot say anything else that THANKS! Is a joy to watch your videos.
By the way, would you share your best print paper?
Gracias amigo
Thanks! I'm a big fan of Red River Palo Duro Soft Gloss.
Hi Kyle. Thanks for some excellent information. One question, what sharpening do you do in Lightroom before sending the image across to Photoshop? I typically don't sharpen the scans I get back from the lab, I just do colour correction in Lightroom. Is this something I should be doing? Cheers Sean
Hey Sean, all depends really... is the sharpening consistent in the scans that you're getting back? And are you happy with how it looks to your eye (ex. not overdone, or not too soft)? I basically just adjust based on what I feel like it needs. But usually my lab scans are sharp enough, or even a little too much.
Love this Kyle. I've watched it a few times, but you don't mention viewing distance. Would you ever go lower in resolution if taking in viewing distance as a factor. I guess we tend to stand further away when viewing a large print.
Yep, absolutely. Viewing distance is important to keep in mind. The larger the print the lower you can get away with. How much will all come down to personal preference.
Hey, if getting negatives scanned from a lab they usually ask if i want to scan for JPG or TIFF's, do you think when i'm intentionally scanning for prints I should go with the TIFF option?
If you can afford it, go with the TIFF.
Better video headline would be "Printing Workflow - How I prepare my films for digital prints". When seeing the original headline first, I assumed it would cover darkroom printing from negatives. Great tutorial though regarding the film/digital printing workflow! Just to mention that the values you change in PS on your screen are very hard to read in the video's resolution. You also need to have the latest PS version to find the same options (for example high pass filter) - CS6 doesn't have them.
Thanks for the great vid. I’ve been subscribed for ages. Quick question. What brightness is your MacBook typically at ? (Without being connected to monitor)
Thank you. I have a macbook with the touch bar, and usually it's around the 3/4 mark on the slider. Not the most tech answer, hah!
not film related, but would love if you did a video of a tour of your studio / room where you appear in this video, showing and talking about the different gear you use for filming and editing your videos.
Thanks Andre. I plan on doing this in the future.
If you only get an image size of 3700 x 2700 px from a medium format picture you must use a very low resolution when scanning (like 1280 ppi). Even a simple flatbed scanner can easily do 2600 ppi (I mean real resolution, not those phantastic numbers of the manufacturers), giving you enough pixels to print large without rescaling.
hey which scanner do you recommend to use to get a great resolution in 120 format? hoping to print big, that why I get a 120 camera for, I have an apcs sony a6500 which have 24million pixel, so I want the 120 film scan to have at least double the resolution. the lab in my country provide noritsu 1800 (3500*3500), Fuji Sp3000 (4600*4600), Nikon coolscan (8900*8900), Hasselblad x5 (6100*6100), epson v850 (6803*6803) this is just one statistic from one store,
should I choose the Nikon? or is it the noritsu or epson is enough? I heard the epson is not sharp or have detailed enough
I just posted a recent video between an Epson and a Nikon for 120 film if you’re interested.
great video, thank you so much!! what monitor do you use?
found in the comments)
Can you tell me the name of the beat at the intro?
Love your content man! What is the monitor you’re using?
Thank you. This one is a BenQ PD3200Q.
Ps actually does a good job creating the extra information as long as you have a fairly decent size to start with. Great Video. Regards, Barrie
Thanks. And yes, was just introduced to their newer ‘preserve details 2.0’ and it seems to work well.
How to print 4x6 pics?
Great vids as always man. Will finish watching it after work - got a notification about having a top fan badge on your facebook page haha, what a Stan. I put my first vid up if you don't mind taking 5 minutes out of your day. Nowhere near your quality but hey.
Dude, just checked it out. Awesome job for your first vid. Keep going! Also, your photos are great. 🍻
@@KyleMcDougall thanks man! Appreciate it.
Hi Kyle. This Not related to this video. I have a question about My Mamiya RB67 PRO SD that perhaps you can help me with.
I tried using my newly purchased Camera today and am having problems. When I try to focus with the bellows, the further I wind the bellows out the blurrier the focus screen gets. I can only achieve focus it seems with the bellows in tight to the body. I can focus on subjects about 5 feet away but when I continue to turn the focus ring and extend the bellows outwards the further away images Just gets blurrier and will not focus on anything.
Am I right in thinking that the further the bellows goes out the further objects will be focused and vice versa with the closer objects, they will be focused when the bellows are in closer to camera body. Your advice is very much appreciated. Thanks
Hey there, it's the other way around. The further away from the body the bellows extend, the closer the focus will be.
Hi Kyle, I have a question regarding the initial scanning of your negative for printing. I was wondering what resolution you look to get your negatives scanned in at? I saw that you replied in someone else's thread about getting them scanned in at the lab in Tiff format but would hope that some of my home scanning would be good enough. I have been scanning at home with an Epson v600 which is supposedly rated at its optimal resolution around the 1600-2400 mark. I would love to do some larger prints eventually with some of my 120 negatives but am a bit cautious about how they would come out with my current scanning set up. Presently its a 2400 dpi using VueScan. Would appreciate anyone else's input too please. Thanks.
Hey Alexander, what size of 120 are you shooting? 645, 67, etc? With 67, you should be able to get a fairly good file size even while scanning on the v600.
@@KyleMcDougall unsing 67. The results seem good with the 2400dpi but I guess there is always the thought the higher the better but then I'd be moving onto another scanner
Late to the party so I have only just seen this video. I've always used Lightroom for printing but have dabbled with printing from Photoshop as I suspect it would give me more control. So this video has been really helpful. One question - in Printer Setup I note you didn't check the Send 16-bit Data box. Any reason for that?
Hey Paul, may have missed that setting. But yes, I'd usually check it off.
Kyle, what professional lab do you use for 35mm negatives? I'm interested in receiving full 48bit scanning capable of printing at 24 inches x 36 inches prints from a 3:2 Aspect Ration. So, my scans would most likely be custom and saved as a TIFF. Thanks, David
Hey David, I’m scanning mostly at home nowadays on the Coolscan 9000. But ive had good results in the past from The Find Lab.
@@KyleMcDougall Thanks!!!
What if you only have a MacBook with no monitor? Do I need to calibrate my MacBook screen?
Yes, still a good idea.
Great video. Thanks. What monitor and calibration tool are you using?
Thanks. I’m using an iDisplay Pro and a BenQ PD3200Q.
Awesome video man 👏 Great vidéo. I feel like printing is overwhelming specially printing film photos. Already following on instagram your content is great 👍 Thanks for doing these videos! Let me so you I would like to make the jump from 35mm to medium format. What camera you recommend me to start and that’s not break the bank. Thanks once again.
Thanks, Juan! Glad you found it helpful. As for a medium format camera, all depends on what style of camera you like best. A TLR is probably going to be your cheapest entry. An older Yashica could probably be had for $200 USD.
Kyle McDougall great, thanks for the feedback Kyle well I guess more la SLR...Thanks once again!
Hey Kyle, what would be the downsides of exporting from Lightroom with resizing for print?
Hey Tim, all of my experience will LR is just for editing. I haven't done any printing from there.
Hi - the link to the print store no longer works for me, just a heads up!
Thanks for the heads up. 🙏 www.kylemcdougallphoto.com/prints
Very nice description. One suggestion is to consider locking the focus on your camera because it was a bit distracting how it goes in and out of focus when you turned to the camera and talked with your hands moving
Thanks. First shoot with a new camera... learning the hard way.
Which monitor are you currently using ?
I’m now using an LG 5K Ultrafine. It’s been great.
Hi there, sorry if I missed this, but which lab do you use to process/ scan?
All sorts of different ones. The Find Lab in the US. Downtown Camera in Canada. Silver Pan Film Lab in the UK.
God damn I've been doing this all wrong. Thanks for the new perspective. I've been wanting to get more prints done but the laziness to rescan them at 300dpi
Glad you found it helpful!
Kyle McDougall watched your video on how you edit. I'm wondering if you'll ever make any presets for Lightroom. I've never been able to find anything that could fast track the process.
What was the size of your negative prior to scanning and enlarging the image?
This image was 6x7.
Just any printer or what printer is best or what printer are you using?
Not sure what printer is best, but I'm using a Canon Pro-10. Epson make good printers as well.
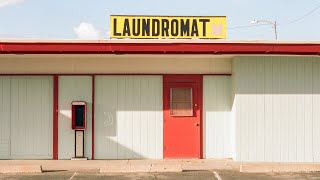
May I ask where that first photo was taken?
I believe that was in Texas. Near the coast somewhere.
Off topic: Where'd you get the hat you're wearing in the video?
By a company called ‘Fairends’
What is your DPI scaling on this monitor set in Display settings?
I don't run this scaled. It's only a QHD monitor.
shouldnt print be always made in cmyk? like rgb is only for web?
CMYK is more common with press printing.
For step one, why don’t you just uncheck the resize option? You can fill in the desired print size and PS will automatically calculate the DPI for you, so you can tell right away if the file is large enough. Works the other way around too, fill in the DPI so you can automatically see the maximum print size you could get at that specific DPI.
Thanks for the note. Will take a look at that in the future.
I noticed you proceeded just to print after setting Photoshop manages printer. Is it not important to check your printer driver and turn off its own automated enhancement features. It was my understanding that selecting Photoshop manages printer does not automatically deactivate the printer enhancement algorithns in the driver?
I guess your drivers are probably set to the optimal settings for Photoshop printing by default?
Hey Andy, all of my settings carry over from previous print jobs, so they're basically set as my defaults.
what printer do you use?
Using a Canon Pro-10
How do you like the canon pro 10?
Yep, like it quite a bit. TBH, I had an Epson before this and they both pretty much do the job the same.
dude the sharpening trick at 15:37 is so fucking smart.
Yep, love it!
Do you make analog prints also?
I dont, no.
Very nice video. I just have one small thing to say (nothing wrong at all) but I noticed slight focus breathing due to the autofocus, so maybe next time you should leave it at manual focus like you've had it before I think. I really really really love your videos even the fact that i don't shoot a lot of film pictures, and please don't take my notice as a bad comment. Keep up the good work!!!
Good eye! First shoot with a new camera. Noticed as well while editing. Thanks for the comment.