How to Replace 5 HP Split Air Conditioner compressor Complete process shown.

Вставка
- Опубліковано 21 жов 2023
- Subscribe us @UATechnicalSolutions
The procedure for replacing a split AC compressor is a complex task and should ideally be performed by a qualified HVAC technician. However, if you have experience in HVAC systems and the necessary tools, here is a general overview of the steps involved in replacing a split AC compressor:
Safety Precautions:
Turn Off Power: Before you begin, turn off the power supply to the air conditioner at the main circuit breaker to ensure your safety.
Procedure:
Refrigerant Recovery: If the system still contains refrigerant, it must be recovered using a specialized recovery machine and properly disposed of according to local regulations.
Disconnect Power: Disconnect the electrical power supply to the outdoor and indoor units. This includes disconnecting any control wires and power cables.
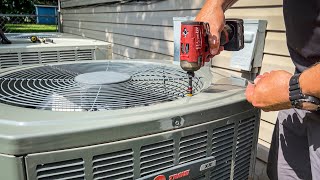
Access the Outdoor Unit: Open the access panel of the outdoor unit to gain access to the compressor and associated components.
Remove Refrigerant Lines: Disconnect the refrigerant lines from the compressor. This involves removing the service valves, which may require the use of a pipe cutter.
Disconnect Electrical Wiring: Disconnect the electrical connections to the compressor. Make sure to note the wiring connections for reassembly.
Compressor Removal: Carefully remove the old compressor from its mounting bracket, taking care not to damage the refrigerant lines or any other components.
Prepare the New Compressor: Ensure that the new compressor is the correct model and size for your AC system. You may need to transfer mounting brackets and rubber isolation pads from the old compressor to the new one.
Install the New Compressor: Carefully place the new compressor into the mounting bracket and secure it in place.
Connect Electrical Wiring: Reconnect the electrical wires to the new compressor following the same configuration as the old one.
Reconnect Refrigerant Lines: Reconnect the refrigerant lines to the new compressor, making sure to use new gaskets and seals where necessary. Use a torque wrench to tighten the connections properly.
Pressure Test: Perform a pressure test to ensure there are no refrigerant leaks. This may involve pressurizing the system with dry nitrogen and using a leak detector to check for any escaping gas.
Evacuate the System: Use a vacuum pump to remove any moisture or air from the system. A proper vacuum should be maintained for a specified duration to ensure the system is completely evacuated.
Recharge with Refrigerant: Once the system is properly evacuated, charge it with the appropriate refrigerant type and quantity according to the manufacturer's specifications.
Test the System: Turn on the power and test the AC system to ensure it is cooling effectively and that there are no abnormal noises or issues.
Seal and Insulate: Seal and insulate any access panels, refrigerant lines, and electrical connections properly.
Perform Routine Maintenance: Perform routine maintenance, including cleaning the condenser and evaporator coils, to keep the AC system in optimal condition.
Please note that this is a simplified overview of the procedure, and the specific steps can vary depending on the brand and model of the AC unit. It's essential to follow manufacturer guidelines and local regulations when handling refrigerants. If you're not experienced in HVAC work, it's highly recommended to hire a professional technician for this task to ensure safety and proper functioning of your air conditioning system. - Наука та технологія