Fusion 360 Tutorial - FanBlade

Вставка
- Опубліковано 15 жов 2024
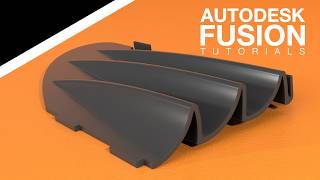
- This video show step-by step tutorial to create a Fan Blade in #Fusion 360
=================================================================================
Help me to spread the knowledge by donating to my paypal account:
paypal.me/Didi...
=================================================================================


Outstanding Job with your tutorial, your English was very good and easy to understand, cant wait for you to do more.
I am planning to move to fusion and have been studying some advanced techniques and approaches for some complex modeling and your tutorial was exactly what i was looking for. Great stuff and good english. Much appreciated!
thanks, please watch my other video, I have the complex one
Sehr sehr gute Video! Ich habe dank dir meine Hausaufgaben machen können du alter Ehrenmann! Daumen hoch! Du bist mein Lieblingsasiate
Es ist gut zu wissen, dass mein Video Ihnen helfen kann, danke
@@DidiWidyaUtama Fan Blade
Very good tutorial, thank you. The only thing I would change is, in order to make the fan blade model match its real life function, reverse the orientation for the curvature of the blades, so that the fan blade would properly blow air to the front of the fan.
Learned how to use Fit Spline for the first time from you bro :) Thank you
So glad my videos can help others, thanks
I didnt get where he was going at first when he was adding multiple arcs, but towards the end it made a lot of sense, thanks dude.
you welcome
Thank you for the great tutorial. Very impressed at how you used different tools skillfully and effectively. It was beautiful.
thanks
Great English, very good tutorial, Please make more videos like this. I was able to repeat the steps easily having very little knowledge of fusion . Thanks
Excellent tutorial! Thank you very much for sharing your knowledge.
My pleasure!
wow great job! it took you less than 20mins to create such a complex design and im over here taking an hour or so to put holes in squares lol.. hahaha great tutorial and I have a long way to go before I can do what you can do! I literally just started learning today.
never stop learning and try, i believe you will more expert than me, thanks for watching anyway.
Wowx3 you are great. Thank youx3. Please do more, that was awesome. It will be my favorite channel.
Thanks, will do!
Didi i´m very pleased with your tutorial. You don´t find that many tutorial on this kind of method. It´s usually the same hard surface tutorials or the organic form ones. I liked yours. Your english is undestandable and charming, as if bruce lee was speking. Nice.
thanks a lot
Wow, very clear explanation. Nice example! You make it look easy. Thanks, i need to see this again, before i can try myself.....
Excellent tutorial! Thank you so much! There's no chance you can provide the .stl file for this, is there? Just so I have it for reference?
Thank you for a very good lesson. I enjoyed it. Now to watch it five more times!...
Britton Evans thanks, please consider to see more interesting videos across my channel, enjoy.
Why did you need successively more arcs the further from the center you got when defining the surface for the loft? Would the top arcs not have sufficed to create the loft?
B Blaze i want the blade have twisted effect , so I created those different inclination of arc, but if you like to have a simple arc you can use extrude a single arc as well
Great Video!
Your English is fine, and appreciate you making the effort to make this video for us!
Thank You Very Much!
Thanks, U’re welcome
Nice work around.... but if this is a typical floor standing fan or table fan blades, the blade curvature angle is inverted....
thanks for your feedback
Great tutorial, looking forward for more new content
Coming soon!
Great tutorial. Earned my subscription
Bravo, great tutorial. I was looking for a way to do it thinking mesh was the key, nope loft is the BEST. Thanks!
The patch idea is the main subject, well done !
thanks
SUBSCRIBED! & thanks for a superb video!
Hi Didi, great tutorial! Can you share the png so we can do the same sketch tracing like your tutorial flow?
Thanks
Awesome!
Keep trying and get there
Very nice! I learned whole lot of new techniques here!
That was really helpful, Thanks for sharing
This was great! You did awesome, thank you.
Wow that was good. I learned a lot!
thanks
thank you very much, great video.
Thanks
Dumb question Pak! how do you use a projected geometry when it is a complex spline line and you need exactly the same shape ? projected geometry seems OK to project the exact shape but you have to draw again on the top to achieve a surface to extrude, right (maybe I am wrong here)? if one part of my sketch is from my drawing and the other part is from projected geometry but with complex spline line, what is the correct process? Trims mas Didi.
you can use projected geometry straight to create feature (extrude, sweep, revolve etc) no need to redraw. if your projected geometry couldn't directly created feature, it must be not In closed form curve/line, so you need to add more lines necessarily in order to create closed curve.
@@DidiWidyaUtama trims Pak
thank you for the tutorial, very helpful
Glad it was helpful!
thanks for sharing, Are you using 3d mouse for orbiting? if so which model do you recommend?
Depends, if you use for notebook, then the small& portable would be great.
How do you pan and zoom in and out to show us the insides and outsides without using the mouse ? What are the shortcuts ? thanks!
(Beginner here!) :-)
akshayd211 please refer to earlier comments below
You sir, are TOO GOOD!
Which is the front side of the fan blade?
According to me, to deliver the breeze to the front side, the curve of the blade should be concave instead of convex.
In your fan blade, if you spin that in CCW direction, the air flow will be on back side.
DIY ELECTRO the rotation should be CW so the air will be flowing from back to front
And you mention CW earlier
And what about concave and convex?
Didi Widya Utama, I agree with your comment.
check out this link to understand about concave and convex.
goo.gl/images/54aqTV
In my opinion, blade should be concave from front side to deliver breeze towards you, BUT if it is convex from front side, it will STILL deliver breeze to front side BUT it will be scattered widely. So you will feel very less breeze.
If you are still confused, just print your model and connect it to CW motor.
My aim is just to enhance your knowledge, and if you are still not agree, then forgive me.
DIY ELECTRO actually many different type of fan profile can be applied to a fan blade depends on their applications, but in this tutorial I didn’t focus on the technical how the fan was working, but i focused on the how to model it, if u like to discuss about modeling i would be happy to answer it, cheers
Pak Didi! Thank you very much for the tutorial. Greatly appreciate your contribution.
hi.what version prog do you use=? do yo have time to learn om the new prog/
?
Sergey Stenberg hi, this video i was created 4years ago, since Fusion360 continuously updating over time, i also made more update videos, please check out my new videos on my channel, thanks
Can u share the file you did also how to do a two angled blade like a computer fan like blade where it bends from one side to the other.
Really good video. I also have a question about how your cursor was moving around while the part was changing views. That was odd. I'm guessing you changed the audio over another video done in the other language. Anyhow, good job!
john hartman i used 3dconnexion for maneuvering the 3D object, so i can freely moved my cursor while orbiting my object
Like the way you make the blade. :)
Your English is so much better than my Malay. But then, I'm American and am only expected to know one language.
Thanks 👍
Great tutorial. Will be doing this soon.
Thanks for doing the demo in English, great work, wish I had your skills.
Du yes. Buk lao is here. No offence dude, I like this tutorial. TYVM
Super Amazing Tutorial. Thank You So Much! This Tut Helped Me Understand The Different Tools (Not All) And Their Functionality. Cant Thank You Enough!
u welcome
THANKS MAN, very helpful
you welcome
Brilliant tutorial. Thanks!
i have many videos like this ,please look trough my channel
yes.. 3dconnoexion.. I don't understand why so few people use it.. by the way thanks for the tutorial.. very good English also
Nice tutorial mas Didi. Subbed.
Very Nice. Thank you.
I hope you answer tNice tutorials bro, I am wondering how can I add plugins from another disk drive if my main drive (where I installed soft soft)
what kind of plugin?
Beautifully done! Thank you.
thanks for making such videos for the beginners.
do known about how we can make a 5 axis machining in fusion 360.
IFTIKHAR Amin yes you can, look inside my channel i have videos how to create 5axis machining in Fusion360
what are you using to pan and tilt/zoom so smoothly?
Thank you, nice work! Good job with the english too.
thanks
Very helpful. Thank you!
Extremely helpful. Thank you very much!
Superbe thanks for the lesson. And your English is good no problems what so ever, good work.
thanks
maaf mas didi mau tanya soal sertifikasi autodeks di indonesia apakah ada?
Kang Damai , cb kontak ke sini : www.3dsolusindo.com/contact-us/
That's really cool! Thanks for this video.
Great! Learned a lot!
really good. Enjoyed following along. Can you do a turbo wheel tutorial?
Keep up the good work
Very clear explanation, thanks berat pak Didi....kita berharap lebih banyak lagi lesson2 yang bisa anda keluarkan....GBU
makasih
Very good. Keep up the good work, thanks!
Very good English.
Thank You Sir.
nice video, thank you!
Thank you for a great tutorial!
Great video. I also want to know how you are panning without the mouse?
Rick de Villiers use this : www.3dconnexion.com
Good job. Thanks.
great tutorial. thank you!!
Thanks you.
Awesome video, thanks! I am really curious how do you achieve those nice view rotations? The cursor display does not change so I assume you're not using mouse wheel? Is it some other device?
I'm using 3dconnexion space mouse
Thanks
Tank. You helped me a lot.
Great work!
Great tutorial!
Please do more, that was awesome.
Thanks, that was very useful and informative
awesome, great tutorial! keep up the good work!
you can disable auto projection in preference
Thanks, It helped me a lot.
I don't know about your english, because I'm brazilian and I don't speak english. KKKKKKKK, but your video is very good. Thanks for the lesson.
thanks
BRAVO!
Works well!! DANKEEE
You're welcome!
thank you for your work!
Thank you. Very usefull for me.
you welcome
This helped me a bunch
you welcome
Pak, apakah cara seperti ini ada juga di inventor? Kalau ada, juga skalian bikin tutorialnya pak. Thanks
mungkin anda bisa menambah/membuat video berdurasi 1-5 menit. semacam quick tips, yg padat dan simple.
terimakasih masukan nya, bisa sy pertimbangkan
Keren pak.. Request tutorial untuk t spline buat mobil boleh ni 😁
T-Spline? good idea, i'll try next
Thanks excellent video, as would a propeller for a drone with an angle for example of 30 degrees ..
for propeller please watch this video ua-cam.com/video/ZGszDz0tlRY/v-deo.html
Great tutorial man, I appreciate it!
thanks
How are you establishing the first contour arc? Fusion wont allow me to create on on that plane...
which one?
Nice! I learned a lot.
thanks
Bagus bgt mas!
Terimakasih, silahkan melihat video lainnya di channel saya.
@@DidiWidyaUtama sudah mas Didi... saya punya banyak waktu saat nih karena di Bali semua sepi sekali. Tidak ada tamu. lalu saya ajarin Fusion 360
Good tutorial. Can you link the image so I can follow along?
ctbram0627 goo.gl/images/LTveZj
15:30 you could use Web feature instead to create the ribs
yes, for sure it possible, thanks for your feedback
Can you make the leading edge of the blade rounded and the trailing edge sharp like a knife edge?
round edge, just add fillet , sharp edge add chamfer
good job with the English !
Om Didi cara bikin lubang tanpa menggunakan kedalaman gimana ya om?? Jadi cuma lubang aja gitu.Maaf kalau kurang jelas pertanyaannya masih baru banget belajar fusion 360 hehehe. Mohon bantuannya ya om. Makasih
Andre Sinaga sy masih belum mengerti maksud nya, lubang tanpa kedalaman , ya berarti tdk ada lubangnya dong? Mungkin lubang tembus gitu?
Iya om maaf, susah ngejelasinnya ni. Hmm maksudnya saya mau bikin lubang di permukaan bidangnya om. Atau mungkin lubang transparan seperti yang om bilang. Makasih
Andre Sinaga klo bidangnya flat, bisa langsung di klik saja bidangnya, tp klo tidak flat, maka hrs bikin workplane dahulu
Hmm misalnya saya bikin balok, terus di atasnya itu saya mau bikin lingkaran bolong om. Itu harus bikin workplane dulu om? Makasi
Andre Sinaga coba lihat caranya di sini ua-cam.com/video/9gABBV26UKE/v-deo.html